Friday, June 07, 2019

Another re-do when I should be doing laundry

The laundry was piled high on the couch, waiting to be folded. Instead of doing the grown up thing, I decided to revamp this little jewelry box I snagged at the thrift store. Here's the before:


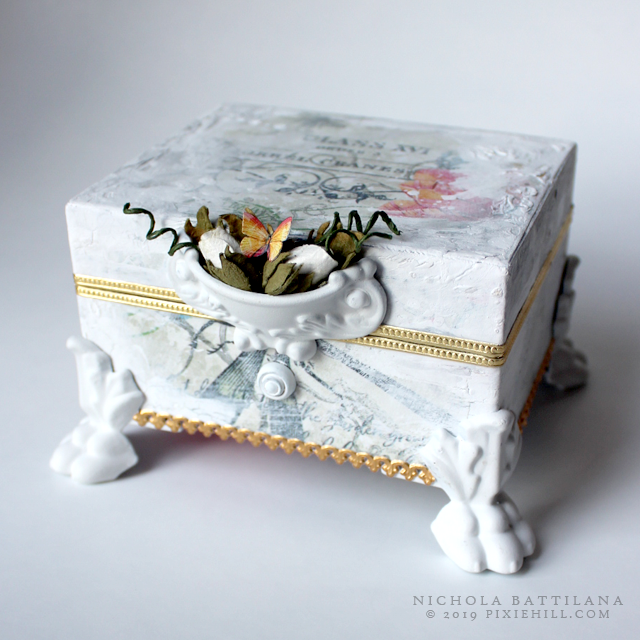
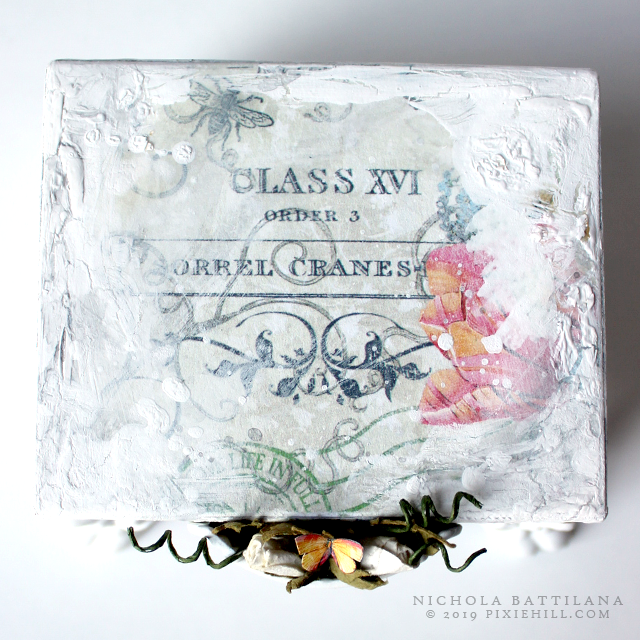
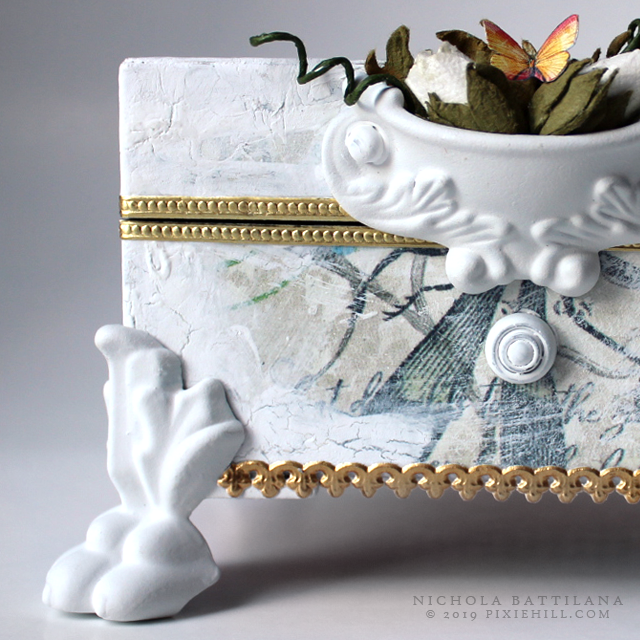
Some white spray paint and a bit of Bloom paper, and here is the after:


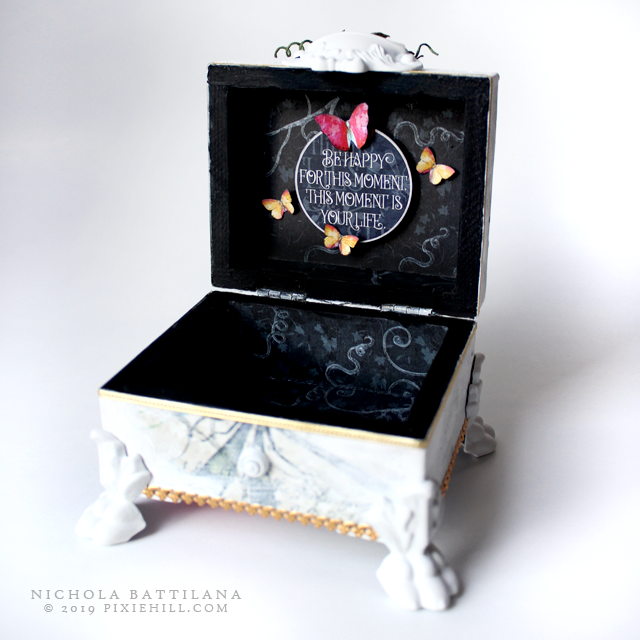
That glass insert had an 'interesting' design on it that I manage to scratch off with blade.


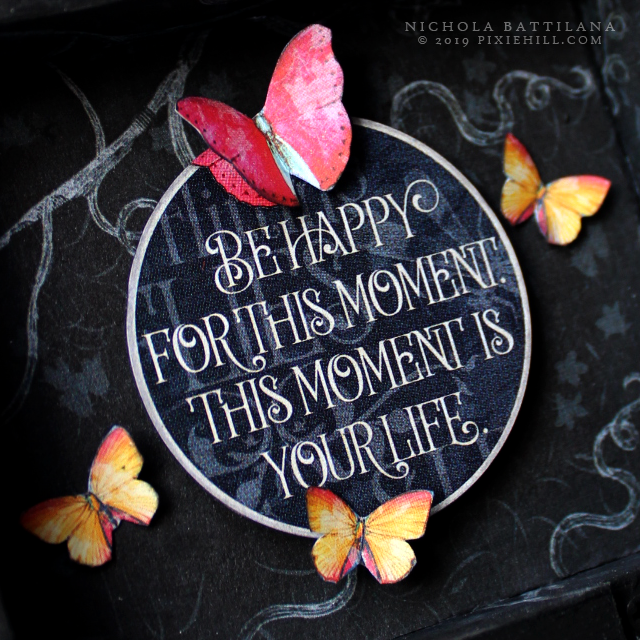
I did put the glass back in, but I put a pretty sentiment behind the glass instead. I might replace that with a photograph later. (Who am I kidding? It'll stay as is forever because I'm forgetful and lazy.)


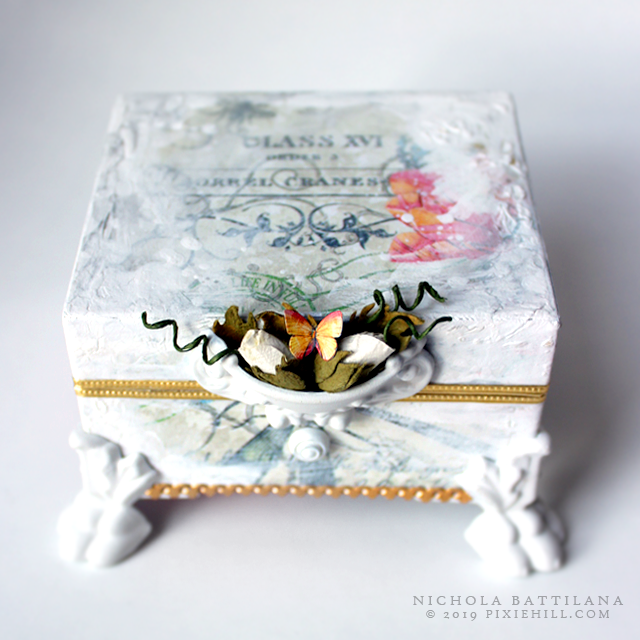
The inside had pink flocking which I kept intact as it coordinates well with the papers. I carefully taped off the interior before spray painting.


I really do love the look of that flat matte spray paint.


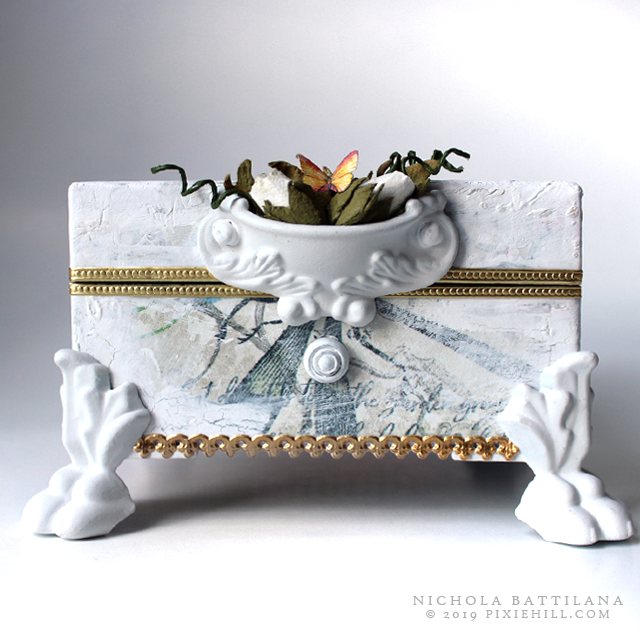
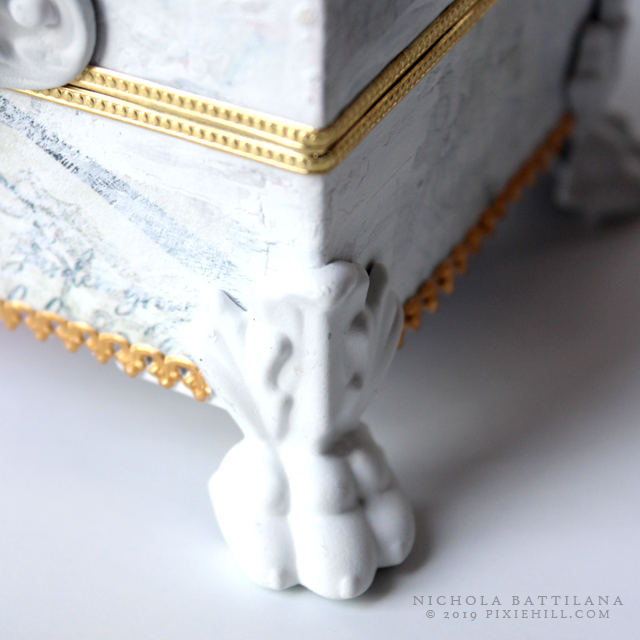
Them dainty feets! And it occurs to me that I really should look at old pieces like this for their hardware. Seriously, feet and handles can get super pricey and jewelry boxes fairly easy to find and thriftily priced (this one was $4). They are usually screwed into place and easily removed. Hmmm.


And now that I've shown this redo off... I gotta grown-up and do a boatload of unfun chores. Bleh!

Wish me well as I tackle Mount Saint Laundry-pile.

Wednesday, May 29, 2019

Flutter Box #G45LightSide

Ah, Flutter. Such a bright and cheerful collection. Believe it or not I’ve take that brilliantly vibrant bunch of papers and made something light and airy for #G45LightSide.


I’ve taken the original hardware off of a simple wooden box and covered it with “Flutter


Using sploshes and splashes of white paint I’ve subdued the brilliance of the paper.


I like the crusty old look created with the layers of paint and bit of white glue.


But I think the REAL stars here are the Antique Brass Claw Feet and the Antique Brass Door Pull (there’s an Antique Brass Stamped Metal Brad in there too).


I’ve spray-painted the decorative hardware with flat matte spray paint and I LOVE the effect.


(Now that I’ve done them in white, I kind of want to paint some in hot pink!)

There are a few tricks for great coverage:

• Apply in several light layers rather than one thick layer, you’ll get MUCH better coverage
• Make sure that your pieces are clean and free of fingerprint oils
• Spray in an area free of dust (ha! I know) and pet hair. You want to avoid these at all cost.


I’ve upturned the drawer pull and popped in some small flowers from the Rose Bouquet Collection—Classic Ivory & Natural Linen and then popped in a tiny fussy cut butterfly because… well, I just can’t help myself.


Inside? Well, I’m not all light and airy, and thought I’d put a cheeky bit of dark inside this piece. I really like the darkness of “Iridescent” from Flutter for contrast. I think a totally brilliant and colourful interior would have been fun too and was totally torn between a black or yellow for the insides.


Finally, I included a sentiment from the Flutter Stickers sheet and a few more butterflies tucked into the lid. These are nicely out of the way so that the box is still usable.

This is a pretty and simple project with just a few products and steps. Still, I’ve made a little walkthrough if you’d like to see the process of making this #G45LightSide box.

Here are all the bits used to make this happy little box:

Flutter
Rose Bouquet Collection—Classic Ivory & Natural Linen
Antique Brass Claw Feet
Antique Brass Door Pull
Antique Brass Stamped Metal Brad


Other Supplies:
Box
Matte white spray paint
White acrylic paint
White Glue
Narrow Gold Fleur Dresden BordersTiny Dot Dresden Borders - Gold

Happy Papercrafting!

Shamrock Chapel with Walk-through

There is a beautiful little church I visited while in Ireland, St. Finbarr's Oratory at Gougane Barra. A wee chapel situated on a bit of a jetty on a lake.


Looking at the Mausoleum Kit in my stash I was inspired by my memories of this place to create a miniature chapel of my own.


For the exterior stone texture I've used drywall compound and the Cobblestone stencil.

Tip: coat your stencil with boating wax to seal it and make it reusable!


I quite like the roof of this piece and the wee turrets that flank the two sides. For the saintly statues I simply painted some miniature figures used for railway models grey and popped them inside. That fancy bit at the front peak is the handle of a chipboard key from the Keys & Plates Shape Set. That spire is a Cabana Row House.


The windows are a stained glass image that I downloaded then printed onto a transparency sheet. Rather than cutting out individual windows, there is a piece that covers the whole windowed area. It's much easier and less fiddly and if no one is going to be peeking inside, why the heck not.


That spikey Gothic trim to the roof? I deconstructed (aka chopped up) a Gothic Border to add some vertical interest.


You can follow the process I went through making this piece with THIS video walk-though.  And here is the supply list of all the bits you'll need to create your own version.


Other supplies needed for this project:
Stained glass pattern printed on transparency
Acrylic paint
Drywall compound
Glue
Cross charm
Railway figures

Psst... Did you find a four leaf clover in those pics?

Monday, May 27, 2019

The Secret Garden Tin Revisited

A few years ago I made a series of Secret Garden themed Altoid tins. I revisited that project last week.

Secret Garden Tin Tutorial

The Secret Garden tins have had loads and loads of tutorial requests since they were first posted. I've always been reluctant to attempt an instructional guide because of the size of the project. It's got a lot of parts, there's drying, and waiting, and fiddly bits. They all come together to make something rather nice, but writing a tutorial for a project that needs to be done over a few days always seemed rather daunting.

Secret Garden Tin Tutorial

I set my mind to it however, and I made a tute. 

It's a big one.

Four jam packed pages of instruction. I am literally attempting to reduce the whopping file size as I type this entry because etsy is telling me it's too flipping big.

Secret Garden Tin Tutorial

These tins are only ever so slightly different than the original set. The handmade robin has been replaced with paper butterflies. The door hardware on my sample is a little fancier than that on the first. But I think they're just as cheery.

Secret Garden Tin Tutorial

If you're interested in making your own tin, the tutorial is available on etsy HERE.


If you're curious what you'll need to make these sweet wee things here is the recommended supply list:

• Altoids style tin (flat/not embossed lid)
• thick card (think cereal box)
• wooden sticks
• egg carton
• drywall compound
• mod podge/sealer/top coat
• old book pages
• bits for door hardware (my sample uses THESE
• faux flowers, leaves, moss (lots of texture is nice)
• hot glue & white glue
• acrylic paint
• chalk pastels
• green paper
• tape
• permanent marker
• star or leaf punch
• stylus or other pokey tool (you could use a pen in a pinch)
• disposable piping bag


“It made her think that it was curious how much nicer a person looked when he smiled. She had not thought of it before.” 
― Frances Hodgson Burnett, The Secret Garden

I hope you're having a smiley day.


Wednesday, May 15, 2019

Alchemy Coasters and Coins for AlphaStamps

AlphaStamps sent me this Alchemy 12 x 12 Pad and I have one word. SWOOOOOON! Ugh! It's the type of pad you take extra care when cutting into because there's something gorgeous on both sides of the paper.


I used that gorgeousness with elements from this months' kit: Coins, Coasters & Holders. 


I mean you wouldn't think that moons and bees would go together.... but here we are.


The coins and coasters that are the base of these pieces are super thick chipboard. If you know me, I like to beat my projects into submission so these extra thick beauties are a total treat.


Oh the lushness!


Snails, stripes, moths and numbers! A jumble of all the nicest things.


And have you heard of Artist Trading Coins? 2.5" diameter, round works of art. You know how much I love working on a small scale so I'm game for these mini arty farty things.


There are coordinating pockets, folders and 'wallets' available to match the coins and coasters. It's such a nice way to present them as a gift, to make them extra special.


Since I can't control myself and make everything extra chunky, I particularly like the pockets with extra room like this Dimensional Coin Folder.


Beautiful graphics, shiny highlights, a bit of paint and glue and you've got yourself some sweet celestial art.


Here are all the bits and pieces you'll need to create your own:


You might want to grab the Coins, Coasters & Holders Kit

Friday, May 10, 2019

Platform 9 3/4

This has been waiting to be finished for AGES. Since before I visited the real platform 9 3/4!

Kings Cross Platform 9 3/4 Hogwarts Express - Nichola Battilana

When I visited the actual platform at Kings Cross station it was absolute madness. I didn't even line up for the photo op because it was swarming with people. (Don't feel badly for me. It gives me a great excuse to return!)

Kings Cross Platform 9 3/4 Hogwarts Express - Nichola Battilana

My little version of Platform 9 3/4 was built inside of a wooden shadow box. It measures approximately 6" x 9" x 1.5"

Kings Cross Platform 9 3/4 Hogwarts Express - Nichola Battilana

I'm so happy with the brickwork in this piece as well as that pipe to the side.

Kings Cross Platform 9 3/4 Hogwarts Express - Nichola Battilana

All of the suitcases are made from cardstock with ribbon and other wee bits.

Kings Cross Platform 9 3/4 Hogwarts Express - Nichola Battilana

There's a little Hogwarts Express ticket, and a few books atop the stack of cases.

Kings Cross Platform 9 3/4 Hogwarts Express - Nichola Battilana

A wax sealed acceptance letter, and a wand too.

Kings Cross Platform 9 3/4 Hogwarts Express - Nichola Battilana

Want to own a little Platform 9 3/4? This piece is listed HERE


P.S. Happy mother's day weekend moms and motherers!


Saturday, May 04, 2019

Paper Stereoscope Tutorial and Downloads

Are there things, objects, that you can't help but feel drawn to? I love old clocks, wooden crates, books. I've also always wanted a stereoscope.


I've wanted to make my own for a while and finally got around to looking into how to make one.


Graphic 45's Olde Curiosity Shoppe—Deluxe Collector's Edition seemed the perfect paper choice!


And I'm so pleased with myself because the stereoscope works like a charm!


Most of what I read suggested 3x lenses. I tried a few different magnifications and ended up using a pair of 4x's magnification reading glasses. Maybe it's because my eyes are a little weak that they worked better for me? Not sure, but I popped the lenses out of the frames, and simply glued them in place inside the viewer. Perfecto!


I didn't add many embellishments to this piece. I wanted to keep it looking like a usable object rather
than a decorative item. There's a restrained trim, a couple of Antique Brass Stamped Metal Brads. But how perfect is that graphic from the Optical Oddities page of Olde Curiosity Shoppe?


Those stereocards? A vintage story of love told in a series of public domain images from a museum collection. 


Because I think everyone should be as excited about stereoscopes as I am, I've put together a big fat tutorial for this project with three parts.

The pattern


The cards


Here are all the other bits you'll need to create this project:
Antique Brass Stamped Metal Brads
Olde Curiosity Shoppe—Deluxe Collector's Edition
Clearsnap Decades Dye Pad Dark Cashmere
Cheap reading glasses 3x's (I used 4x)
Thick card
White Glue
Glue Stick
Scissors

Thats it! Just a handful of things to make a really neat something :)


Now all I have to do is figure out how to make my own stereoview images...