Friday, July 26, 2019

Free Photo Friday

Once a week I share an old timey photo from my personal collection. Feel free to use them in your mess making, art and crafting.

The images are not polished and left in their grungy, smudged and speckled glory. Just how I like 'em! Without further ado... 


Do NOT sell, give, or distribute the images as your own, digitally or printed, alone or as part of a collection, collage sheet or group. BUT DO absolutely make stuff with them and sell the stuff you make. If you share your project, a link is appreciated.

Violators will be turned into toads, given warts, all the bad stuff... I mean it... It won't be pretty. 

Friday, July 19, 2019

Free Photo Friday

Once a week I share an old timey photo from my personal collection. Feel free to use them in your mess making, art and crafting.

The images are not polished and left in their grungy, smudged and speckled glory. Just how I like 'em! Without further ado... 

Do NOT sell, give, or distribute the images as your own, digitally or printed, alone or as part of a collection, collage sheet or group. BUT DO absolutely make stuff with them and sell the stuff you make. If you share your project, a link is appreciated.

Violators will be turned into toads, given warts, all the bad stuff... I mean it... It won't be pretty. 

Friday, July 12, 2019

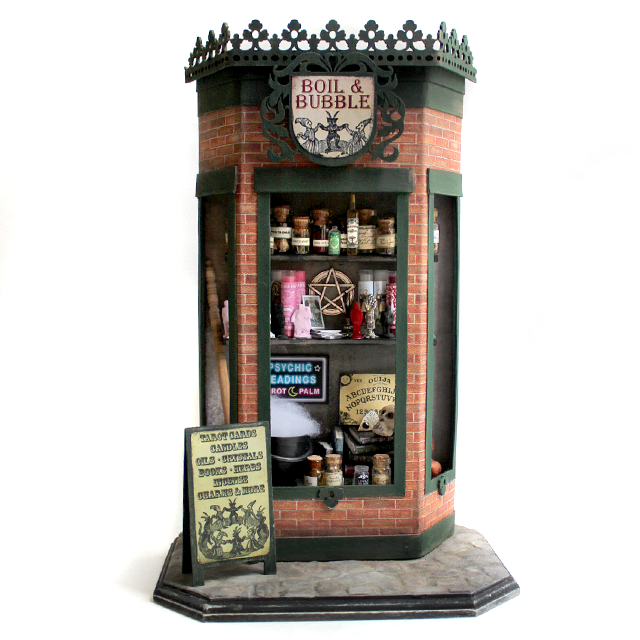
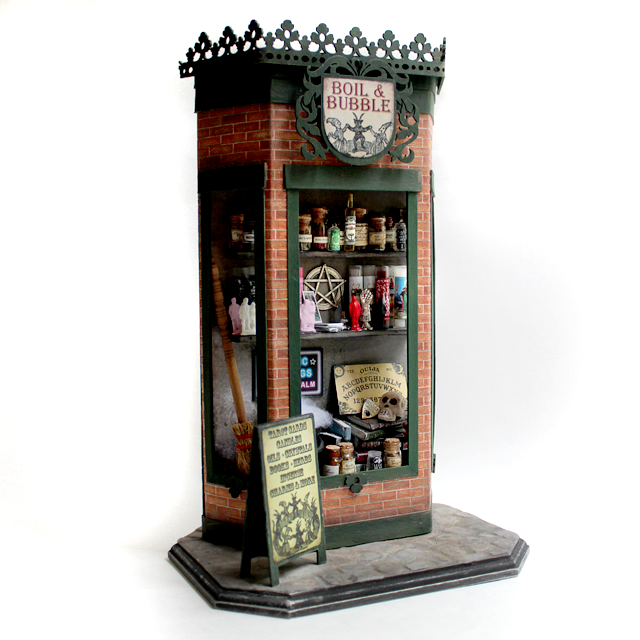
Boil & Bubble An Occult Shop Window

If I had a slew of money I'd open a fantastical magical occult shop. I'm not rolling in dosh so I have to settle for making a little version (for now).

Boil & Bubble Miniature Occult Shop Window - pixiehill.com

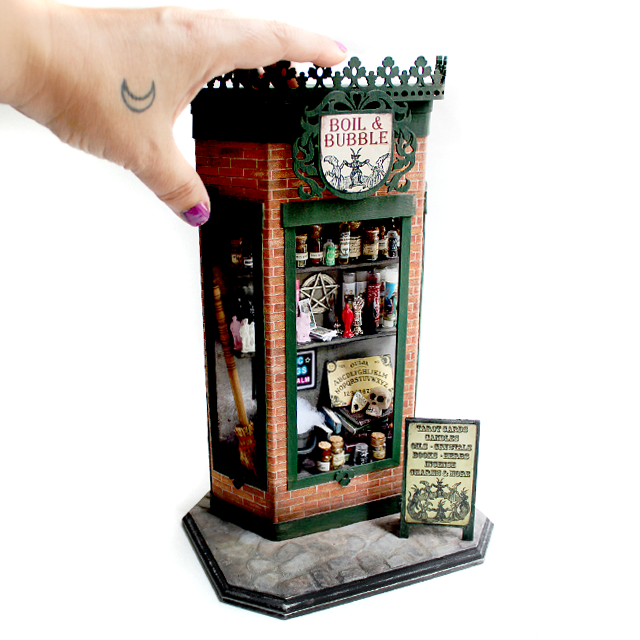
The skeleton of this piece is this 10" Bay Window with added bits of cardstock as trim. The base is a wooden wall plaque with eggcarton cobblestones. The overall size is approximately 7" wide x 5.5" deep (with base) x 11" tall.

Boil & Bubble Miniature Occult Shop Window - pixiehill.com

I've opted not to put 'glass' in those windows. I just wasn't feeling it and the plastic 'glass' seemed to blur the wee things inside too much for my old eyes. Besides, I figure any dust that gets inside will just add to the atmosphere.

Boil & Bubble Miniature Occult Shop Window - pixiehill.com

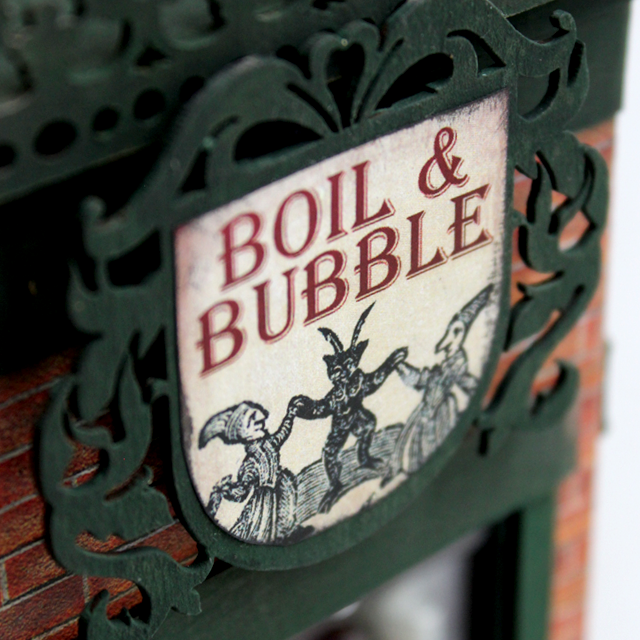
The sign is a Mini Crest Sign with a printed something I whipped up. I asked for name suggestions, and there were some great ones, but I went with this old bit from the Macbeth witches and an old woodcut image.

Boil & Bubble Miniature Occult Shop Window - pixiehill.com

Inside the wee space is chocked full of novena and figure candles, bottles and vials of herbs and elixers, tiny tarot cards, and loads more!

Boil & Bubble Miniature Occult Shop Window - pixiehill.com

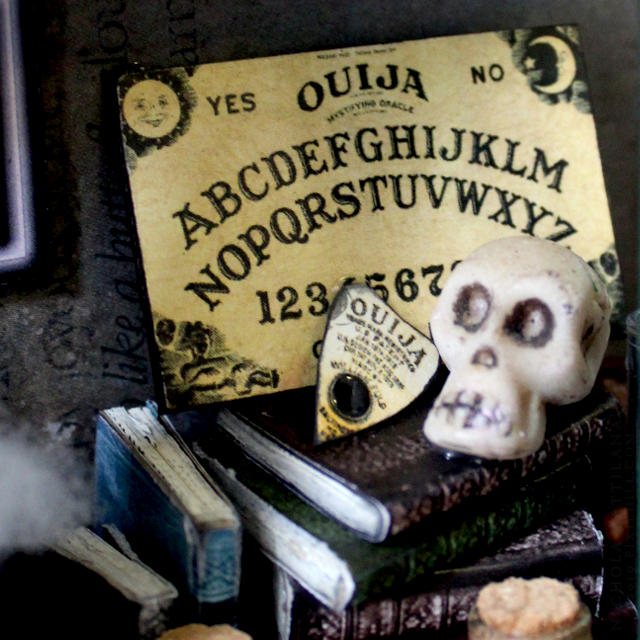
I'm delighted with the wee Ouija board sitting a top a stack of books.

Boil & Bubble Miniature Occult Shop Window - pixiehill.com

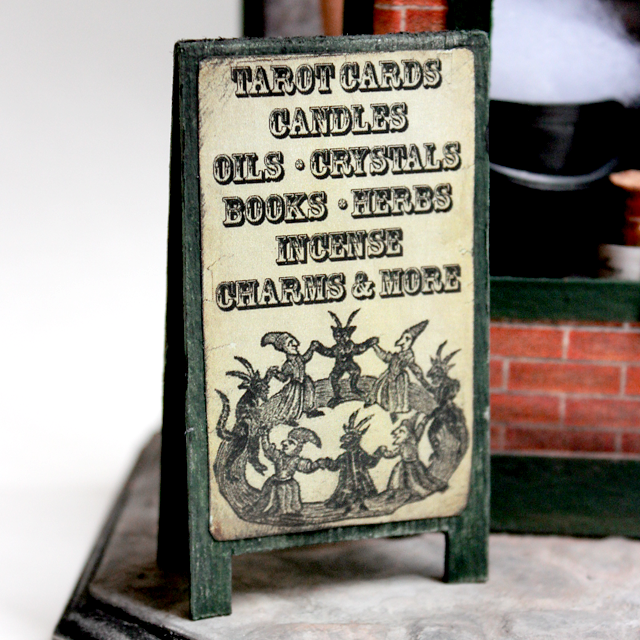
And to make sure you know what you're getting into when you enter the shop, a sign sits outside with a listing of all the goodies inside.

Boil & Bubble Miniature Occult Shop Window - pixiehill.com


Boil & Bubble Miniature Occult Shop Window - pixiehill.com

If you'd prefer to make your own version, here are (most of) the supplies used in this piece:
wooden plaque
cardboard
glue
acrylic paint
eggcarton

1:24 Antique Brick Wall Sheet*
various charms
plastic skull bead


Free Photo Friday

Once a week I share an old timey photo from my personal collection. Feel free to use them in your mess making, art and crafting.

The images are not polished and left in their grungy, smudged and speckled glory. Just how I like 'em! Without further ado... 


Do NOT sell, give, or distribute the images as your own, digitally or printed, alone or as part of a collection, collage sheet or group. BUT DO absolutely make stuff with them and sell the stuff you make. If you share your project, a link is appreciated.

Violators will be turned into toads, given warts, all the bad stuff... I mean it... It won't be pretty. 

Friday, July 05, 2019

Free Photo Friday

Once a week I share an old timey photo from my personal collection. Feel free to use them in your mess making, art and crafting.

The images are not polished and left in their grungy, smudged and speckled glory. Just how I like 'em! Without further ado... 

Do NOT sell, give, or distribute the images as your own, digitally or printed, alone or as part of a collection, collage sheet or group. BUT DO absolutely make stuff with them and sell the stuff you make. If you share your project, a link is appreciated.

Violators will be turned into toads, given warts, all the bad stuff... I mean it... It won't be pretty. 

Saturday, June 29, 2019

Honey Bee Shadow Boxes

While I can often be seen running, arms flailing, yelling "get lost" to wasps (in not so lady-like language) honey and bumblebees are welcome visitors in my garden.


Just look at that buzzy bum in the chive blossoms!


Inspired by my pollinating visitors, I've made a couple of sweet honey bee shadowboxes.


With Fold Up Oval and Fold Up Box Rectangle boxes as my base, I've added beautiful yellow papers from Graphic 45's Floral Shoppe. Inside there's a pretty image of a vintage lady, a pinch of moss and paper flowers.


For the exterior I've used Honeycomb & Bees. The bees have been painted and have Transparent Wings added. A tiny bit of black fuzz finish off these chippy bees.


The interior background is vintage music paper with a splash of white and blue acrylic paint.


Want to make your own? I've created a video walk through for you to follow along and create your own. You can find it over HERE


And here are all the bits you'll need:

Graphic 45's Floral Shoppe
Paper flowers
Moss
Vintage portrait images (These are the ones I used)
Glue
Foam spacer squares
Black flocking

Note on the flocking: Don't buy a pound of flocking for this project!  You really only need a very small amount. A few pinches! If you can find it, "Ultra Fine Flower Soft" will work well for the bee fuzz. Or search for miniature landscape "scatter" or "static grass" and you should find something suitable.

Friday, June 28, 2019

New and Improved Moon Maidens with Tutorial

While I loved my first batch of moon maidens I knew they could be improved. So I set to work on those lovelies and colourized them, gave them blushed rosy cheeks and some extra golden splatter.


I think they are much improved!


I am all sorts of in love with the gold and blue combination. 


And I've always been a fan of stringing sweet words together. When they fit together it's like getting encouragement from the universe.


If you'd like to make your own Moon Maiden ATC's here is the list of supplies you'll want to consider: (if you don't have something experiment, make do, or try something unexpected!)

- card or board for the base
- old paper for the background (I think old paper absorbs pigment better)
- black, blue and white acrylic paint
- floral stamp
- stamp pad
- gold embossing powder
- heat gun
- gold paint or ink
- scrapbook paper (for back)
- glue

If you don't want to source your own vintage images, I have a collage sheet of the ladies, birds and words I used HERE


To help you make your lovely moon ladies, I created a video walk through over here on my YouTube channel


Oh to delight in beautiful nights and under full moons! To send messages on the wings of songbirds!


Here's to making new and improved glorious messes, my lovely friends.

P.S. I almost forgot! All ATCs in the etsy shop are 30% off when you use the code ATC30 at checkout.