Showing posts with label gslcuts.com. Show all posts

Friday, May 29, 2020

Mermaid Silhouette Luminary

The weather has been absolutely glorious here and my pool is all glistening ripples. I'm going to be taking advantage and become a total mermaid this summer. I created a little something to encourage my sea maiden ambitions for this months Gypsy Soul Laser Cuts project.


I've used an simple, straight sided vase as a base for my luminary. You could absolutely use a jar for but this was inexpensive ($2) and the was no mucking around to fit your hand inside. 

I've used a spray to frost the glass and tinted it with washes of acrylic paint. You can see my process by visiting THIS video walkthrough.


I've placed two figures from the Mermaids Shape Set inside my vase. The figures in this set are quite sizable, so if you're working with small jars I'd recommend considering the Mermaids Miniatures instead.


I've added shells. cheesecloth, and unraveled twine at the base of my luminary, as well as a Word Tag. There's some wired glass baubles that poke out here and there and look wonderfully like bubbles.


For a seaweed effect, I've used snips of the Leafy Swirl cutouts.

You could add an led candle inside the vase, or a string of lights, but I think it looks rather pretty just sitting in front of a bright window... especially one that overlooks the pool and reminds me to jump in, make a splash and mermaid my heart out!

Here are all the bits I've used for this project:
Word Tag - Travel (coming soon)
Leafy Swirl Cutouts
• Rustoleum Frosted Glass spray
• glass vase
• acrylic paint
• sea shells
• cheesecloth
• twine
• wired glass baubles
• glue

And HERE is where you can find out how to put all the bits together.

Friday, March 29, 2019

The Butterfly Conservatory for Gypsy Soul Laser Cuts

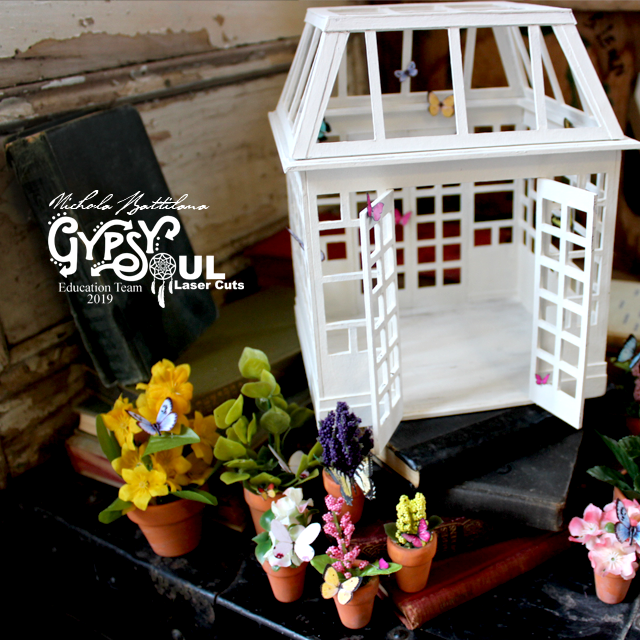
On my trip to London last year I made certain to time my visit with the butterfly exhibit at the Natural History Museum. I made it just in time, squeezing in on the afternoon of the very last day. It was magic. Then again, how could walking among butterflies not be?!

Small Conservatory - Butterfly House - gslcuts.com

This project, is a sort of homage to that memory. A pretty space filled with flowers and fluttery things.

Small Conservatory - Butterfly House - gslcuts.com

This project may take time, but it uses  only a handful of supplies. The structure is a Small Conservatory. That's it. I haven't added any fancy embellishments (but don't let that stop you from adding some dramatic flair!)

Small Conservatory - Butterfly House - gslcuts.com

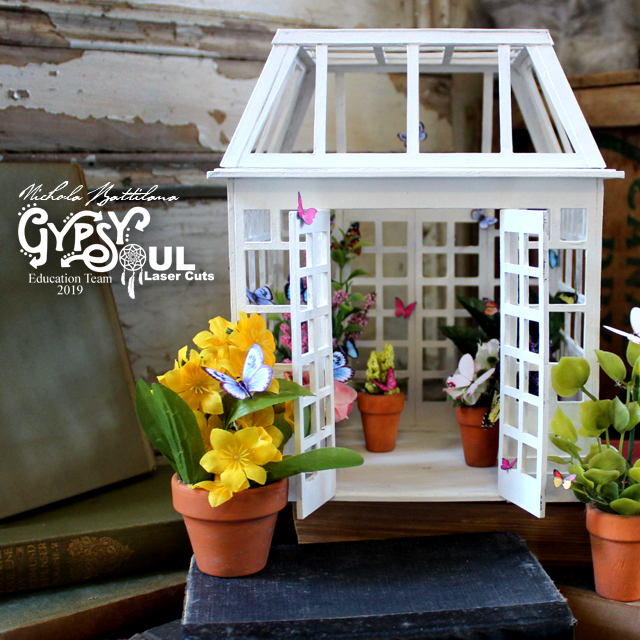
Inside I've added miniature wooden pots packed with faux flowers and leaves. They aren't properly scaled and they don't even look like any particular sort of 'real' plants, but they give a nice floral feel and provide lots of texture.

Small Conservatory - Butterfly House - gslcuts.com

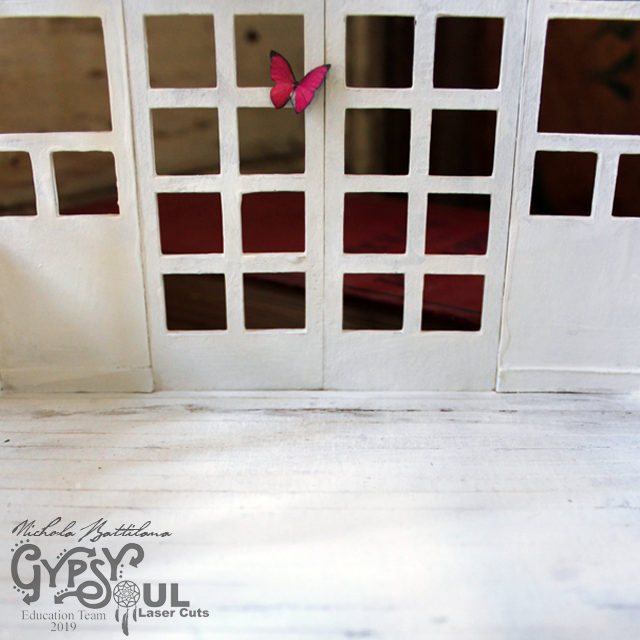
Those paper butterflies inside are all from my English Fairy Garden collage sheet. I printed it out at 50% to scale the butterflies down to a more appropriate size.

Small Conservatory - Butterfly House - gslcuts.com

I haven't glued any of the pots in place so that I can move those potted pretties around, and even change up the Small Conservatory completely if I want to!

Small Conservatory - Butterfly House - gslcuts.com

Besides paint and glue, the last supply I used was a plain sheet of cardboard. I've used strips to create the 'wood' floor and baseboards inside the conservatory.

Small Conservatory - Butterfly House - gslcuts.com

Outside, again, I used layered strips of plain card to create a subtle architectural element to the bottom of the structure. I also used the card on the roof of the building to hide the slot and tabs that hold the piece together.
Small Conservatory - Butterfly House - gslcuts.com

And that's it! Just those few little bits to make something quite pretty. If you'd like to see how I put this project together, follow along with this walkthrough video

Small Conservatory - Butterfly House - gslcuts.com

And here is your supply list:
Small Conservatory

Miniature plant pots
Faux flowers
English Fairy Garden collage sheet
Sheet of cardstock
White acrylic paint
Glue (white and hot glue)

Happy making!

Thursday, November 29, 2018

Jolly Little Christmas Floats with tutorial

My kid decided he was too old for trick-or-treating this year, but not too old for a Christmas parade. Before moving here I was never really into parades. Standing around in questionable weather? Nah, thanks. Discovering night parades swayed my grinchy mind. The lights! The magic! *swoon*

Little Christmas Floats - Nichola Battilana for gslcuts.com

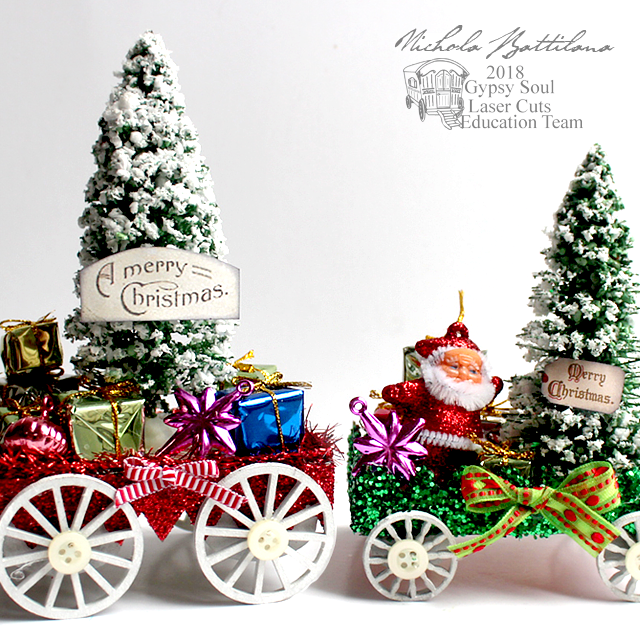
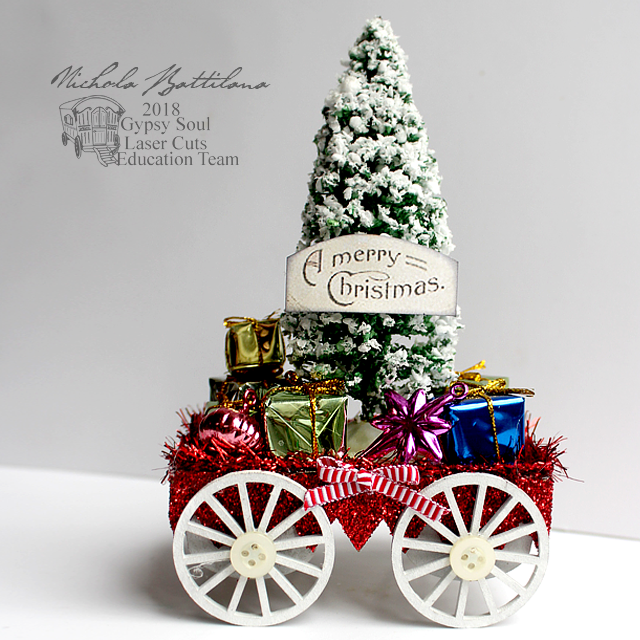
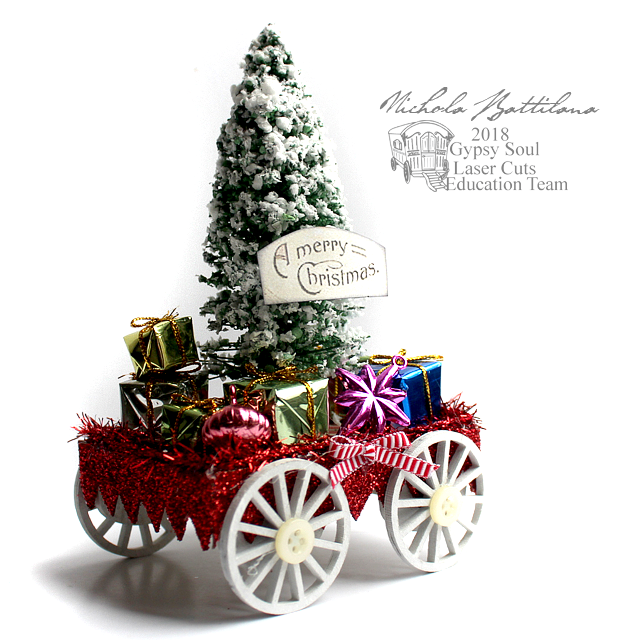
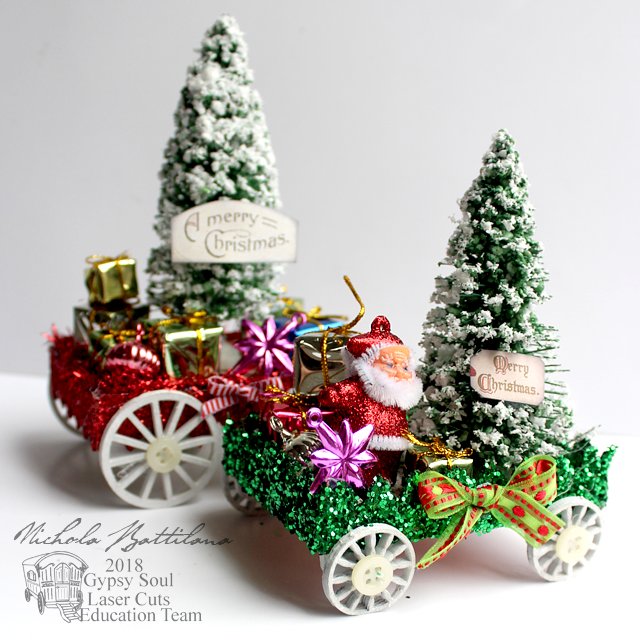
And while these wee things aren't all lit up (although you could absolutely add lights!) I'm smitten with the bright sparkly cheeriness of these wee floats.

Little Christmas Floats - Nichola Battilana for gslcuts.com

To make these little floats I simply added Wheels 1 inch Fancy and Wheels 1.5 inch Straight to Chunky ATC Blanks.

Little Christmas Floats - Nichola Battilana for gslcuts.com

Glittered Chipboard Shingles - Pointed added around the edges complete the base.

Little Christmas Floats - Nichola Battilana for gslcuts.com

Then it's just a matter of filling up those floats! I've used bottlebrush trees, miniature packages and decorations and a vintage looking Santa. All of those bits were bought in the holiday aisle at the discount shop.

Little Christmas Floats - Nichola Battilana for gslcuts.com

Cute. Easy. Inexpensive. Yes please!

Little Christmas Floats - Nichola Battilana for gslcuts.com

I have a little video to show you exactly how to put these pretty things together right HERE.

Little Christmas Floats - Nichola Battilana for gslcuts.com

I need to make a slew of these to create an entire holiday parade for my mantle!

Little Christmas Floats - Nichola Battilana for gslcuts.com

Want to make your own too? Here are the supplies I used:

Ribbon
Glitter
Holiday paper
Buttons
Bottlebrush trees
Tiny gift and ornament baubles
Plastic vintage looking Santas
White glue
Hot glue
Acrylic paint
Thin dowling or bamboo sticks

Wednesday, September 05, 2018

Graphic 45 Floral Shoppe House 'Pins'

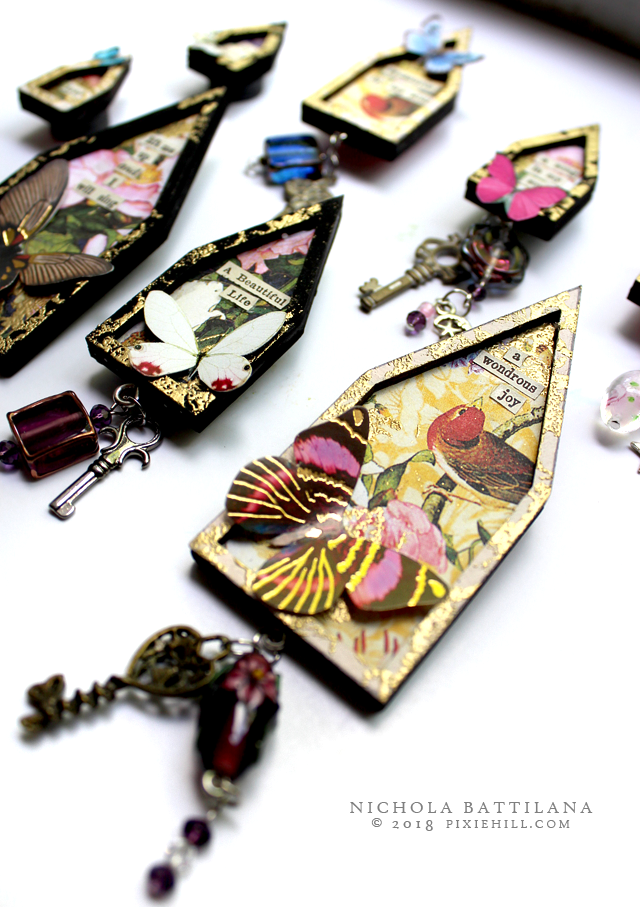
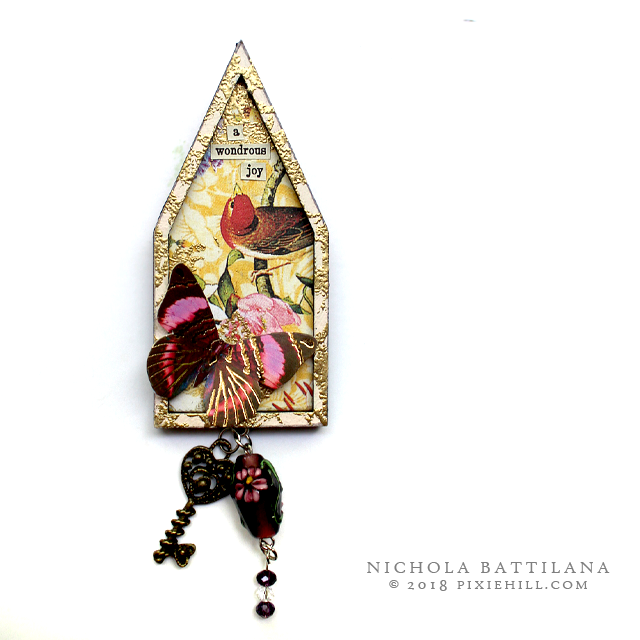
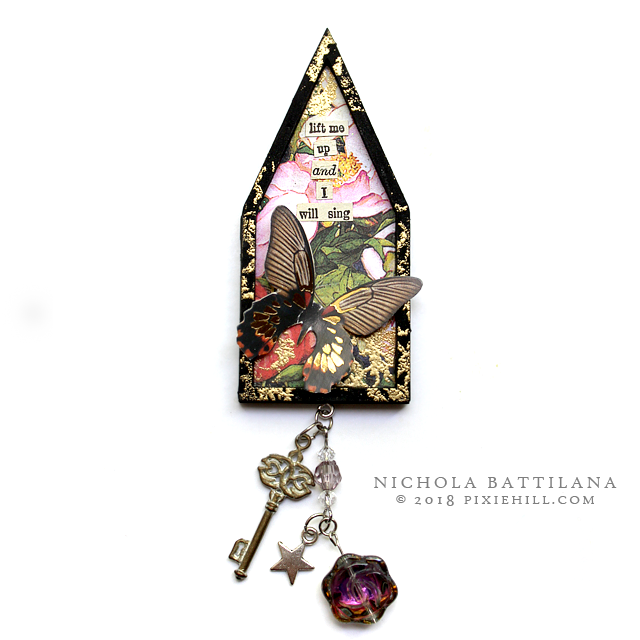
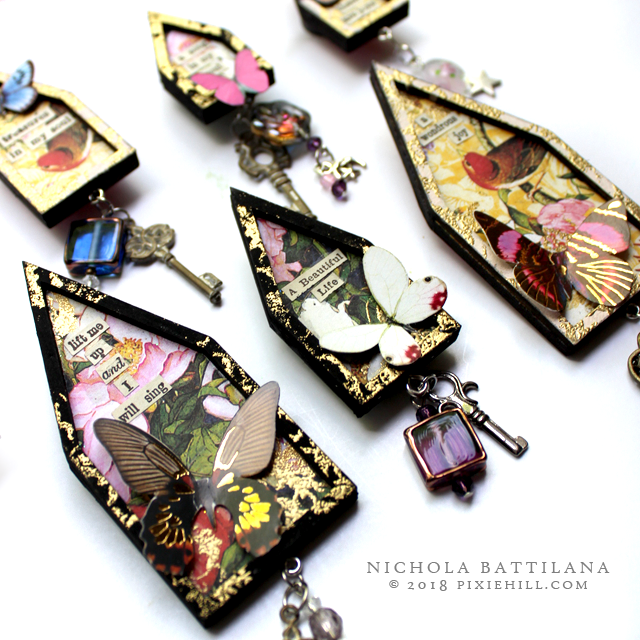
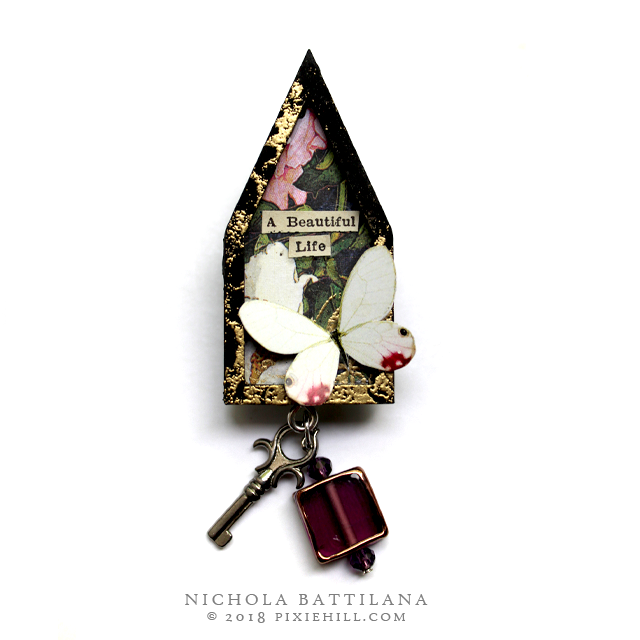
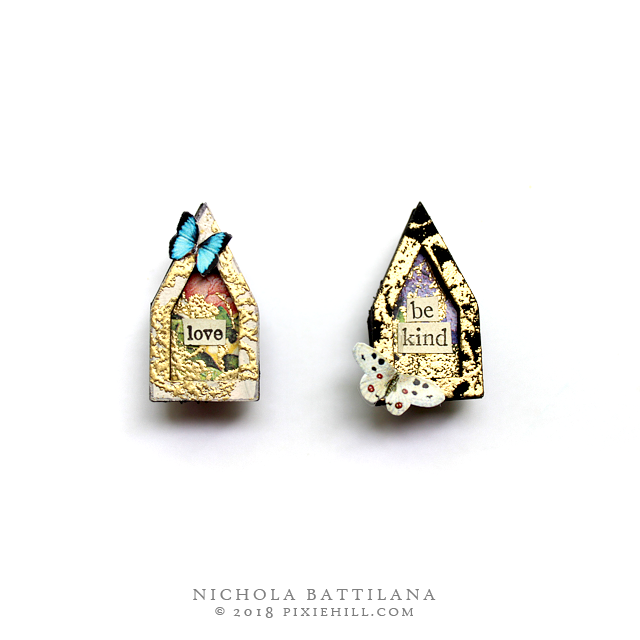
I am in love with Graphic 45's Floral Shoppe. It's just so.... lush, gorgeous, beautiful, pretty. I can't say enough good things about it. Every sheet is a dream. Today I'm showing off some wearable art I created using this collection and the House Jewelry Pieces from Gypsy Soul Laser Cuts.

Graphic 45 Floral Shoppe House 'Pins' - Nichola Battilana


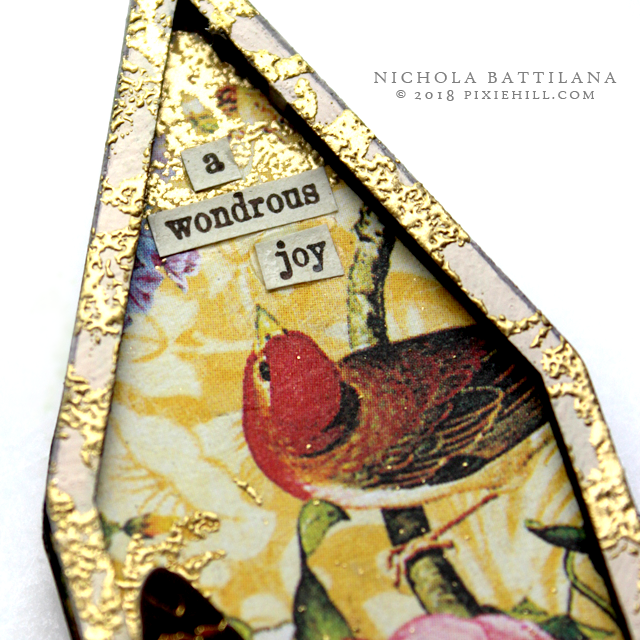
I've used various Floral Shoppe papers for the backgound keeping some pretty elements (like those pretty birds) nicely framed as a focal point on some of the pieces.

Graphic 45 Floral Shoppe House 'Pins' - Nichola Battilana

I randomly stamped the base corners and frames with a floral design from Gilded Lily and applied gold embossing powder before gluing the frame and base together.
Graphic 45 Floral Shoppe House 'Pins' - Nichola Battilana

A few sweet words snipped from vintage books. 

Graphic 45 Floral Shoppe House 'Pins' - Nichola Battilana

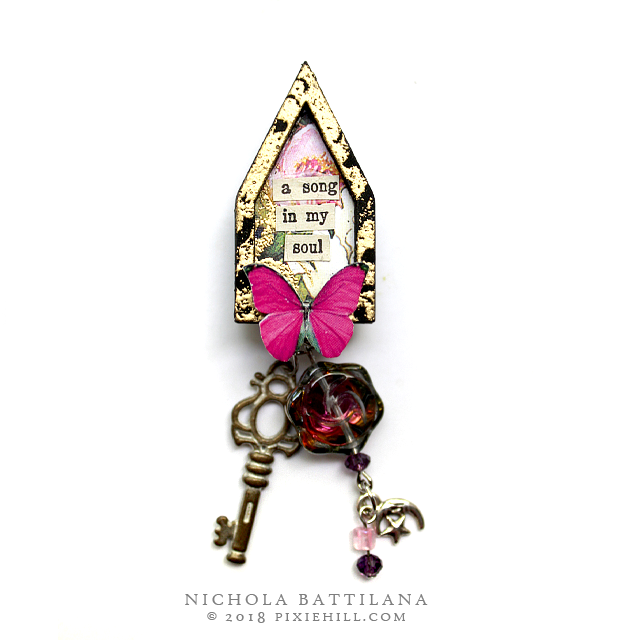
Paper butterflies are added too.

Graphic 45 Floral Shoppe House 'Pins' - Nichola Battilana

Tiny eyehole screw is added to the bottom edge.

Graphic 45 Floral Shoppe House 'Pins' - Nichola Battilana

Pretty charms and beads are added.

Graphic 45 Floral Shoppe House 'Pins' - Nichola Battilana

What is it about those Antique Brass Ornate Metal Keys that is oh so appealing? Must have something to do with the possibility of opening new doors, or hidden treasure boxes.

Graphic 45 Floral Shoppe House 'Pins' - Nichola Battilana

I really like the range in size. From statement piece, to delightfully wee!


Graphic 45 Floral Shoppe House 'Pins' - Nichola Battilana

I was in a bit of a pickle when it came to finding pin backs for these pieces. The small house shapes are quite tiny so I wanted to use butterfly clutches rather than long pin backs but I couldn't find them anywhere! But I did find magnetic 'buttons'.

Graphic 45 Floral Shoppe House 'Pins' - Nichola Battilana

These won't hold in place on a thick sweater or coat, but these little magnets are quite strong (they were trying to stick together when I was shooting the group photos for this post!) and will absolutely pull together through thinner materials. Not exactly what I was looking for, but hey, now they can be used as magnets by those who don't wear pretty pins, buttons or brooches.

Graphic 45 Floral Shoppe House 'Pins' - Nichola Battilana

Want to make your own? Here are the supplies you'll need

Gold embossing powder
Acrylic paint
Beads, charms and jumprings
Small eyehole screws
Discarded books
Magnetic buttons


Thursday, July 19, 2018

Buntings are hard to photograph and the new wood shed

I love buntings. I think they are just about one of the prettiest things around. They're whimsical and joyous and sweet... and such a pain to photograph.

Graphic 45 Floral Shoppe Bunting - Nichola Battilana

This particular bunting is a happy thing, all yellow and sunshiney. But pictures! Ugh, pictures. I was moping around this morning trying to figure out how to show it off when the new woodshed caught my eye.

Graphic 45 Floral Shoppe Bunting - Nichola Battilana

The Mr used recycled wood so it doesn't LOOK new, but huzzah for that because it's the perfect contrast to my pretty flaggy thing-a-ma-doodle. I'm certain Mr had no idea he was actually building me a giant photography prop.

Graphic 45 Floral Shoppe Bunting - Nichola Battilana

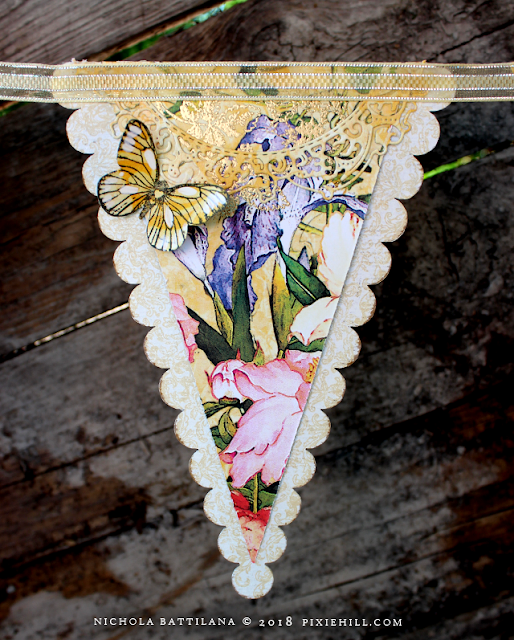
But on to the bunting! I knew I wanted to create a long banner so I used two sets of this Banner Builder Pennant Set. Instead of layering straight and scalloped edged pieces, I've used them separately. 

Graphic 45 Floral Shoppe Bunting - Nichola Battilana

I painted the chipboard white and stamped the edges with a floral filigree pattern. Atop of that I applied papers from Floral Shoppe (which is gorgeous and probably my favourite Graphic 45 paper ever.) The colours I chose are a very subtle nod to my beloved Hufflepuff house.

Graphic 45 Floral Shoppe Bunting - Nichola Battilana

The butterflies are stamped onto Floral Shoppe Indigo Lilies. A few dabs of white paint are added as highlights, then I fussy cut those suckers.

Graphic 45 Floral Shoppe Bunting - Nichola Battilana

The flowers were created using elements from the Large Tag ATC and Flower Die set.


Graphic 45 Floral Shoppe Bunting - Nichola Battilana

That snip of lacy paper at the top was created by clipping a portion of clock from from the Square Tag and Clock Dies

Graphic 45 Floral Shoppe Bunting - Nichola Battilana

Attach all those bits to a length of ribbon and you've got yourself a bunting that is very difficult to photograph!

Graphic 45 Floral Shoppe Bunting - Nichola Battilana

Thank goodness for new woodsheds that look old.

Here's the bit list if you too would like to make a pretty hanging something-or-other.

Floral Shoppe: Golden Serenity
Floral Shoppe Indigo Lilies

Friday, December 29, 2017

Night Angel Mixed Media Triptych

This month for GSLCuts.com I've created a set of three mixed media angels. A dreamy mystical triptych.


With New Year looming I thought it was a perfect time to think of dreaming and making wishes. That's what this set is all about. Looking up and forward and making bedtime wishes listened to by Night Angels.


Each of the three elements is made using a Cross Top Triptych piece. One of the thing I really appreciate about these elements is that the front piece is made up of straight edges, making it easy to embellish with scrapbook paper.

Each of the three seperate pieces is a slightly different size, but all fit nicely on Gypsy Soul ATC Stands. This makes displaying your pieces soooo simple. AND those little stands come in a set of three  so they're perfectly matched. (AND they're pretty dang reasonable too!)


While putting these pieces together is so simple, I have a little walkthrough of the process of making them. Hop over HERE for the video.


Below are all the bits I used to create my pieces, but you should absolutely feel free to add your own special touch to create your own dreamy night angels.


Cross Top Triptych
ATC Stands

decorative scrapbook papers
acrylic paint

Sunday, October 29, 2017

Perpetual Happiness Calendar

Sometimes, I need a reminder to breathe more than I need to recall that it's Sunday the 29th of October.

Perpetual happiness calendar - Nichola Battilana for gslcuts.com

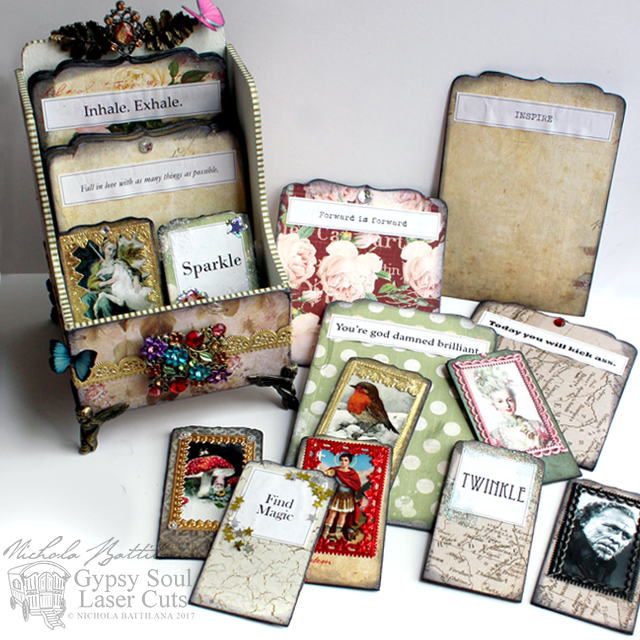
So I've taken the Gypsy Soul Perpetual Calendar Bracket Style and turned it into a Perpetual Happiness Calendar.

Perpetual happiness calendar - Nichola Battilana for gslcuts.com

Instead of days and dates, I've replaced them with reminders to kick ass, to sparkle, and included images of some of my favourite things like Christmas robins, Van Gogh and pretty ladies in pink.

Perpetual happiness calendar - Nichola Battilana for gslcuts.com

Both sides of the cards are decorated to give lots of variation. When the mood strikes, I'll select new cards, reminders to inhale/exhale, to think nice thoughts and encouragement to keep at it!

Perpetual happiness calendar - Nichola Battilana for gslcuts.com

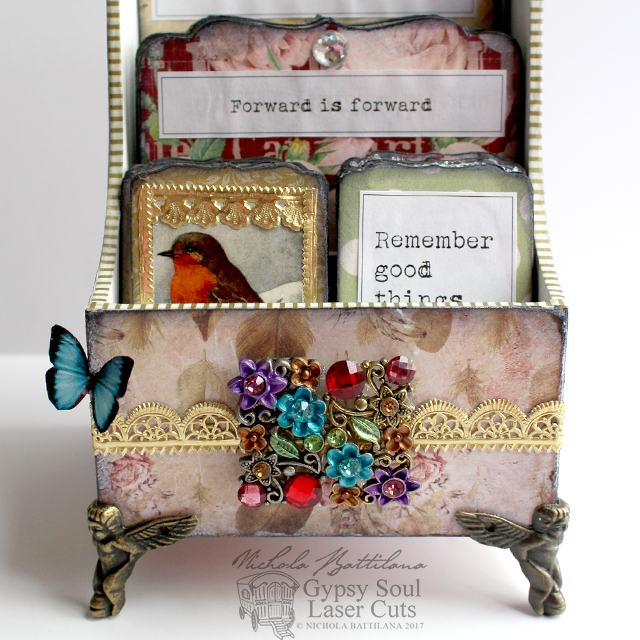
I've added gold and pink dresden trims and colourful fun bits of sparkle.

Perpetual happiness calendar - Nichola Battilana for gslcuts.com

With little angel feet to hold up my happiness.

Perpetual happiness calendar - Nichola Battilana for gslcuts.com

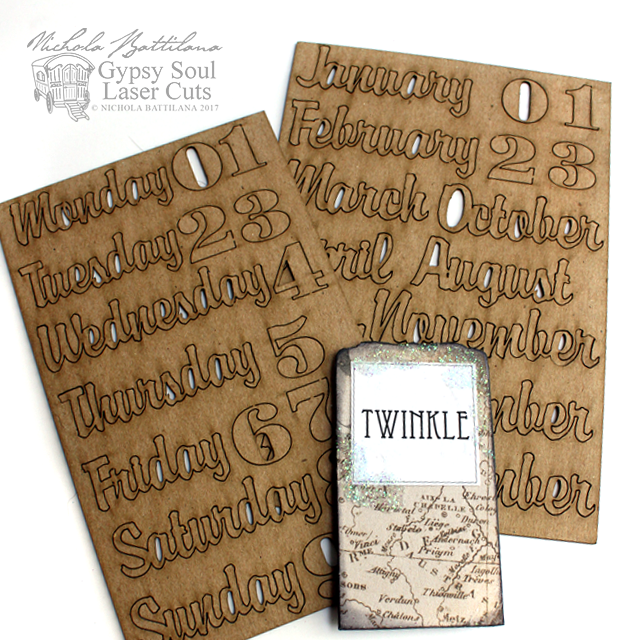
If you really do need to remember what day it is, laser cuts of the months, days and numbers come with the Perpetual Calendar Bracket Style

Perpetual happiness calendar - Nichola Battilana for gslcuts.com

Or you can set them aside and decorate the inserts with your own joyful reminders.

Perpetual happiness calendar - Nichola Battilana for gslcuts.com

I've created a short video with tips on putting together this piece. You can skedaddle over HERE to see it. 

Perpetual happiness calendar - Nichola Battilana for gslcuts.com

The list of requirements!

Perpetual Calendar Bracket Style

Scrapbook paper
Dresden Trims
Cherub Metal Box Feet Set
Oak leaf charms
Gem/Jewel bits and bobs
Washi tape
Stickers
Glitter
Glue