Showing posts with label tutorial. Show all posts

Thursday, November 09, 2017

MOTHER EFFIN' SNOWBALLS! with tutorial

Today was supposed to be the first snow of the season. Because it's daylight savings and now dark at 2 in the afternoon (not really, but it feels like it) I have no idea if it actually did snow today BUT there's these dudes. The yearly Cheeky Snowballs.

Cheeky Snowball Ornaments with Tutorial - Nichola Battilana

I've been making these guys for nearly 10 years. TEN FREAKING YEARS! They started out as emotional snowballs and transformed into the cheeky variety.

Cheeky Snowball Ornaments with Tutorial - Nichola Battilana

This year I've decided to do a tutorial so people can create their own. The video is available HERE on my YouTube channel. If you create your own, please share on social media and tag me. Seriously, it's appreciated and I totally want to see what you make.

Cheeky Snowball Ornaments with Tutorial - Nichola Battilana

A couple of things I KNOW are going to come up.

1. Can I use a different clay?  
I REALLY recommend you use Creative Paperclay for this project. It's super light weight so your ornament won't drag down the Xmas tree branches. It gives a beautiful finish. There may be a bit of a learning curve if you're used to other materials... but  In my opinion it's absolutely worth $ and time. 

2. It's taking SOOO LONG! Can I speed up the drying?
I prefer to let things dry naturally. There seems to be less warping, and cracking when I let things take their course. Plus, do you really want to put styrofoam in the oven? Nah.

3. Clear glitter?
Never mind fancy stuff, head over to the kids aisle in Micheal's and grab a big ole jar of Creatology "Crystal Clear" glitter. It looks like this...
What is most important is that your glitter of choice is NOT SOLID WHITE. The flecks in this product are transparent. This is important. You want a product that will allow the underlying paint colour to show through. Just look for something transparent or translucent.

4. I can't find tiny eye hooks!
I use teeny tiny eye hooks for hanging on my snowballs. If you can't find any small enough, try the jewellry section of the craft store and look for findings like these Tiny Silver Eye Pins*. Poke a hole with a straight pin, add a dab of glue, and slide it in. They'll work in a pinch.

5. What kind of glue do you use?
I'm using Elmer's School Glue in the tutorial. The better the quality glue you use (i.e. Aleene's Tacky Glue) the more glitter will remain on your snowballs in the long run.

6. Can I (insert other subsitution/method/madness)?
Part of the joy of creating is experimentation. Have an idea? Give it a try! Maybe it'll turn out a bazillion times better than my snow dudes!


Cheeky Snowball Ornaments with Tutorial - Nichola Battilana

THE LIST OF SUPPLIES!
- styrofoam balls (2" - 2.5" makes a nice size)
- Creative Paperclay
- white glue
- clear/transparent/translucent glitter
- pink, black paint
- mini eyehooks
- fake snow
- clear gloss medium like Diamond Glaze, Glossy Accents or Dimensional Magic

Sunday, October 29, 2017

Perpetual Happiness Calendar

Sometimes, I need a reminder to breathe more than I need to recall that it's Sunday the 29th of October.

Perpetual happiness calendar - Nichola Battilana for gslcuts.com

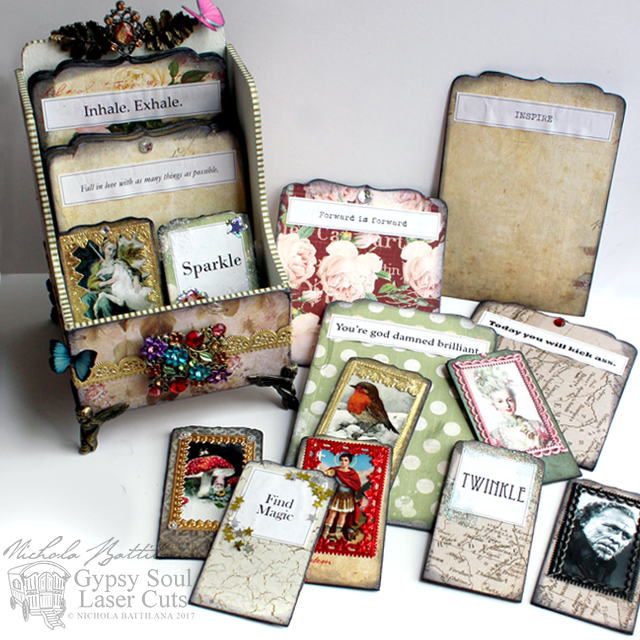
So I've taken the Gypsy Soul Perpetual Calendar Bracket Style and turned it into a Perpetual Happiness Calendar.

Perpetual happiness calendar - Nichola Battilana for gslcuts.com

Instead of days and dates, I've replaced them with reminders to kick ass, to sparkle, and included images of some of my favourite things like Christmas robins, Van Gogh and pretty ladies in pink.

Perpetual happiness calendar - Nichola Battilana for gslcuts.com

Both sides of the cards are decorated to give lots of variation. When the mood strikes, I'll select new cards, reminders to inhale/exhale, to think nice thoughts and encouragement to keep at it!

Perpetual happiness calendar - Nichola Battilana for gslcuts.com

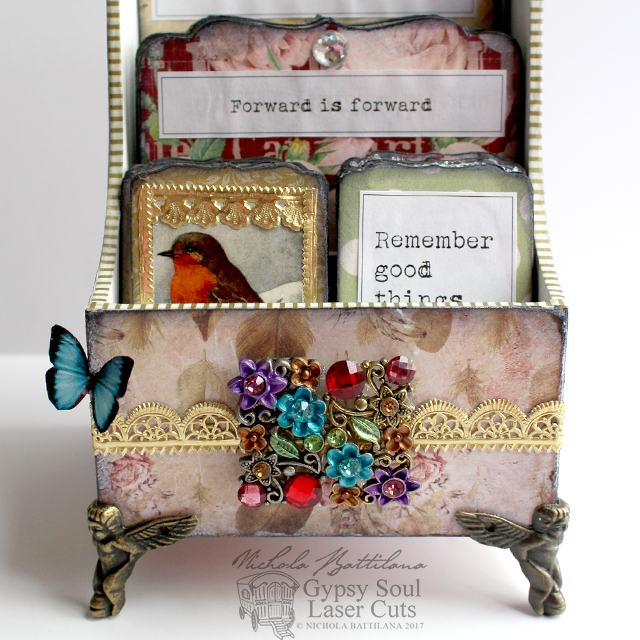
I've added gold and pink dresden trims and colourful fun bits of sparkle.

Perpetual happiness calendar - Nichola Battilana for gslcuts.com

With little angel feet to hold up my happiness.

Perpetual happiness calendar - Nichola Battilana for gslcuts.com

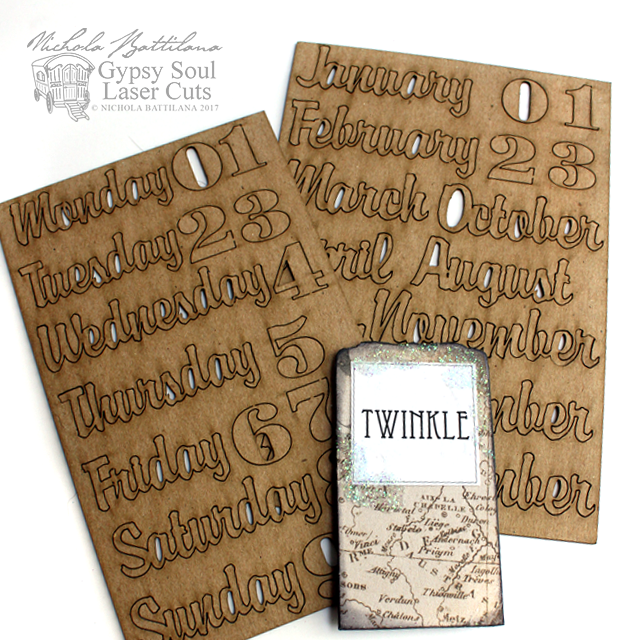
If you really do need to remember what day it is, laser cuts of the months, days and numbers come with the Perpetual Calendar Bracket Style

Perpetual happiness calendar - Nichola Battilana for gslcuts.com

Or you can set them aside and decorate the inserts with your own joyful reminders.

Perpetual happiness calendar - Nichola Battilana for gslcuts.com

I've created a short video with tips on putting together this piece. You can skedaddle over HERE to see it. 

Perpetual happiness calendar - Nichola Battilana for gslcuts.com

The list of requirements!

Perpetual Calendar Bracket Style

Scrapbook paper
Dresden Trims
Cherub Metal Box Feet Set
Oak leaf charms
Gem/Jewel bits and bobs
Washi tape
Stickers
Glitter
Glue


Saturday, September 30, 2017

Halloween Hotrods with Tutorial

One of my very favourite projects from last year were the Mad Max hot rods built with my buddy Paula Mould. It's one of those projects that is just so much messy fun. I mean you COULD be neat and proper and make something stunning... or you can let loose and just glue crap to other crap and have a grand old time doing it.

Halloween Hotrods: Dollarstore project with video tute • Nichola Battilana

There's Halloween junk all over the Dollarstore aisles and it made me nostalgic and inspired to revisit that project. This time with a video tute (see below) for you to make your own monster machines.

Since this is a dollarstore, stash busting project, it's not going to break the bank.

Halloween Hotrods: Dollarstore project with video tute • Nichola Battilana

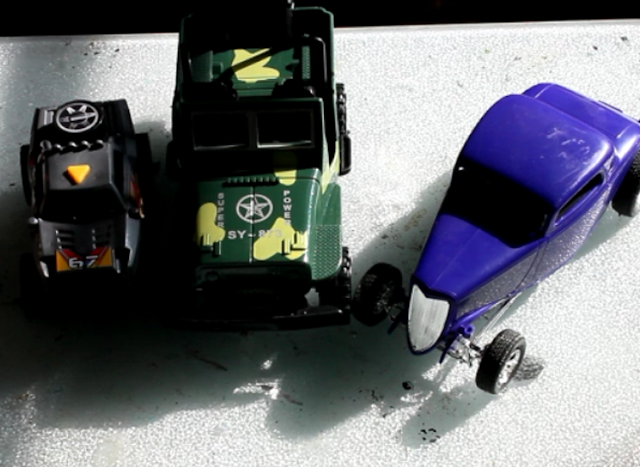
We're starting out with simple plastic toy cars and trucks.

Halloween Hotrods: Dollarstore project with video tute • Nichola Battilana

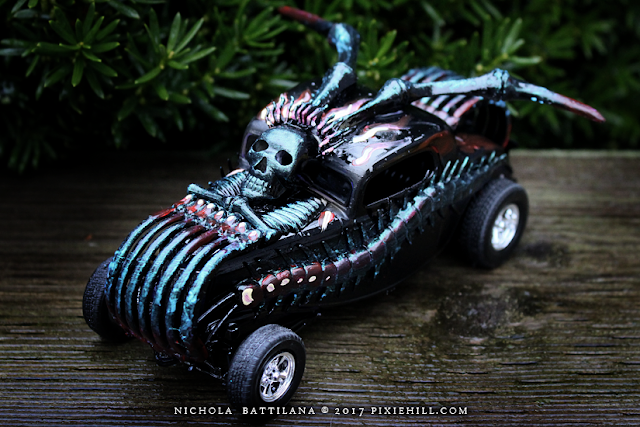
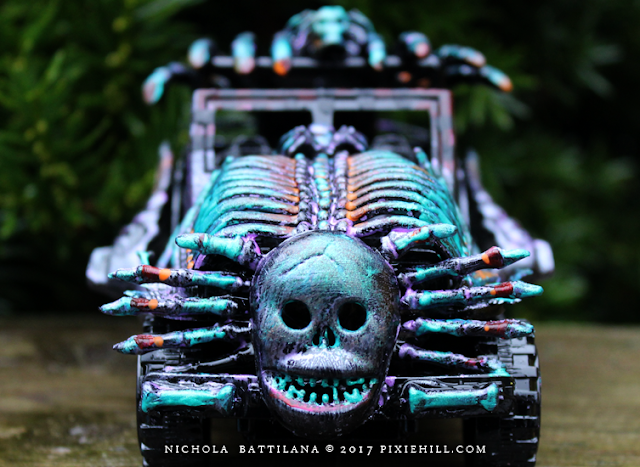
Embellishing the heck out of them. Giving them a knock out paint job. And ending up with something like this...

Halloween Hotrods: Dollarstore project with video tute • Nichola Battilana

They check off most of the boxes for a kid friendly project. They're cheap, fun, neatness isn't exactly a factor. You WILL need to supervise/modify the project depending on age appropriateness (i.e. glue guns are the devil) but it's do-able for and little hotrodders you know.

Halloween Hotrods: Dollarstore project with video tute • Nichola Battilana

I've just used my trusty old hot glue gun for this project. If you want something that can be handled (crashed? raced?) and remain somewhat intact, you'll need to invest/experiment with a better method of adhesion. Or, you know, let them be the $3 works of art they are and just enjoy the destruction.

Halloween Hotrods: Dollarstore project with video tute • Nichola Battilana

Here's your supply list:

Toy cars: trucks, busses, boats, planes... whatever strikes your fancy!
Halloween swag: skeletons, bugs, beads, bones, skulls, spiders, bats
Black spray paint: I used gloss in the tute... I MUCH prefer flat/matte

Acrylic paint: I mostly used a product from Colourarte called Silks Acrylic Glaze It has a nice pearlescent finish and it was in my stash. Metalics looks super cool.
Paint brush
Sponge brush
(for blending)
GLUE: I used hot glue because it's fast and easy. Do what works for you!
Cutting tools: for chopping up spiders and plastic skeletons
Tape: for covering any bits you don't want spray painted

Halloween Hotrods: Dollarstore project with video tute • Nichola Battilana

That's it weirdos! Go make something hotroddy!

Here's how to put them together.

Friday, September 29, 2017

Spooky Wee Houses

Halloween is just around the corner so I thought that this month I'd make something spooky for that sweet holiday. Using products from Gypsy Soul Laser Cuts,  Canvas Corp and 7Gypsies.


I've used the Cabana Row Houses as my base. There's 5 in the set and so you can create quite a nice little haunted neighbourhood!


Some of the houses are covered using papers from 7Gypsies. Some are simply painted white, decorated with Architextures™ Parchment Rub-Ons and then distressed.


Each of the houses uses pieces from the Miniature Bookplates Shape Set as windows. Creating the rooves was super simple with burlap pieces from Canvas Corp


There are plenty of embellishment opportunites. I've used Faux Metal Number Plates 1 to 25 but don't forget the larger Faux Metal Number Plates and Gears Shape Set would be super cool for a steampunk haunted neighbourhood. Go check out all the shapes available at Gypsy Soul and I'm sure you'll find some inspiration.

For a final touch I've added plastic spider and ants from the halloween aisle at the dollar store. 

Want to make your own? I've created a walk through with some simple practical tips HERE

And here are the goods I used in making my own little spooky neighbourhood.
7Gypsies Paper
Architextures™ Parchment Rub-Ons
Burlap from Canvas Corp
Plastic spiders
Vintage images
Twine/Ribbon
Acrylic Paint
Hot Glue
White Glue

Saturday, July 29, 2017

Starry Tags with Tutorial for Gypsy Soul Laser Cuts

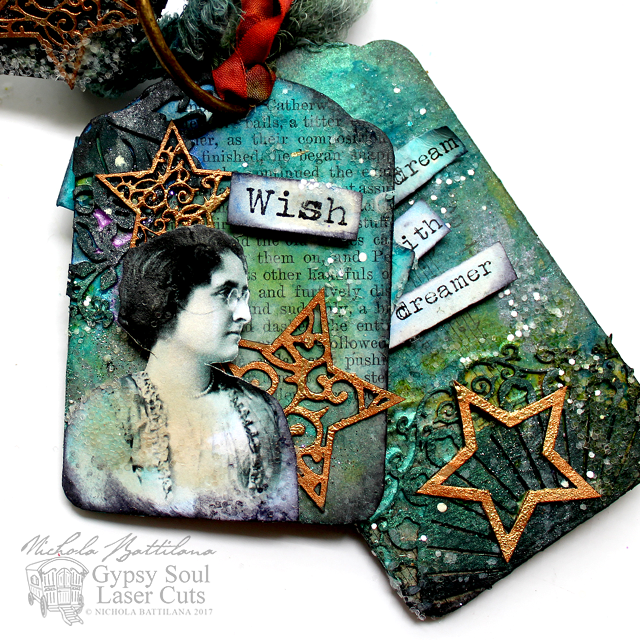
This month for Gypsy Soul Laser Cuts I've used their 3 tag set to create something starry and dreamy.

Starry Tags with tutorial - Nichola Battilana pixiehill.com gslcuts.com

With some layers of paint, chipboard stars and glitter those kraft coloured tags are transformed.

Starry Tags with tutorial - Nichola Battilana pixiehill.com gslcuts.com

They are the perfect backdrop for the sentiments and vintage images found on THIS Stars and Dreamers Collage Sheet (which is totally free to download because I love you.)

Starry Tags with tutorial - Nichola Battilana pixiehill.com gslcuts.com

If you need a little guidance putting these beauties together, I've put together a video tutorial for you.

Starry Tags with tutorial - Nichola Battilana pixiehill.com gslcuts.com

I do use a fair few layers of colour... but I honestly think that multiple washes add a depth of colour and visual interest that is incomparable to a slap of thick paint.

Starry Tags with tutorial - Nichola Battilana pixiehill.com gslcuts.com

But hey! if a thick coat of acrylic is your thing... go for it! Art and craft is all about YOU, the maker. I wholeheartedly encourage you to do what works for you.

Starry Tags with tutorial - Nichola Battilana pixiehill.com gslcuts.com

Here are all the bits I used to create these starry sparkly tags:

Gypsy Soul Tags
Keys Engraved
Printers Ornament Corners
Swirl Medallion Small
Deco Stars
Acrylic Paint (also used 
Glue
Glitter
Metal Ring
Ribbon/Fibers

Sunday, July 23, 2017

Wild Faerie Wands

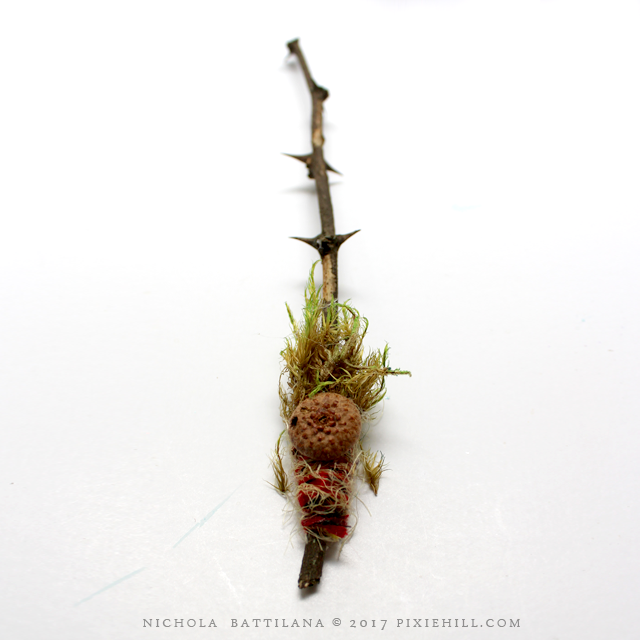
Not all sticks are plain old twigs. Some are faerie wands hidden in plain sight! (I've mentioned this before)

I happened across a fair number of wands this weekend. I'm sure the weather has the wee folk a little more fumbly and droppity than usual.

Wild Faerie Wands - Nichola Battilana pixiehill.com

With the plethora of wands scattered about, I thought I'd share some thoughts on embellishing wild faerie wands.

Wild Faerie Wands - Nichola Battilana pixiehill.com

There are a number of things to consider when encouraging the wand to reveal it's magical nature. 

The type of tree the wand is from is the biggest determining factor to the type of magic that the wand will best preform. Here are some simple examples:

Locust (above): protection
Apple: fertility
Oak: truth and knowledge
Willow: emotion
Ash: wisdom
Cedar: cleansing

A quick google search for "magical properties of wood" will lead you to a wealth of information on the subject.

Wild Faerie Wands - Nichola Battilana pixiehill.com

Charms can add to the magical purpose too! A key might be helpful for magic that opens the way to you. I think that acorn caps, buttons and found objects hold a great deal of magic in them. You could also sew beads and gems to those magical wands.

Wild Faerie Wands - Nichola Battilana pixiehill.com

You might carve and shape your wand. Whittle a point, or carve patterns or symbols into the bark.

Wild Faerie Wands - Nichola Battilana pixiehill.com

Colour can add to the magic too! Again, a little research will provide you with a lot of information on colour and magical associations... but don't neglect your intuition*. Faeries in your particular region may have a very different opinion of the colour yellow than the faeries in my back garden.

For a little more 'how-to' I've made a little video. Hop over to youtube and give it a gander...


*I have always read that faeries love milk. That leaving a small dish would be an appropriate offering. Mine HATE milk! The last time I left them some they turned all the milk in the house sour. So trust your experience over what some silly website says... even this one.


Saturday, July 15, 2017

Old Glass and Another Apothecary

This is a much smaller version of the Fairy Apothecary I showed off earlier in the week. I had a couple of requests for a tutorial and an AlphaStamps deadline looming so... ta dah!


This is probably about 1/4 the size of the earlier version, but crammed with just as many wee jars and bottles and vials. Overall size is approximately 3" x 5.7".


I've skipped over the box assembly in the video tutorial. It's easy peasy and you can look at the old vids on my channel to see how I generally stick stuff together and cover with paper.


Instead I've focused on recreating the look of authentic old glass. It's not over the top grungy... but it absolutely replicates the appearance fairly accurately.


So hop over to the tutorial HERE


And grab all of the supplies you need HERE

Or here's all the bits listed separately:


Tuesday, February 14, 2017

The Little Death Matchbox Shrine

Do you celebrate Valentine's Day?

We don't...

Well, not really...

Okay, I confess, last year asked for chocolates and a card. After almost 25 years with the fella with no romantic demands, I don't think it was asking too much.

This year Mr Pixie asked what I wanted for Valentine's. I said "Nothing" but quickly changed my mind and requested a cheesecake and his spot on the couch.

Mr. P has actually been quite woo-ey over the past few months. It's so out of the ordinary that family members have asked if one of us is dying. For the record, we're both fine. *knock on wood*

Speaking of death....

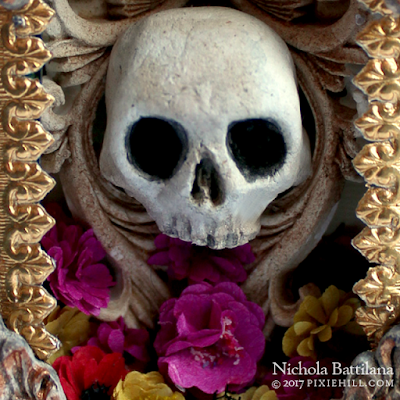
The Little Death Matchbox Shine for Love and Lovers w/ tute - Nichola Battilana

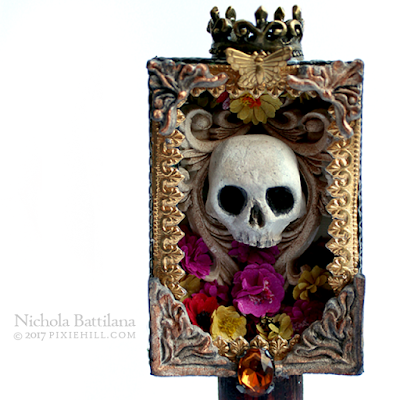
I made this piece specifically to celebrate Valentine's Day. "The Little Death" matchbox shrine is a bit of a cheeky joke with "La petite mort" a metaphor for sexual orgasm.

The Little Death Matchbox Shine for Love and Lovers w/ tute - Nichola Battilana

Despite there being a little skull smack dab in the middle, and it being called 'The Little Death', this isn't about doom and gloom. It's sex, love and romance baby!

The Little Death Matchbox Shine for Love and Lovers w/ tute - Nichola Battilana

Some of those little paper flowers look like chrysanthemums, a symbol of joy and optimism. Maybe they are asters, talisman of love and a symbol of patience.

The Little Death Matchbox Shine for Love and Lovers w/ tute - Nichola Battilana

There's a golden butterfly, the symbol of the soul and positive transformation.

That shiny amber something at the bottom of the shrine? A nod to Freya, the Norse goddess of love, sex, beauty and death. Freya would weep amber tears while waiting for her beloved husband to return to her from his extended journeys.

The Little Death Matchbox Shine for Love and Lovers w/ tute - Nichola Battilana

Ok, maybe there is a tiny bit of death in all of this, but so many symbols associated with love, sex and life also share a connection with death. And why not, that's what we do isn't it? We live, we love, we die... hopefully we do it all well.

If you're interested in seeing "The Little Death" being made, hop over HERE or watch below


And here's a list of the supplies I used to create that wee shrine.

• coloured tissue paper
Creative Paperclay
• standard match box
• chess rook
• paper (I used a vintage love poem and G45 scrapbook paper)
• charms (metal crown, stamped brass butterfly)
2 Symmetrical Flourishes Silicone Mold
Flower Soft (used for flower centres)
Narrow Gold Fleur Dresden Borders*
Tiny Dot Dresden Borders - Gold*
• acrylic paint
• glue

Note: The tool I mention in the video is a ball stylus... not necessary, but a handy thing to have around.

Whether you're celebrating today or not, I'm sending a little love your way.

Happy Valentine's Day, sweetie pies!

Friday, January 06, 2017

Pins for Every Type of Valentine

The plan was to create an organization project. But I don't feel much like organizing.

I'd rather get romantic-like and look ahead to Valentine's Day.

So I came up with a slew of simply made pins for every Valentine.


I've used a variety of Punchelements from Gypsy Soul Laser Cuts for the bases. (Only the round are currently listed on the site.) Not too long ago I scored a 1" round punch at the craft store so making these was super simple.

Paint the base, add sparkle, add image/sentiment, embellish and finish off with a pin back!


I've made them to suit just about every Valentine. There's pink and sparkly for the romantic.


And something glittery and red for the saucy types. There's a "Go Away" pin for those who would rather be left alone.


"I am crazy" for my buddy who says this is the reason she is single.


A number of the pins have images of Cupid and Psyche, a theme I think I might like to further explore some time.


A few of the pins are a little crass... but I like the way glitter and the indelicate work together.


Do you want to make your own? You can download a sheet of the saucy and silly, nice and naughty sentiments below. (Note: You may have to click for the full sized image.)


If you need a little more direction the video tutorial for creating these wee thing-a-ma-bobs can be found HERE.

Supplies:

Punchelements 1 inch Scalloped

Acrylic Paint
Glitter
Glue
Embellishments
Pin Backs


Now, prepare some sparkly Valentine's for the peeps you love!