Showing posts with label tutorial. Show all posts

Thursday, June 21, 2018

Graphic 45 Fairie Dust ATC Tags

Asked to create a self portrait project for Graphic45 my mind raced. Should I upcycle some cool old dodad? Make a steampunky something or other?! Create a super cool Sherlocian whatchamacallit with Master Detective?!?! I was a mess of ideas!


I took a deep breath, refocused, and realized the exact right thing to do was play with the fairies.
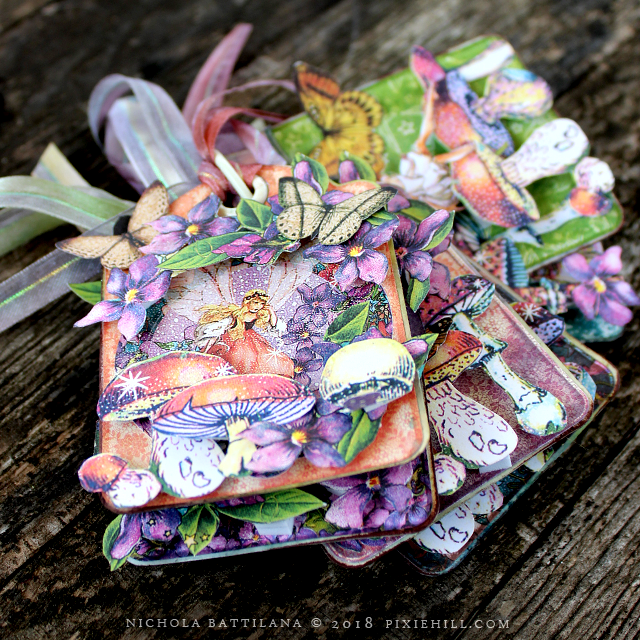
My #G45selfie includes three things I like best... ATC's, fussy cutting, and fairy folk.


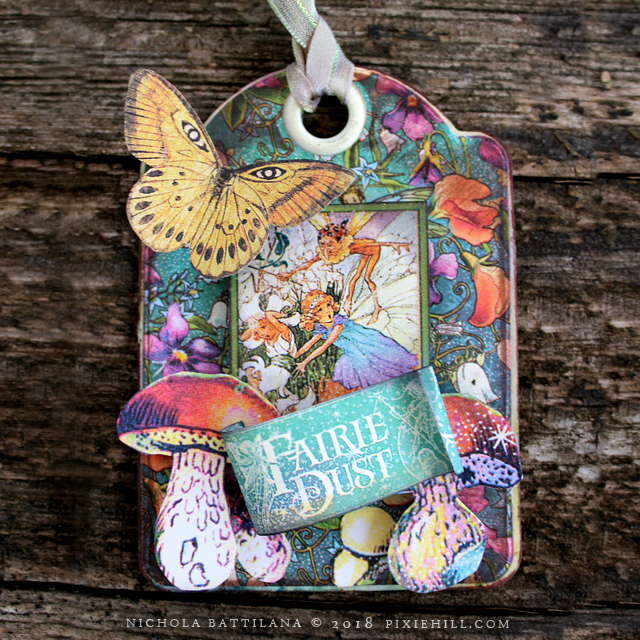
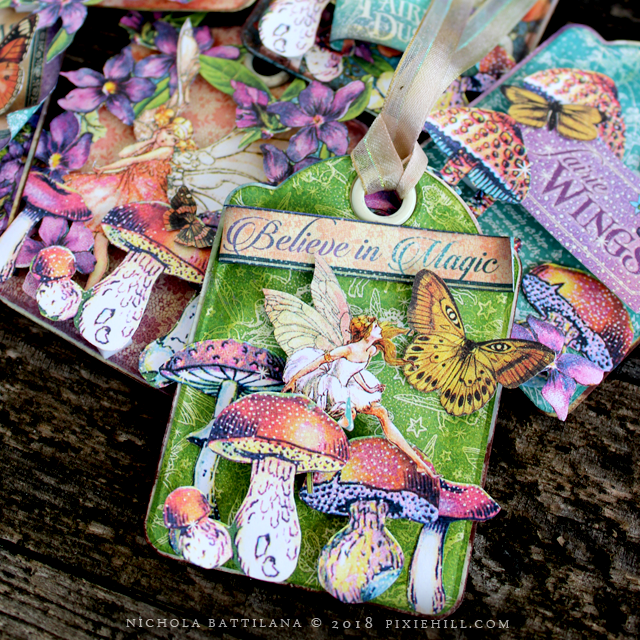
As a friend of the fairies, I'm all sorts of in love with Fairie Dust. It's so cheery and colourful. I've also added butterflies from Olde Curiosity Shoppe to my project, they just seem to go hand in hand.


I love working in ATC size. If I'm feeling stuck, or need to kick my creative mojo in the pants, creating in ATC size is undaunting (is that a word?) It's a non-stressful size, but big enough to be creative.


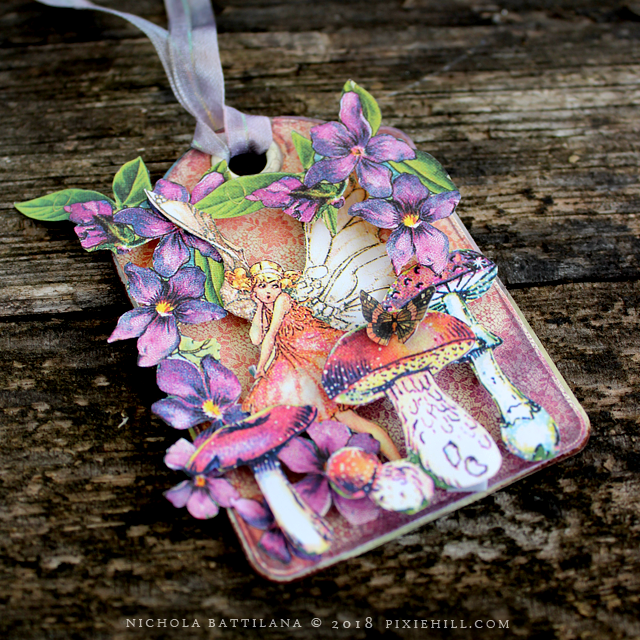
I also love fussy cutting. I do it while watching tv, collecting those tiny snips as I cut away. My best fussy cutting tips? Use super sharp scissors and cut more than you think you'll ever use.


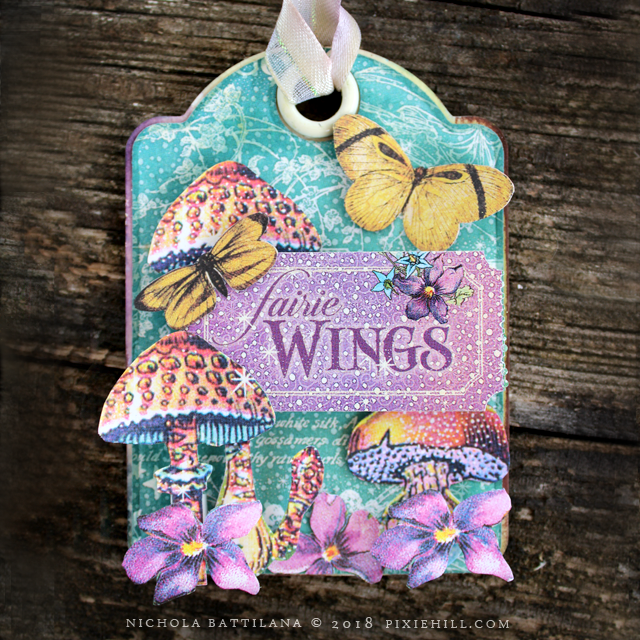
Toss all those elements together and you've got yourself a cute-as-can-be set of Fairie Dust ATC's. I’ve created a video to show you exactly how I created these cute little tags. (https://youtu.be/uGxSF14HY4o)


So grab some sharp little scissors, some Fairie Dust, and make some magical little tags with me.”

Staples - Artist Trading Tags-Ivory

Graphic 45 Supplies:
Tiny Toadstools
• Parlor Wall
• Butterfly Specifics


Other Supplies:
• glue
• ribbon

• foam squares

Wednesday, June 20, 2018

A Hufflepuff Box

I am a Hufflepuff. For a long while I fought against it, but I have come to embrace my house. What's not to love about loyalty, a dedicated work ethic and strong moral code?!

Hufflepuff Box - Nichola Battilana

Now whenever I see yellow I think "HUFFLEPUFF!" and set to celebrating my house with pride.
The yellow window on the Stained Glass Windows Collage Sheet reminded me of something that might be in the Hufflepuff common room so that's where I drew my inspiration.

Hufflepuff Box - Nichola Battilana

Inside, a Hufflepuff garden full of yellow Curly Paper Roses. There are  Mini Fern Garland leaves, Tiny Paper Roses and Miniature Creeping Vine Garland too.

Hufflepuff Box - Nichola Battilana

But enough showing off! Here's how I made this sweet little Hufflepuff Box.


1. Assemble the inside drawer of the Matchbox for Conservatory Book. Use the arched frame element from the Mini Conservatory Accordion Book as a template and cut the arched shape from the drawer. NOTE: leave a bit of a border when you cut, you will need the edge to glue the frame in place later.

2. Cover the inside and exterior of the box with cobblestone paper from the Wandering Ivy 12" pad


3. Paint the arched elements cut from the Mini Conservatory Accordion Book. Cut the yellow window from the Stained Glass Windows Collage Sheet and glue to the back side of one of the frames.


4. Glue that to the inside of the drawer.


5. Glue the second frame to the exterior.


6. Add Sheet Moss, Curly Paper Roses, Mini Fern Garland and Miniature Creeping Vine Garland to the interior.

7. Cut butterflies from the Wandering Ivy 12" pad and colour with felt tip markers.


8. Download a public domain badger image and add it, along with the prepared butterflies to the interior.


9. Cover outside sleeve of the matchbox with paper from the Wandering Ivy 12" pad. I am NOT gluing the end in place. This piece will wrap around the inside drawer, not slide over it.


10. Cover the exterior.


11. Glue 2 lengths of ribbon to the outside cover and add some pretty buttons.

Hufflepuff Box - Nichola Battilana

Add a couple of cute charms and tie closed! Easy as pie.

Hufflepuff Box - Nichola Battilana

Are you a Hufflepuff? Or will you make a little something for your Ravenclaw heart? Gryffindor? Or something a little green perhaps?

Whatever your house, have take pride in it and make a little something to celebrate all the goodness it encompasses... yes, even you Slytherin!

Thursday, April 05, 2018

Graphic 45 2018 Brand Ambassador Audition

Some of you may recall that a few years ago I was on the Graphic 45 design team. It was a lot of fun, I learned so much, and (best of all) I made such nice friends.

So, when I saw that Graphic 45 had announced a Brand Ambassador Call... well I couldn't help myself.


I've made an extra special project with a new video tutorial just for the occasion.

Paper Fairy Frock with Tutorial - Nichola Battilana

Paper fairy frocks! It's the sort of project that ticks all my boxes... moderately simple, uses few supplies, and easily customizable. As a bonus, there's a bit of recycling in there too!

Paper Fairy Frock with Tutorial - Nichola Battilana


I've used Graphic 45's Baby 2 Bride Classic Collection "Birdy Baby Blues" with a smidge of Botantical Tea for this frock. But don't let that limit your imagination! You can make these to suit just about any taste or theme.

Graphic 45 Paper Fairy Frocks with Tutorial - Nichola Battilana

Seriously, how cute would these be for a shower? Or a ladies lunch? Or sweet 16?!


Something chic for the fashionista with Couture.

Graphic 45 Paper Fairy Frocks with Tutorial - Nichola Battilana

Or perhaps something playfully psychobilly with Rare Oddities

Graphic 45 Paper Fairy Frocks with Tutorial - Nichola Battilana

I think they are all sweet as can be.

Are the possibilities swimming in your head? Are you ready to create your own? 
Download the template below. CLICK HERE if you're having trouble

Paper Fairy Frocks with Tutorial - Nichola Battilana


Here are all the supplies you'll need:

Scrapbook paper
(Graphic 45's Baby 2 Bride Classic Collection - Birdy Baby Blues is used in the video sample)
Pleated Ribbon
Empty container for base
Florist Oasis/Foam
Moss
1/4" wood doweling
Fairy Wings
Buttons, faux flowers and leaves, ribbon, embellishments
Adhesive

And... AND... my second audition project: a mini mini album!

Graphic 45 Rare Oddities Mini Mini Album - Nichola Battilana

And I do mean mini! Just 1.25" x 2" made with Graphic 45's Rare Oddities. 

Graphic 45 Rare Oddities Mini Mini Album - Nichola Battilana

Now, I will be the first to admit that mini albums are not one of my skill strengths, BUT I think that my sense of crafting adventure IS my absolute biggest strength.

Graphic 45 Rare Oddities Mini Mini Album - Nichola Battilana

I love crafting. It's fun. It brings me joy. That joy comes from exploring, playing, experimenting and fearlessly making mistakes. Loads and loads of mistakes.

Graphic 45 Rare Oddities Mini Mini Album - Nichola Battilana

I glue my fingers together regularly. I mismeasure and cut where I shouldn't. And that's ok! Everyone does it. Every one of us starts somewhere.

Graphic 45 Rare Oddities Mini Mini Album - Nichola Battilana

While this finished the project may look spiffy, the two prototypes I made before were a mess!

Graphic 45 Rare Oddities Mini Mini Album - Nichola Battilana

And those two messes? They are soooo important because, cross my heart, the trying, the doing, the mistakes and messes, they are the most valuable creative tools you have. Never ever be afraid of mistakes (unless you're a beginner knife thrower).

Good luck to everyone auditioning for Graphic 45 Brand Ambassador. I've seen a load of other audition posts and there are some fiercely talented folks auditioning. If you're on the fence about applying... GO FOR IT! DO IT NOW!!! You have until the April 8th, 2018 to apply.

Friday, December 29, 2017

Night Angel Mixed Media Triptych

This month for GSLCuts.com I've created a set of three mixed media angels. A dreamy mystical triptych.


With New Year looming I thought it was a perfect time to think of dreaming and making wishes. That's what this set is all about. Looking up and forward and making bedtime wishes listened to by Night Angels.


Each of the three elements is made using a Cross Top Triptych piece. One of the thing I really appreciate about these elements is that the front piece is made up of straight edges, making it easy to embellish with scrapbook paper.


Each of the three seperate pieces is a slightly different size, but all fit nicely on Gypsy Soul ATC Stands. This makes displaying your pieces soooo simple. AND those little stands come in a set of three  so they're perfectly matched. (AND they're pretty dang reasonable too!)


While putting these pieces together is so simple, I have a little walkthrough of the process of making them. Hop over HERE for the video.


Below are all the bits I used to create my pieces, but you should absolutely feel free to add your own special touch to create your own dreamy night angels.


Cross Top Triptych
ATC Stands

decorative scrapbook papers
acrylic paint

Wednesday, November 29, 2017

A Plethora of Presents

I absolutely love Christmas and gift giving. If I could, I'd buy something lovely for every single person I know. Alas, my bank account is firmly against this.


BUT I had a nice little idea! I saw the Set of Pre-Cut Drawers intended for the Advent Calendar Shadowbox and thought that they'd make a sweet little base for tiny tokens of holiday cheer. Super simple to assemble and sold as a set of 25 they just lend themselves for en masse making.


AND!!! AND!!! A strip cut from a 6" sheet will wrap around the boxes just so, with just a sliver needed to be trimmed. So, you only need a 6" scrapbook pad to cover these cute wee things. These boxes have all been covered with papers from Authentique's Vintage Christmas. The items I've used are all inexpensive but festive.


Covering the boxes with different papers and embellishments, like Miniature Bookplates or decorative brads, make the tiny gifts feel personalized and not mass produced. Filling the boxes with a variety of dodads and treats makes each little box feel like a unique present.


The items I've chosen to fill the boxes are all inexpensive but festive. I think they're rather sweet.


Some ARE filled with sweets! Then a bit of celophane and a simple tie. If you want to be extra fancy, you might place a single gourmet truffle inside. 

Pieces from the Snowflake Shape Set or Winter Shape Set also make sweet little embellishments.


Or perhaps you'd like to top your box with Christmas fairies or angels.


Or send a little holiday message.


While these little tokens have a decidedly Yuletide feel, these could easily be adapted to any theme as party or wedding favours. 


While these are super simple to create, I do have a video tutorial for you. You can pop over HERE to see just how easy they are!

The list of bits I've used:

Snowflake Shape Set
Winter Shape Set
Victorian Corners 2
Banner Border Strips


Authentique's Vintage Christmas
Wrapped Gift Box Ornaments
Tiny Wrapped Gift Box Ornament
Retro Bottle Brush Tree
Fancy Scalloped Gold Dresden Borders
Little Sweeties Collage Sheet
Angel Wings Collage Sheet
Brads
Fake snow
Moss
Candy
Tissue Paper
Cellophane
Ribbon