Saturday, April 02, 2016

The Bird House for AlphaStamps

A while ago I created a set of mixed media chunky houses with bases I had the hubs cut from mdf. I still had one of those housey shapes kicking around and I decided to put it to use for this month's AlphaStamps.com project. And so, here is 'The Bird House'.

There's nothing too complex going on here. Some fussy cutting, some embellishing, painting and gluing and Ta Da! a pretty shabby thing-a-ma-doodle to hang on the wall.


I restrained myself and didn't use a spec of glitter. To make up for it I did paint a golden egg and add some Narrow Gold Fleur Dresden Borders* (which I think is just about the prettiest thing ever). And topped it with this Fancy Silver Birdhouse Charm* 


Normally I avoid using gold and silver together but I think they're getting along on this piece. Maybe it's because they're just sitting delicately, and are too buy being pretty to compete against one another. 

Note: Yes, my supplies have personalities.


While going off the deep-end, buying buckets of supplies, and throwing all you've got at a project can be fun, sometimes a 'simple' something is just the thing for your soul. Sometimes you only need a little this and that.

"The Bird House" supply round up from AlphaStamps
Silver Bead Caps
MDF board

Friday, April 01, 2016

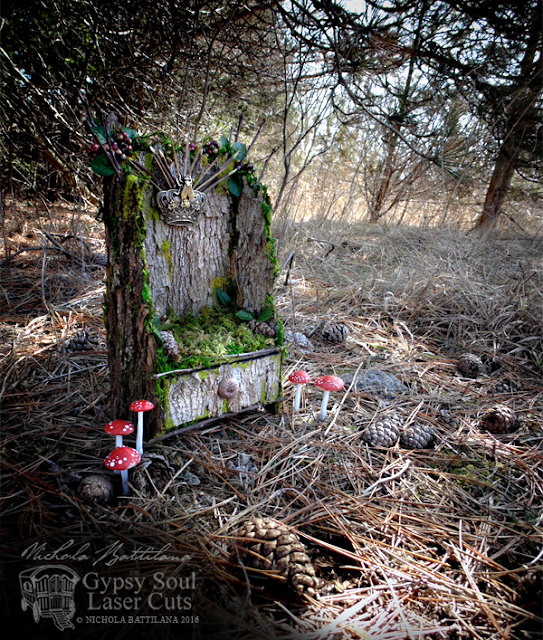
The Goblin Throne

Spring is finally creeping into our neck of the woods. My faithful furry buddy and I have been taking advantage of the nice weather, wandering through the dried grasses and meandering next to the little stream that edges our property.

The Goblin Throne and tutorial - Nichola Battilana

While these conditions are ideal for fairy sightings, it was a goblin we first encountered on our stroll the other day. Normally I don't mix with goblins (I don't have anything against them in particular, but avoiding them seems like the best practice) but we regarded each other respectfully and engaged in a little chatter.

The Goblin Throne and tutorial - Nichola Battilana

He shared his ideas with me for a sort of goblin throne. I agreed to make one, in exchange for permission to share the project with others. He grumbled that he didn't much care, so long as the throne was made, and here we are.

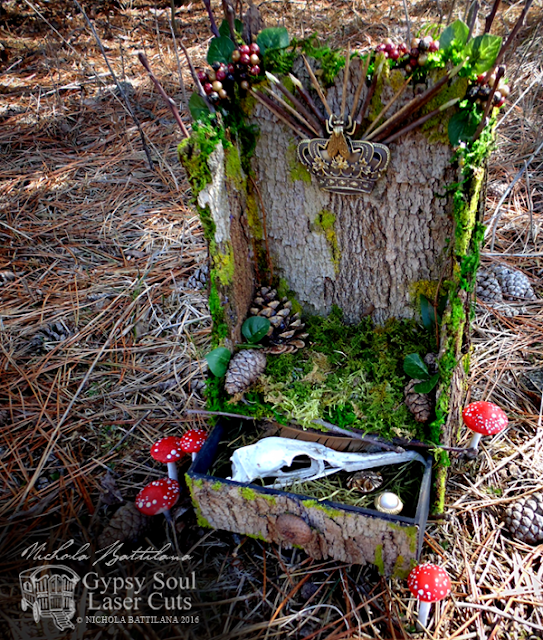
The Goblin Throne and tutorial - Nichola Battilana

There were four elements of utmost importance to be included:

1) It must not look out of place in the goblins den.

2) The seat must be well cushioned, because even goblins do not like sore bottoms.

3) It should be embellished with poisoned berries and pointy things. (Note: The design didn't have to BE dangerous, but if it looked as though you might prick your finger that would be a very good thing indeed. And poisoned berries because goblins like to nibble throughout the day.)
4) It must contain a secret chamber for goblin treasures.

The Goblin Throne and tutorial - Nichola Battilana

As soon as he mentioned the secret chamber my mind turned to this Trinket Drawer Stand and I gathered up some bark and moss and set to work.

This isn't a complicated project, and the supplies are few, but our goblin acquaintance was well pleased with the results. If goblins aren't your cup-of-tea, add flowers rather than spikes, and hide jelly beans in the secret drawer to make a regal chair for a fairy queen.

Here's the story of the Goblin Throne and how I put it together.


And here is a list of all the goods used:
Trinket Drawer Stand
Black acrylic paint
Moss
Bark
Pinecones
Acorns
Faux berries and leaves
Sticks and twigs
Toothpicks
Large metal crown
Metal bee
FlowerSoft in "Moss" and "Sage"
LOADS of glue

The Goblin Throne and tutorial - Nichola Battilana

Tuesday, March 29, 2016

Two wee mixed media things

It's Tuesday and I should be posting about a certain little tent project... but I've decided to put the "how to be inspired" posts indefinitely on hold. For those who wanted to play along, I'm sorry. The truth is my enthusiasm has had a number of dampers placed on it and my heart just isn't in it. 

Instead, I have a couple of mixed media pieces to show off.

The suddenly she remembered how pretty she was. - Mixed media - Nichola Battilana

She was a friend. - Mixed media - Nichola Battilana

Supply round up:
Reliquary - Tower Top
Reliquary - Arch Top
Decorative Windows 1 to 24
Faux Typewriter Keys Symbol Set
Blushing Ladies Collage Sheet
Asparagus Fern Garland*
Mini Rose Buds - Ivory*
Mini Rose Buds - Pink Cream Variegated*
3mm Brass Flat-Back Studs*
Narrow Gold Fleur Dresden Borders*
Golden Copper paint
Moss
Paper butterflies

Sentiments cut from old books

Saturday, March 19, 2016

Mr. McGregor's Garden

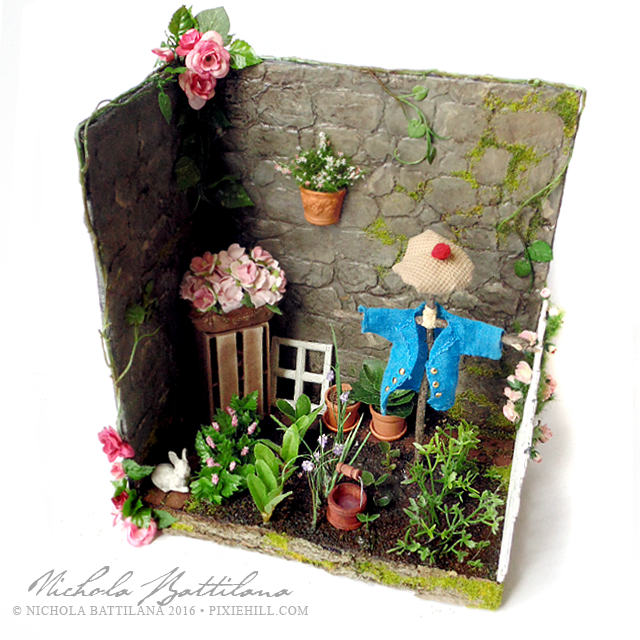
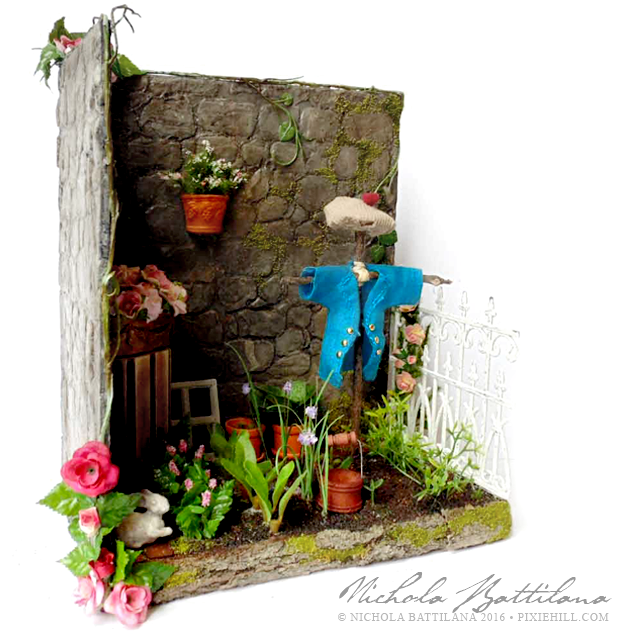
This month AlphaStamps kit is themed "The Garden". Although the thought of a tiny a fairy garden did fleet through my mind, I decided to create a corner of Mr. McGregor's garden instead.

Mr. McGregor's Garden - Nichola Battilana

If you need help recalling who Mr. McGregor is, he is the big old meanie who tends the garden that Peter Rabbit and Benjamin Bunny 'visit' in Beatirix Potter's books. That's Peter's jacket on the scarecrow. He lost it in the garden after his mother warned him not to go there.

Mr. McGregor's Garden - Nichola Battilana

This corner of the McGregor's garden was created using a Corner Room Box as a base with a Stone Wall Chipboard Texture Sheet* and plaster to achieve the wall. Although difficult to see, there is a brick path edging the soil. Can you guess what was used for the soil? Tea! And all of those sprouting vegetables are deconstructed faux plants/flowers like this Twiggy Leaf Garland*.

Mr. McGregor's Garden - Nichola Battilana

The clay pots scattered in the garden, like this Terracotta Wall Planter are super cute. I think they add a touch of extra colour which compliment Peter's blue jacket. And did you notice the brass buttons which Peter was so proud of in the story? They are 3mm Brass Flat-Back Studs*.
Mr. McGregor's Garden - Nichola Battilana

And if your chomping at the bit, wanting to create your own garden corner, here's a list of the bits and bobs available from AlphaStamps used in creating this piece:

Corner Room Box
Stone Wall Chipboard Texture Sheet*
Brick Wall Chipboard Texture Sheet*
Stone Rabbit Figurine Set
Tall Wooden Fruit Crate
Aged English Flower Box
Clay Planters with Saucers
Terracotta Wall Planter
Mini Black Wrought Iron Fence
Flower Soft - Peony Pink
Flower Soft - Sweet Pea
3mm Brass Flat-Back Studs*
1 Inch Curly Paper Roses - Pale Pink*
Tiny Paper Roses - Pink Cream Variegated*
Mini Rose Buds - Pink Cream Variegated*
Pink Rose Garland*
Asparagus Fern Garland*
Fern Garland*
Mini Fern Garland*
Twiggy Leaf Garland*

Or you can find them all in one place HERE

OR you this original piece is available for sale HERE

And finally, for a size comparison, here's the wee corner with my coffee mug.

Mr. McGregor's Garden - Nichola Battilana


Wednesday, March 09, 2016

A BIG birthday and a couple of WIP's

Yet again I missed Tuesday's "How to be Inspired Post" BUT I have an excellent excuse. It was D's 13th Birthday! I cannot believe he's a teenager, but I'm so proud of the young man he's become (mushy mum talk but totally true). Woo hoo! Huzzah! Yay! Yippie! 

After what seems like an eternity, I finally feel as though I'm getting my footing back. I'm on the mend from a vicious germ attack (surely sent by the goblins). My 'to-do' list has gone from critical to manageable. AND I've been back in the studio making things. 

Two biggish projects on the go at the moment.

Here's a quick look at the progress on 'Stumpy'...


The base is a coffee can and the exterior made with paper napkins!


I used THIS tutorial from Sharon Ojala at Homemade Obsessions, and modified slightly. 


I'm pretty pleased with the results so far and have my fingers crossed that I don't bugger it up somehow because achieving that bark colour took FOREVER.

Next up a little stone wall using my Corner Room Box as the base.


This one had me a little perplexed but I think I've got it somewhat sorted in my head and I'm looking forward to the results.

And if you're interested in a visit here, keep your eyes peeled because I *think* I might offer this project (or a variation of it) as a day-long workshop later this year. 

So how have YOU been? How's the weather where you are? Seen any good movies lately?

Friday, March 04, 2016

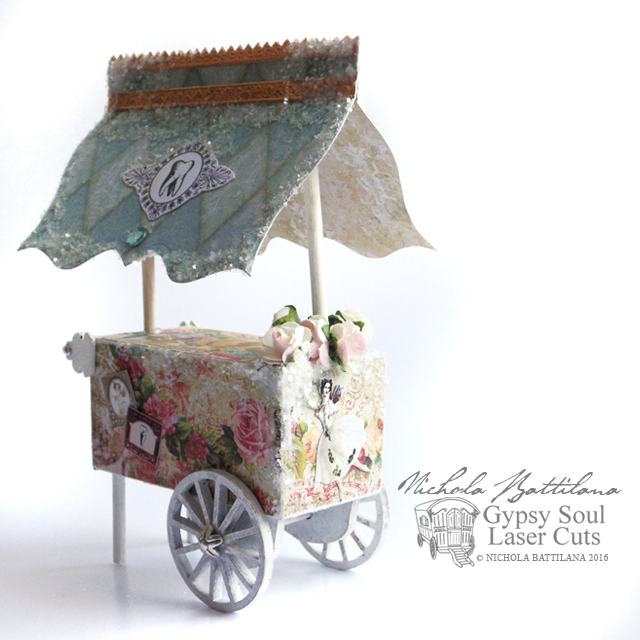
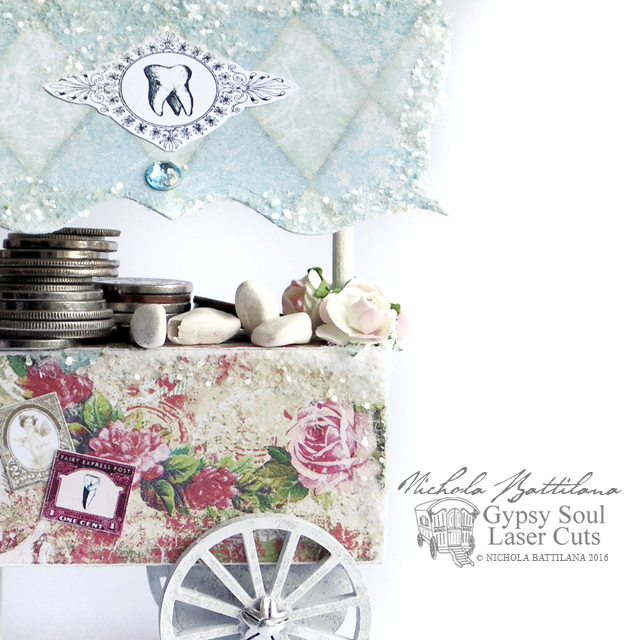
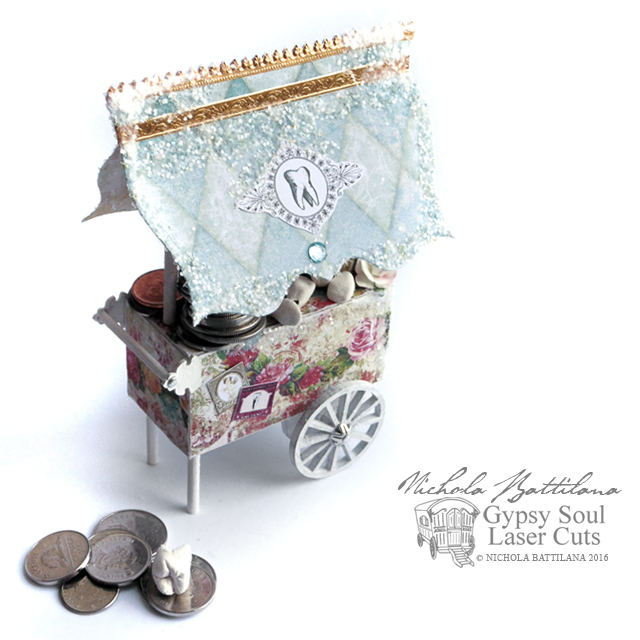
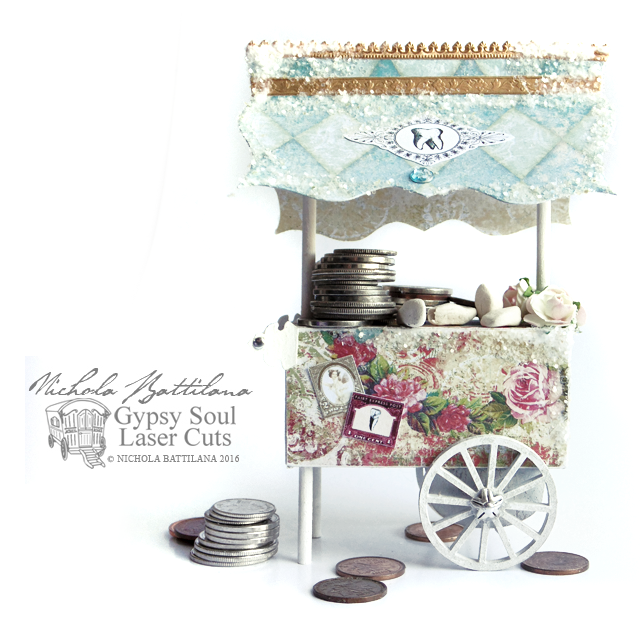
Tooth Fairy Cart and Tutorial

It's the first Friday of March... and that means a new tutorial from little old me for Gypsy Soul Laser Cuts.

Last week I had a very interesting letter from the Department of Tooth Fairy Affairs. It seems that there is spike in tooth loss and the Tooth Exchange Fairies (the troop who preform the tooth/reward transactions) are having a hard time keeping up with the demand.

Tooth Fairy Cart with Tutorial - Nichola Battilana

They asked very nicely if I might come up with a wee cart design, something to help with the transporting of goods, while remaining true to the Tooth Fairy Dress, Appearance and Conduct Code. (Fairies like to be very official.) I was happy to oblige.


Tooth Fairy Cart with Tutorial - Nichola Battilana


With a Bagatelle BoxWheels, and Keys & Plates Shape Set from Gypsy Soul, some scrapbook paper, doweling, glitter and trims... I set to work.

Tooth Fairy Cart with Tutorial - Nichola Battilana

In no time at all I had assembled a tiny cart fit for a fairy! And while this one is intended to assist the Tooth Fairy Department with distribution and exchange, I'm sure that it would come in handy for other fair folk to exchange sweets, flowers, seeds, and cake crumbs too.

To create your own little cart, hop over to the YouTube Tutoral to see how I put this simple little cart together. Or just jump down to the very bottom of this post.


Tooth Fairy Cart with Tutorial - Nichola Battilana

Supply round up!

Bagatelle Box
 (I used the Bagatelle Box 1.5 by 3 inch but don't let that limit you! Use different sizes to create an assortment of looks)

Wheels 1.5 inch Straight
Keys & Plates Shape Set


Thin wood doweling or bamboo skewars
Glue
Glitter
Blush Charmed Scrapbook Paper (or paper of choice)
1/2 Inch Pale Pink Paper Roses*
3mm Silver Nailheads*
Mini Floral Dresden Borders - Antique Gold
Narrow Gold Fleur Dresden Borders*
Miniature Tooth Fairy Letter PDF collage sheet (used for graphics on cart)

Wednesday, March 02, 2016

Thistles and other things

For the past couple of years I've sort of taken it easy during January and February. It hasn't been by choice, but rather my body giving in after months of holiday making/stress. Something inside shouts *I SURRENDER!* and a forced hibernation ensues.

This year I thought I'd be sneaky and planned to update my site and do a few 'easy' things that have been forever on my to-do list. No such luck. I know I haven't been posting much, but I have been kept busy. Here are a few of the bobs that I've been making...

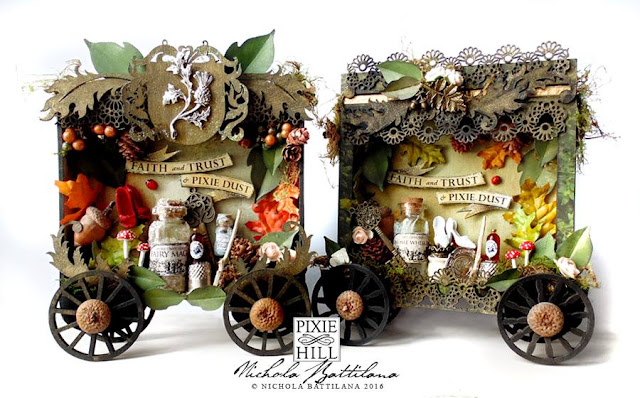
A woodsy fairy cart.

Woodsy Fairy Cart - Nichola Battilana

Two in fact! They are a forest-y version of the Fairy Godmother Travelling Sales Wagon I made in January (there's a tute in that link if you're interested).

Woodsy and Thistle Fairy Cart - Nichola Battilana

There's loads of fun stuff jammed in there including: 

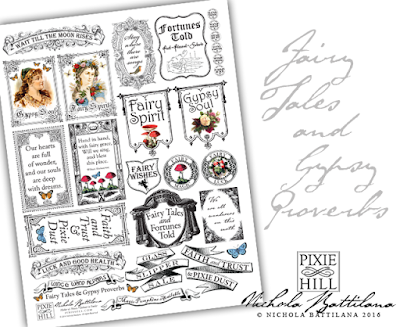
If you want some sweet sayings, fairy signage or gypsy wisdom to add to your cart, there's a downloadable PDF collage sheet available in my etsy shop HERE.

Fairy Tales and Gypsy Proverbs Collage Sheet - Nichola Battilana

And although I don't generally do commissions, I've been working on a number of several custom pieces like this paper funerary carriage...

Paper Funerary Carriage - Nichola Battilana

... and this rainbow wagon too.

Paper Rainbow Carriage - Nichola Battilana

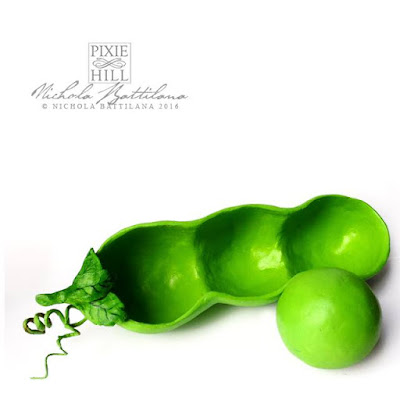
It hasn't been all wagons, carts and wheeled things. This giant peapod hopped off my work table last week!

Paper Pea and Pod - Nichola Battilana

The long and short of it is, I'm grateful to have been so busy the past few months, but I'm looking forward wrapping up a whole bunch of loose ends and finishing touches this week so I can get back to making proper magical messes.