Showing posts with label holiday. Show all posts

Monday, November 19, 2018

Big Fat Christmas Greeting Matchbox

I think my forced break from crafting while I was on my trip kind of reinforced the notion that crafting helps to keep me sane. It quietens the world around me. Although I do feel like I'm playing catch up with laundry and dishes and cleaning... I've been thoroughly enjoying making things, and savouring the 'stillness' creating brings.


But enough deep thoughts! Can we talk about the Christmas Vintage 12×12 Paper Pad? It's from Stamperia and it is full of old Christmas charm. Here I've used some sweet chickadees and cut out a rustic winter scene. I've fussy cut loads of holly and berries too (fyi there's some great Christmas puddings and cakes in the collection too.)


In addition to the background sky, I've added some clear glitter to the edges of the buildings and on the tops of the hills. It think it catches the light just right.


The top corner has a nice grouping of chickadees and holly and baubles. 

On a side note, the chickadees are out in full force here! They peck at the feeders and make a huge mess on the ground below. It's all good though the snowbirds prefer to forage and clean up after them. The whole while we have blue jays who swoop in and squawk like maniacs. Seriously, you'd link such handsome fellows would have a beautiful strong whistle. Nope!


But back to beautiful things!

This scene is set in a nice fat  Big Chunky Matchbox with Window and topped with a wired bow.

Want to make your own? Here's the list of making!

Big Chunky Matchbox with Window
Christmas Vintage 12×12 Paper Pad
Christmas In The Village Tiny Houses (background)
Wired ribbon
Clear Glitter

*I am an absolute stinker and have no idea which holly paper was used on the exterior of the box but I CAN say that it can be found in the Christmas Paper section at AlphaStamps

Wednesday, November 14, 2018

Santa's Helper Holiday Cards

I found a set of card blanks and envelopes at the DollarTree and thought I'd whip up some sweet holiday cards. So I grabbed some Christmas Magic and set to work.


I say I whipped up this set, but I began by spending a night fussy cutting an entire sheet of "Santa's Little Helpers" from the 12" Collection Pack. (I was watching Filmworker which was a really great documentary btw).


Next I added some wee transparent wings to the little dudes. I can just picture these little fellas fluttering about, switching out burnt out christmas lights, taking care of all the tiny chores that go unnoticed.


A band of gold embossing power backdrops a length of holly from Christmas Magic "Gifting Gala". An iridescent acrylic snowflake is added and a sentiment from Christmas Magic "Gifting Gala" or the Christmas Magic Ephemera pack.


Finally, those sweet little winged helpers!


I mean, how cute! Right?!


Some of the cards have a bit of jute twine added and a smidge of stickles sparkle because... well... glitter!


Want to make your own sweet wee cards? Here's the list of all the bits I used:

Christmas Magic 12" Collection Pack
Christmas Magic Patterns & Solids Pad
Christmas Magic Ephemera pack
Wee Wings Transparency Sheet
(or Wee Wings PDF Download to print your own)
Gold embossing powder
Acrylic snowflakes
Jute twine
Stickles
Card blanks


And I've still got a load of these cuties hopping around the work table. They might be making appearances until Easter!


Saturday, November 10, 2018

Pretty Pink Christmas Things

A few years ago I would have laughed if you told me I'd be all about pink Christmas. This year I'm all about the pink Christmas.

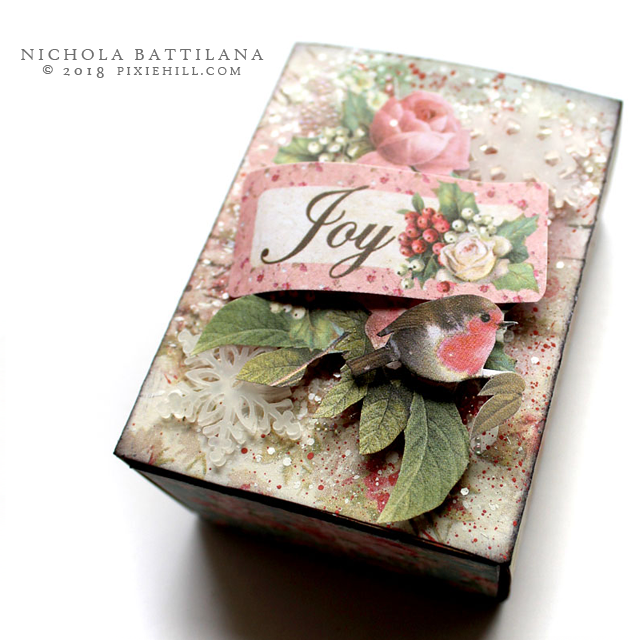
AlphaStamps.net Pretty Pink Christmas - Nichola Battilana

I've used two paper collections: Pink Christmas 12x12 Paper Pad and Christmas Vintage 12x12 Paper Pad for the following projects and I'm loving the way they work together.
AlphaStamps.net Pretty Pink Christmas - Nichola Battilana

Add some faux snow and a Gold Dresden Christmas Tree swoon!

AlphaStamps.net Pretty Pink Christmas - Nichola Battilana

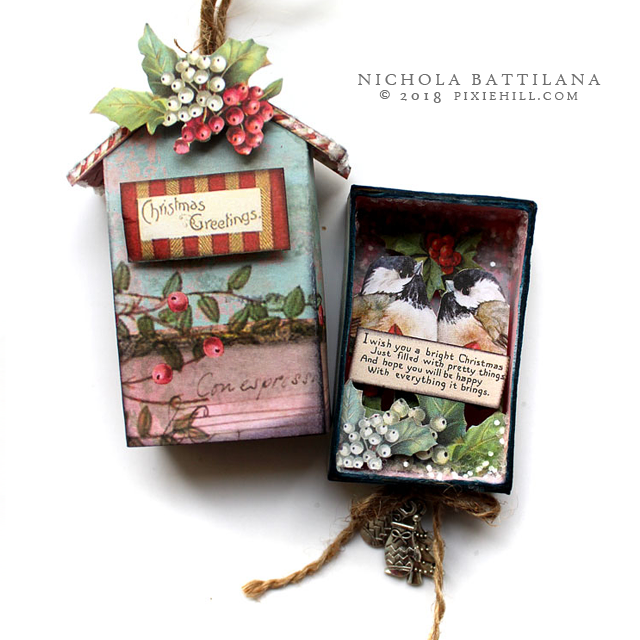
There was a quite a bit of fussy cutting involved in these projects, but the results are terribly sweet. Just look at this Peaked Roof Matchbox...

AlphaStamps.net Pretty Pink Christmas - Nichola Battilana

...and those little birds and inside. 

AlphaStamps.net Pretty Pink Christmas - Nichola Battilana

What a lovely holiday treat for someone nice.

AlphaStamps.net Pretty Pink Christmas - Nichola Battilana

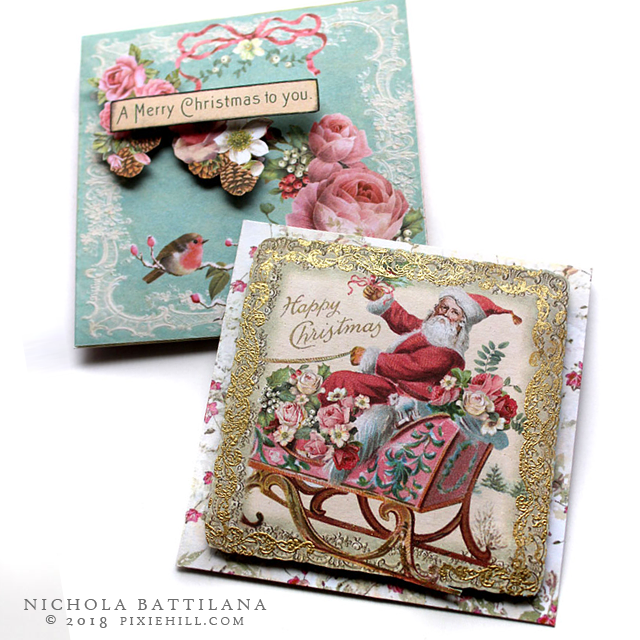
It's totally worth mentioning that the Pink Christmas 12x12 Paper Pad has a super cute tag, envelope, ephemera elements that come together really, really swiftly. 

AlphaStamps.net Pretty Pink Christmas - Nichola Battilana

I did some gold embossing around the edge of the vintage Santa image and it looks so authentically old timey. And while old envelopes probably would have been plain white, the envelope element is the perfect compliment. Swoon!

AlphaStamps.net Pretty Pink Christmas - Nichola Battilana

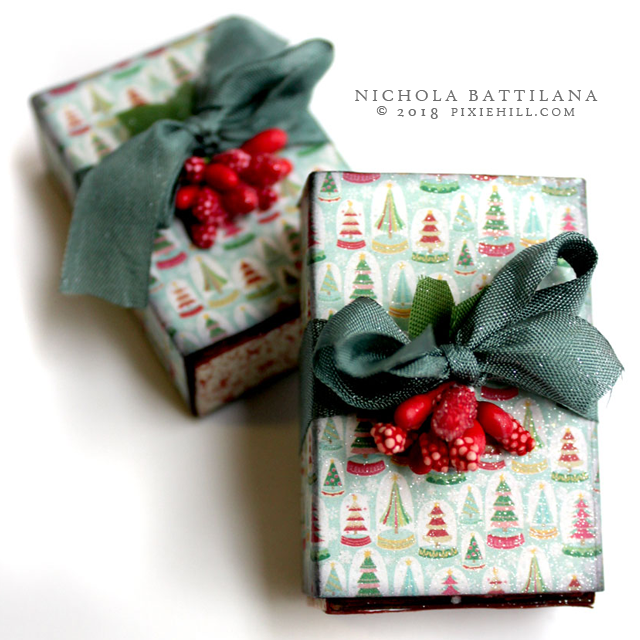
The final two pieces (yes there's more!) are more of a kitchy rather than antique vintage. Still totally cute though.

AlphaStamps.net Pretty Vintage Christmas - Nichola Battilana

Here I've used Jingle 6x6 Paper Pad and Tree Ornament Matchboxes. I'm thinking that i might pop these on top of presents instead of a standard bow. Afterall, what could be nicer than a gift topped with another wee surprise?!

AlphaStamps.net Pretty Vintage Christmas - Nichola Battilana

I usually start Christmas crafting in September so this is a very late start for me, but I gotta admit, I'm really enjoying it this year. It's far less work and much more pleasure this time around. I hope you're enjoying holiday creating too.

NOW, if you want to make your own slew of pretty pink Christmas things, here's the supply list:

Saturday, December 10, 2016

Day 10 - Vintage Image Shaker Ornaments

This month the Alpha Stamps is offering Round Layered Ornaments Kits. They are pretty dang cute. I've actually done two* versions of these (you'll see the second batch next week). 
*Maybe even three if I get my act together.

But on to the ones that I've actually finished and am ready to show off today!


Pretty cute, no?! If you had told me a few years ago I'd be all about the glittery pipe cleaners (and yes, they will forever be pipe cleaners to me) I would have told you, you were nuts... but here we are all glittery and pipecleanerish!


Not only do these sweeties shake and make a lovely noise, are two sided to boot!


I'm smitten!

And here's all the goodies to make your own...

Round Chipboard Ornament Layers Sets
Snowy Winter Day Ornaments Collage Sheet
Silver Snowflake Charm Set
Winter Snow Glitter Mix
Round Ornaments Ribbon Set

Tuesday, November 15, 2016

Squiffy Fruitcake

My auntie said I looked 'squiffy' the other day. I wasn't sure what she meant, but I was fairly certain it was true because that word sounds exactly how I feel most of the time. When I looked it up I discovered that it means to be tipsy or slightly drunk. So yes, if not actually squiffy, I do look squiffy most of the time.

ANYWAY... 

I've been at the Christmas making and managed some fruitcakes. I know, I know... bleh! But cross my heart, homemade fruitcake is pretty dang scrummy. And these fruitcakes are perfect for me because they are totally squiffy too!


I've had a number of requests for the recipe. Just jumble it up as you see fit. Want to add pecans instead of almonds? Go ahead! Just keep it quite heavy on the boozed dried fruit. This made enough for 6 small loaves (extra large muffin size) and two shallow loaves.


Ok, here's what I used:

1 cup dried cherries (seriously, these are delicious)
1 cup dark seeded raisins
1 cup dried currants
1 cup candied peel
1 cup chopped dried apricots
1 cup chopped pitted prunes
1 cup brandy
1 cup chopped walnuts
1 cup slivered almonds
3 cups flour
1/2 cup  butter, softened
3/4 cup granulated sugar
3/4 cup brown sugar
4 eggs
2 tsp vanilla
1 tsp baking powder
1 1/2 tsp cinnamon
1/2 tsp nutmeg
1/2 tsp baking soda
1/2 tsp salt
1/2 tsp ground allspice
1/4 tsp ground cloves
MORE BRANDY!!!!

In a huge bowl mix all of the dried fruit with the brandy. To be honest, it's A LOT of fruit and I used more brandy than what the recipe calls for. Cover and let that fruit get tipsy overnight and soak up the booze.

Mix the nuts with 1/2 cup of flower, then toss with the dried drunken fruit.

Beat the butter and granulated sugar. Beat in brown sugar. Beat in eggs one at a time. Beat in vanilla.

Sift the dry ingredients together. Add to butter/sugar/egg batter and mix.

Combine everything together. It's a lot and it will probably be a sticky mess. Yum!

Grease your baking tins or use parchment (I like the parchment method!) and fill with the batter. Like I said above, I used x-lrg muffin tins and two loaf pans (filling about 1/2 way). I like smaller cakes because they bake and set more quickly. FYI this batter doesn't rise very much. Also, I used a wet spatula to sort of smooth the tops... because I'm a picky bugger ;)

Set oven to 300. Place a shallow pan of water on the lowest rack. Loosely cover prepared pans with tinfoil and bake on the middle rack. Bake for 1 hour then then check on those bad boys. A toothpick/skewer should come out clean. My small ones took an hour, the larger ones about an hour and a half. It really depends on what pans you're using. I'm soooo helpful, I know.

When done, remove the cakes from their pans, and brush with brandy. Dip some cheesecloth in brandy and wrap the cakes with it. I store them in a large Tupperware container, removing once in a while to brush with extra booze.

You'll want to let these sit for quite a while before they are good and settled. I've made mine about a month in advance. And while I've avoided those horrific glace cherries and candied fruit... if that's your thang, feel free to include it in your own version.

Enjoy!


Monday, December 07, 2015

Wintry Sleigh and Card with Petaloo and Graphic 45

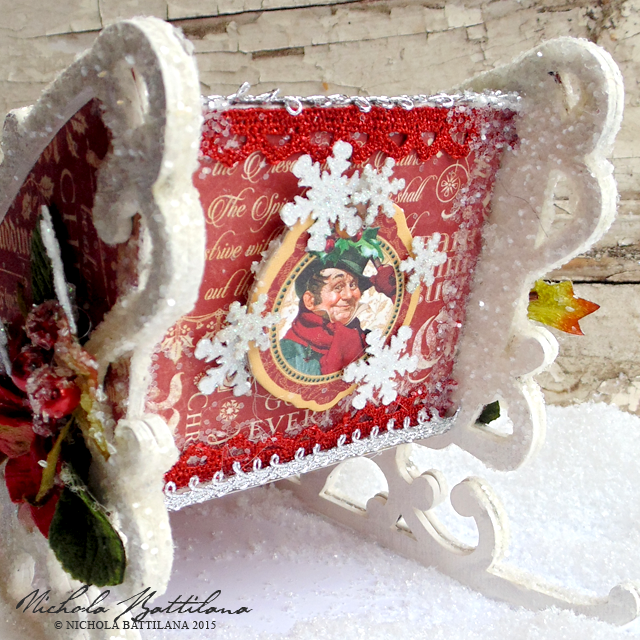
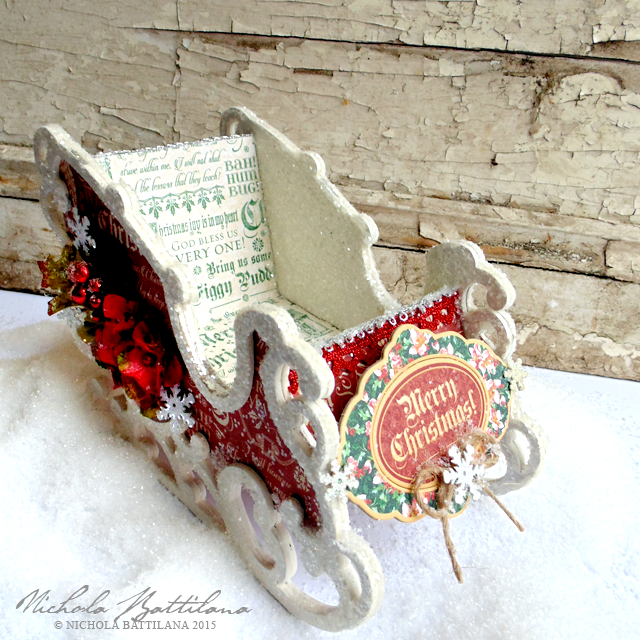
What a lovely holiday treat to have the chance to work with the Christmas Carol collection from my old friends at Graphic 45. The gorgeous, vibrant colours work so well with Petaloo's blooms. Whether it's red, green or blues... they all coordinate beautifully.

Graphic 45 / Petaloo Sleigh - Nichola Battilana

I've embellished this Chipboard Sleigh which is perfectly sized to hold your holiday cards and tags. The sleigh is embellished with Bah Humbug and Graceful Garland  from Christmas Carol. A sweet bough of blooms adorns each side.
  
Graphic 45 / Petaloo Sleigh - Nichola Battilana

A bough of Sugared Berrys ClusterChantilly-VelvHydrangeas and White Glitter Snowflakes adorn each side of the sleigh.

Graphic 45 / Petaloo Sleigh - Nichola Battilana

The front and back have Christmas Carol Journaling Chipboard embellishments, accented with White Glitter Snowflakes

Graphic 45 / Petaloo Sleigh - Nichola Battilana
  
Finally, a bit of bling with Fancy Trims and a whole lot of glitter.

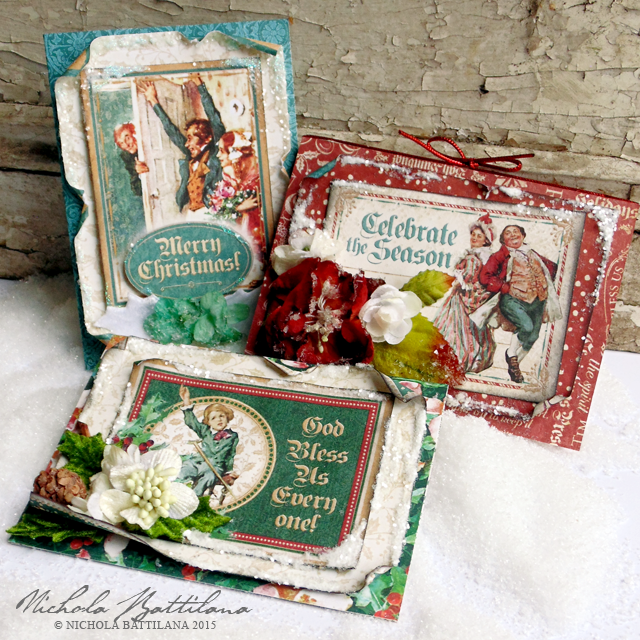
Graphic 45 / Petaloo Cards - Nichola Battilana

Here are the handmade cards I've filled my little sleigh with. Made with all sorts of papers from the 12" Christmas Carol pad. I've embellished with white and green Velvet Holly LeavesSugared Blooms, Botanica Petite’s and Sugared Mini's

Graphic 45 / Petaloo Card - Nichola Battilana

Graphic 45 / Petaloo Card - Nichola Battilana

Graphic 45 / Petaloo Card - Nichola Battilana


And here's the supply round up if you want to create your own sparkly winter sleigh to hold your Christmas Treasures:

Petaloo:
Graphic45:
Chipboard Sleigh
Glitter


Happy crafting!

Monday, November 23, 2015

Simple Mixed Media Canvas

I hosted a kids workshop at the studio this weekend. My goal was to create four gift quality projects that were also kid friendly. Participants could choose a project and it was wrapped/boxed before they left to ensure that there was no peeking by their grown ups. 

This little mixed media canvas was one of the projects offered.

Simple Mixed Media Canvas w/ Tutorial - Nichola Battilana

If you have little people to craft with, there's a video tute available on my youtube channel HERE or see below. (Note: I suggest keeping the kidlets away from the heatgun.)


Here is a list of all of the supplies I used:
4" canvas
Snowflake Shape Set
Cardstock Doily Set Intricates
Ornate Metal Keys from Graphic 45
Fancy Red Holly Berries Mix*
Silks Acrylic Glaze: Stargazer
twine
vintage image
clear glitter
white acrylic craft paint
white school glue
Aleene's tacky glue

And here are some of the other projects completed by my amazing workshop kiddies!


So proud of those little people :)