Showing posts with label petaloo. Show all posts

Monday, December 07, 2015

Wintry Sleigh and Card with Petaloo and Graphic 45

What a lovely holiday treat to have the chance to work with the Christmas Carol collection from my old friends at Graphic 45. The gorgeous, vibrant colours work so well with Petaloo's blooms. Whether it's red, green or blues... they all coordinate beautifully.

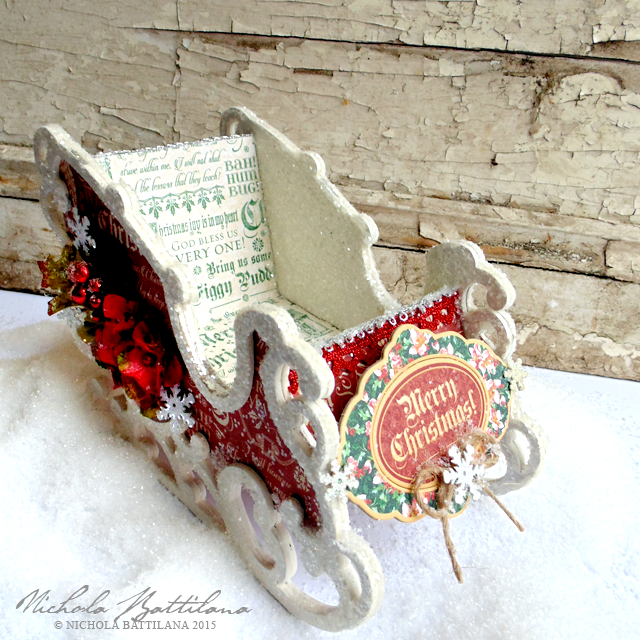
Graphic 45 / Petaloo Sleigh - Nichola Battilana

I've embellished this Chipboard Sleigh which is perfectly sized to hold your holiday cards and tags. The sleigh is embellished with Bah Humbug and Graceful Garland  from Christmas Carol. A sweet bough of blooms adorns each side.
  
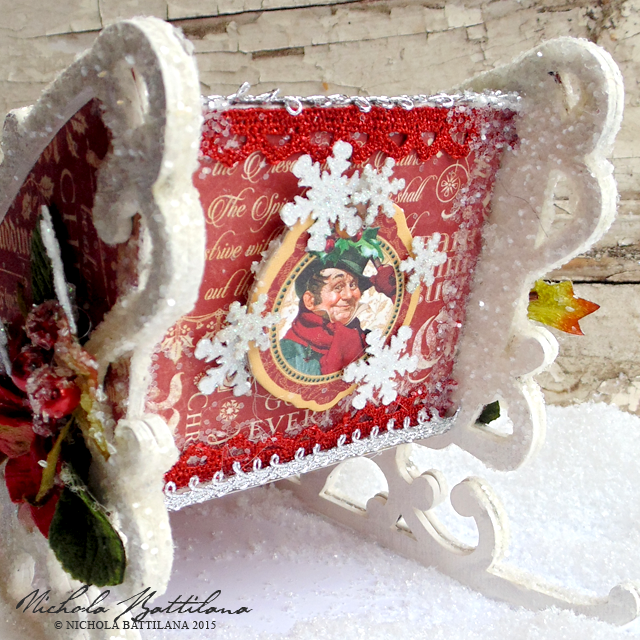
Graphic 45 / Petaloo Sleigh - Nichola Battilana

A bough of Sugared Berrys ClusterChantilly-VelvHydrangeas and White Glitter Snowflakes adorn each side of the sleigh.

Graphic 45 / Petaloo Sleigh - Nichola Battilana

The front and back have Christmas Carol Journaling Chipboard embellishments, accented with White Glitter Snowflakes

Graphic 45 / Petaloo Sleigh - Nichola Battilana
  
Finally, a bit of bling with Fancy Trims and a whole lot of glitter.

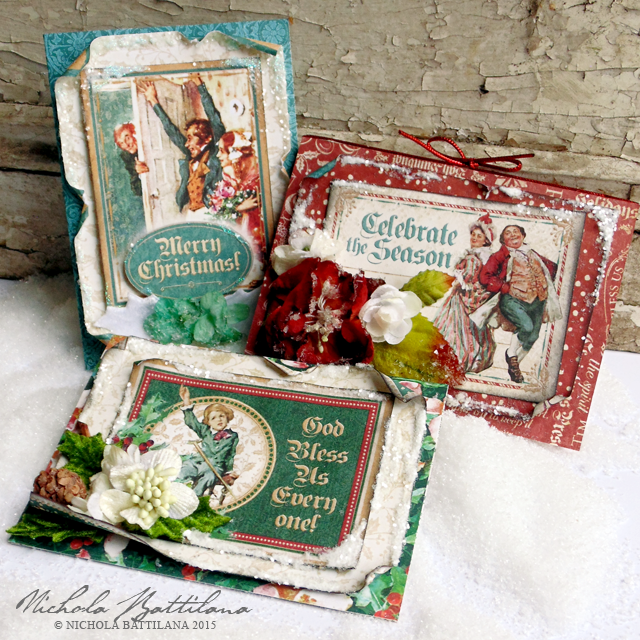
Graphic 45 / Petaloo Cards - Nichola Battilana

Here are the handmade cards I've filled my little sleigh with. Made with all sorts of papers from the 12" Christmas Carol pad. I've embellished with white and green Velvet Holly LeavesSugared Blooms, Botanica Petite’s and Sugared Mini's

Graphic 45 / Petaloo Card - Nichola Battilana

Graphic 45 / Petaloo Card - Nichola Battilana

Graphic 45 / Petaloo Card - Nichola Battilana


And here's the supply round up if you want to create your own sparkly winter sleigh to hold your Christmas Treasures:

Petaloo:
Graphic45:
Chipboard Sleigh
Glitter


Happy crafting!

Monday, September 07, 2015

School Memory Jar for Petaloo

Tomorrow it's back-to-school for my kidlet. I'm going to miss having that boy around all day.

I have to be honest, I'm usually completely stumped when challenged to create a 'back to school' project. This year however I was a woman on a mission! I knew that I wanted to create a project for keeping memories.


I've taken a good sized jar with a wide mouth. The lid has been gussied up with a bit of paper from Graphic 45's ABC Primer Deluxe Collector's Edition and I've added trims and flowers from Petaloo.


A length of wide Crochet Lace Trim and Burlap Trim are wrapped around the jar, then Burlap Small SunflowersBurlap Wild Sunflowers and a sprig of DIY-Baby’s Breath is added. A tag and key are the final touches.


So now I have a place to store all of my son's memories from grade 7. Notes from his adventures, snapshots and small treasures found in his pockets. They'll fill this jar and be kept safe and sound. 

Here's hoping grade 7 is the best year ever :)

Petaloo Supplies
Crochet Lace Fancy Trim 2.25 ydsBurlap TrimBurlap Small SunflowersBurlap Wild SunflowersDIY-Baby’s Breath


Other:Graphic 45's ABC Primer Deluxe Collector's Edition1 Inch Wide Wooden Finial 
Glass jar
Glue

Tuesday, August 11, 2015

Summer Fun Altered Canvas with Petaloo

I have loads of fresh photographs from our misadventure camping trip last week and I'm celebrating our "Summer Fun" with Petaloo by creating this altered canvas. 

SummerFun1

I'm not really a scrapper, but I wanted to celebrate the memeories from our misadventures in camping so this altered canvas was an ideal option.

 SummerFun2

I know that summer fun often means bright, vibrant colours, but in this instance I'm using the DIY-Mini Mix in Teastained Cream just as they are to compliment the understated colours in the photograph. They add just the right amount of texture, and they pair so well with the natural burlap trim.

SummerFun3

Canvas
Neutral scrapbook papers
Gel medium
Acrylic paint
Feathery Flourishes Set

Friday, August 07, 2015

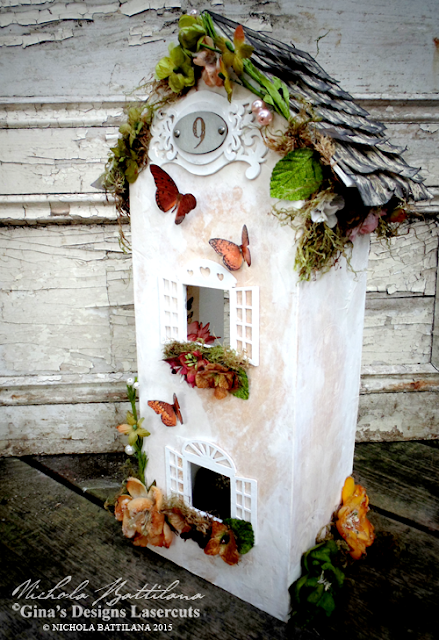
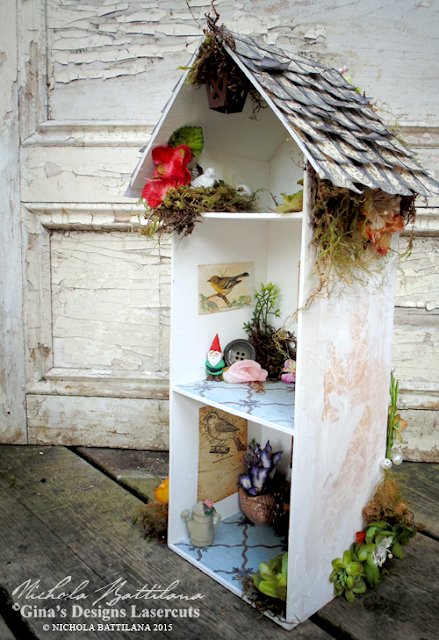
Tall Garden Cottage Tutorial

Every month I create a project with a tutorial for GinasDesigns.net. This month it's a biggy...

Tall garden Cottage with Tutorial - Nichola Battilana

There are loads of steps and it'll take some time to complete (especially when you factor in drying time), but I think it's worth it.

Tall garden Cottage with Tutorial - Nichola Battilana

Created from Gina's 3 Story House, you could customize the contents to your own whims and tastes. Filled with little mementos, keepsakes and small photos it would make a wonderful gift for someone special. 


Tall garden Cottage with Tutorial - Nichola Battilana

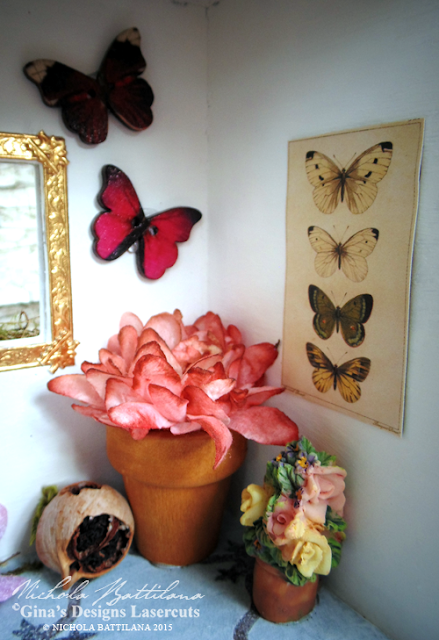
Mine isn't quite so sentimental and will be home to little gnome and elf figures and collectibles :)


Tall garden Cottage with Tutorial - Nichola Battilana

Don't feel rushed with this project. Enjoy the process of making it 'just-so' and the challenge of filling it with lovely little bits and bobs.


Tall garden Cottage with Tutorial - Nichola Battilana

I only had one piece of Honeycomb Fleur Cardstock from The Robin's Nest to cover the house, so I'll show you how to be a little sneaky if you're short on paper.


Tall garden Cottage with Tutorial - Nichola Battilana


You can find the full video tutorial HERE


If you have any questions or are unclear about anything, don't hesitate to ask.

Gina's Supply List:

The Robin's Nest Supplies:
Calamity Jane Diagonal Glitter Cardstock
Honeycomb Fleur Cardstock

Other Supplies:
White Tacky Glue
Spackling (I used one that goes on pink and dries white)
*And a quick link to all of the products used available via Alpha Stamps

Sunday, August 02, 2015

Sparkly Floral Crown with Petaloo

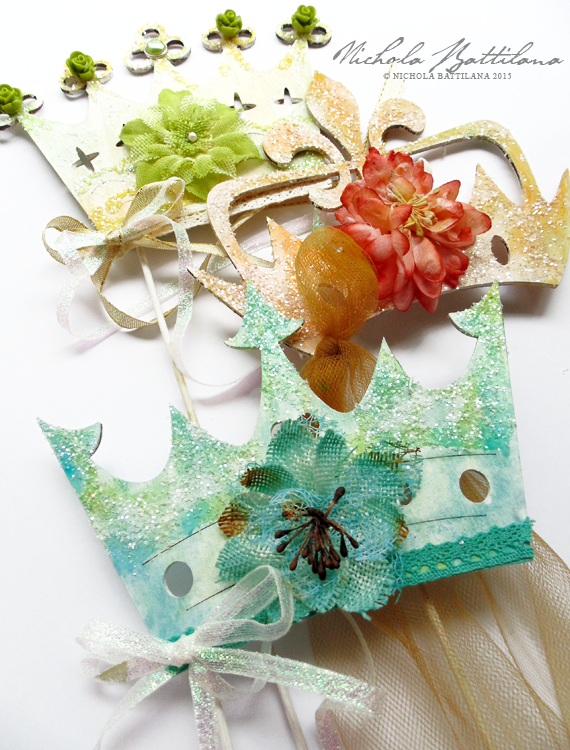
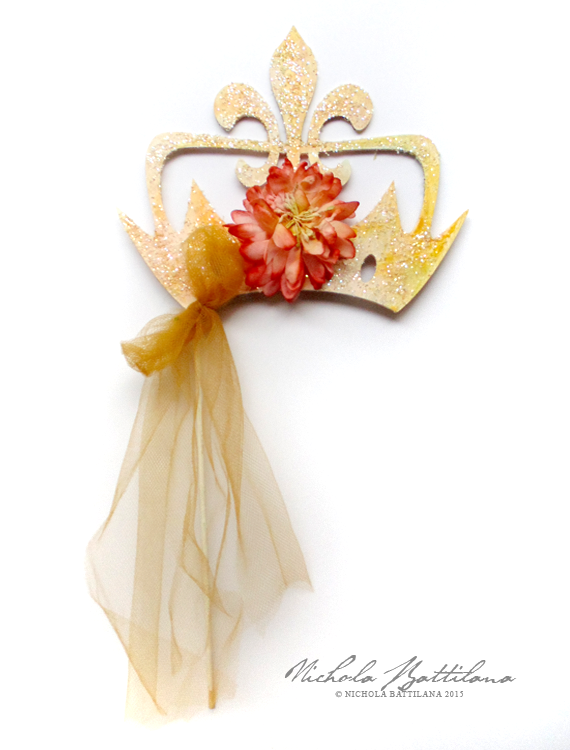
I found some simple wooden crown cut outs at Michaels. They have a little stick to hold the crown shape above your head during photographs or when meeting crown worthy dignitaries, all the while preventing unsightly 'crown head' hair.
Sparkly Floral Crown with Petaloo Blooms - Nichola Battilana

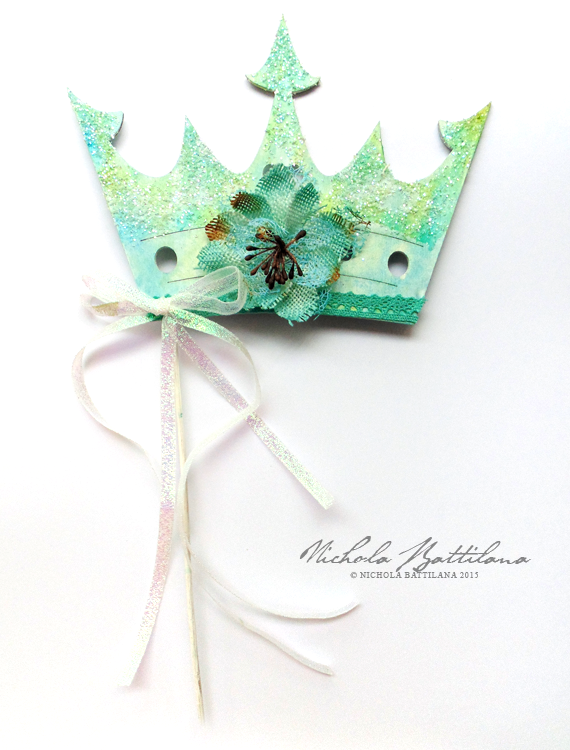
I thought the shapes were cute and a great kids project. After all, even if you can't find these wooden cutouts at your local craft store, it would be easy enough to create your very own from some cardboard and a bit of doweling. They would make a totally adorable "make and take" for birthday parties.
Sparkly Floral Crown with Petaloo Blooms - Nichola Battilana

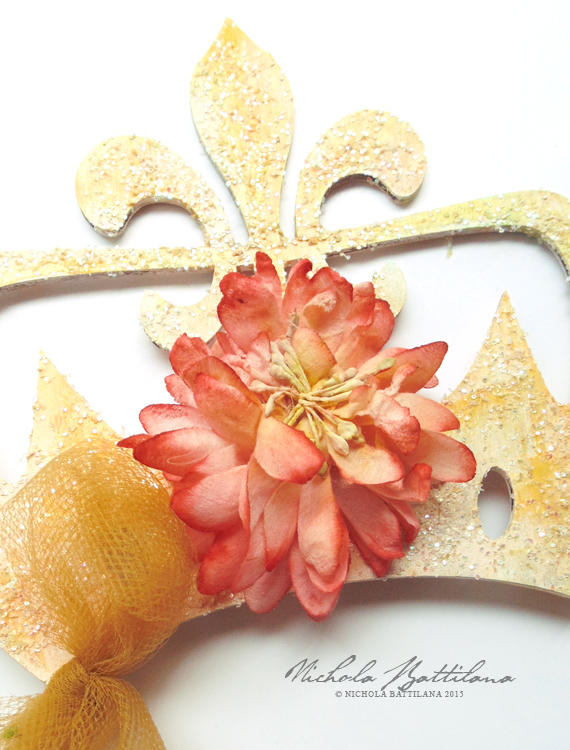
I began by painting all of the pieces white, then sploshing some paint on them. Sploshing doesn't require being neat or tidy so it is perfectly appropriate for little hands. Eat a cookie or fresh fruit salad and wait for that sploshing to dry before adding some glitter (Tip: good quality glue will help avoid glitter from loosening). For this crown I've added Fancy Trimsalong the bottom edge and a coordinating Teal Burlap Blossom
Sparkly Floral Crown with Petaloo Blooms - Nichola Battilana

For this crown I've used a DIY-Mum which you can colour to match your project. (Note: I coloured this blossom with watercolour paint then dipped it in tea to soften the colour) Then I added a length of tulle to gussy up the handle.
Sparkly Floral Crown with Petaloo Blooms - Nichola Battilana

Those DIY blooms are pretty amazing and colouring them could be a fun project for kiddos in and of itself.
Sparkly Floral Crown with Petaloo Blooms - Nichola Battilana

Working with kids can be a lot of fun and there are many ways to include them in crafting. Let them make decisions about colour and trims. Let them do the sploshing. You can set limits if you like "Let's pic three flowers to add" but let them have some control. Be sure to have those little people help clean up afterwards too.
So get out there and make some crowns with your littles. And don't forget the tea party photo shoot afterwards.

Supply List:
Misc ribbons and trims
Wooden Crown cut outs or DIY crown shapes

Tuesday, July 07, 2015

A Pixie House Shrine

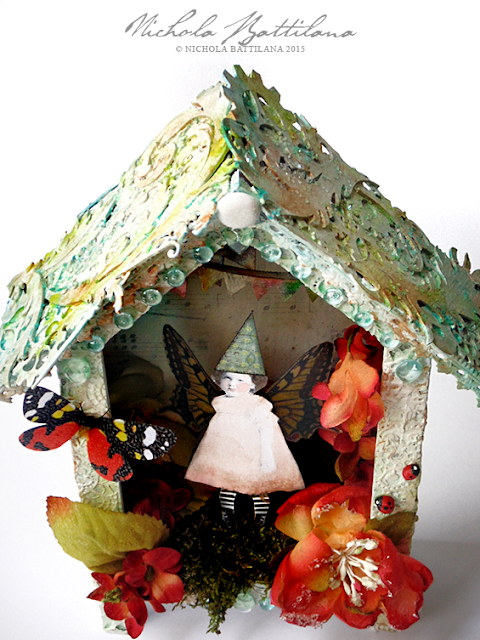
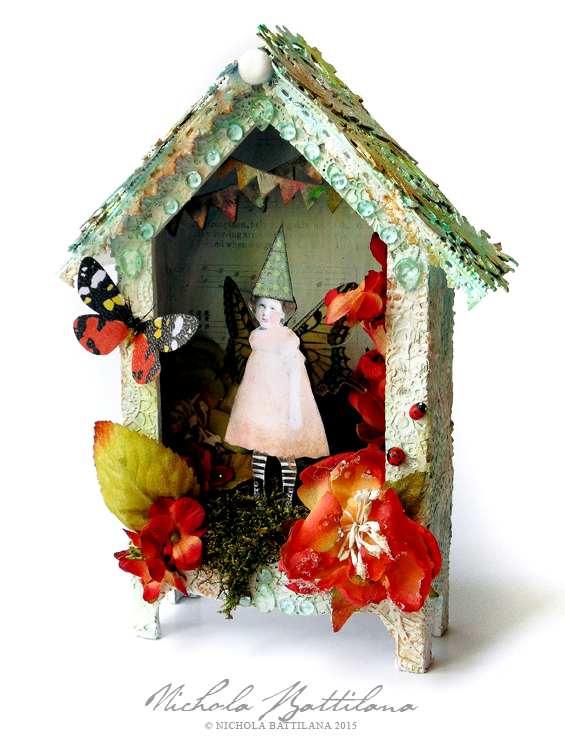
I altered this cute House Shrine Box for a colour challenge that I totally missed the deadline for. 

Pixie House Shrine - Nichola Battilana

I used to be terrified of colour but plowed through that wall. Now, I'm trying to consciously add texture to my pieces. This piece is chocked with textured elements. 


Here's the texture of the walls of this wee house. I've layered Cardstock Doily Set Intricates, painted them white and then added a smidge of colour with some ColourArte silks and H20's. I'm pretty smitten with the way it turned out.

Pixie House Shrine - Nichola Battilana

For the roof I used sturdier chipboard pieces. There are some Feathery Flourishes (quickly becoming one of my favourite embellishments!) and Steampunk Fan blades. Again I painted them white and added some colour with ColourArte products.

Pixie House Shrine - Nichola Battilana

The piece is finished off with some super cute Water Dew Drops from The Robins Nest, handmade ladybugs, a sweet winged vintage girlie and more. Here's the whole supply list kit-and-kaboodle.

White acrylic paint
Vintage image

This gal is currently listed HERE in the etsy shop.

Adorable Floral Cake Topper for Petaloo

I was asked to create a wedding themed something for Petaloo. You can now add cake topper to your DIY wedding list. 
Adorable Petaloo Cake Topper - Nichola Battilana

I've used pink burlap flowers and daisy layers to top this cake while imagining a sweet, simple backyard wedding. But if your 'I do's' are a little more fancy, you could absolutely consider Botanica blooms atop a prettily iced cake, or vintage velvet blossoms for a shabby chic wedding.
Adorable Petaloo Cake Topper - Nichola Battilana

To create my topper I simply cut out thick decorative paper and affixed a mound of florists foam/oasis to the top. I added coordinating trim to hide the bottom edge, then simply applied the flowers to the foam. I printed the sentiment on thick card, applied a painted bamboo skewer and pushed into place. If you're worried about your topper moving, simply push toothpicks in the bottom to hold your piece in place.
Card Stock
Oasis
Bamboo Skewer
Butterflies