Saturday, October 31, 2015

Blog Hop with Gina's Designs and Creative Paperclay

I am really excited about this Blog Hop/Link Party. I'm a HUGE fan of Creative Paperclay, and I love Gina's to bits, so I'm chuffed to share an opportunity for you to win products from both of these amazing companies. Here's the rundown from the hosts...

The Creative Paperclay Design Team
has teamed up with Gina's Designs Lasercuts Design Team
for a Halloween Theme Blog hop

We are excited to show off our Halloween projects
and even more excited about the fact YOU can win a prize

Prize Package Includes
1 pound package of Paperclay
1 sample package of Sandits
and
$25 shopping spree to Gina's DesignsLasercuts
How to enter - each of these will get you one entry
1) Enjoy the hop
2) Stop by each blog on the hop and leave a comment
3) Pin each project on your Pinterest site
4) Share this post on your Facebook page

Here is the List of BLOGS:

And now on to my Gina's/Paperclay mashup project...


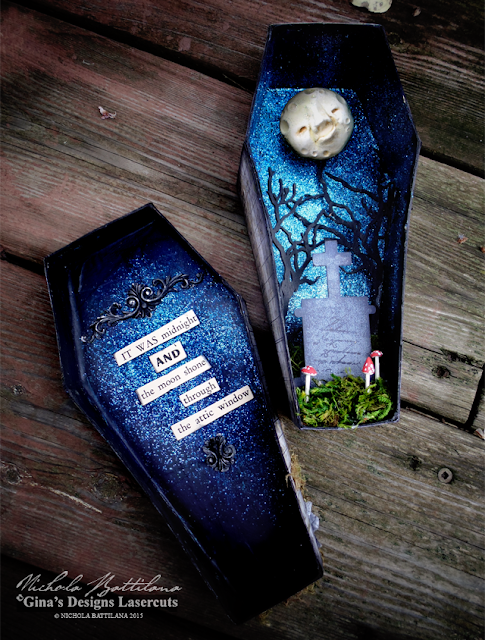
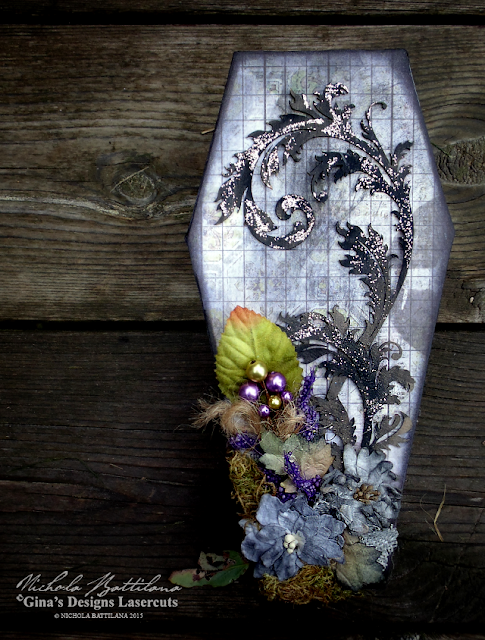
GinasDesigns.net & CreativePaperclay Coffin Shrine - Nichola Battilana

I've taken a Coffin Box from Gina's and embellished it with paper from Tim Holtz Wallflower 12x12 Paper Stash. I've also added flowers from Petaloo and a bit of dried moss. Finally I've added some Feathery Flourishes which have been painted black and have just a bit of glitter added.

GinasDesigns.net & CreativePaperclay Coffin Shrine - Nichola Battilana

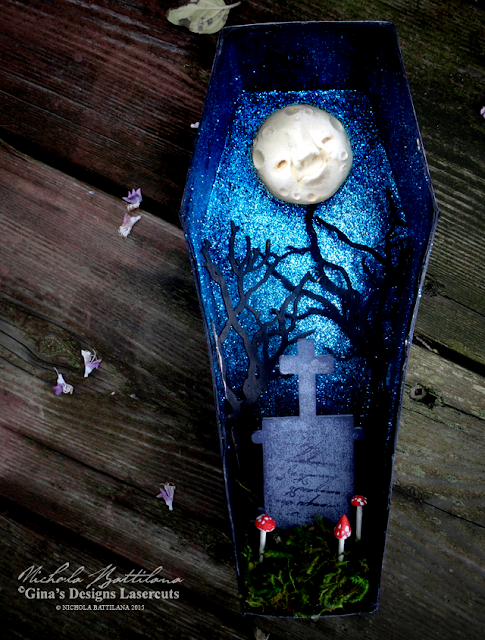
I painted the interior black and covered it in fine blue glitter. A bit of moss at the base provides a lawn for my Paperclay toadstools and a Tombstone Stand Up. For the text on the tombstone I've simply used a rubberstamp of script writing. You'll also notice some creepy trees in there. I've used one Chipboard Tree from Gina's and chopped it in half for this little scene.

GinasDesigns.net & CreativePaperclay Coffin Shrine - Nichola Battilana

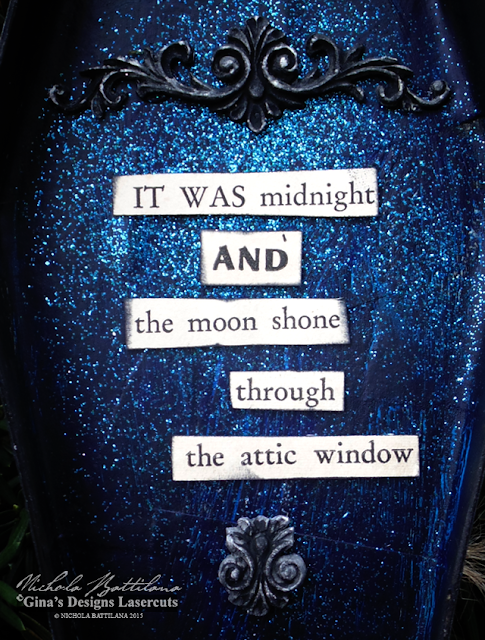
The sentiment on the underside of the coffin lid "It was midnight and the moon shine through the attic window" is from an old vintage children's book. The filagree bits that frame the words were made by pressing Paperclay into this Silicone Mold. Wiping excess paint off of the Paperclay while it is still wet give a great distressed look.

GinasDesigns.net & CreativePaperclay Coffin Shrine - Nichola Battilana

And finally that little moony face. I sculpted him using a Creative Paperclay product called Delight. It is extremely soft, sort of like working with marshmallows, and even more lightweight than the original Paperclay.


GinasDesigns.net & CreativePaperclay Coffin Shrine - Nichola Battilana

Want to make your own version? Here's a list of the materials I used:

Coffin Box
Feathery Flourishes
Tombstone Stand Up
Chipboard Tree
Creative Paperclay®
Paperclay Delight
Wallflower 12x12 Paper Stash
Silicone Mold
Petaloo flowers
Moss
Glitter

Tuesday, October 27, 2015

Old Timey Tuesday

Old grungy pictures from my personal collection for use in your art and craft projects.


You may NOT sell, give or distribute the images, digitally or printed, alone or as part of a collection, collage sheet or group.

Violators will be turned into toads... I mean it... It won't be pretty.

Wednesday, October 21, 2015

Tiny Flower Tute and Alpha Stamps news

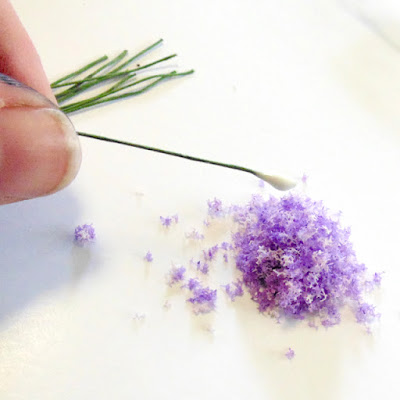
Alpha Stamps is carrying a product called "Flower Soft" which is available in different colours (cross my fingers more will be listed shortly). I was asked to do a tutorial for creating the flowers with this fluffy stuff and I feel sort of guilty about it because it is INCREDIBLY easy to use.

Flower Soft Tutorial - Nichola Battilana

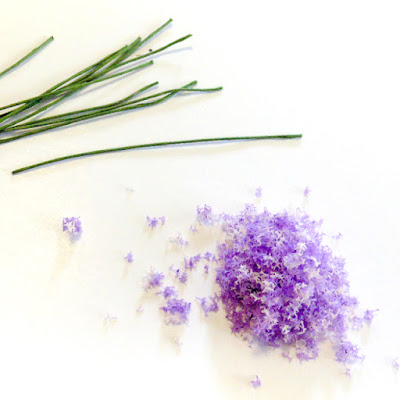
Gather some florist wire and a pour out a small pile of Flower Soft. A little goes a looonng way.

Side note: Whenever I use little wired flowers, I trim them and am left with a short length of wire. These trimmings are perfect for creating these flowers because you really only need 1.5" or so of wire. So save those scraps!

Flower Soft Tutorial - Nichola Battilana

Put a healthy glob of glue on the end of the wire. My glue of choice is Aleene's Tacky Glue because it is super thick and usually stays where it's told.

 Flower Soft Tutorial - Nichola Battilana

Roll the gluey end of the wire in the product.

Flower Soft Tutorial - Nichola Battilana

Set aside and allow to dry. That's it! You'll have sweet little floral stems ready for microgardening or bunch them together to make the wee-est bouquets. Just look at those tiny flowers in that sweet wee vase from this Miniature Vase Set (I'm holding the smallest one below).

Flower Soft Tutorial - Nichola Battilana

Aaannnnd, for my bit of Alpha Stamps news: they'll now be selling my Corner Box and Frame Front Box. I'm really excited about this because Canadian shipping prices are outrageous (*shakes fist at Canada Post*) so you actually save a few pennies.

For a refresher...
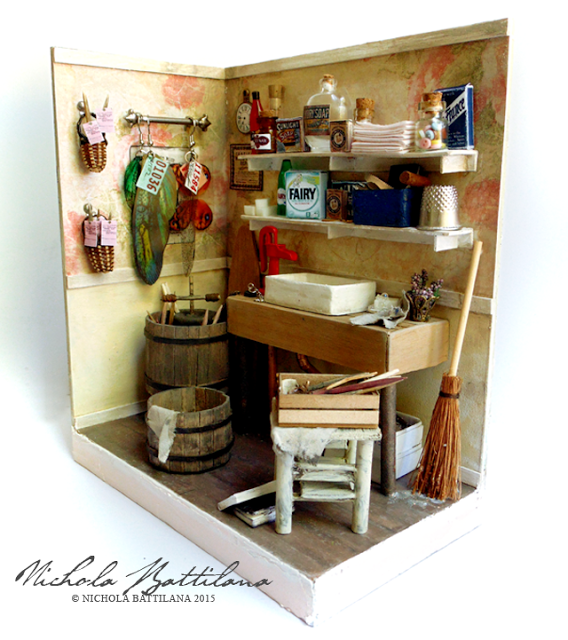
The Wandry Room - Nichola Battilana

Here's the Wandry Room which is made from the Corner Box. (+additional supplies)

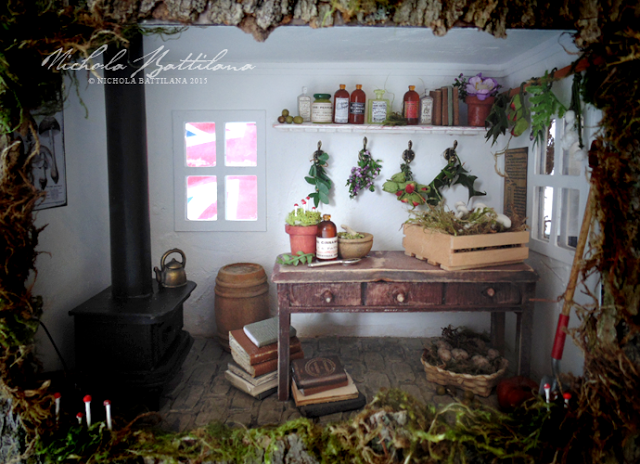
The Wortcunners Shed - Nichola Battilana

This Wortcunner's Shed was made from the Frame Front Box. (+additional supplies.)

Finally, you'll also be able to purchase my Miniature Fairy Godmother Magazines Collage Sheet and Miniature Tooth Fairy Letter Collage Sheet from Alpha Stamps also.

That's it for today, but be sure to come back for another visit because I've got loads of good stuff coming up over the next couple of weeks. Smooches lovelies!

Little Flower Cart with Petaloo and Authentique

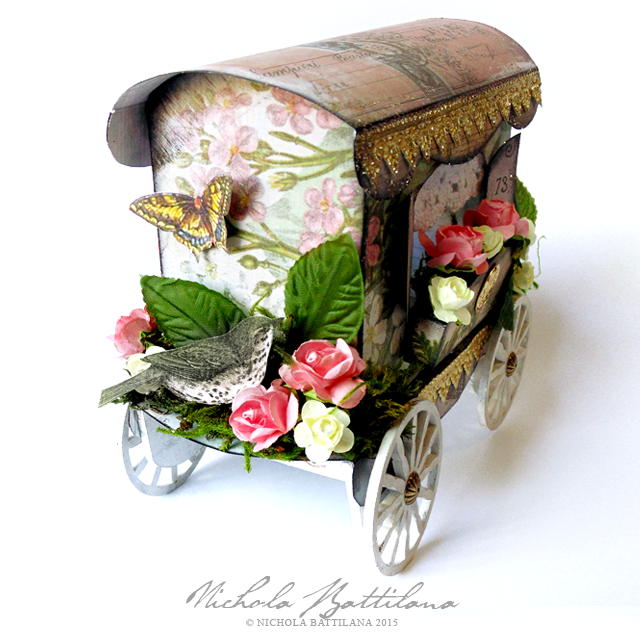
I'm so excited to be taking part in Petaloo's blog hop with Authentique. To celebrate both products I've created a little flower cart. (Don't forget to head over to the Petaloo blog for a chance to win some fab prizes.)

Flower Cart - Nichola Battilana

I think it's pretty dang cute!

Flower Cart - Nichola Battilana

The body of the cart is covered in "Tender" from the Nestled collection. The awning created with "Hearty". I've then added embellishments from 'details' the cardstock sticker sheet from the same collection.

Flower Cart - Nichola Battilana

Inside my little cart, all sorts of Petaloo blooms which pair perfectly with Authentiques "Nestled" collection. Just look at how well those Chantilly Mixed Blooms in cream, and Sugared Mini's in mocha coordinate with the colours of the sticker. 


Tuesday, October 20, 2015

Old Timey Tuesday

Old grungy pictures from my personal collection for use in your art and craft projects.


You may NOT sell, give or distribute the images, digitally or printed, alone or as part of a collection, collage sheet or group.

Violators will be turned into toads... I mean it... It won't be pretty.

Saturday, October 17, 2015

Breastfeeding & Human Rights: A New Walmart Saga

After posting about my glue gun misadventures yesterday, someone suggested that I go directly to the Walmart Canada facebook page to complain. When I landed on the page I noticed another customer complaint and an astoundingly ignorant reply from Walmart Canada.


So they have new/expectant mom parking spaces but if you want to feed your baby you have to do it in the same place people poop?

Feeling riled, I shared the link on my profile. Shortly after posting a reply from Walmart Canada with an apology (because they wrongly thought the complaint was from myself).


Now here's the thing, in Ontario it is a mom's legal right to breastfeed her baby wherever she feels most comfortable as is clearly stated on the Ontario Human Rights Commission website:


I'm not sure if I'm more disgusted by the fact that women are still being forced to feed their children in the same place people defecate, or that a corporation the size of Walmart is so clueless as to their responsibilities when it comes to Human Rights. This is not up for debate. This is not up to the discretion of a store manager. This is a legal obligation and as pointed out in the Code: "It is unacceptable to choose to remain unaware, ignore or fail to address potential or actual human rights violations, whether or not a complaint is made."

Anywho, feel free to hop over to the Walmart Canada facebook page to let them know your thoughts.

Friday, October 16, 2015

Ad Tech Glue Guns, Walmart, and Great Balls of Fire

This afternoon I was tinkering away gluing this to that, when suddenly, right beside me, something pretty frightening happened.


A ball of fire shot out of the glue chamber of my glue gun, the chamber continued to flame for a few moments, then subsided and gave way to the acrid smell of burning plastic. 

This is the gun that I was using: Ad Tech Hi Temp Glue Gun purchased at Walmart less than a year ago. It had been plugged in for about 30 minutes and I was using the recommended glue sticks.


I immediately searched the brand and found the following within just a few minutes:


Yeah, this isn't an isolated incident despite this canned reply from the company: "AdTech is committed to safety, and its products have an excellent safety record."

So I dutifully made my way to the Walmart website, the place I purchased the product, and left this review "A literal fireball came out of the glue chamber followed by the acrid smell of burning plastic. I'm a professional artist/crafter and have used many similar products and never had anything like this happen before. A quick internet search revealed this is not an isolated incident with this brand. I would absolutely NOT recommend this brand and question the safety of this product." Basically everything I've just explained to you.

The review was rejected by Walmart. I've asked for their reasoning and will post if they reply.

Until then, I really and truly hope that you will think twice before buying Ad Tech brand glue guns. I'm sure it appeals to a lot of thrifty crafters, it's pretty cheap and widely available... but maybe the few extra bucks for something that doesn't catch fire or explode would be money well spent. After all, if you're crafting near paper or other flammable materials it could spell disaster. Heaven forbid this happens while someone is holding the thing and someone gets injured.

Just because something is value priced, doesn't mean it should burst into flames.

Craft safely, friends!

Edit: I did contact AdTech and told them of the incident. They never replied. Walmart asked to see the rejection message they sent to me and still has not supplied a reason for the rejection.

Thursday, October 15, 2015

Paper Caravan Template & Tutorial

Every time I post a little paper caravan I get a few requests for a 'how-to'. I've FINALLY drafted a streamlined pattern to create a basic, simplified version. The template and tutorial are available as an instant download from my etsy shop.
Paper Gypsy Caravan Tutorial/Template - Nichola Battilana

A few important notes about the design. 

• The design does NOT include wheels. I recommend 2" Fancy Wheels from GinasDesigns.net Gina designed them at my request, and they are perfect for this project. Great value, easy to use, and lightweight.

• The design DOES include one template PDF and a three page instructional PDF.

• You can complete this project with just one 12" sheet of scrapbook paper if it has a random design. If using papers that have repeating patterns (or a specific orientation) you will need more than one sheet to ensure that everything is facing the right way.

• More notes on paper: double-sided would be best to use as the reverse can be peeked at! Thick paper / card is recommended.

Dresden borders are your friend. These will absolutely add the feeling of ornate detailing to your project.

• A scoreboard is highly recommended for this project. Scoring helps your folds to be neat and straight. If you do any sort of paper crafting, spend the $20 - $30 and invest in one. It's one of those things that will leave you wondering how you crafted without it.

Paper Gypsy Caravan Tutorial/Template - Nichola Battilana

The paper I've used on this caravan is from Tim Holtz Wallflower 12x12 Paper Stash. You will want to use a heavy weight paper / card for this project. My favourite papers for making caravans have been these super thick Sanctuary Scrapbook Papers

Paper Gypsy Caravan Tutorial/Template - Nichola Battilana

If you've got a bit of crafting under your belt and want a project that you can alter and make your very own... this is for you. Easily changeable with paper selection, color choice and embellishments used. For those even braver, change the window shape/size, the window box, the shutters, the edging and make this project your very own. 

Go on then! What are you waiting for?! Go make some tiny paper Gypsy magic!

Tuesday, October 13, 2015

Old Timey Tuesday

Old grungy pictures from my personal collection for use in your art and craft projects.


You may NOT sell, give or distribute the images, digitally or printed, alone or as part of a collection, collage sheet or group.

Violators will be turned into toads... I mean it... It won't be pretty.

Sunday, October 11, 2015

A Card for Romantic Weirdo's

I saw a post the other day celebrating Morticia and Gomez Addams' romance. Sure, maybe they are a couple of weirdos... but they love passionately and give the rest of us weirdo's something to aspire to. 

Card1

I thought that this quote from the Addams's would make a great card to give your "Cara mia" or "Mon Cher" on Halloween... or if you're a true romantic, any time!

Card2

"Last night - you were unhinged. You were like some desperate, howling demon. You frightened me. Do it again!"

Card3

How fun! Petaloo's little Chantilly-Velvet Hydrangeas are totally lush and perfect for this project. I've also added a couple of small Burlap Blossoms and a length of Burlap Trim tied in a bow.

Card4
  
Finish off with some distressing and skull charm, and you've got just the thing to let your weirdo know you love them. :)

Here's the supply list: 

Tuesday, October 06, 2015

Moony house shrine

I've been busy chipping away at my holiday makings but I'm trying to hold off posting Christmas projects until after Halloween. On one hand I understand that posting wintery/Christmas stuff sets people into a panic... but on the other hand posting early gives people enough time to order supplies and make stuff. What a conundrum! What do you think? To post or not to post? Ugh.

ANYWAY here is my latest non holiday piece.

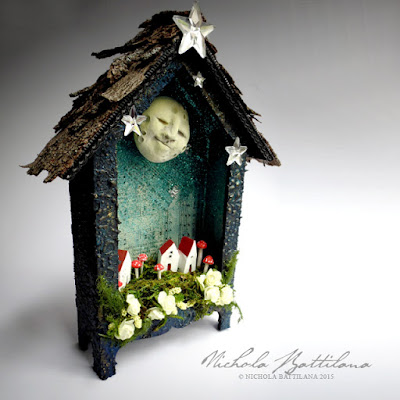
Moony House Shrine - Nichola Battilana

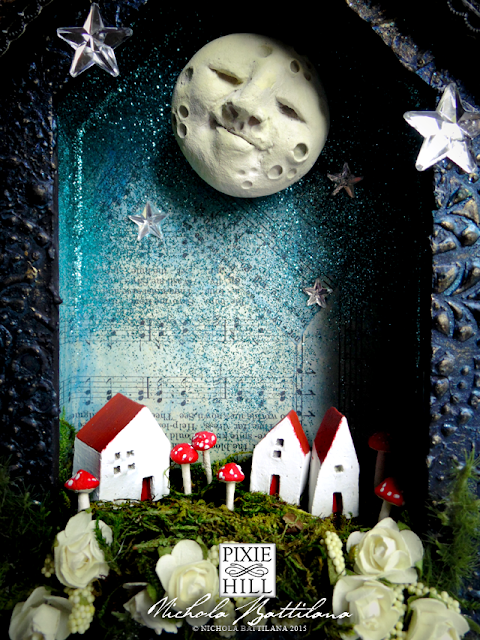
The shrine part of this piece is from Gina's and can be found HERE. (I know that I'm on Gina's DT but I really do love her stuff and do order from her for personal non-dt goodies.) The exterior of the shrine has a texture created with gel medium. The roof is natural bark collected from around Pixie Hill. Inside is lined with music sheets from a vintage hymnal.

Moony House Shrine - Nichola Battilana

Those little red roofed houses inside are from the batch that I pit fired in the back garden a few weeks ago. I'm pretty smitten with them. The moon and mushrooms are Creative Paperclay. And here are the links to the Roses and Tim Holtz Mirrored Stars.

Moony House Shrine - Nichola Battilana

And if you want a really good look inside...

Moony House Shrine - Nichola Battilana

This piece is currently listed HERE.

Old Timey Tuesday

Old grungy pictures from my personal collection for use in your art and craft projects.


You may NOT sell, give or distribute the images, digitally or printed, alone or as part of a collection, collage sheet or group.

Violators will be turned into toads... I mean it... It won't be pretty.

Friday, October 02, 2015

Simple Sparkly "Dream" Tutorial

Today I have a new tutorial created just for GinasDesigns.net. This month I thought we'd create something fun and simple. A quick project that doesn't take a lot of time or products but still has a 'wow' factor. Some glittery goodness to keep you inspired, or maybe a little bit of glam to cheer up a friend.

I've used a sturdy chipboard sentiment, a brand new design from Gina's, available soon. I've chosen the word "Dream" but other inspirational words will also be available.


To kick up the glam factor of this project I've covered my pieces in ultra fine glitter. You can see exactly how I apply it, and tips for a flawless flat glittery finish, in my tutorial video for this project. 


Finally, those sweet shooting star elements, another new design from Gina's, and adds even more whimsicality.

Are you ready to create your own bit of sparkly magic?!

HERE is the video tutorial and here is a list of all the products I used:

Gina's "DREAM" chipboard sentiment *Available Soon!*
Gina's chipboard stars *Available Soon!*
4 large beads
black acrylic paint
white acrylic paint
ultra fine glitter
star tinsel
bamboo skewer
glue