Friday, October 02, 2015

Simple Sparkly "Dream" Tutorial

Today I have a new tutorial created just for GinasDesigns.net. This month I thought we'd create something fun and simple. A quick project that doesn't take a lot of time or products but still has a 'wow' factor. Some glittery goodness to keep you inspired, or maybe a little bit of glam to cheer up a friend.

I've used a sturdy chipboard sentiment, a brand new design from Gina's, available soon. I've chosen the word "Dream" but other inspirational words will also be available.


To kick up the glam factor of this project I've covered my pieces in ultra fine glitter. You can see exactly how I apply it, and tips for a flawless flat glittery finish, in my tutorial video for this project. 


Finally, those sweet shooting star elements, another new design from Gina's, and adds even more whimsicality.

Are you ready to create your own bit of sparkly magic?!

HERE is the video tutorial and here is a list of all the products I used:

Gina's "DREAM" chipboard sentiment *Available Soon!*
Gina's chipboard stars *Available Soon!*
4 large beads
black acrylic paint
white acrylic paint
ultra fine glitter
star tinsel
bamboo skewer
glue

Tuesday, September 29, 2015

Old Timey Tuesday

Old grungy pictures from my personal collection for use in your art and craft projects.


You may NOT sell, give or distribute the images, digitally or printed, alone or as part of a collection, collage sheet or group.

Violators will be turned into toads... I mean it... It won't be pretty.

Monday, September 28, 2015

Out of the fire

I made these little clay houses a couple of weeks ago.


Yesterday I popped them into a fire pit. 


This morning I pulled out some lovely little rustic houses!


I really have no idea what I'm doing when it comes to clay. I've learned a lot with the few firings I've done, but I am by no means a 'potter'. I'm not looking to make a tea set or food-safe dishes. If I manage a few primitive pieces in the process of playing and experimenting, I'm happy.

Those little houses may not look like much to a seasoned potter, but today they make me pretty happy :)

Saturday, September 26, 2015

Two Haunted Houses for AlphaStamps

More spookiness today. This time little cardboard houses!
Altered Art Haunted Houses - Nichola Battilana
These were a lot of fun to make. It made me realize how much I miss altered art paper crafting. The best thing about this type of crafting is that you really don't need much to get started, but can get as elaborate as you choose. I digress. HERE is the Haunted House Kit I used.

Altered Art Haunted Houses - Nichola Battilana

With an old story book in hand I clipped words to create ooky snippets. If you don't have time (or the inclination) to scour a book for wicked little sayings, AlphaStamps has put together a collage sheet.

Altered Art Haunted Houses - Nichola Battilana

You may notice a few spider webs on the peak of the house above and covering the fence on the piece below. Can you guess what they are made from? Hot glue! For once I've created hot glue strands and fly-aways on purpose to create those webs.
Altered Art Haunted Houses - Nichola Battilana

I think these two little weirdos are my favourite.

Altered Art Haunted Houses - Nichola Battilana

And I use the term weirdo in the most endearing way!

Happy haunting lovely crafters!

Supply List:
September kit: Haunted House
Haunted House Add-On Kit
Cream Adhesive Pearls 
Halloween Owl Cameo*

Or simply click here for all of the supplies in one place :)


Wednesday, September 23, 2015

Halloween Tree with Ornament Tutorial

Grrrr... moan.... BRAINS.... uugghhh!

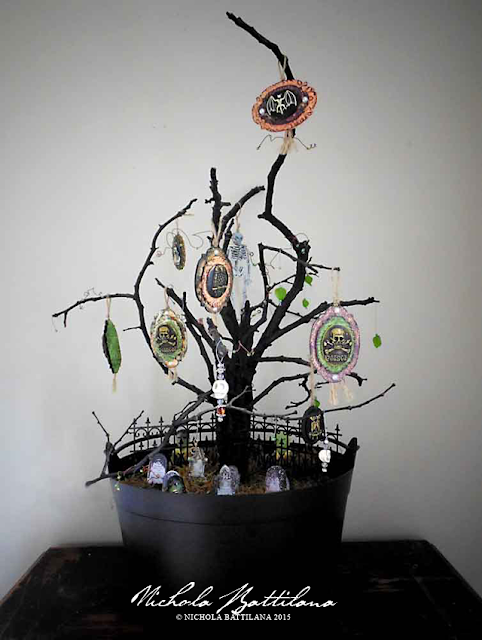
Halloween Tree - Nichola Battilana

I feel like I totally missed Halloween last year, so I'm really digging all the spooky stuff from Alpha Stamps over the past couple of months. I know that creepy isn't for everyone... but I love to get ghoulish!

I've wanted a Halloween tree for some time and I decided to finally make myself one to hold all my tiny terrifying trinkets and charms.

Halloween Tree - Nichola Battilana

Let me just say that big things are a pain to photograph. This actually looks pretty dang magnificent on my dining room table with all those spindly branches poking this way and that. Unfortunately, those same spindly branches don't translate well in a single image. (Poo!)

Halloween Tree - Nichola Battilana

ANYWAY, I created the tree by binding several branches together with wire, then spray painting the whole kaboole in matte black. The 'tree' sits in a cauldron with zombie infested cemetery scene using pieces from the August Cemetery Kit.

Halloween Tree - Nichola Battilana

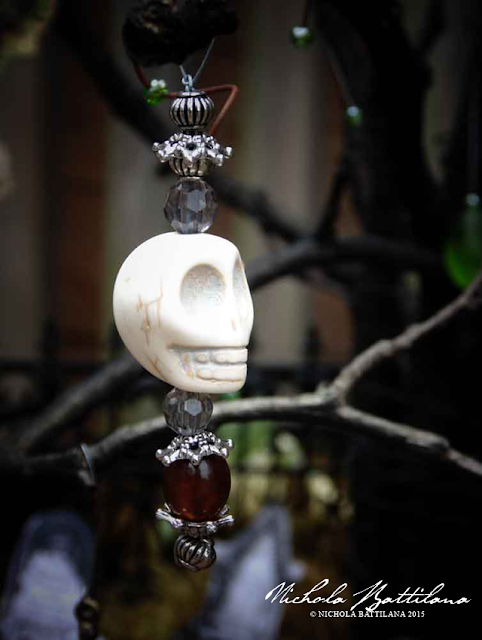
On the branches of the tree I've created some little ornaments, stringing together beads and gruesome things like this Large White Turquoise Skull Bead.

Halloween Tree - Nichola Battilana

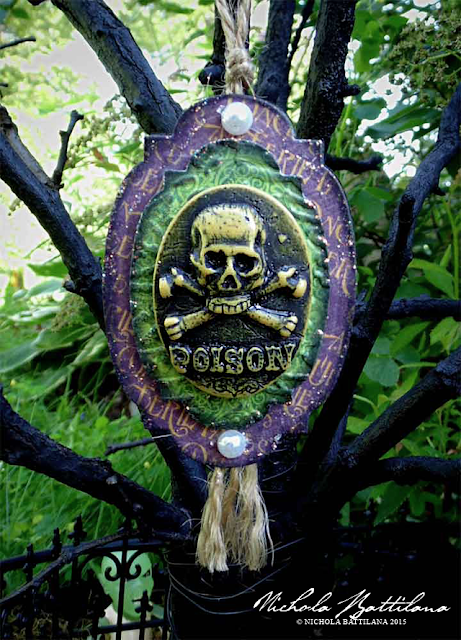
I also created a bunch of simple paper ornaments and to show off some spooky doodads like this  Halloween Poison Cameo.

Want to make your own? Here's how:

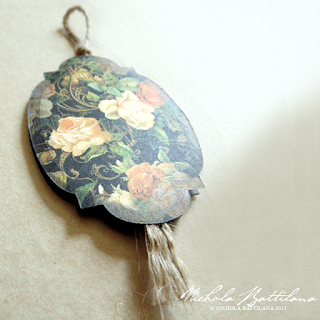
Halloween Tree Ornament Tutorial - Nichola Battilana

1. Cut two large shapes and one smaller shape. 
and cut pieces from Graphic 45's An Eerie Tale 8x8 Paper Pad 

Halloween Tree Ornament Tutorial - Nichola Battilana

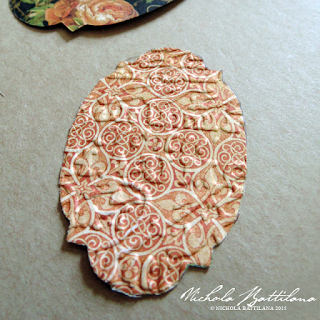
2. Add some texture to the smaller piece with an embossing folder. 

Halloween Tree Ornament Tutorial - Nichola Battilana

3. Ink the edges and raised embossed areas with an old stamp pad.

Halloween Tree Ornament Tutorial - Nichola Battilana

4. Apply some foam squares to the piece like so and
add a loop of jute twine for hanging.


Halloween Tree Ornament Tutorial - Nichola Battilana

5. Affix the two large pieces together with the twine
sandwiched between the layers.

Halloween Tree Ornament Tutorial - Nichola Battilana

6. Apply the smaller shape on top.

Halloween Tree Ornament Tutorial - Nichola Battilana

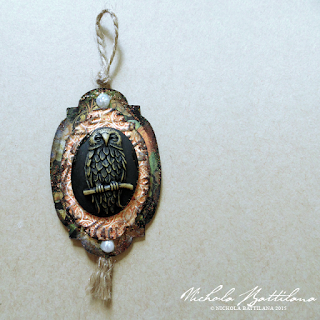
7. Add some decorative elements like Cream Adhesive Pearls and a focus piece such as this Halloween Owl Cameo* 

Halloween Tree Ornament Tutorial - Nichola Battilana

8. For one last finishing touch, apply a bit of sparkle with some Diamond Stickles

These ornaments are simple to make and could be altered to fit any occasion. Prepare the pieces ahead of time and they'd be a great project for even the littlest 'helper' to assist in making them.

Here's all the doods and dads for making the bits in this post:

THE HALLOWEEN TREE
August 2015 - Cemetery Kit
Mini Black Wrought Iron Fence 
Zombie Finger Puppets
Sheet Moss*
large plastic cauldron
branches
wire
black matte spray paint


PAPER ORNAMENTS
Diamond Stickles 
Cream Adhesive Pearls 
Halloween Owl Cameo*
Tim Holtz - Embossing Folders - Eiffel Tower & French Script Set 

Tim Holtz Thinlits Mini Labels Die Set
An Eerie Tale 8x8 Paper Pad
adhesive foam squares
jute twine


Spooky Book of Spells for Petaloo

I adore Halloween. I love creepy, kooky and ooky things. Old, grimy, scuffed and icky sticky things are my favourite. And so, here's a wee horrific project created with Petaloo goodies for Halloween.

Book of Shadows - Nichola Battilana

The base is a book box that are fairly easy to find this time of year in most craft supply stores. I've painted it black and green with a bit of cracklish aging.

Book of Shadows - Nichola Battilana

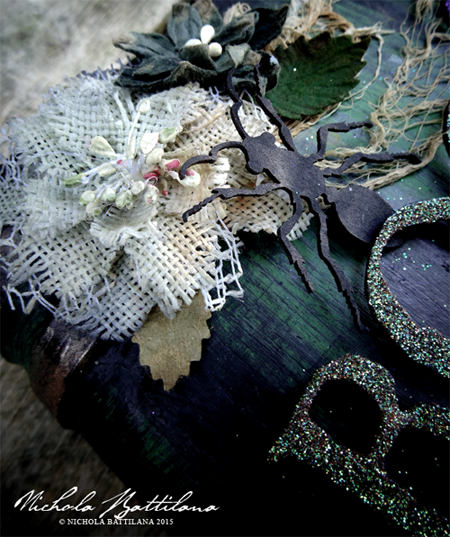
These DIY burlap flowers have been distressed slightly with some murky water. If you work in washes, allowing to dry between layers, you can a achieve a really great stained look. They look great next to a little cheesecloth that has been stained and stretched.

Book of Shadows - Nichola Battilana

Add some bugs and Darjeeling leaves and blossoms and your all set to store some spooky supplies in your embellished Spell Box!

Supplies:

Book box
Cheesecloth
Bug Collector Shape Set
B
ook Of Shadows Cutout (available Oct 1 from GinasDesigns.net)
Acrylic Paint
Glitter

Tuesday, September 22, 2015

Old Timey Tuesday

Old grungy pictures from my personal collection for use in your art and craft projects.


You may NOT sell, give or distribute the images, digitally or printed, alone or as part of a collection, collage sheet or group.

Violators will be turned into toads... I mean it... It won't be pretty.