Wednesday, June 24, 2015

The Wandry Room

I've hustled, avoided all housework, and managed to get my little corner done. Are you ready? I think you're going to like it...

The Wandry Room - Nichola Battilana

"The Wandry Room" just like a boring laundry room... only for fairy wands and wings.

The Wandry Room - Nichola Battilana

Inside! I am smitten. I can't hardly believe I made it with my own stubby hands :) There's a lot going on in there. Including a bottled magic, soap, baking soda, wand and wing starch, bars of soap, buckets, and a wandry machine for getting tough wand stains.

The Wandry Room - Nichola Battilana


The Wandry Room - Nichola Battilana

There's even suds in the tiny sink.

The Wandry Room - Nichola Battilana

A wee little plug.

The Wandry Room - Nichola Battilana

Maybe the plumbing needs to be checked? There's some extra wand parts being stored under the sink.

The Wandry Room - Nichola Battilana

In case you were worried, the owner of this fine establishment is certified.

The Wandry Room - Nichola Battilana

A teeny wand repair manual c. 1978 in the tool tub on the shelf.

The Wandry Room - Nichola Battilana

To properly clean wands and wings you need bubbles. Lots and lots of bubbles.

The Wandry Room - Nichola Battilana

Sometimes magic spills a bit here and there. You can see some freshly cleaned wands drying on the left.

The Wandry Room - Nichola Battilana

There's some other care manuals tucked here and there too.

The Wandry Room - Nichola Battilana

And here are some wings and wands tagged and ready to be picked up.

The Wandry Room - Nichola Battilana

Finally a shot with my grubby hand to give you a good idea of the size. It measures 7" x 8" x 4". I used one of my Corner Box as the base. Here are some of the other products I used:


And some products that are similar that you may find useful:
Set of Mini Wooden Buckets 

Stork Scissors 


Or you can just hop HERE for the whole she-bang listed in one spot :)

The Wandry Room is currently listed in the etsy HERE.


Tuesday, June 23, 2015

Simple Floral Favors for Petaloo

Holy heck! I almost forgot to post this super sweet project I created for Petaloo!

Although I've been married for an age, I believe the worries of time and money probably still plague brides-to-be today. I thought this project may be too simple but quickly realized that might be exactly what someone needs, an oh so simple favour that can be done in a pinch.

Simple Petaloo Flower Favor Rings - Nichola Battilana
Ok, ok... but what are they?
Simple Petaloo Flower Favor Rings - Nichola Battilana

Pretty floral rings! Easy as can be to make. Simply affix the blooms to a ring blank and ta-da! You've got a cute as a button favour for your guests. Selecting adjustable rings will take the worry out of fitting.
Simple Petaloo Flower Favor Rings - Nichola Battilana

Give as party favours at a bridal shower, or give as a sweet token of affection to those who help make your day special.
I've used Chantilly Mixed Blooms in Sienna 1279-212 and Textured Elements Mini Blossoms in Red 1263-212 but I am certain that there is a Petaloo bloom to match any wedding colour pallet. 

Monday, June 22, 2015

A work in progress

I don't often share my works-in-progress but I'm pretty excited with how this project is coming along. The bones is this Blank Corner Diorama made exclusively for me by Gina's Designs.

Blank Corner Diorama - Nichola Battilana

It's exactly what I wanted and my-oh-my the possibilities! I've got a katrillion ideas tumbling around in my head. My first project currently looks like this...


WIP Corner diorama - Nichola Battilana

It may not look like much yet... but I'm pretty sure you'll like what I have planned ;) Seriously, it's so much fun I can barely contain myself!

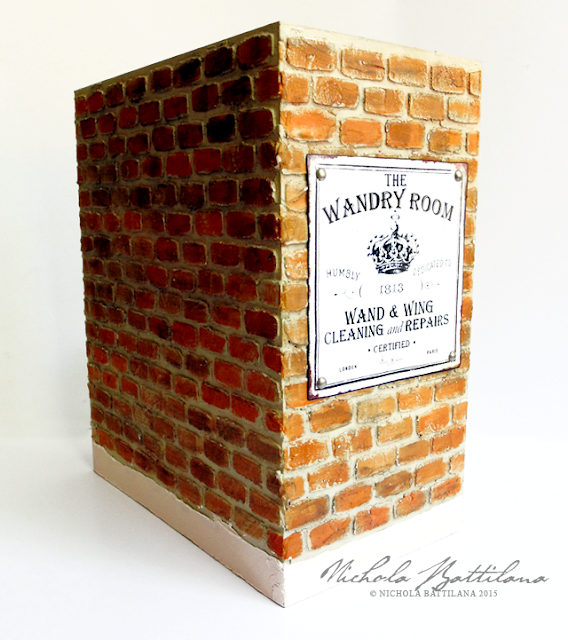
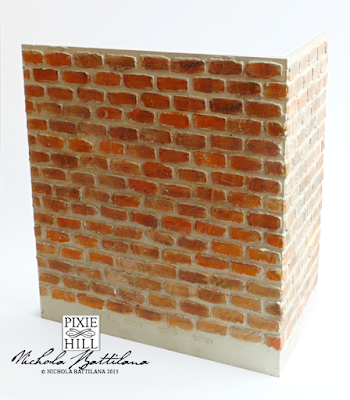
Miniature brick wall texture on corner diorama - Nichola Battilana

For the outside I've created a brick exterior using a brick stencil sheet from Gina's DesignsI'm pretty dang happy with the results so far. 

If you'd like your own Blank Corner Diorama there are a handful available exclusively in my etsy shop. It's a great size to work with (7"x8"x4"), easy to assemble, and I think you're really going to like the projects I have planned using this piece as a base.  


A Mid-Summer Progress Report

First things first, SOLSTICE BLESSINGS to you!

Despite calls for drizzle it was a glorious weekend and I got burnt to a crisp working in the garden. Our garden is coming along nicely (thanks to all of the hard work by Mr. Pixie) and I'm grateful for all of the leafy green goods that are sprouting and ending up on our dinner table.

Mid-Summer at Pixie Hill

Our solstice celebrations were quiet. I made a nice meal for the hubs (it also being father's day and all) and then took some treats outside for our fairy friends. Honey, jam, bread, and sweet wine. Our contribution to the wee folk's solstice celebrations.

Mid-Summer Fairy Offering at Pixie Hill

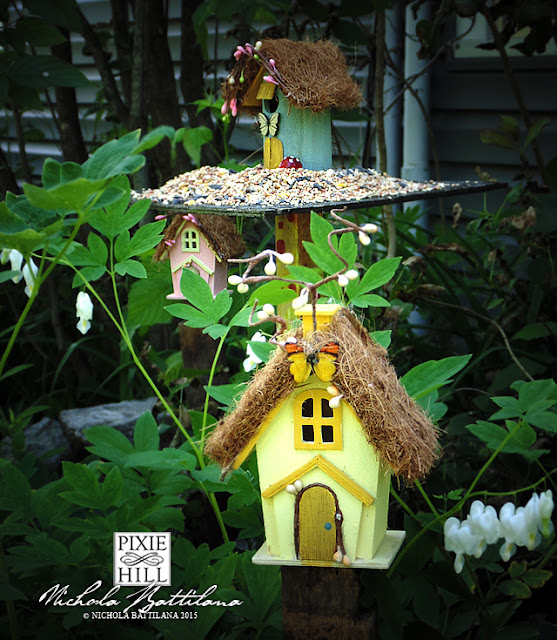
Our "fairy sanctuary" is coming along slowly but surely. I managed to finish up a handful of sprite cottages, which are now sitting in an overgrown tangle of leaves. They'll be a perfect spot for our little fairy visitors to rest.

Sprite Cottages at Pixie Hill - Nichola Battilana

Our resident Hobbit has returned. The long grass was cleared, a small stone wall built and his tiny garden tended.

Hobbit Home at Pixie Hill - Nichola Battilana

Word of our safe heaven must be spreading. On Thursday evening I heard a ruckus outside and when I went to investigate I found this wee caravan parked beneath the bird bath. Some travelling fairies have come to stay for the summer.

Travelling Fairy Caravan at Pixie Hill - Nichola Battilana

I'll try to get better photos of the caravan camp soon. It was being guarded by a band of determined mosquitoes when I took this photo. I was very nearly eaten alive before I was chased away ;)

Wednesday, June 17, 2015

Frogs and Pixies

For the past week, this fellow has stopped by for a visit every evening. He hops onto the living room window and stays for a few hours. I'm not sure if he's a frog prince waiting for a kiss or a maybe a moocher looking to borrow $5. Check out that sexy yellow leopard colouring on those legs!


This morning I ventured outside (a dangerous feat, the mosquitoes were on full alert) and very nearly stepped on this little hopper.


I cursed and grumbled and this wee pixie came along to see what the fuss was about. She double checked on the little guy and gave a nod of approval before fluttering off.

Pixie checking on a little tree frog - Nichola Battilana

She's been hanging out in my studio since Christmas, just lazing around, stealing my scissors and buttons. I guess she got fed up of being on my 'to-do list' and made herself some raggedy clothes.

One little pixie sitting in a tree - Nichola Battilana

Last I looked she was sitting in the black locust tree, taking in the morning sun.

I think this one will be a handful ;)

Tuesday, June 16, 2015

Sleeping Stones

I am not the sort who has any desire to travel the world. I'm quite pleased to explore my own land and sleep in my very own bed thank-you-very-much. 

There is an exception. 

Iceland. 

Iceland, where Huldufólk and Ã¡lfar, (trolls and elves) live in rocks and beneath the earth. Where roads are detoured to protect mounds of stone, least the those creatures be disturbed. Where rocks should not be thrown for fear that Huldufólk may be harmed.

Perhaps these stones in the Pixie Hill garden are sleeping, weary from their long Icelandic voyage.

Sleeping Stones - Nichola Battilana

For more stones that have had their faces coaxed to the surface see my Stone Creatures pinterest board.

Saturday, June 13, 2015

A Mermaid Shrine for Alpha Stamps

Alpha Stamps theme this month is mermaids. Being a child of the 80's my thought process on those fish-tailed beauties beneath the sea goes something like this:

1. Gorgeous Daryl Hannah in Splash.
2. The selkies of The Secret of Roan Inish (if you haven't see this, you should)
3. George Melies' Under the Seas

I ended up with a dreamy glittery underwater mermaid shrine inspired by the tints of Melies' (that sounds far more pretentious than it is).

For the base I've used this Curio Cabinet. I've simply omitted the shelf inside to create a large open interior. Almost every surface has been covered with an iridescent glitter thanks to a Stickles. I simply spread them with my finger, giving a glowwy rather than a glitter encrusted effect. It's pretty, like flecks reflecting light beneath the sea.

I wanted the outside to coordinate with the Unearth Copper Patina Scrapbook Paper interior. Here's the paint process I used:


• plain chipboard
• black
• turquoise smudges
• yellow ochre smudges
• copper highlights

I think it compliments the paper nicely :)


For the seabed floor I used a square of organza, which fills the space nicely and also provides a nice reflective quality too.


My fussy cut mermaids sit upon painted chipboard coral. Staggering the placement of these pieces helps with the depth perception.


On the exterior I've draped ribbons as a sort of banner. It helps with the dreamy quality and is a bit like fantasy seaweed. A few stamped brass charms and adhesive pearls finish off the the piece with a bit of treasure trove flair.

Supply List
Mermaids Kit
Thin Fleur Dresden Borders - Turquoise 

Cream Adhesive Pearls - 3mm* 
Gypsy Coin Mix* 
Waterfall Stickles* 
Raw Brass Flourish* 
Curio Cabinet
Organza