Tuesday, November 03, 2015

Old Timey Tuesday

Old grungy pictures from my personal collection for use in your art and craft projects.

I love this family portrait. They look like such a nice little family. I actually have another family portrait of the same little brood when the girl is grown.

Happy making!

You may NOT sell, give or distribute the images, digitally or printed, alone or as part of a collection, collage sheet or group.

Violators will be turned into toads... I mean it... It won't be pretty.

Monday, November 02, 2015

Fairy Christmas Card Advent Calendar

Ok, I've let Halloween pass and now it's full steam ahead with the Christmas posts. I have a few projects coming up that I KNOW you're going to want to try so I'm posting nice and early to give you plenty of crafting time. Today, a totally freaking adorable advent calendar alternative.

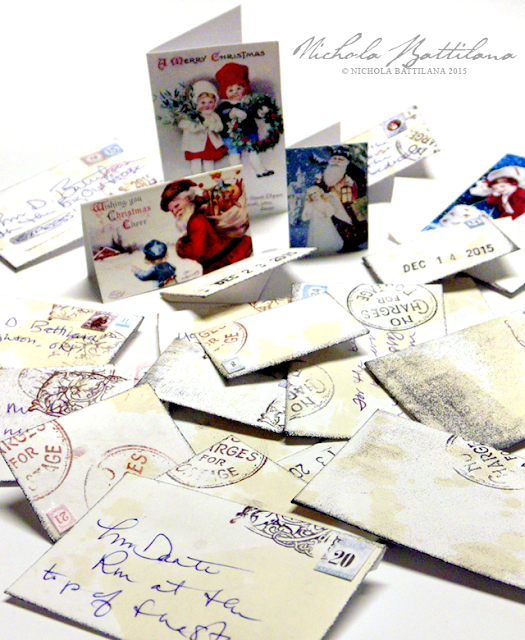
Fairy Christmas Cards, an alternative Advent calendar - Nichola Battilana

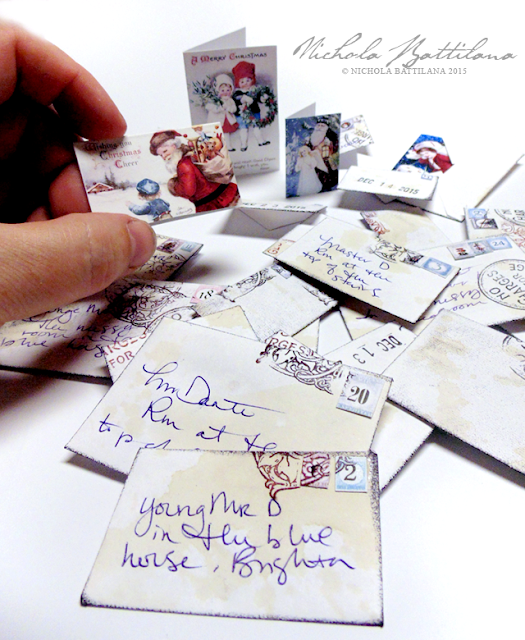
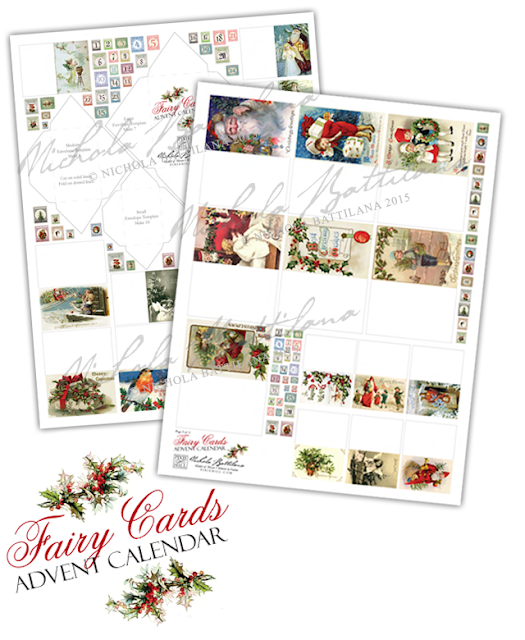
Imagine waking up each day to find a card from the fairies helping you count down to Christmas! I've put together a Fairy Card Advent Calendar, a 2 page download that includes 25 miniature cards with vintage holiday imagery, numbered postage stamps and three envelope templates to fit the various sized cards.

Fairy Christmas Cards, an alternative Advent calendar - Nichola Battilana

Now, when I showed this project to my kiddo he said "Yeah, but what about the treat?" The wheels in my mind starting turning and I thought of all the little things that would fit in those envelopes... letters, notes, coins, buttons, glitter, jokes, stickers, charms... then the light bulb above my head lit up. 

Fairy Christmas Cards, an alternative Advent calendar - Nichola Battilana

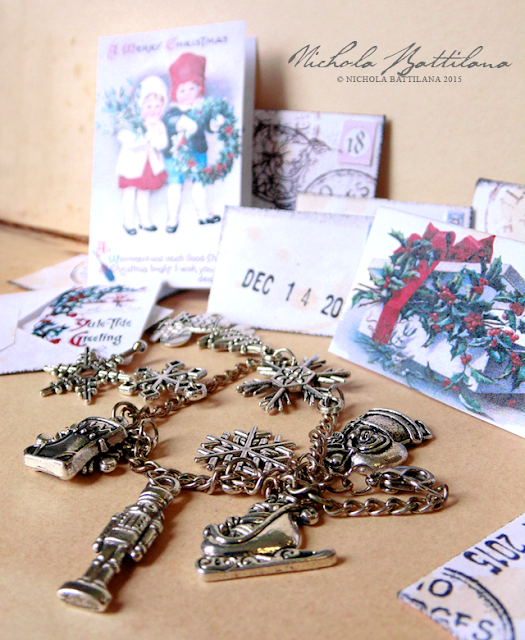
Every few days a charm could be included in the tiny card and your little pixie could make their own Christmas charm bracelet! The sets I've used here are the Santa Sleigh Silver Charm Set and the Silver Snowflake Charm Set from Alpha Stamps.

Fairy Christmas Cards, an alternative Advent calendar - Nichola Battilana

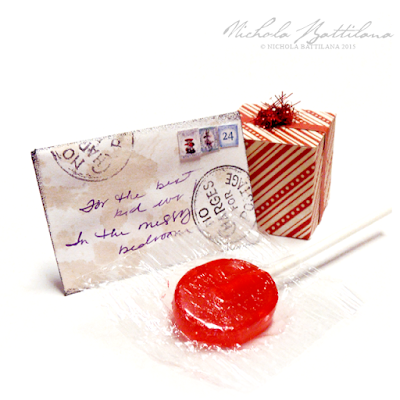
Cute as buttons and sugar free! Although if you do like the sweet stuff you could always give a lolly or chocolate kiss.

Fairy Christmas Cards, an alternative Advent calendar - Nichola Battilana

Don't do the advent calendar thing? No worries! You could always make these up and pass them out to the people in your life who need a little extra fairy magic around the holidays.

Fairy Christmas Cards, an alternative Advent calendar - Nichola Battilana

Now, as for decorating the outside of those envelopes, here's what I suggest:

1. Using the templates from the Fairy Cards Advent Calendar, trace the envelope shapes onto a piece of regular white paper.


2. Cut the shapes.
3. Fold the two short sides, then fold the bottom (the one with the flat edge) and glue into place. Be careful not to glue the envelope shut!


4. Sprinkle both sides with a bit of tea or coffee. I prefer tea as it doesn't leave a lingering scent. Allow to dry. NOTE: You can age your paper before creating the envelopes, but I found that doing it in this order results in a flatter, smoother finished piece. See wrinkles above.

5. Add little postage stamps and 'cancel' them using a rubber stamps. Any patterned stamp will do. Place a scrap bit of paper beneath so as not to ink your work surface.


6. Address the envelopes, personalizing them for the recipient.


7. Add the wee cards and any tiny surprises you'd like to include.


Fairy Christmas Cards, an alternative Advent calendar - Nichola Battilana

Lastly, and this is kind of important, these can NOT go through the regular postal system. Their size requires that they be handled only by Royal Faerie Post. If you want to send them to someone far away, I suggest mailing them within a larger card with a note of explanation.

Supply round up:
scissors
glue
tea/coffee for staining*
rubber stamps*
ink pad*
*optional

Do-dads for the charm bracelet:
Chain, clasp and jump rings / or pre-made bracelet
Santa Sleigh Silver Charm Set

Silver Snowflake Charm Set


Saturday, October 31, 2015

Blog Hop with Gina's Designs and Creative Paperclay

I am really excited about this Blog Hop/Link Party. I'm a HUGE fan of Creative Paperclay, and I love Gina's to bits, so I'm chuffed to share an opportunity for you to win products from both of these amazing companies. Here's the rundown from the hosts...

The Creative Paperclay Design Team
has teamed up with Gina's Designs Lasercuts Design Team
for a Halloween Theme Blog hop

We are excited to show off our Halloween projects
and even more excited about the fact YOU can win a prize

Prize Package Includes
1 pound package of Paperclay
1 sample package of Sandits
and
$25 shopping spree to Gina's DesignsLasercuts
How to enter - each of these will get you one entry
1) Enjoy the hop
2) Stop by each blog on the hop and leave a comment
3) Pin each project on your Pinterest site
4) Share this post on your Facebook page

Here is the List of BLOGS:

And now on to my Gina's/Paperclay mashup project...


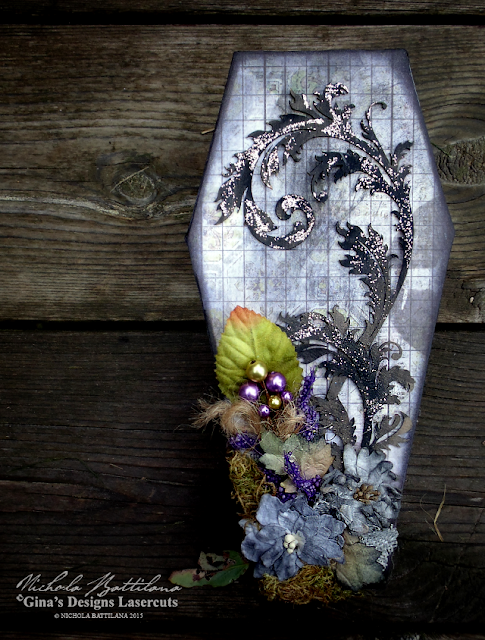
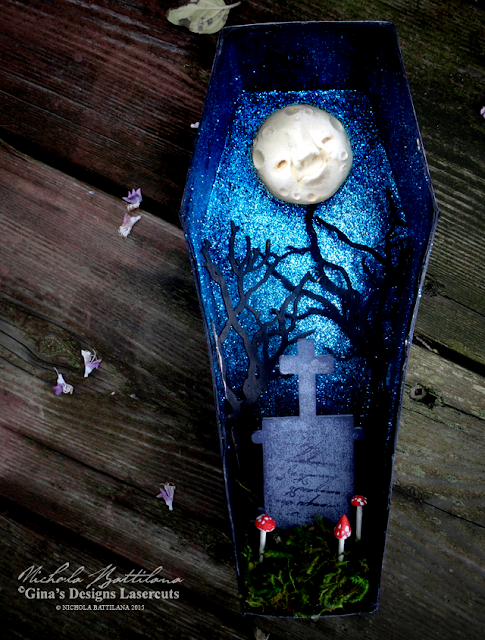
GinasDesigns.net & CreativePaperclay Coffin Shrine - Nichola Battilana

I've taken a Coffin Box from Gina's and embellished it with paper from Tim Holtz Wallflower 12x12 Paper Stash. I've also added flowers from Petaloo and a bit of dried moss. Finally I've added some Feathery Flourishes which have been painted black and have just a bit of glitter added.

GinasDesigns.net & CreativePaperclay Coffin Shrine - Nichola Battilana

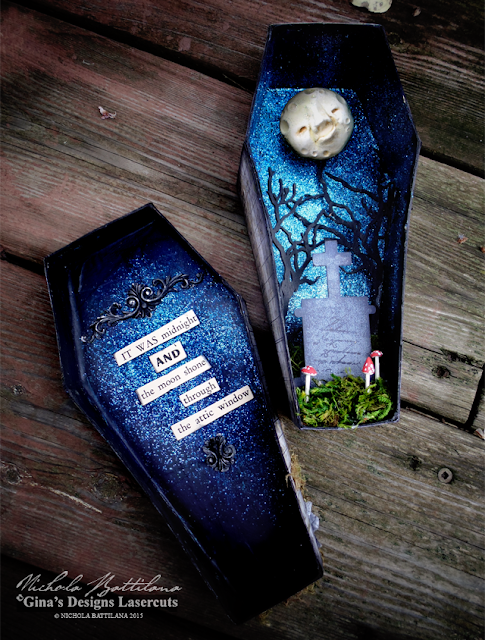
I painted the interior black and covered it in fine blue glitter. A bit of moss at the base provides a lawn for my Paperclay toadstools and a Tombstone Stand Up. For the text on the tombstone I've simply used a rubberstamp of script writing. You'll also notice some creepy trees in there. I've used one Chipboard Tree from Gina's and chopped it in half for this little scene.

GinasDesigns.net & CreativePaperclay Coffin Shrine - Nichola Battilana

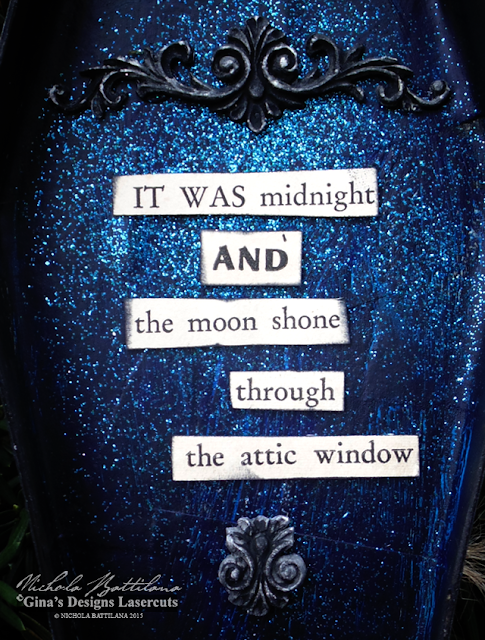
The sentiment on the underside of the coffin lid "It was midnight and the moon shine through the attic window" is from an old vintage children's book. The filagree bits that frame the words were made by pressing Paperclay into this Silicone Mold. Wiping excess paint off of the Paperclay while it is still wet give a great distressed look.

GinasDesigns.net & CreativePaperclay Coffin Shrine - Nichola Battilana

And finally that little moony face. I sculpted him using a Creative Paperclay product called Delight. It is extremely soft, sort of like working with marshmallows, and even more lightweight than the original Paperclay.


GinasDesigns.net & CreativePaperclay Coffin Shrine - Nichola Battilana

Want to make your own version? Here's a list of the materials I used:

Coffin Box
Feathery Flourishes
Tombstone Stand Up
Chipboard Tree
Creative Paperclay®
Paperclay Delight
Wallflower 12x12 Paper Stash
Silicone Mold
Petaloo flowers
Moss
Glitter


Tuesday, October 27, 2015

Old Timey Tuesday

Old grungy pictures from my personal collection for use in your art and craft projects.


You may NOT sell, give or distribute the images, digitally or printed, alone or as part of a collection, collage sheet or group.

Violators will be turned into toads... I mean it... It won't be pretty.

Wednesday, October 21, 2015

Tiny Flower Tute and Alpha Stamps news

Alpha Stamps is carrying a product called "Flower Soft" which is available in different colours (cross my fingers more will be listed shortly). I was asked to do a tutorial for creating the flowers with this fluffy stuff and I feel sort of guilty about it because it is INCREDIBLY easy to use.

Flower Soft Tutorial - Nichola Battilana

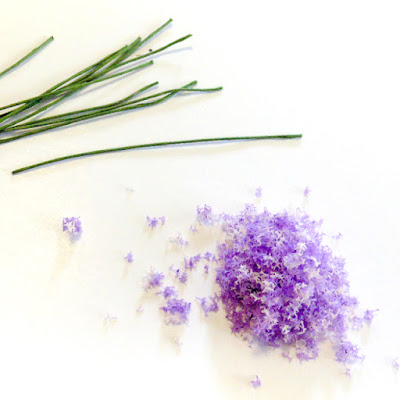
Gather some florist wire and a pour out a small pile of Flower Soft. A little goes a looonng way.

Side note: Whenever I use little wired flowers, I trim them and am left with a short length of wire. These trimmings are perfect for creating these flowers because you really only need 1.5" or so of wire. So save those scraps!

Flower Soft Tutorial - Nichola Battilana

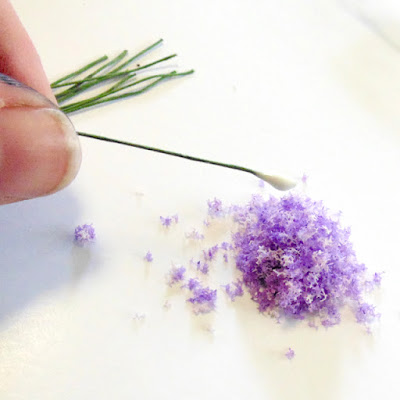
Put a healthy glob of glue on the end of the wire. My glue of choice is Aleene's Tacky Glue because it is super thick and usually stays where it's told.

 Flower Soft Tutorial - Nichola Battilana

Roll the gluey end of the wire in the product.

Flower Soft Tutorial - Nichola Battilana

Set aside and allow to dry. That's it! You'll have sweet little floral stems ready for microgardening or bunch them together to make the wee-est bouquets. Just look at those tiny flowers in that sweet wee vase from this Miniature Vase Set (I'm holding the smallest one below).

Flower Soft Tutorial - Nichola Battilana

Aaannnnd, for my bit of Alpha Stamps news: they'll now be selling my Corner Box and Frame Front Box. I'm really excited about this because Canadian shipping prices are outrageous (*shakes fist at Canada Post*) so you actually save a few pennies.

For a refresher...
The Wandry Room - Nichola Battilana

Here's the Wandry Room which is made from the Corner Box. (+additional supplies)

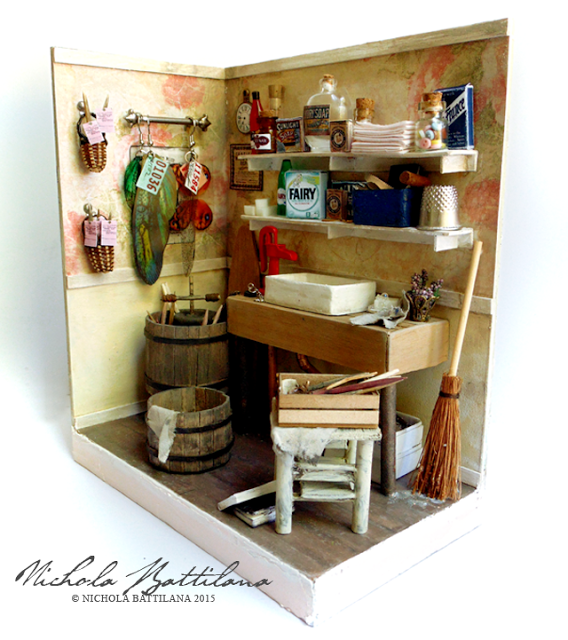
The Wortcunners Shed - Nichola Battilana

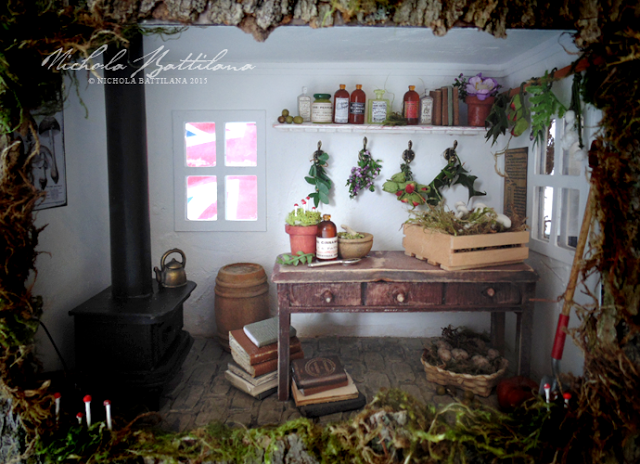
This Wortcunner's Shed was made from the Frame Front Box. (+additional supplies.)

Finally, you'll also be able to purchase my Miniature Fairy Godmother Magazines Collage Sheet and Miniature Tooth Fairy Letter Collage Sheet from Alpha Stamps also.

That's it for today, but be sure to come back for another visit because I've got loads of good stuff coming up over the next couple of weeks. Smooches lovelies!

Little Flower Cart with Petaloo and Authentique

I'm so excited to be taking part in Petaloo's blog hop with Authentique. To celebrate both products I've created a little flower cart. (Don't forget to head over to the Petaloo blog for a chance to win some fab prizes.)

Flower Cart - Nichola Battilana

I think it's pretty dang cute!

Flower Cart - Nichola Battilana

The body of the cart is covered in "Tender" from the Nestled collection. The awning created with "Hearty". I've then added embellishments from 'details' the cardstock sticker sheet from the same collection.

Flower Cart - Nichola Battilana

Inside my little cart, all sorts of Petaloo blooms which pair perfectly with Authentiques "Nestled" collection. Just look at how well those Chantilly Mixed Blooms in cream, and Sugared Mini's in mocha coordinate with the colours of the sticker. 


Tuesday, October 20, 2015

Old Timey Tuesday

Old grungy pictures from my personal collection for use in your art and craft projects.


You may NOT sell, give or distribute the images, digitally or printed, alone or as part of a collection, collage sheet or group.

Violators will be turned into toads... I mean it... It won't be pretty.