Showing posts with label how to. Show all posts

Thursday, April 03, 2014

Punch and Judy 'By the Sea' Theatre

I realize it's been quiet around these parts over the past week or so BUT I have a really good excuse: I made the top 30 for the Graphic 45 design team and I've been working on my super special project for round 2!

Are you ready?

Here's my Punch and Judy "By the Sea" Theatre...

If you aren't familiar with Punch and Judy they play a big role in the culture of the British sea side. It's a sort of violent puppet show which can be dated back to just before the 1700's, reaching a height of popularity during the Victorian era.


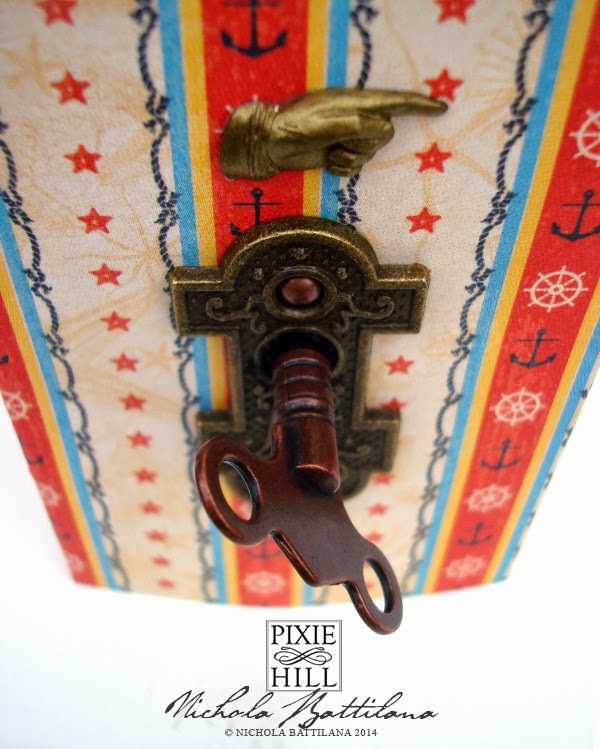
Now, see that little knob?


Turn it and Punch and Judy whack one another! You just can't argue with a 100's year old tradition.


 AND if you want to make your own there's a tutorial!


... and here is the accompanying print out (click for full size)

... and finally, here is the complete supply list


Corrugated cardboard
Thin wood doweling
Coffee stir sticks
Drinking straw
Jute twine
Hot glue & adhesives

Tuesday, March 11, 2014

Graphic 45 Typography Print Tray

It's National Craft Month in the good ol' USA and I'm proud to take part and spread the crafty love with Graphic 45 and this project...


...an altered print tray embellished with loads of fabulous junk (or 'la junque' if your pants are fancy) and the magnificently classically graphic Typography.


I love altering things, making assemblages and mixed media pieces. The process I go through when creating most of my mixed media pieces is almost always the same. Prep, base, gather, play, layer, finish! If you hop over to today's Graphic 45 blog post you can play along with an easy peasy tutorial!


Supply list:


Small wooden printer style tray
Acrylic paint
Ink pad
Adhesives
Misc items for embellishing: wooden spools, wire, twine, Glass Bottles and vintage vials, buttons, miscellaneous rusty bits, old pen nibs, metal letters, Tim Holtz Clock Keys, metal brads,  Reversible Round Metal Number Tiles, Scrabble tiles, metal corners

Tuesday, January 21, 2014

Sherlocked Matchbox


Loads of people said very nice things about my Sherlock Altoid tin yesterday. There were a few inquiries as to if the tin was for sale, or if others would be available. Unfortunately I am quite greedy and will be keeping the tin for myself  and it may be a while before I make another BUT....

I do love you for encouraging the fan-girl in me (although I am far too old for it) so, I spent the day making something especially for you. I believe that every last person should have a little 221B to fit in their pocket so I came up with a matchbook version you can create for yourself. It's not as detailed as the tin, but it's cute as a button and you'll be able to make one in no time at all

Are you ready? Here we go...


Download THIS template. Be sure when you print that it is at 100% scale. Fair warning: you will very likely have to do some fiddling around to get things to fit perfectly... I would suggest a trial run.


Let's start with the outside of the matchbox. Here I've cut out the pieces to the door...


... then glued them to the reverse side of piece of black paper.


Using a very sharp blade I cut out the pieces carefully using the template as a guide. When I turn the pieces over, I have perfectly cut black paper pieces.


I gather all of my pieces together, along with a small piece of transparency with a black pattern on it. This is for the window above the door but you could leave it blank. I also grab the outside sleeve of my matchbox. Notice that small patch of white paper on the sleeve? That just hides the packaging where the window above the door is.


I assemble to door, gluing the layers in place. Large piece, transparency, door with cutouts (small blocks on the top) and finally the smallest plain rectangle. This then gets glued behind the large white cutout doorway, like this...


Center the door on the front of the matchbox sleeve and wrap the paper around the box. You will need to trim the ends as I've left loads of excess... just in case. Finally, I've added a sliver of gold trim for the mail slot, and a tiny piece of bent wire for the knocker. I've added trim along the top and inked the bottom edge to give a more finished look.


You might notice that my door looks wet. To hide any white paper edges that might be visible, I've given the door a wash of black paint.

Let your exterior dry and move on to the inside!

Begin by lining the inside drawer with black paper, trimming away the excess.


Next cut out the interior fireplace wall and fold it along the lines like this...


It really helps if you have a score board or bone folder. If not, GENTLY score with a sharp blade along the fold lines and fold... if you don't go too deep with the blade you should have nice crisp folded edges.


Insert the two bookshelf strips into the valleys then...


... affix your folded piece into your matchbook drawer like this. If you have trouble with your paper cracking, you can give a wash of very thin paint to give an aged look and camouflage the cracking.


Add the lower bookshelf inserts. While they are drying, you can paint/stain a matchstick a woody sort of colour and chop it into bits for your fireplace mantle.


As those little pieces dry, paint/stain a coffee stir stick and cut it into small pieces to use as shelves. **These sticks are great for crafting. They are much easier to cut than Popsicle sticks and not nearly as thick. If you can't find them in a craft shop, definitely swipe a few next time you see them in a cafe!


Put a tiny dab or two of white glue along three edges of your little 'shelves' and push them into place. While waiting for them to dry, lets make our teeny weeny books. Start with a long, very narrow slip of paper (about 1/8th of an inch).


Cover both sides with a thin layer of glue and accordion fold then press.


Don't worry about being perfect. You want a little variation so that the edge looks like a pile of books.


Using different weights, lengths and colours will give a nice varied look to your library. Rub a little brown or black paint along 'spine' edge to add depth. Put a little dab of glue on the bottom of your book stacks and push them onto the tiny shelves. Add tiny stacks of paper too.


Finally, for the mirror above the mantle I've simply cut a tiny square of tin foil and glued it in place.


All that's left is to wait for that bad boy to dry and you've got your own little 221B Baker Street to fit inside your pocket and carry with you all day long.

Smmoooches to you, and thanks for being so nice :) xoxo
Thursday, December 12, 2013

12 Days of Christmas Graphic 45 Christmas Cracker!

Just in case you haven't noticed Graphic 45 has been hosting the most amazing 12 Days of Christmas event. There's a boatload of serious eye candy on their blog so you should run right over with a napkin for any drooly accidents. AND because they are the most generous crafty bunch ever... check out the prize pack you could win just by leaving a comment on the Graphic 45 blog! A winner will be announced tomorrow so hurry over.

Now, I happened to be given the 12th day of celebrations and here is my little contribution....

We have a combined Christmas in my household, celebrating both my husbands Italian roots and my British background. One of the Brit traditions we always include is the Christmas Cracker. Just before dinner, guests grasp the ends and pull apart these little treats, a small snap inside ‘CRACKS!’ as it breaks open. Inside is a paper crown to be worn during the feast, a joke or motto, and a small treat, gift or trinket.


Graphic45_ 12 Days of Christmas_Cracker_Crown_Nichola Battilana_gift, tutorial, holiday,


Want to make your own? Here's the supply list:


Cracker snap (I purchased mine from Michaels’s 12 for under $3)

Tissue Paper

Double Sided Tape


• Botanica Minis in Cranberry/Amber/Orange

• Velvet Hydrangea leaves

Trinkets and treats for inside the cracker.


And here is how to create your very own Traditional English Christmas Cracker.


Tutorial:


Begin by creating the paper crown. The crown should be quite simple and not heavily embellished as it will be rolled up. Create your own version or use THIS .template


I’ve cut the two pieces from the template from 12 Days of Christmas. **NOTE the template only measures 11” across. Clip or incorporate the extra 1” however you see fit.


Graphic45_12DaysofChristmas_Cracker_Crown_NBattilana_1


Use some double sided tape to adhere the layers together. Take a 28” length of coordinating ribbon and affix it with double sided tape to the crown, adhere the middle of the ribbon with the middle front of the crown. The extra length at the sides will be used to tie the paper crown to your head.


Graphic45_12DaysofChristmas_Cracker_Crown_NBattilana_3


I lightly embellish with some dots from the 12 Days of Christmas Banners and a festive 12 Days of Christmas Sticker. DO NOT over embellish.


Now we move on to creating the actual cracker. Begin by cutting two pieces of coordinating paper into 5” x 6” rectangles.


Graphic45_12DaysofChristmas_Cracker_Crown_NBattilana_5


I’m going to use the piece from the 12 Days of Christmas 6x6 Patterns & Solids Pad for my inner tube. I place a double width of 2 sided tape down the length of the short edge of the paper. I want this inside tube to be slightly smaller than the outsider one.


Graphic45_12DaysofChristmas_Cracker_Crown_NBattilana_6


With the inner tube now created, I roll my paper crown tight enough to fit inside. I can also place any other treats, jokes or small items inside at this point. (Psst! If you have trouble keeping them from falling out, you can sneak them in later!)


Graphic45_12DaysofChristmas_Cracker_Crown_NBattilana_7


Using a small piece of tape (or hot glue, or any other adhesive) tack a snap into place. This will help to keep it in place when it is pulled apart. Do not affix it in the centre, where the snappy bit is.


Graphic45_12DaysofChristmas_Cracker_Crown_NBattilana_8


By bending the strip like the photo below, you further help the snap to stay in place.


Graphic45_12DaysofChristmas_Cracker_Crown_NBattilana_9


I fold a standard piece of tissue paper in half and tightly roll it around my tube. Don’t worry about the excess width, we’ll need it. Tack in place with a tiny bit of hot glue or double sided tape.


Graphic45_12DaysofChristmas_Cracker_Crown_NBattilana_10


 Try to avoid squishing the ends as you wrap the second piece of 5” x 6” paper around the outside. Align this outer roll with the inside one.


Graphic45_12DaysofChristmas_Cracker_Crown_NBattilana_11


You should have something that looks like this...


Graphic45_12DaysofChristmas_Cracker_Crown_NBattilana_12


At this point I usually trim about 1” from either end of the tissue. Making sure the the ends are neat and tidy.


To create clean, crisp rolls at the end I make an extra tube that is slightly smaller than my cracker. This doesn’t have to be pretty as it is going to be my rolling tool.


Graphic45_12DaysofChristmas_Cracker_Crown_NBattilana_13


Insert the roll tool inside the end of the cracker. You’ll want to leave about 1-2” of space between the end of the tool and the edge of the crackers tube.


Graphic45_12DaysofChristmas_Cracker_Crown_NBattilana_14


Firmly twist until you have a nice tight seal and a neatly rolled end. Peek inside and you should see the end of the snap poking out of the centre of the twist.


Graphic45_12DaysofChristmas_Cracker_Crown_NBattilana_15


To ensure the twist does not unfurl, tie a small piece of ribbon to hold everything in place.


Graphic45_12DaysofChristmas_Cracker_Crown_NBattilana_16


If you were having trouble keeping your treats inside the cracker, you can now sneak them inside by pushing them in the open end before repeating the same twisting technique to seal the opposite side.


The final step is to embellish the exterior. Use coordinating ribbons, and tags, Fussy cut flowers and lords-a-leapin’. I’ve added a decorative brad and some beautiful flowers and leaves from Petaloo.


Graphic45_12DaysofChristmas_Cracker_Crown_NBattilana_17(1)


When you’re setting your Christmas table, place one cracker on each plate and have guests pull them apart before the feasting begins. And make certain that everyone wears their silly paper hats… they make Christmas merry and jolly indeed!

Tuesday, December 03, 2013

Coffee Filter Roses - How to!

Last week I posted this photo of the coffee filter roses that are on one of my large mixed media canvas' pieces.


A few people asked for a tutorial... and because I loves ya I'm happy to oblige.


Friday, November 29, 2013

Family Friendly Matchbox Town with Tutorial

Graphic 45 asked me to create a family friendly beginner project, so I came up with this super cute little matchbox town. I've kept little fingers in mind for this project so that everyone can play along.


My son loves to create with match boxes. Their size is comfortable for little hands. One of these little buildings can be created quickly, a whole village created in an afternoon. It’s also a great group project, each person contributing a little building of their own. 

I create regularly with children and know how innovative and imaginative they can be. Use this tutorial as a guideline. Be sure to give little helpers assistance but let them do what they do best - create! If you’re a bit of a fuss pot (like me!) offer up items from one collection and everything will match fine and dandy.

Here is the supply list: 
Standard size matchboxes (without matches!)
Tacky Glue
Scor Tape
Black ink marker/pen
Ink pad


Graphic45_12DaysofChristmas_holiday_town_NBattilana_TUTE1of6


1. Gather all of your materials! Here I’m using paper, tags, stickers and banners from the Twelve Days of Christmas collection. 


Graphic45_12DaysofChristmas_holiday_town_NBattilana_TUTE2of6

 2. Choose the back ground colour of your building and cut a strip of paper the same height as your matchbox (mine was 2.1”) then wrap the paper around the outside sleeve of the matchbox and affix it into place. It’s a good idea to make the paper wider for younger children, to give them some wiggle room, then trim away the excess.


Graphic45_12DaysofChristmas_holiday_town_NBattilana_TUTE3of6


3. Select a piece from the bunting sheet for the door, ink the edges if you like, then push a small brad through to create a door knob. I sketched three small windows and cut them out, as well as three small rectangles for window sills. **If you are working with very small children you might consider preparing windows ahead of time so that they can focus on assembly.


Graphic45_12DaysofChristmas_holiday_town_NBattilana_TUTE4of6


 4. Glue the door and windows into place. I like to ink all of the edges. I think it makes the pieces ‘pop’ and adds to the sketchy charm of the pieces.


Graphic45_12DaysofChristmas_holiday_town_NBattilana_TUTE5of6
 

5. Add finishing touches like Dresden trims and stickers.


Graphic45_12DaysofChristmas_holiday_town_NBattilana_TUTE6of6


For variation stack boxes together, creating fatter buildings with bundles of two or more boxes. One lonely building isn’t very impressive so make a whole holiday village perfect for imaginative holiday play or hiding little sweets and charms inside.


Hop over to the Graphic 45 blog for more photos of this project and LOADS of other beautiful papery eye-candy.