Showing posts with label how to. Show all posts

Thursday, November 09, 2017

MOTHER EFFIN' SNOWBALLS! with tutorial

Today was supposed to be the first snow of the season. Because it's daylight savings and now dark at 2 in the afternoon (not really, but it feels like it) I have no idea if it actually did snow today BUT there's these dudes. The yearly Cheeky Snowballs.

Cheeky Snowball Ornaments with Tutorial - Nichola Battilana

I've been making these guys for nearly 10 years. TEN FREAKING YEARS! They started out as emotional snowballs and transformed into the cheeky variety.

Cheeky Snowball Ornaments with Tutorial - Nichola Battilana

This year I've decided to do a tutorial so people can create their own. The video is available HERE on my YouTube channel. If you create your own, please share on social media and tag me. Seriously, it's appreciated and I totally want to see what you make.

Cheeky Snowball Ornaments with Tutorial - Nichola Battilana

A couple of things I KNOW are going to come up.

1. Can I use a different clay?  
I REALLY recommend you use Creative Paperclay for this project. It's super light weight so your ornament won't drag down the Xmas tree branches. It gives a beautiful finish. There may be a bit of a learning curve if you're used to other materials... but  In my opinion it's absolutely worth $ and time. 

2. It's taking SOOO LONG! Can I speed up the drying?
I prefer to let things dry naturally. There seems to be less warping, and cracking when I let things take their course. Plus, do you really want to put styrofoam in the oven? Nah.

3. Clear glitter?
Never mind fancy stuff, head over to the kids aisle in Micheal's and grab a big ole jar of Creatology "Crystal Clear" glitter. It looks like this...
What is most important is that your glitter of choice is NOT SOLID WHITE. The flecks in this product are transparent. This is important. You want a product that will allow the underlying paint colour to show through. Just look for something transparent or translucent.

4. I can't find tiny eye hooks!
I use teeny tiny eye hooks for hanging on my snowballs. If you can't find any small enough, try the jewellry section of the craft store and look for findings like these Tiny Silver Eye Pins*. Poke a hole with a straight pin, add a dab of glue, and slide it in. They'll work in a pinch.

5. What kind of glue do you use?
I'm using Elmer's School Glue in the tutorial. The better the quality glue you use (i.e. Aleene's Tacky Glue) the more glitter will remain on your snowballs in the long run.

6. Can I (insert other subsitution/method/madness)?
Part of the joy of creating is experimentation. Have an idea? Give it a try! Maybe it'll turn out a bazillion times better than my snow dudes!


Cheeky Snowball Ornaments with Tutorial - Nichola Battilana

THE LIST OF SUPPLIES!
- styrofoam balls (2" - 2.5" makes a nice size)
- Creative Paperclay
- white glue
- clear/transparent/translucent glitter
- pink, black paint
- mini eyehooks
- fake snow
- clear gloss medium like Diamond Glaze, Glossy Accents or Dimensional Magic

Sunday, July 23, 2017

Wild Faerie Wands

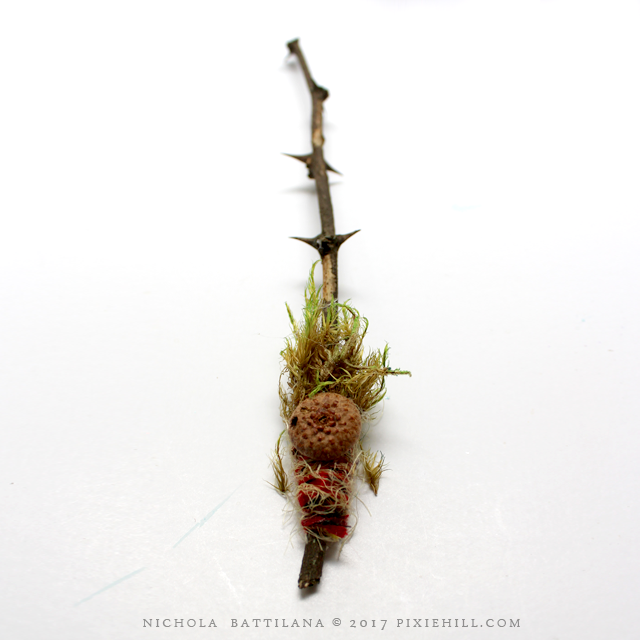
Not all sticks are plain old twigs. Some are faerie wands hidden in plain sight! (I've mentioned this before)

I happened across a fair number of wands this weekend. I'm sure the weather has the wee folk a little more fumbly and droppity than usual.

Wild Faerie Wands - Nichola Battilana pixiehill.com

With the plethora of wands scattered about, I thought I'd share some thoughts on embellishing wild faerie wands.

Wild Faerie Wands - Nichola Battilana pixiehill.com

There are a number of things to consider when encouraging the wand to reveal it's magical nature. 

The type of tree the wand is from is the biggest determining factor to the type of magic that the wand will best preform. Here are some simple examples:

Locust (above): protection
Apple: fertility
Oak: truth and knowledge
Willow: emotion
Ash: wisdom
Cedar: cleansing

A quick google search for "magical properties of wood" will lead you to a wealth of information on the subject.

Wild Faerie Wands - Nichola Battilana pixiehill.com

Charms can add to the magical purpose too! A key might be helpful for magic that opens the way to you. I think that acorn caps, buttons and found objects hold a great deal of magic in them. You could also sew beads and gems to those magical wands.

Wild Faerie Wands - Nichola Battilana pixiehill.com

You might carve and shape your wand. Whittle a point, or carve patterns or symbols into the bark.

Wild Faerie Wands - Nichola Battilana pixiehill.com

Colour can add to the magic too! Again, a little research will provide you with a lot of information on colour and magical associations... but don't neglect your intuition*. Faeries in your particular region may have a very different opinion of the colour yellow than the faeries in my back garden.

For a little more 'how-to' I've made a little video. Hop over to youtube and give it a gander...


*I have always read that faeries love milk. That leaving a small dish would be an appropriate offering. Mine HATE milk! The last time I left them some they turned all the milk in the house sour. So trust your experience over what some silly website says... even this one.


Friday, September 02, 2016

Wee Winged Shrines with Tutorial

Can you believe it's the first Friday of September?! (What happened to the summer? Seriously, where'd it go?) The good news is that means it's tutorial day and I have a a fun and fantastical project for you. 

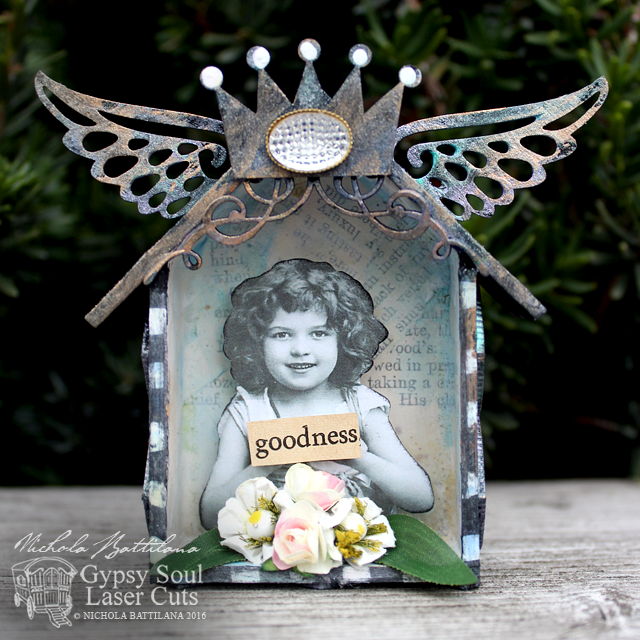
This month I wanted to encourage the spreading of good will, kindness and nice surprises. These little winged shrines are just the ticket! They're pretty easy to put together, and you can get a bit smooshy and sloppy in your mess making and have a lot of fun with them.

Wee Winged Goodness Shrines with Tutorial - Nichola Battilana

Each of these sweet things uses a Mini House Shadowbox as a base, and Victorian Corners to finish off the peak.

Wee Winged Goodness Shrines with Tutorial - Nichola Battilana

Add some wings from the Steampunk Shape Set and then whatever embellishments your heart desires. Buttons, little paper flowers, charms... you name it!

Wee Winged Goodness Shrines with Tutorial - Nichola Battilana

The images I've chosen were all selected from thegraphicsfairy.com. She has a lovely selection of images that are free to use. The sentiments are just snipped from discarded books, but you could easily write your own or use a commercial sentiment.

Wee Winged Goodness Shrines with Tutorial - Nichola Battilana

I think these are absolutely the sweetest and I'm sure that given as a gift, especially a surprise for no reason at all, they'd certainly help to spread cheer and goodness.

To help you make your own, here's how I put these cuties together


And here are all of the supplies I used in the pieces above.
Misc. decorative bits & bobs and embellishments
Acrylic craft paint
Instant glue

Monday, June 06, 2016

A Tin Can Kingdom

I have a new project.

It's cute. Really cute.

AND there's a tutorial.

Are you ready?

I think you're going to like this.

Recycled Tin Castle Towers with tutorial - Nichola Battilana pixiehill.com

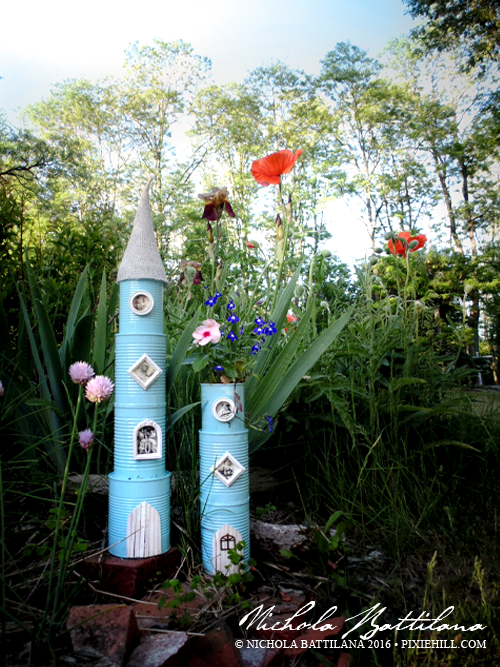
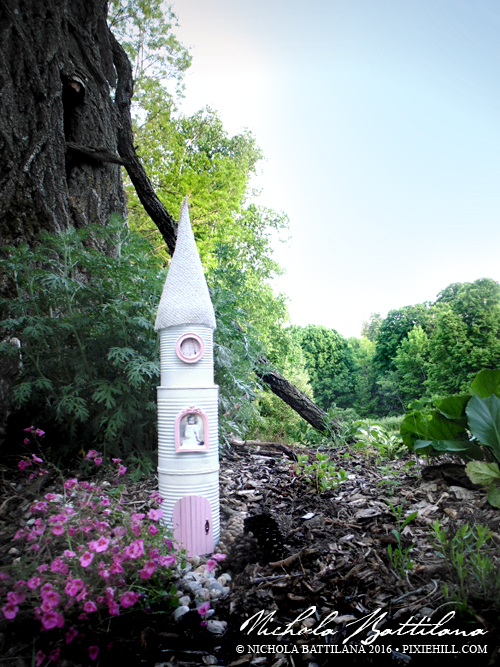
Can castles! Tin turrets! Recycled fairy garden towers!

Recycled Tin Castle Towers with tutorial - Nichola Battilana pixiehill.com

The biggest struggles setting up the summer fairy garden have been the battles with the weather and the critters. This year I was determined to come up with something a little more sturdy to survive the summer and the squirrels. These are the result of all that thinkin'.

Recycled Tin Castle Towers with tutorial - Nichola Battilana pixiehill.com

I'm kinda in love with them and want to make them in all the colours to dot around my garden. Just look at those blue beauties next to the tall poppies.

Recycled Tin Castle Towers with tutorial - Nichola Battilana pixiehill.com

Some are topped with roof top gardens (which fairies love btw). Others have really simple pointy cone roofs which are just a bit of burlap sewn into a cone shape, then spray painted. The paint adds some stiffness and helps to prevent fraying. Pretty sure that any stiff fabric would do. My initial thought was to use reusable grocery bags (reusing the reusable!) but the burlap was on hand so I'll do that next time.

Recycled Tin Castle Towers with tutorial - Nichola Battilana pixiehill.com

And speaking of 'next time'... 

I've made a video tutorial for the basic version of this project so if you haven't already, hop over and subscribe to my Youtube channel.

Recycled Tin Castle Towers with tutorial - Nichola Battilana pixiehill.com

The video tutorial is below, and below that you'll find the supply round-up. If you're inspired to make your own tin can kingdom and show it off, tag me in your post! I'd love to see what you made. Want to recreate this project for your own blog? Have at it! Just be sure to link back here please-and-thank-you. The credit for the inspiration is appreciated, and it encourages me to share more free projects.


Here's everything you'll need:

Tin cans of all sizes and shapes
Silicone
Spray paint (I recommend using a paint w/ primer)
Bits and bobs for windows & doors

Cardboard
Stir sticks
Burlap
Stones
Soil
Plants and moss

*GooGone for removing label glue from tins
*Nail polish remover will remove SOME ink stamps

Friday, April 01, 2016

The Goblin Throne

Spring is finally creeping into our neck of the woods. My faithful furry buddy and I have been taking advantage of the nice weather, wandering through the dried grasses and meandering next to the little stream that edges our property.

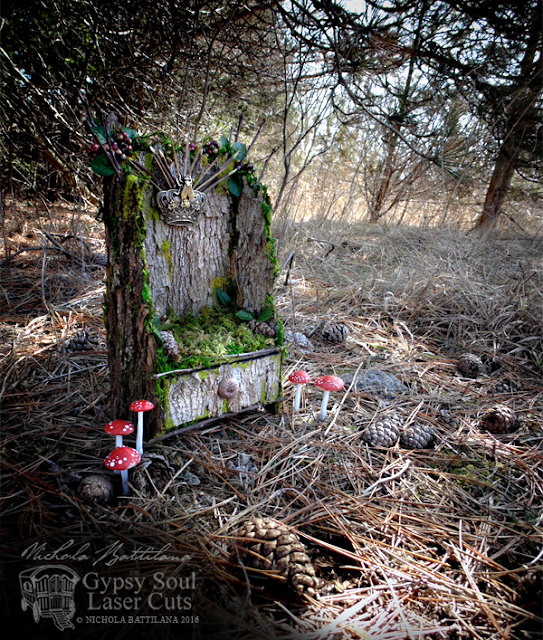
The Goblin Throne and tutorial - Nichola Battilana

While these conditions are ideal for fairy sightings, it was a goblin we first encountered on our stroll the other day. Normally I don't mix with goblins (I don't have anything against them in particular, but avoiding them seems like the best practice) but we regarded each other respectfully and engaged in a little chatter.

The Goblin Throne and tutorial - Nichola Battilana

He shared his ideas with me for a sort of goblin throne. I agreed to make one, in exchange for permission to share the project with others. He grumbled that he didn't much care, so long as the throne was made, and here we are.

The Goblin Throne and tutorial - Nichola Battilana

There were four elements of utmost importance to be included:

1) It must not look out of place in the goblins den.

2) The seat must be well cushioned, because even goblins do not like sore bottoms.

3) It should be embellished with poisoned berries and pointy things. (Note: The design didn't have to BE dangerous, but if it looked as though you might prick your finger that would be a very good thing indeed. And poisoned berries because goblins like to nibble throughout the day.)
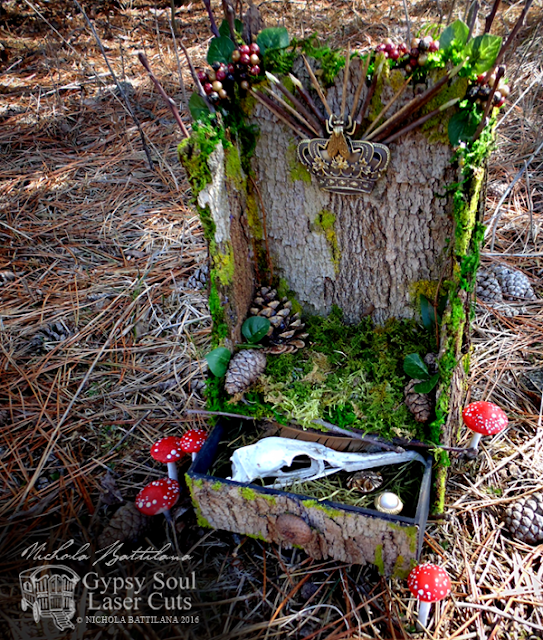
4) It must contain a secret chamber for goblin treasures.

The Goblin Throne and tutorial - Nichola Battilana

As soon as he mentioned the secret chamber my mind turned to this Trinket Drawer Stand and I gathered up some bark and moss and set to work.

This isn't a complicated project, and the supplies are few, but our goblin acquaintance was well pleased with the results. If goblins aren't your cup-of-tea, add flowers rather than spikes, and hide jelly beans in the secret drawer to make a regal chair for a fairy queen.

Here's the story of the Goblin Throne and how I put it together.


And here is a list of all the goods used:
Trinket Drawer Stand
Black acrylic paint
Moss
Bark
Pinecones
Acorns
Faux berries and leaves
Sticks and twigs
Toothpicks
Large metal crown
Metal bee
FlowerSoft in "Moss" and "Sage"
LOADS of glue

The Goblin Throne and tutorial - Nichola Battilana

Friday, November 06, 2015

Winter Shrine Tutorial

First Friday of the month! That means a tutorial for a glittery magical something for GinasDesigns.net. Jack Frost and the holiday season are on the way but there's loads of time before the holiday madness to get your supplies for this super cute project. 


This snowy winter wonderland shrine was created using Gina's House Shrine Box. I really and truly love that little shrine house. It's such a great piece to apply your own style to. 

Below you can just peek at the roof texture. This is achieved by layering pieces from the Cardstock Doily Set Intricates. The result is really cool and I show exactly how to do it in the video tutorial that goes along with this project.


The shrine is embellished with pieces from the Snowflake Shape Set. They've been painted and glitterfied and look oh, so sweet. Alternatively, you could use the Winter Shape Set which also includes snowmen, icicles and other wintry icons.


Inside my wee shrine I've added some bottle brush trees and a carpet of moss. Fill that space with whatever you like! A little Santa figure or snow capped house would be adorable. 


Being a total glitter fiend, I used a lot of the sparkly stuff on this project. Feel free to leave it out if you like, but I think that it adds and special icy touch. You might think that white glitter would be ideal for a winter landscape, but I recommend using clear glitter for a snowy look. 


What do you say? Want to make your own? You can find the full video tutorial HERE.

And here are all the supplies you'll need:

Wallflower 12x12 Paper Stash (or paper of choice)
Clear glitter
Light blue ultra fine glitter
White acrylic paint
Glue
Moss
A piece of foam
Bottle brush trees

*Note: the shrine box used in the tutorial is slightly larger than the one listed on the Gina's site. If you really, really, really, truly, must have the bigger version, please contact Gina's for pricing.

Thursday, April 16, 2015

Because you asked so nicely...

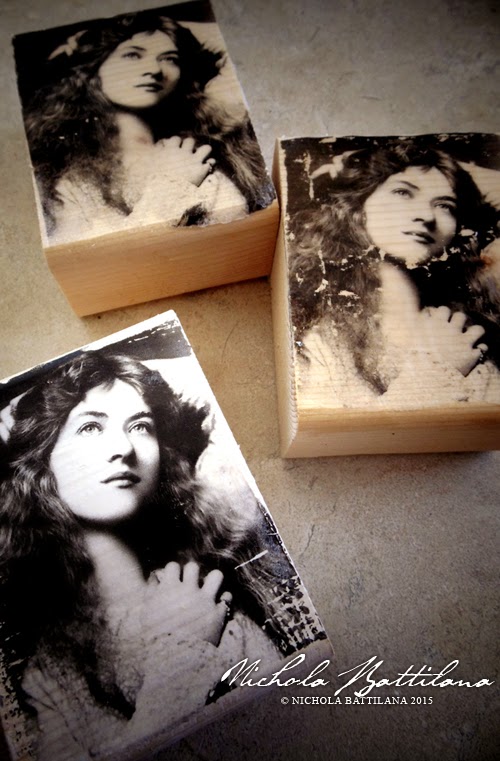
There were a number of requests for an image transfer tutorial after posting my Petaloo project the other day. There are LOADS of videos and online tutorials available demonstrating this technique. I learned by watching others and you should absolutely view a number of tutorials, get as much information as you can, then experiment for yourself.

Image transfer tutorial and comparison with Gel Medium and Mod Podge - Nichola Battilana

I've done a fair bit of my own experimenting over the past week and put together a quick video tutorial with a basic 'how-to', a couple of variations, and the results using different materials.


Here are a few points I didn't include (err... yes, I forgot) but are worth a mention...

Paint
In my demonstration I show an example where a wood block is primed with a wash of white paint before applying the transfer. I think this looks fab and provides a solid base, creating greater contrast in the finished image. Keep in mind that you will be saturating and rubbing your piece. Will your paint be able to hold up or rub off and take the transfer with it? Just some things to keep in mind.

Heat
Some people say that heat may help the transfer. You can create a weak transfer with heat alone after all. When I attempted to speed up the drying process with a heat gun the results were not pretty. I would even go so far as to recommend avoiding hot water when removing the paper.

Patience
It really does pay to wait. I know others have had success lifting the paper soon after application but in my trials I found that the longer I waited wait, the stronger the transfer was. Let that sucker dry!

More Patience
Let your piece dry before applying a top coat or sealant. Some of those paper fibers can be pretty sneaky! By allowing the piece to dry you can spot those smokey, foggy areas where some paper residue has been missed. Simply re-wet that area and rub the paper away. When satisfied with your piece after it has dried apply a fancy pants top coat or simply apply a layer of gel medium or Mod Podge.

Practice
In this case practice doesn't exactly make perfect, but you will learn a lot! Don't expect perfection. If you are okay with some distressing and having fun with your mess making, the entire experience and results will be much more satisfying.

The tute supply list: Golden Heavy Gel (matte), Mod Podge (matte), wood bock, laser print of vintage image from thegraphicsfairy.com, water, paintbrush

**Mod Podge does have a product specifically for image transfers. It was unavailable in my area but it does have good reviews.**

Thursday, October 02, 2014

Little Altered Art Frames with Graphic 45

It never fails. As soon as I see a cool altered object project, the object in question becomes impossible to find.


While looking for something entirely different the other week, I saw bag of small frames at a very reasonable price. I snagged them and set to work creating a pretty little set of altered art. 


With a little love, Come Away with Me, and Shabby Chic Staples, I've turned those sad little frames into tiny treasures. And you can too!  I've created this snapguide to show you how :) 

Check out How to Make Shabby Chic Altered Art Frames by Nichola Battilana on Snapguide.

How fun would they be as party favours, small thank-you gifts, or abandoned as random acts of kindness for strangers to find? Come on... I know you can do this!


My supply list:

P.S. You can hop over the Graphic 45 blog for even more pictures AND take a gander at a super fun project by the amazing, talented and all around lovely Rhea Freitag :)

Sunday, August 31, 2014

Two quick tutes

It's nearing the first of the month, which means I'm swamped with looming deadlines and sitting on a pile of projects I can't reveal just yet. What I can show you are a couple of tutorials you might find helpful.

First, I've put together this snapguide showing how I assemble the flower die-cut accessories from Graphic 45 for pretty dimensional flowers.


And secondly, a guide on how to achieve a crackle paint finish... without crackle paint finish. I'm certain many of you have seen this technique, it certainly isn't my original invention, but for those who haven't it's a nice little trick to file away for future use.


Hope you're enjoying the long weekend! 

xoxo

Tuesday, August 19, 2014

Botanical Tea Guest Book

It used to be that weddings were ginormous events and huge tomes with pages and pages were necessary for all of the well wishes from wedding guests. Today however weddings are often smaller, more intimate affairs and perhaps a little handmade book would be more fitting. 


My cousin and his beautious bride got hitched in Vegas not long ago and I created this little book made with Graphic 45's Botanitcal Tea and Large Staples Tags to toss into their suitcase and collect congratulations from their guests.


It's a pretty little thing, a handmade something, to remind them of their gorgeous day.


Want to make your own special keepsake book? Here's the supply list:

Ribbon
Thread/Yarn
Paper

And here's how to put it all together...

Graphic45_NBattilana_BotanicalTea_Guestbook_a

Step One:  Cut several sheets of paper to 3.9” x 8”, the same size as the large tags. You could use regular bond (printer) paper or splurge and use better quality for something a little more special. Use a corner punch to round the edges of your paper so that they align perfectly with the tag edges.
Graphic45_NBattilana_BotanicalTea_Guestbook_b

Step Two: On ONE of the large tags, create a score line at 1.2” from the bottom, short edge.

Graphic45_NBattilana_BotanicalTea_Guestbook_c

Step Three: Cut four pieces of Graphic 45 paper to cover your tags. (I’ve chosen Spring Duet for the outside covers, and Fauna to line the inside.) At 1 ⅛” from the short bottom edge, cut a 1/4” strip from the papers that will embellish the front and back of the cover tag.

Affix your papers to the tags. Leave the fold line free on the front cover like so:


Graphic45_NBattilana_BotanicalTea_Guestbook_e

Step Four: Wrap a length of Washi Tape around the front cover where the exposed fold line is located and burnish into place.
Graphic45_NBattilana_BotanicalTea_Guestbook_g

Step Five: Puncture small holes in your covers and papers using a small punch, awl or nail. Mine are located .5” from the edge and there are 5 holes evenly spaced apart.
Graphic45_NBattilana_BotanicalTea_Guestbook_h

Step Six: Bind all of the pages together using thread, ribbon or yarn. If you look up Japanese Stab Binding, there are many tutorials available demonstrating this very simple binding technique in a variety of patterns.

Graphic45_NBattilana_BotanicalTea_Guestbook_i

All of these steps will help your book to lay flat when opened, avoid cracking paper, and provide stability to your fold line.

Graphic45_NBattilana_BotanicalTea_Guestbook_j

Step Seven: Now to embellish your cover! I begin with Botanical Tea Stickers...

Graphic45_NBattilana_BotanicalTea_Guestbook_k

… add some Botanical Tea Banners ...

Graphic45_NBattilana_BotanicalTea_Guestbook_l

… and a fussy cut butterfly.

Graphic45_NBattilana_BotanicalTea_Guestbook_m

Step Eight: Finally I add a Botanical Tea Chipboard tag, and Shabby Chic Ornate Metal Key with a length of pretty ribbon pulled through the tag grommet holes and finish the whole thing off with the lucky couple’s initials using Botanical Tea Alphabet Stickers.

Graphic45_NBattilana_BotanicalTea_Guestbook_5of7