Showing posts with label tutorial. Show all posts

Monday, July 29, 2019

Potages Cauldron Shop

I'm embracing my inner Potterhead once again. This time I've created a miniature version of "Potages" the cauldron shop located on the North Side, Diagon Alley, in the Harry Potter universe.


I've used a 7 by 7 Corner Room Box as the base for my little shop. I've also added a
Double Window Ornate on both the inside and exterior of the 'building'.


The signage are printouts pasted to thick board with small brad heads added to the corners.


Simple trims, which are just various sized strips of card cut from a cereal box, are a super easy way to create a finished custom look.


Wooden floor was created with coffee stir sticks, stained with washes of acrylic paint. And how perfect is that wallpaper with it's pattern of tiny spiders?! That's "It's Elementary" from Graphic 45s Master Detective Collection. Scrapbook paper makes excellent room box wallpaper.


To fill my shop, all sorts of little cauldrons. I even designed some products for proper cauldron upkeep like wax, cleaner and polish. To be honest, those little packages put me almost a whole day behind... totally worth it :P You can download the collage sheet to create these at the bottom of this post.


Want to create your own Potages? Or maybe a shop from your own imagination?! I have a video walk-through for creating the basics of this room that might help you in making your own masterpiece. You can find it HERE


Finally, here are supplies used in my wee cauldron shoppe:
(Pssst... if you're in the UK you can order from gslcutsuk.com)
Metal Cauldron or Pot

"It's Elementary" Graphic 45, Master Detective Collection

cereal box card
thick card
wooden stir sticks
acrylic paint
drywall compound
small metal brads
transparency paper
glue, glue, glue
Cauldron Shop Printable (ta dahhhh, see below)


Have fun!


Tuesday, April 16, 2019

A Full Moon Mobile

Some people love the sea... I love the night sky and light of the moon. I've made myself a little mobile so that I might have a slice of that celestial magic inside.


I'm really pleased with how it came out and it was really quite simple. I even have a tutorial for you below, but first a  couple of notes about this project:

• Don't fret if you can't find the wooden shapes I used. You can absolutely cut your own from cardboard

• Really, really, really play around with balance to find where the best placement of your stars and moon, and also where to place the hanging wire.

• I 100% DO NOT recommend this project for above a baby crib. Bark, fishing line, glitter and tiny stars that might come loose may all pose a danger to little ones. Don't risk it!
• I only decorated the front of the pieces because I'll be hanging my mobile against a wall. If you want to suspend yours you may want to decorate both sides of your stars and moon.


Okay? Okay.

Here are all the things I used:
Wooden circle and stars
Old sheet music
Glue
Acrylic Paint
Nail file
Glitter
Twig
Acrylic stars
Fishing line

And, finally, here's how it's made it:


If you make your own, please tag me when you're showing off. It really is the best compliment and it helps promote my little crafty mess making heaps and heaps. Plus, I just love to see what you're making ;)

NOW GO MAKE SOME MOON MAGIC!!!!

Friday, March 29, 2019

The Butterfly Conservatory for Gypsy Soul Laser Cuts

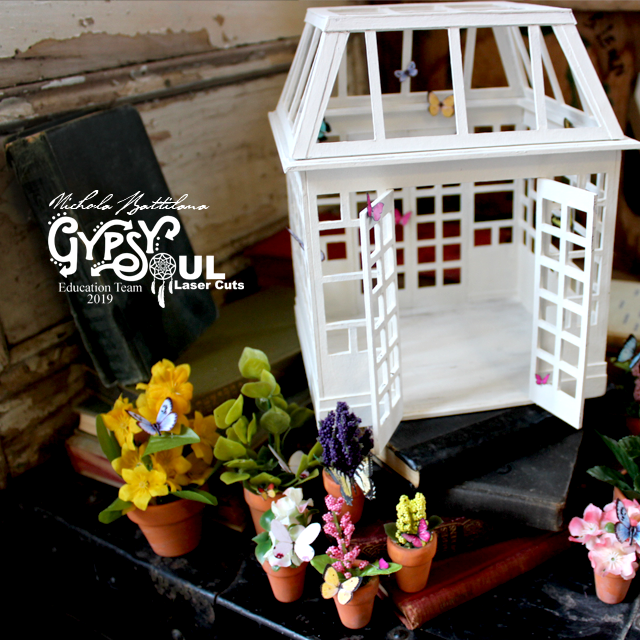
On my trip to London last year I made certain to time my visit with the butterfly exhibit at the Natural History Museum. I made it just in time, squeezing in on the afternoon of the very last day. It was magic. Then again, how could walking among butterflies not be?!

Small Conservatory - Butterfly House - gslcuts.com

This project, is a sort of homage to that memory. A pretty space filled with flowers and fluttery things.

Small Conservatory - Butterfly House - gslcuts.com

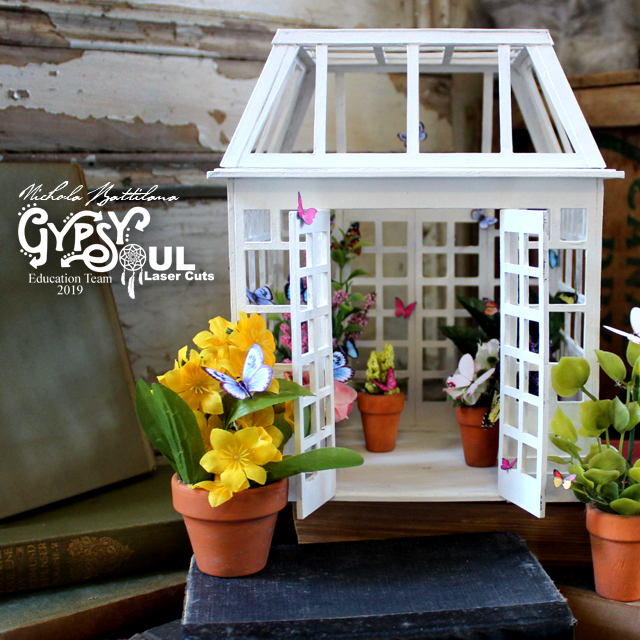
This project may take time, but it uses  only a handful of supplies. The structure is a Small Conservatory. That's it. I haven't added any fancy embellishments (but don't let that stop you from adding some dramatic flair!)

Small Conservatory - Butterfly House - gslcuts.com

Inside I've added miniature wooden pots packed with faux flowers and leaves. They aren't properly scaled and they don't even look like any particular sort of 'real' plants, but they give a nice floral feel and provide lots of texture.

Small Conservatory - Butterfly House - gslcuts.com

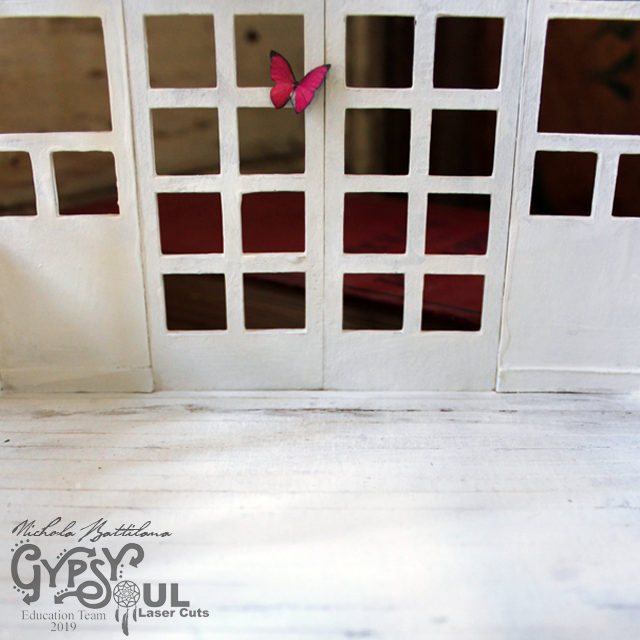
Those paper butterflies inside are all from my English Fairy Garden collage sheet. I printed it out at 50% to scale the butterflies down to a more appropriate size.

Small Conservatory - Butterfly House - gslcuts.com

I haven't glued any of the pots in place so that I can move those potted pretties around, and even change up the Small Conservatory completely if I want to!

Small Conservatory - Butterfly House - gslcuts.com

Besides paint and glue, the last supply I used was a plain sheet of cardboard. I've used strips to create the 'wood' floor and baseboards inside the conservatory.

Small Conservatory - Butterfly House - gslcuts.com

Outside, again, I used layered strips of plain card to create a subtle architectural element to the bottom of the structure. I also used the card on the roof of the building to hide the slot and tabs that hold the piece together.

Small Conservatory - Butterfly House - gslcuts.com

And that's it! Just those few little bits to make something quite pretty. If you'd like to see how I put this project together, follow along with this walkthrough video

Small Conservatory - Butterfly House - gslcuts.com

And here is your supply list:
Small Conservatory

Miniature plant pots
Faux flowers
English Fairy Garden collage sheet
Sheet of cardstock
White acrylic paint
Glue (white and hot glue)

Happy making!

Tuesday, March 19, 2019

Wee Floral Fairie Scene in a Tiny Tin with Fairie Dust from Graphic 45

If you follow me on Instagram, you'll know that I've been whining about being sick. Despite feeling like death on a stick, I've been really productive. Working has been a distraction from feeling terrible. (Don't worry, I'm feeling positively perky today.)

One of the things that popped off my work table was a collection of little fairy tins. 

There's not much to these cuties. They're made with "Fairie Dust", inexpensive clear topped tins, a whole lot of fussy cutting. 


I started by fiddling around with just one wee tin... then quickly went through the entire half dozen I had on hand.


I got so carried away I even made a tutorial so that you can join me in my madness. My voice is pathetic because I'm sick, and the lighting is horrendous because I really didn't plan on making a tutorial for these, but the How-To vid can be found over HERE.


You can absolutely make these with any tin or box. The tutorial gives a technique for covering an object with curved edges.


These are made with the "Fairie Dust" collection save for the wee yellow butterflies from "Flutter" and these Wee Wings Transparency


Want to make your own? Good! Here are all the bits you'll need:

Graphic 45 Fairie Dust
Graphic 45 Flutter
Wee Wings Transparency
Small metal tin
Good quality white glue (I use Aleene's tacky glue)
Hot glue
White acrylic paint
Adhesive foam squares
A pinch of glitter

And here's that tutorial link again... HERE.


And remember, if you're feeling inspired and make your own, please tag me! I really appreciate the shout out, and I absolutely love to see the things you make. xoxo


Tuesday, January 29, 2019

Sweet Winged Dressform

I've started this blog post a million times. Trying to come up with a good explanation, a reason for this project. The truth is, there is none. It's just a fun silly thing that happens to be pretty.


And you know, that's ok. Why does there need to be a reason to create something other than the urge to do so?!


 So I've made this pretty frock using a Dressform Hang Up as a base.


To it I've added a pair of wings from the Wings Assortment

And nestled a piece of the Victorian Corners 2 set onto the bodice (it fits just right!)


I've layered silk rose petals and tulle for the dress portion, simply hot gluing them in place. A bit of glitter, paper flowers and a heart embellishment and voila! you've got a sweet little something. 

If you need some guidance to create this piece, I have a video walkthrough HERE, but rest assured it's easy as can be.

Here are all the bits you'll need:

Dressform Hang Up
Wings Assortment
Faux Metal Number Plates 1 to 25
Victorian Corners 2


acrylic paint
paper flowers
silk flower petals
tulle
glitter


glue

Thursday, November 29, 2018

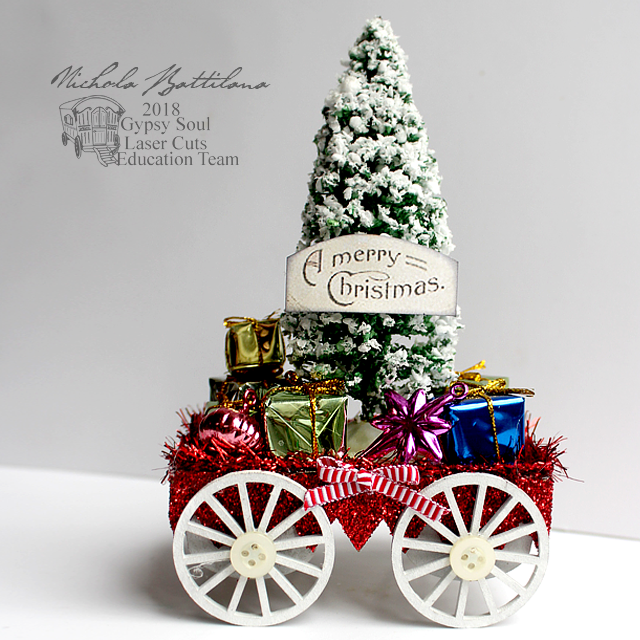
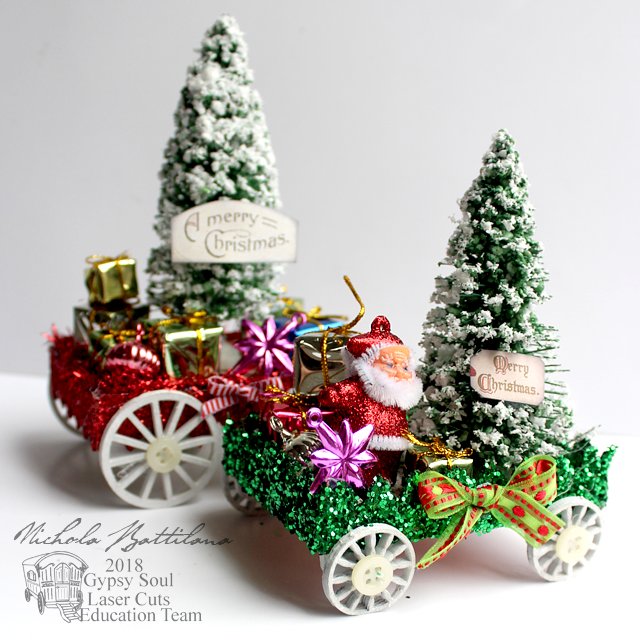
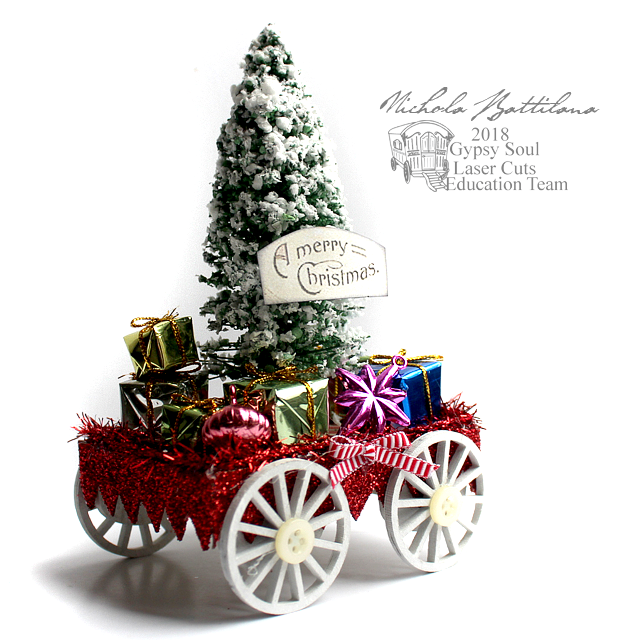
Jolly Little Christmas Floats with tutorial

My kid decided he was too old for trick-or-treating this year, but not too old for a Christmas parade. Before moving here I was never really into parades. Standing around in questionable weather? Nah, thanks. Discovering night parades swayed my grinchy mind. The lights! The magic! *swoon*

Little Christmas Floats - Nichola Battilana for gslcuts.com

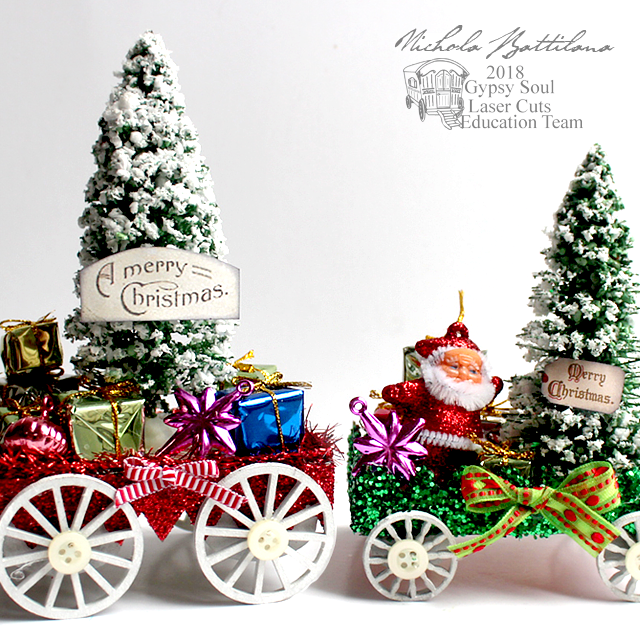
And while these wee things aren't all lit up (although you could absolutely add lights!) I'm smitten with the bright sparkly cheeriness of these wee floats.

Little Christmas Floats - Nichola Battilana for gslcuts.com

To make these little floats I simply added Wheels 1 inch Fancy and Wheels 1.5 inch Straight to Chunky ATC Blanks.

Little Christmas Floats - Nichola Battilana for gslcuts.com

Glittered Chipboard Shingles - Pointed added around the edges complete the base.

Little Christmas Floats - Nichola Battilana for gslcuts.com

Then it's just a matter of filling up those floats! I've used bottlebrush trees, miniature packages and decorations and a vintage looking Santa. All of those bits were bought in the holiday aisle at the discount shop.

Little Christmas Floats - Nichola Battilana for gslcuts.com

Cute. Easy. Inexpensive. Yes please!

Little Christmas Floats - Nichola Battilana for gslcuts.com

I have a little video to show you exactly how to put these pretty things together right HERE.

Little Christmas Floats - Nichola Battilana for gslcuts.com

I need to make a slew of these to create an entire holiday parade for my mantle!

Little Christmas Floats - Nichola Battilana for gslcuts.com

Want to make your own too? Here are the supplies I used:

Ribbon
Glitter
Holiday paper
Buttons
Bottlebrush trees
Tiny gift and ornament baubles
Plastic vintage looking Santas
White glue
Hot glue
Acrylic paint
Thin dowling or bamboo sticks

Monday, October 29, 2018

"The Mad Hatter's Secrets" Hidden Drawer Book Box with Tutorial

This is one of those projects that just kind of sprouted. All the supplies just kind of jumped up and shouted "ME! ME!". I'm glad they did because I'm smitten with this project.

Mad Hatters Secrets Hidden Drawer Book - Nichola Battilana


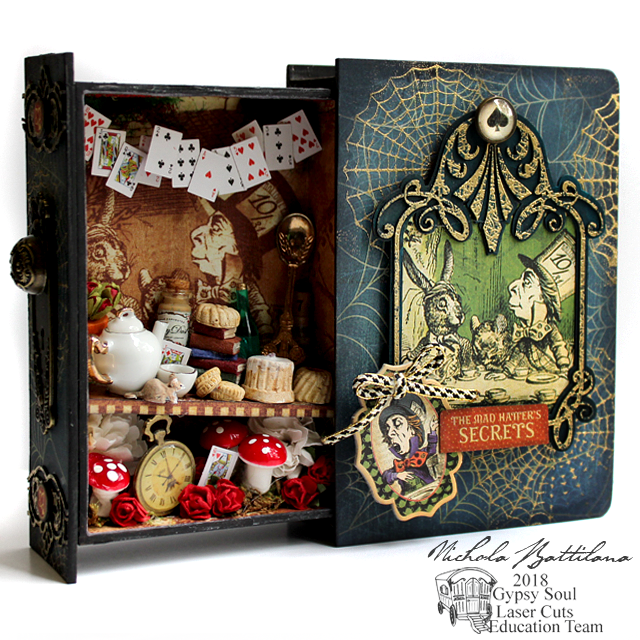
I've used the 6" Hidden Drawer Book Box as my base and then ran with the Mad Hatter theme from the Hallowe'en in Wonderland Deluxe Collectors Edition from Graphic 45.

I've repeated the cobweb theme of the scrapbook paper with a wed stamp and gold embossing powder.

Mad Hatters Secrets Hidden Drawer Book - Nichola Battilana

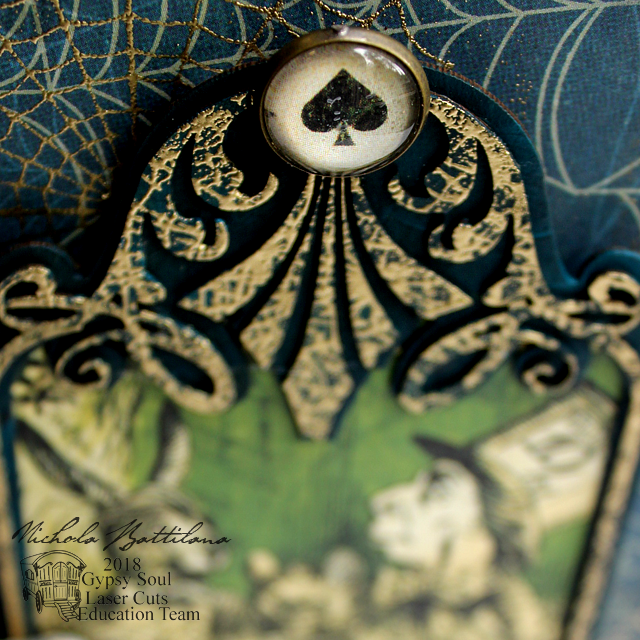
I used that same stamp, repeatedly, on a Layered Frame Aria then added a spade charm to the tippy top for some added interest.
Mad Hatters Secrets Hidden Drawer Book - Nichola Battilana

I used the same stamping and embossing technique for the top and bottom elements on the spine. I used a Deco Frame, then trimmed the elements I wanted to use.

Mad Hatters Secrets Hidden Drawer Book - Nichola Battilana

Also on the spine and cover, I've used more elements from Hallowe'en in Wonderland Deluxe Collectors Edition and added a Metal Door Plate and Knob.

Mad Hatters Secrets Hidden Drawer Book - Nichola Battilana

Inside, the Hatter's Tea Party! I really just sort went to town and filled the interior with suitable miniatures already in my stash including: a pocketwatch pendantminiature wine bottle, a dormouse, playing cards, cakes and cookies and more. 

Mad Hatters Secrets Hidden Drawer Book - Nichola Battilana

If you'd like to see the process of making this piece, take a gander over HERE for the video walkthrough.

And here is the list of supplies I used:
6" Hidden Drawer Book Box
Layered Frame Aria
Deco Frame
Web Stamp (available soon!)
Embossing powder
Acrylic paint
Hot glue and white glue
Foam squares
Bits and pieces for the interior

Thursday, October 25, 2018

Altoid Tin Altars #G45DarkSide

I was so excited to see this months Graphic 45 challenge: #G45DarkSide. This was just the prompt I needed to get to business on a project I’ve been thinking about for a long while.

Portable Altoid Tin Altar #G45DarkSide - Nichola Battilana

I’m a big fan of altering altoid tins. You can create these tins to hold just about anything. Create a fancy little sewing kit. Keep one in your car filled with emergency bits and bobs. You can fit a surprising amount in those little tins.

Portable Altoid Tin Altar #G45DarkSide - Nichola Battilana

I’ve created two #G45DarkSide tins here. One tin pairs papers from Communique—Deluxe Collector's Edition with brass Staples Decorative Hardware.

Portable Altoid Tin Altar #G45DarkSide - Nichola Battilana

Portable Altoid Tin Altar #G45DarkSide - Nichola Battilana

The other uses Floral Shoppe with shabby chic Staples Decorative Hardware

The tins contain a sort of storage space which, if careful, can fit a surprising amount of goodies!
Portable Altoid Tin Altar #G45DarkSide - Nichola Battilana

All of the items above fit comfortably in that trap-door space.

Portable Altoid Tin Altar #G45DarkSide - Nichola Battilana

My tins will be used as tiny portable travel altars. Each contains matches, a vile of herbs, incense, candles, gemstones, a tiny crystal ball, vessels for libations and offerings, magnetic images and more!

Portable Altoid Tin Altar #G45DarkSide - Nichola Battilana

But if altars aren’t your thing… no worries! The video tutorial I’ve created demonstrates how to cover an altoid style tin and create the trapdoor element inside. So take those instructions to create something that suits YOU.

Portable Altoid Tin Altar #G45DarkSide - Nichola Battilana

I'm smitten with my little altars but I totally encourage you to take this idea and run with it, making something filled with little things useful or treasured by you.

Supply List:

Antique Brass Metal Clock Keys
Antique Brass Ornate Metal Keys
Antique Brass Ornate Metal Key Holes
Shabby Chic Ornate Metal Key Holes
Antique Brass Stamped Metal Brads
Shabby Chic Ornate Metal Brads
Floral Shoppe
Communique—Deluxe Collector's Edition
Couture - Fabulous

Cardboard
Charms
Small wooden blocks
Glue
Black ink pad
Altoid style tin
Bits and bobs to fill your tin