Saturday, August 06, 2016

A Little Burrow

July's kit for Alpha Stamps was the Vintage Beach Cabanas. And although I'm not a beachy sort, I did manage to make those Cabanas work for me. I made a little burrow.


This isn't exactly the Weasley abode (it's far too tidy and not nearly wonky enough) but it is inspired by the home of my favourite magical family.

Now, I don't have a full tute, but I will give you a few pointers if you'd like to make something similar. 

I simply took the Cabana Row House Set and stacked the wee buildings together, chopping out any bits that were in the way, to make everything fit neatly.


The roofing tiles, although applied in rows, are totally wonky. I think it's kind of charming though... neatness isn't everything after all. You'll also notice here a little Thin Fleur Dresden Borders around the edge and peaks of the roof which I think add a nice touch. And there are people peeking through the windows from the Seaside Victorian Children Collage Sheet


If you look on the bottom left here you'll see some Wooden Spreaders. They don't actually hold anything in place (yay hot glue!) but they make sense visually. You can absolutely cheat when it comes to miniature construction. Build the impossible! BUT adding little details like fake supports and whatnot adds a smidge of 'reality' to your nonsense.


That bent chimney is a bendy straw painted black. If you happen to be out and about and see a box of those things on the cheap, buy them. They are super handy for making chimneys and pipes in miniature work. The rooftop chimneys include Black Umbrella Bead Cap which I think adds a nice little detail. 


Don't forget the back and sides of your piece. They are easy places to overlook but, if possible, worth fleshing out. It's always a pleasant surprise to see that an artist or maker has take the care to consider every viewpoint.


This little project was a lot of fun, so much so that I'm thinking I might make a second proper Weasley Burrow to be it's neighbour!.

Here are all the bits used in this project in one place.

Or the individual parts:
Cabana Row House Set
1-1/2 Inch Wooden Spreaders
1-7/8 Inch Wooden Spreaders
Seaside Victorian Children Collage Sheet
French Riviera 8x8 Paper Pad
Seaside Doors & Windows Set
Thin Fleur Dresden Borders - Black
Tim Holtz Long Mini Brads
Black Umbrella Bead Cap
Tiny Black Hinge Set
Flower Soft - Vintage Christmas
Box Feet
Bendy Straw
Acrylic paint
Glue
Wood Stir Sticks (door)

Friday, August 05, 2016

Indoor Fairy Garden Tutorial

It's the first Friday of the month so that means a project for Gypsy Soul Laser Cuts and a brand new TUTORIAL! This month I'm showing off how to make this little indoor fairy garden.


This sweet little cobble stoned garden uses Gypsy Soul's Cottage Base and measures just 9" square. It's a nice size to work on because you can put a lot of detail in that little space, but it's not an overwhelming size to fill or display.


One of the very nice things about this project is that you can absolutely personalize it to make it your own. I've chosen Gypsy Soul's 1:24 scale arbor and Tiny Birdhouse as accessories, but don't let that limit your choices! There are loads of possibilities and you should absolutely make your wee garden to suit your own tastes.


In my example I've used the Cobblestone texture sheet to create the garden path. Again, don't feel limited by my choice. There are loads of interesting texture sheets to choose from, as well as a brick wall sheet that would be ideal.


So, start collecting little garden bits and bobs, teeny flowers and twigs, and let's make an indoor fairy garden!


Cottage Base1:24 scale arbor
Tiny Birdhouse

Cobblestone
Acrylic gel medium
Acrylic paint
Tea and coffee grinds
Sheet moss
Twigs and sticks
Little faux flowers, leaves
Misc. accessories

Tuesday, August 02, 2016

Old photos, my granny and the internet

Something very cool happened yesterday. My first cousin two times removed (or is it 2nd cousin 1 time removed?), whom I have never met and don't know in the least, sent some old photos of my gran as a wee girl.


Above she is sitting on the mayor's left knee (your right) during King George V's Jubilee celebrations.


And here she is at the head of the table, assisted by the mayors wife.

Now, I clearly remember visiting someones house and seeing a video game for the first time. Imagine being awestruck by Pong. So I'm sort of an oldie and still amazed by the connective power of the internet. The ability it gives us to travel miles and years. To share information and memories.

I realize that sometimes it seems the interwebs is full of stinkers... but it can be pretty nice place too :)

Sunday, July 31, 2016

Pocket Preacher

I've been watching Preacher and have really enjoyed it so far. Tonight is the season finale and I wanted to try out my new super teeny tiny brushes so I made a matchbox diorama with Tulip, Jesse and Cassidy.

Pocket Preacher Matchbox Diorama w/ Tulip, Jesse, Cassidy - Nichola Battilana

My hands are like a 10 year olds so here's a nickle for better size reference.

Pocket Preacher Matchbox Diorama w/ Tulip, Jesse, Cassidy - Nichola Battilana

And for those asking about the wee people, I'm going to put together a few blank sets and pop them up in my etsy shop tomorrow. which can be found HERE.

Friday, July 29, 2016

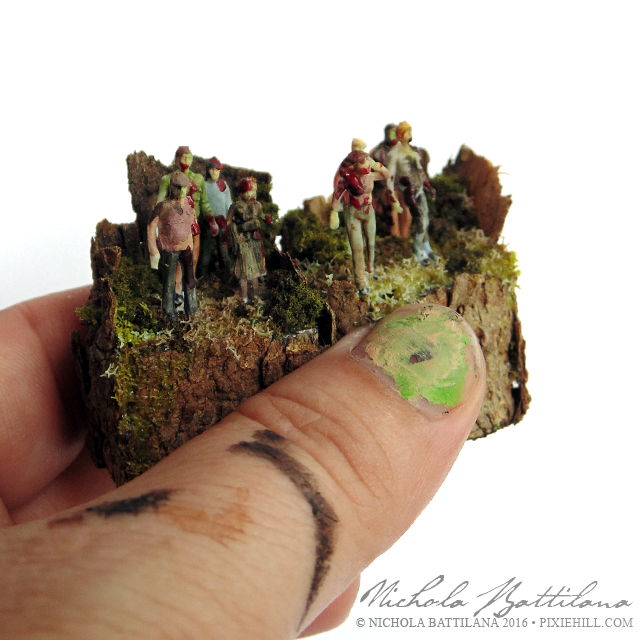
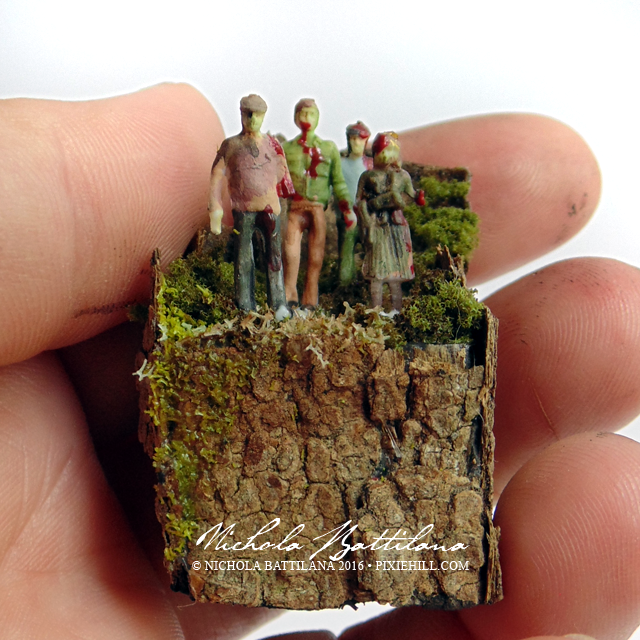
Pocket Sized Zombie Apocalypse Practice

A load of tiny little plastic people arrived in my mailbox yesterday.


I wanted to jump right in for a bit of practice and my friend Paula Mould suggested zombies. I couldn't resist!

Pocket Sized Zombie Apocalypse Practice - Nichola Battilana

I stayed up past my bedtime to make the teeniest zombie apocalypse you ever did see.

Pocket Sized Zombie Apocalypse Practice - Nichola Battilana

And these wee things are TINY. I didn't really have appropriate brushes (all of mine look like they've been chewed on) but all things considered they didn't turn out half bad.

Pocket Sized Zombie Apocalypse Practice - Nichola Battilana

But it does look like a trip to the craft shop for some supplies is in order. New paint. New brushes. My life is soooo hard sometimes ;) 

Pocket Sized Zombie Apocalypse Practice - Nichola Battilana

P.S. That locker tute IS coming. I filmed it and then realized that the footage was crap and that I hate my camera. *sigh* Fingers crossed the camera fairy visits me this weekend.

P.P.S. I've popped a few sets of little people up on my etsy shop if you're inclined to join the dark side and lose your eyesight painting minis too.

Thursday, July 28, 2016

'Fairy in a Jar' with Tips and Hints

My lovely crafty friend Amy Love hosted a Fairy in a Jar Swap over on youtube. I jumped in and made this wee thing for my dear partner. (*waves* Hi Kim!)

Fairy in a Jar with Tips and Hints to create your own - Nichola Battilana

There are loads of tutorials available for this sort of project. Instead thought I'd put together some helpful hints and tips instead. Here's the whole list, but you can hop over to the video version if you like

• To make sure your fairy and wings are sturdy. I've had some professionally printed on very thick card but if you're printing your own, glue your printout to a sheet of thick scrapbook paper to add a bit of heft.

• The back of my fairy (and her wings) have a subtle black pattern. This gives a nice clean finish and isn't visually distracting if someone peeks at the back of the piece.

• Ink your edges. I run a lining brush loaded with black paint around my cut edges. This camouflages cut edges so you don't see the white core of the paper.

• Apply wings on an angle to help give the impression of a 3d figure rather than a flat image.


• Many jars have a seam in the glass. Try to be aware of where this is and embellish your jar so it is hidden from view.

• Use sheet moss rather than loose moss. It comes in clumps and will be cleaner and easier to apply than the loose variety.

• Take care to position the paper fairy in such a way that it is not distorted by bend or bevels in the glass. If this means a little surgury, and chopping off feet, have at it!

• Hot glue dries fast and hard and is a good choice to keep your fairy in place.

• Use embellishments to provide additional support to your fairy.

• You can use scissors as tweezers for larger items. You don't want to squeeze too hard or you'll leave cut marks, but with gentle handling they can be incredibly useful for items too large for regular tweezers.

• To deal with wispy hot glue strands, give a little blast with a hot glue gun.

• Use a clean, dry brush to tidy up inside the jar.

• A pinch of glitter can go a long way to adding a magical effect.

Supplies:
Thick Fairy Jar Collage Sheet Set

Tuesday, July 26, 2016

Reminiscing and grotty fingers

I'm working on a locker tutorial. Hopefully it'll be ready in a day or two.

The more I thought about it, the more I liked the idea that it's a project that could be deeply personalized. Filled with shared memories, photographs, movie posters, miniaturized mementos, it could make a great a sentimental gift.

For my tutorial sample I decided to fill it with things that brought me joy in my teenage years. To be completely honest my teenage years were not my happiest... far from it... like, really, really fecking far from it... but those bright points of joy, the music, and books, and movies, those are worth reminiscing.

Miniature record collection - Nichola Battilana

So I created some miniature album covers from my teenaged-self collection. I'm pretty sure I still have the original vinyl for most of these kicking around in a crate somewhere. Did you have any of these?

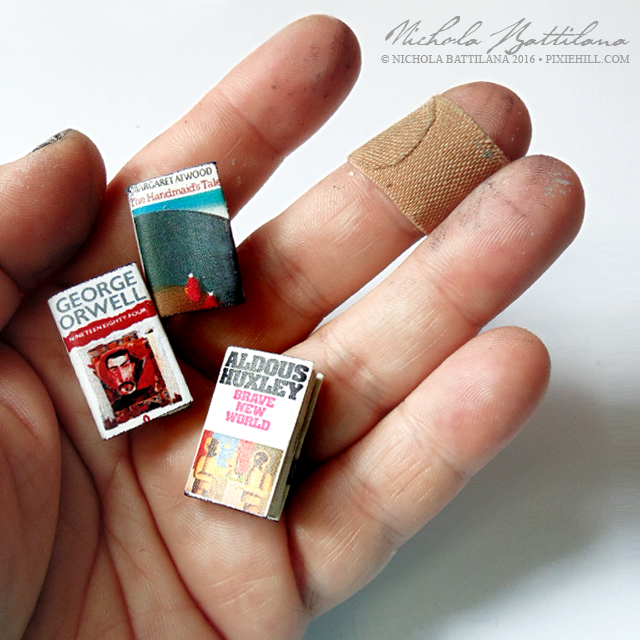
Miniature favourite books - Nichola Battilana

I also made some of my favourite books. I was an avid reader all my life (until recently when time seems to slip away and I just can't sit still to crack one open) and these were my favourite teenage reads.

I noticed that Aldous Huxley was trending today. It's his birthday. Suddenly I remembered that he had a hand in my husband and I hooking up. I stopped by his place and he lent me a copy of Brave New World. That was almost 25 years ago! He still doesn't trust me when I borrow his things ;)

Anyway, just a little sentimental post. Excuse my gross fingers (they almost always look like that but the bandaid is a bonus). I'll have the tutorial available soon.

Hope your day is a happy one.