Showing posts with label gypsy soul laser cuts. Show all posts

Monday, July 29, 2019

Potages Cauldron Shop

I'm embracing my inner Potterhead once again. This time I've created a miniature version of "Potages" the cauldron shop located on the North Side, Diagon Alley, in the Harry Potter universe.


I've used a 7 by 7 Corner Room Box as the base for my little shop. I've also added a
Double Window Ornate on both the inside and exterior of the 'building'.


The signage are printouts pasted to thick board with small brad heads added to the corners.


Simple trims, which are just various sized strips of card cut from a cereal box, are a super easy way to create a finished custom look.


Wooden floor was created with coffee stir sticks, stained with washes of acrylic paint. And how perfect is that wallpaper with it's pattern of tiny spiders?! That's "It's Elementary" from Graphic 45s Master Detective Collection. Scrapbook paper makes excellent room box wallpaper.


To fill my shop, all sorts of little cauldrons. I even designed some products for proper cauldron upkeep like wax, cleaner and polish. To be honest, those little packages put me almost a whole day behind... totally worth it :P You can download the collage sheet to create these at the bottom of this post.


Want to create your own Potages? Or maybe a shop from your own imagination?! I have a video walk-through for creating the basics of this room that might help you in making your own masterpiece. You can find it HERE


Finally, here are supplies used in my wee cauldron shoppe:
(Pssst... if you're in the UK you can order from gslcutsuk.com)
Metal Cauldron or Pot

"It's Elementary" Graphic 45, Master Detective Collection

cereal box card
thick card
wooden stir sticks
acrylic paint
drywall compound
small metal brads
transparency paper
glue, glue, glue
Cauldron Shop Printable (ta dahhhh, see below)


Have fun!


Tuesday, January 29, 2019

Sweet Winged Dressform

I've started this blog post a million times. Trying to come up with a good explanation, a reason for this project. The truth is, there is none. It's just a fun silly thing that happens to be pretty.


And you know, that's ok. Why does there need to be a reason to create something other than the urge to do so?!


 So I've made this pretty frock using a Dressform Hang Up as a base.


To it I've added a pair of wings from the Wings Assortment

And nestled a piece of the Victorian Corners 2 set onto the bodice (it fits just right!)


I've layered silk rose petals and tulle for the dress portion, simply hot gluing them in place. A bit of glitter, paper flowers and a heart embellishment and voila! you've got a sweet little something. 

If you need some guidance to create this piece, I have a video walkthrough HERE, but rest assured it's easy as can be.

Here are all the bits you'll need:

Dressform Hang Up
Wings Assortment
Faux Metal Number Plates 1 to 25
Victorian Corners 2


acrylic paint
paper flowers
silk flower petals
tulle
glitter


glue

Monday, October 29, 2018

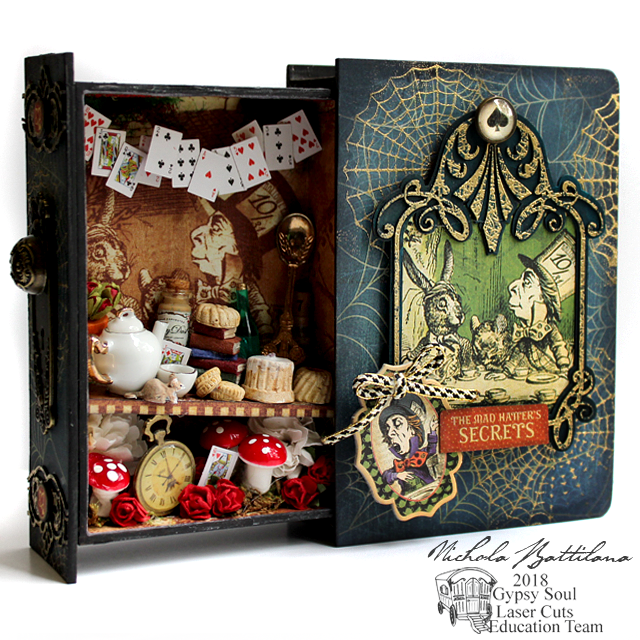
"The Mad Hatter's Secrets" Hidden Drawer Book Box with Tutorial

This is one of those projects that just kind of sprouted. All the supplies just kind of jumped up and shouted "ME! ME!". I'm glad they did because I'm smitten with this project.

Mad Hatters Secrets Hidden Drawer Book - Nichola Battilana


I've used the 6" Hidden Drawer Book Box as my base and then ran with the Mad Hatter theme from the Hallowe'en in Wonderland Deluxe Collectors Edition from Graphic 45.

I've repeated the cobweb theme of the scrapbook paper with a wed stamp and gold embossing powder.

Mad Hatters Secrets Hidden Drawer Book - Nichola Battilana

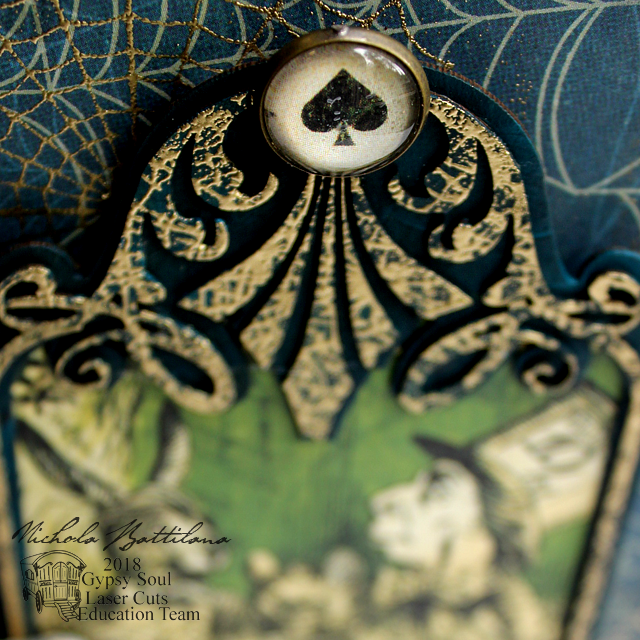
I used that same stamp, repeatedly, on a Layered Frame Aria then added a spade charm to the tippy top for some added interest.
Mad Hatters Secrets Hidden Drawer Book - Nichola Battilana

I used the same stamping and embossing technique for the top and bottom elements on the spine. I used a Deco Frame, then trimmed the elements I wanted to use.

Mad Hatters Secrets Hidden Drawer Book - Nichola Battilana

Also on the spine and cover, I've used more elements from Hallowe'en in Wonderland Deluxe Collectors Edition and added a Metal Door Plate and Knob.

Mad Hatters Secrets Hidden Drawer Book - Nichola Battilana

Inside, the Hatter's Tea Party! I really just sort went to town and filled the interior with suitable miniatures already in my stash including: a pocketwatch pendantminiature wine bottle, a dormouse, playing cards, cakes and cookies and more. 

Mad Hatters Secrets Hidden Drawer Book - Nichola Battilana

If you'd like to see the process of making this piece, take a gander over HERE for the video walkthrough.

And here is the list of supplies I used:
6" Hidden Drawer Book Box
Layered Frame Aria
Deco Frame
Web Stamp (available soon!)
Embossing powder
Acrylic paint
Hot glue and white glue
Foam squares
Bits and pieces for the interior

Tuesday, May 29, 2018

Floral Phone Holder for Gypsy Soul Laser Cuts

This month I decided to make something a little less elaborate, but it's one of my favourite products from Gypsy Soul Laser Cuts: the Tablet/Ipad/Phone Holder


I have three of these Phone holders around my house and I use them every day.


I know, I know... "but I could just prop my phone against something." That's what I thought too, but I really do love my little holders, use them daily and find them so useful.


Plus, it's a fun little project to work on. A little project to express your own style that takes up just a short time, a very few supplies, and is practical! Woo hoo, right?!?!


I've made a quick video walkthrough with a few tips like adding embellishment to the far edges rather than the centre. You can find it HERE 


You can get as elaborate or restrained as you like. Create something to suit your own style and tastes... but here are all the supplies I used to create this version of the Tablet/Ipad/Phone Holder.

Tablet/Ipad/Phone Holder
Lace Frame
Graphic 45 Floral Shoppe - PINK LILIES
Graphic 45 Floral Shoppe - Chipboard Tags
Thin Looped Dresden Borders - Pink
1 Inch Curly Paper Roses - Variegated Yellow Pink
Butterfly Charm
Acrylic paint

Wednesday, November 29, 2017

A Plethora of Presents

I absolutely love Christmas and gift giving. If I could, I'd buy something lovely for every single person I know. Alas, my bank account is firmly against this.


BUT I had a nice little idea! I saw the Set of Pre-Cut Drawers intended for the Advent Calendar Shadowbox and thought that they'd make a sweet little base for tiny tokens of holiday cheer. Super simple to assemble and sold as a set of 25 they just lend themselves for en masse making.


AND!!! AND!!! A strip cut from a 6" sheet will wrap around the boxes just so, with just a sliver needed to be trimmed. So, you only need a 6" scrapbook pad to cover these cute wee things. These boxes have all been covered with papers from Authentique's Vintage Christmas. The items I've used are all inexpensive but festive.


Covering the boxes with different papers and embellishments, like Miniature Bookplates or decorative brads, make the tiny gifts feel personalized and not mass produced. Filling the boxes with a variety of dodads and treats makes each little box feel like a unique present.


The items I've chosen to fill the boxes are all inexpensive but festive. I think they're rather sweet.


Some ARE filled with sweets! Then a bit of celophane and a simple tie. If you want to be extra fancy, you might place a single gourmet truffle inside. 

Pieces from the Snowflake Shape Set or Winter Shape Set also make sweet little embellishments.


Or perhaps you'd like to top your box with Christmas fairies or angels.


Or send a little holiday message.


While these little tokens have a decidedly Yuletide feel, these could easily be adapted to any theme as party or wedding favours. 


While these are super simple to create, I do have a video tutorial for you. You can pop over HERE to see just how easy they are!

The list of bits I've used:

Snowflake Shape Set
Winter Shape Set
Victorian Corners 2
Banner Border Strips


Authentique's Vintage Christmas
Wrapped Gift Box Ornaments
Tiny Wrapped Gift Box Ornament
Retro Bottle Brush Tree
Fancy Scalloped Gold Dresden Borders
Little Sweeties Collage Sheet
Angel Wings Collage Sheet
Brads
Fake snow
Moss
Candy
Tissue Paper
Cellophane
Ribbon


Friday, September 29, 2017

Spooky Wee Houses

Halloween is just around the corner so I thought that this month I'd make something spooky for that sweet holiday. Using products from Gypsy Soul Laser Cuts,  Canvas Corp and 7Gypsies.


I've used the Cabana Row Houses as my base. There's 5 in the set and so you can create quite a nice little haunted neighbourhood!


Some of the houses are covered using papers from 7Gypsies. Some are simply painted white, decorated with Architextures™ Parchment Rub-Ons and then distressed.


Each of the houses uses pieces from the Miniature Bookplates Shape Set as windows. Creating the rooves was super simple with burlap pieces from Canvas Corp


There are plenty of embellishment opportunites. I've used Faux Metal Number Plates 1 to 25 but don't forget the larger Faux Metal Number Plates and Gears Shape Set would be super cool for a steampunk haunted neighbourhood. Go check out all the shapes available at Gypsy Soul and I'm sure you'll find some inspiration.

For a final touch I've added plastic spider and ants from the halloween aisle at the dollar store. 

Want to make your own? I've created a walk through with some simple practical tips HERE

And here are the goods I used in making my own little spooky neighbourhood.
7Gypsies Paper
Architextures™ Parchment Rub-Ons
Burlap from Canvas Corp
Plastic spiders
Vintage images
Twine/Ribbon
Acrylic Paint
Hot Glue
White Glue

Friday, May 05, 2017

Super Simple Earring Organizer

This project is sooo easy AND you'll be able to make three with as little as just one product! Are you ready?


I've simply taken Gypsy Soul's Decorative Screen, applied a coat of paint, added a length of ribbon, and created an organizer for my dangly earrings. This is a serious improvement over plonking them in my jewelry box and creating a tangled mess. I just used the cut areas to hang my sparkly fake jewels from.


The Decorative Screen comes with three panels, and my little organizer only uses one, so you can use the other two parts for gifts, to sell, or if you have a bazillion pairs of earrings, to keep all to yourself. I've created three in three different styles.


You could put all the panels together to create a complete screen to sit on your dresser but I really like the hanging ribbon that lets me cart my jeweled bits all over the place depending on where I'm getting myself gussied up.


I'm certain you don't need any guidance for this project, but HERE is a video for creating the above Steampunkish version of this project.

The only extra bit of advice I'll give is that it's probably best to be a little restrained in your embellishing if you want this to be a functional item.


The bare necessities you'll need for this project:
Decorative Screen
Acrylic paint
Length of ribbon

If you want to get fancy add decorative elements such as Flourishes, or any shapes that suit your fancy. Additional elements I've used are:
Faux Metal Number Plates
Faux Metal Number Plates 1 to 25
Faux Typewriter Keys Symbol Set
Gears Shape Set
Stackable Labels Shape Set

Now, go make something perfectly suited to you!


Friday, December 02, 2016

Day 2 - Cozy Fairy Beds

When I was a little girl, my Christmas stocking was always placed at the bottom of my bed. I'd wake up super duper early on Christmas morning and find a sock full of treats waiting for me. I'm sure this pleased my mother, as it gave her some extra sleep while I pillaged the stocking goodies.

Cozy fairy beds - Nichola Battilana

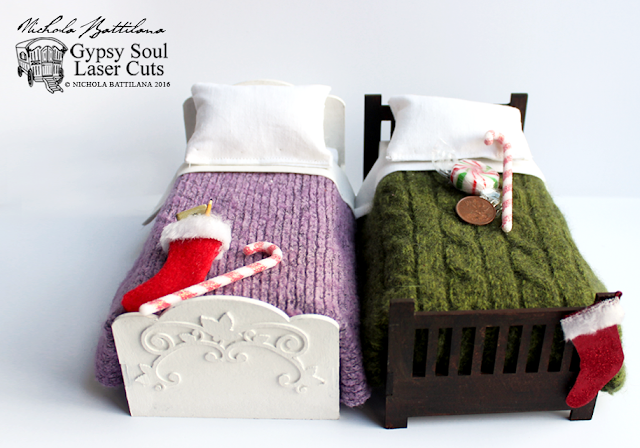
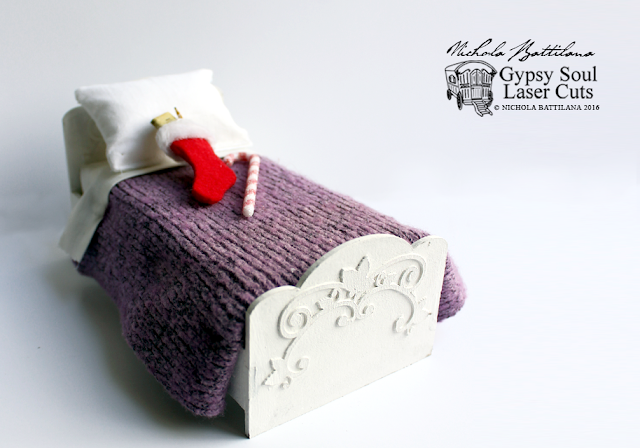
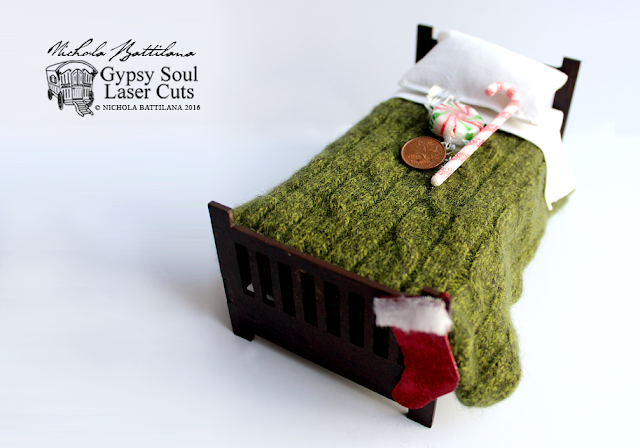
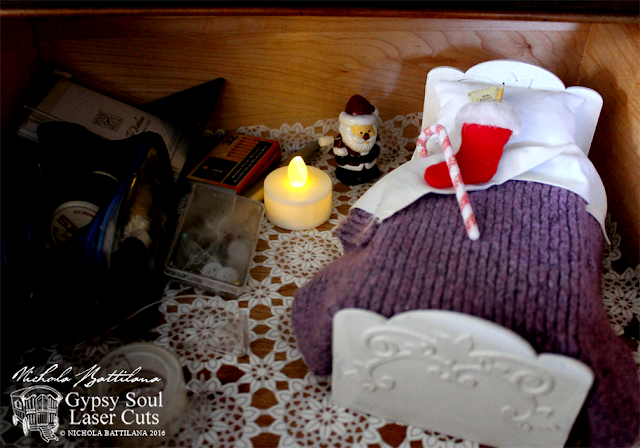
I am CERTAIN that fairies celebrate Christmas too. (In fact, fairies love celebrating so much, I'm sure that they partake in every possible holiday!) I wanted to give my fairies the same Christmas experience so, I've made my house fairies some little beds to get tucked into on Christmas eve. I've used a Gypsy Soul Mission Style Bed and a Standard Bed. I've added Leafy Corners to the Standard Bed as decorative accents. 

Cozy fairy beds - Nichola Battilana

The linens have been made from an old cotton pillowcase and the bedding is chopped from discarded sweaters. They are quite the cozy little things!

Cozy fairy beds - Nichola Battilana

I've also used the Christmas Shape Set to add a stocking to the end of the bed. I've dusted one with glitter and added a fuzzy trim... but if you want to get extra fancy, use the cutout as a template and cut 2 shapes out of felt. Glue the edge together and you'll have made a cute little stocking you can put the tiniest of treats inside!

Cozy fairy beds - Nichola Battilana

Now my fairies will be tucked safely into drawers and cupboards, no-so-patiently waiting for Santa's arrival. If you want to create your own wee beds, HERE is a video showing just how I put these cuties together.

Happy holidays to you and your fairy folk

Supplies
Acrylic paint
Glue
Styrofoam
Cotton fabric
Old sweater
Felt & fuzz (if making stocking)