Showing posts with label halloween. Show all posts

Saturday, October 27, 2018

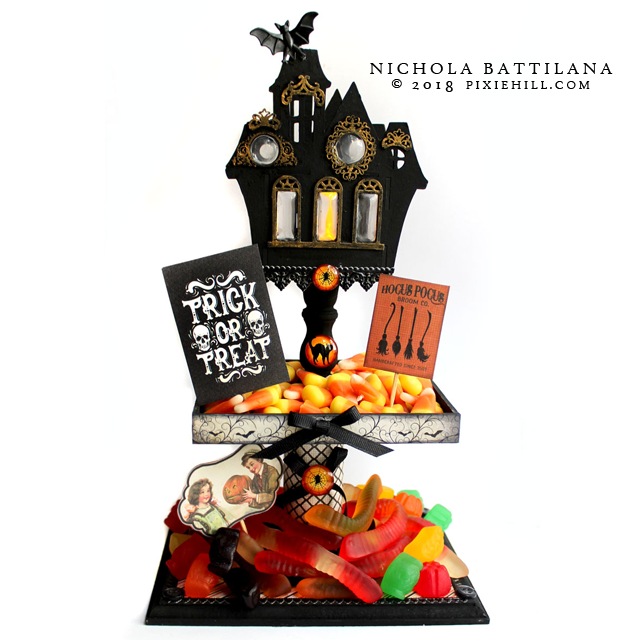
AlphaStamps Spooky Hallowe'en Candy Dish

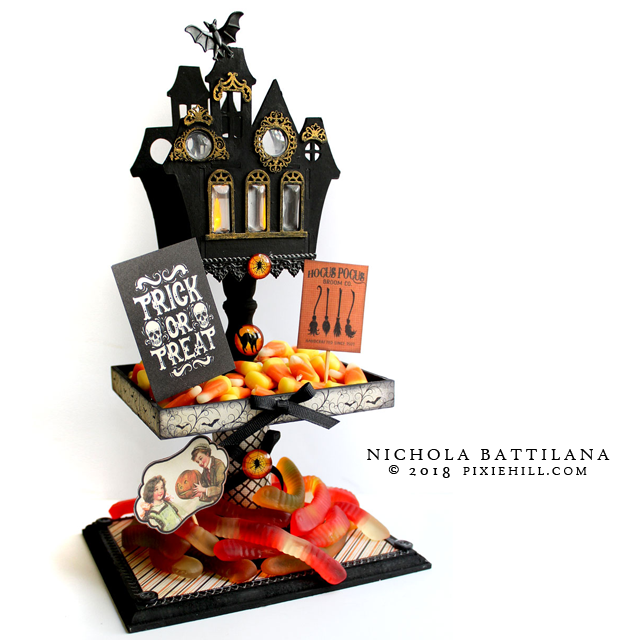
First of all, how cute is this candy dish?

AlphaStamps Spooky Candy Dish - Nichola Battilana

So cute, right?!

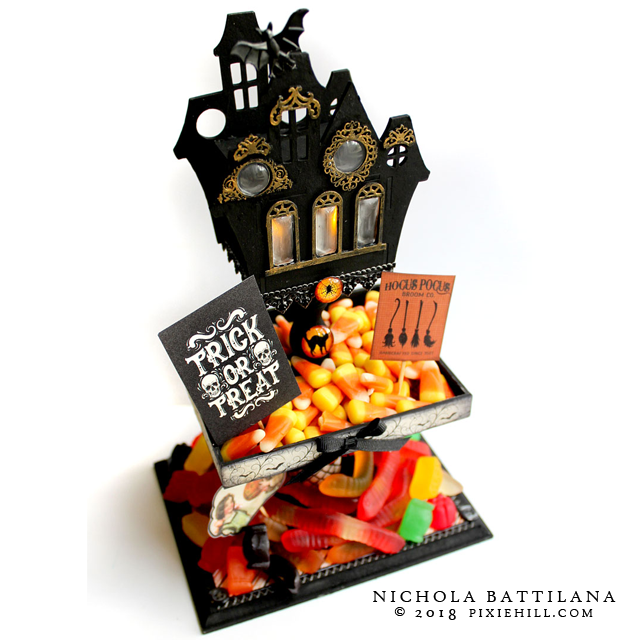
I made it using the Tealight Haunted House Kit with Base from AlphaStamps. Only I didn't use the base as a base, I used it upside down for something more important... candy corn (do not even try to debate me on the goodness of candy corn).

AlphaStamps Spooky Candy Dish - Nichola Battilana

Not only is this project cute, but came together pretty quickly. Quick, easy and cute = extra awesome in my books.

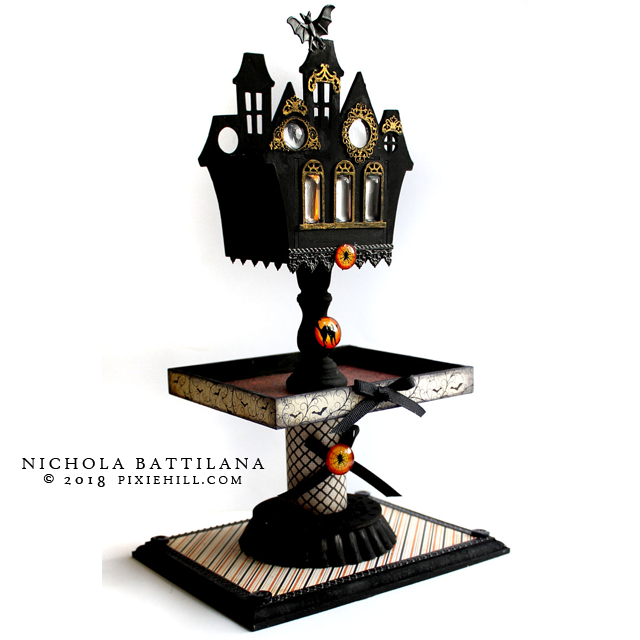
I didn't fiddle around with the house at all. I assembled it, added the window frames, applied a good coat of acrylic paint, then highlighted the frames in gold. To finish it off I added dresden trim, glass cabochon windows and wee plastic bat.

AlphaStamps Spooky Candy Dish - Nichola Battilana

What elements did I use for the rest of the piece? From bottom to top: wooden plaque, tart tin, child's building block, House Base3 Inch Tall Candlestick HolderTealight Haunted House

AlphaStamps Spooky Candy Dish - Nichola Battilana

Painting everything black and sticking with papers from the Nightfall 6x6 Paper Pad, everything comes together to create a cohesive look.

AlphaStamps Spooky Candy Dish - Nichola Battilana

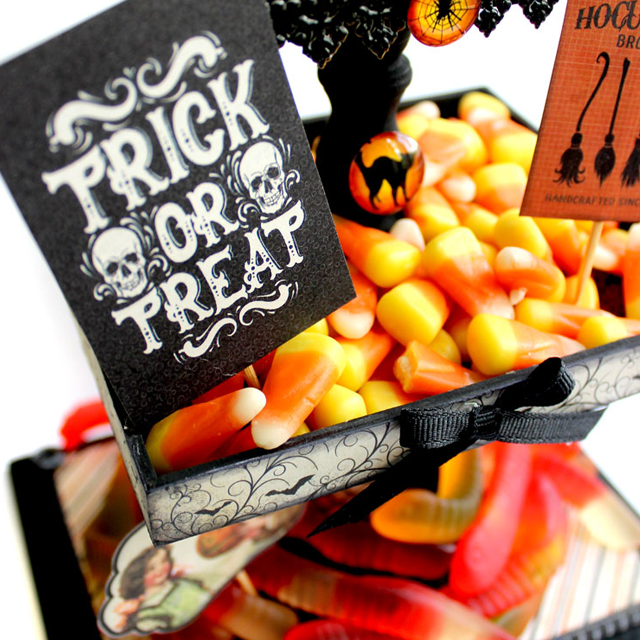
A few cute black ribbon bows, spooky cabochon, trim. I also created some little signs by gluing toothpicks to the sentiments snipped from the  Nightfall Pad as a finishing touch, but I was told candy is the best finishing touch.

AlphaStamps Spooky Candy Dish - Nichola Battilana

Ready to make your own? 


And here is the list of goodies:
10x25mm Mini Glass Rectangular Cabochon
14mm Round Glass Cabochons
18mm Round Glass Cabochons
Rectangular Frames for 10x25mm Cabs
Round Frames for 14mm Cabs
Black Cat Glass Cabochon - 18mm
Spider Web Glass Cabochon - 18mmSpider Web Glass Cabochon - 14mm
Nightfall 6x6 Paper Pad
Black Dresden Border Sampler Set 

Wooden plaque
Building blocks
Ribbon
Toothpicks
Glue
Acrylic paint
Plastic bat
CANDY!!!!

Monday, October 22, 2018

Hallowe'en in Wonderland Nonsense Clock #G45DarkSide

The challenge this month over at Graphic 45 is to create a project using a dark colour pallet. I did create another project, which I can't show off just yet, but I couldn't help but make another with the #G45DarkSide theme when Hallowe'en in Wonderland arrived in the mail.

Hallowe'en in Wonderland Clock #G45DarkSide Nichola Battilana

I've used a chipboard Grandfather Clock 1:12 from gslcuts.com as the base. It measures just 7.5" tall but if you're not comfortable with that tiny scale, there is a larger 11" version available too.

Hallowe'en in Wonderland Clock #G45DarkSide Nichola Battilana

I toyed with the idea of putting a working watch face in the top of the clock, but opted for an antique metal clock key with the stem chopped off, and an ornate metal key hole with the top and bottom loops snipped off to fit. There are some brass stamped metal brads there too. I've snuck a Tim Holtz clock key from my stash on the top.

Hallowe'en in Wonderland Clock #G45DarkSide Nichola Battilana

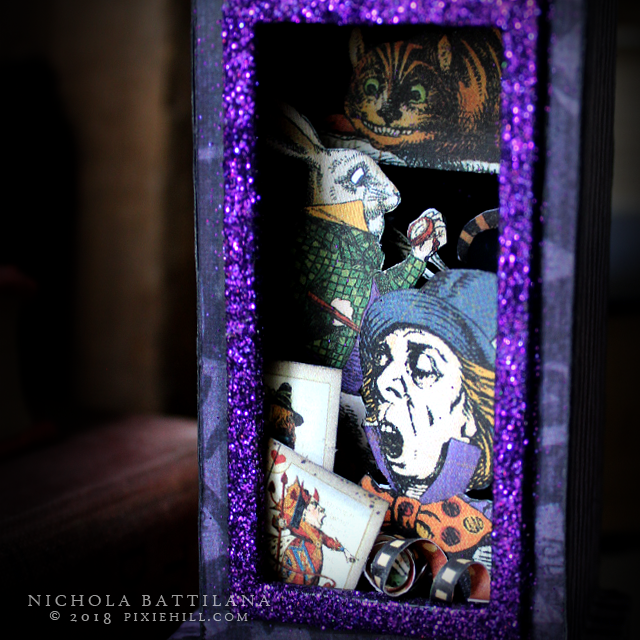
The bottom area, where there would normally be the clockwork pendulum, all of the characters have jumped in and are doing their thing. The Queen is shouting, the Hatter is spouting nonsense, Rabbit is checking the time, and the Cheshire cat is smiling.

Hallowe'en in Wonderland Clock #G45DarkSide Nichola Battilana

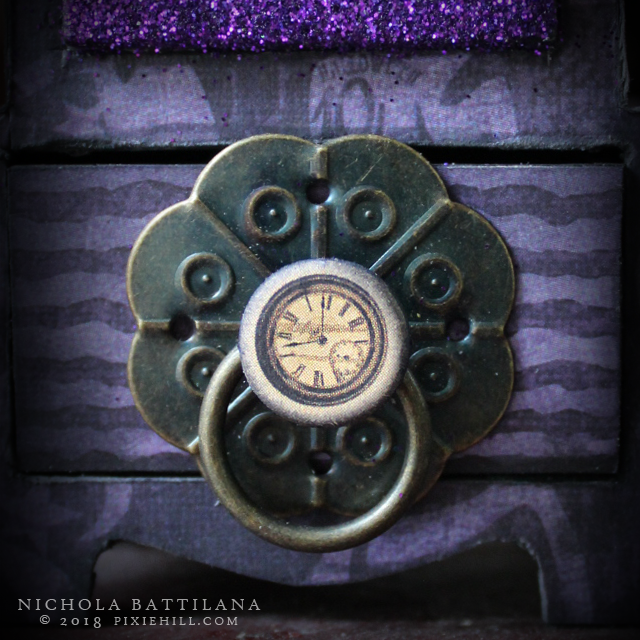
The bottom The little drawer at the bottom (which I have thoughtfully accidentally glued shut) has a brass pull and a little chippy accent from Hallowe'en in Wonderland.

Hallowe'en in Wonderland Clock #G45DarkSide Nichola Battilana

A bit of glitter, fussy cutting and curls and my clock is done! And because Alice is all about nonsense, and what could make more sense than a clock that doesn't actually tell time and with a drawer that doesn't open?!

Hallowe'en in Wonderland Clock #G45DarkSide Nichola Battilana

Want to make your own? Here's the bits and pieces list:

Hallowe'en in Wonderland Deluxe Collectors Edition
Grandfather Clock 1:12
Antique Metal Clock Keys
Tim Holtz Clock Key
Brass Drawer Pull
Glue
Acrylic Paint
Glitter


Saturday, October 21, 2017

Haunted House Shadow Box

 A little haunted house shadow box today, for alphastamps.com

Haunted House Shadow Box - Nichola Battilana

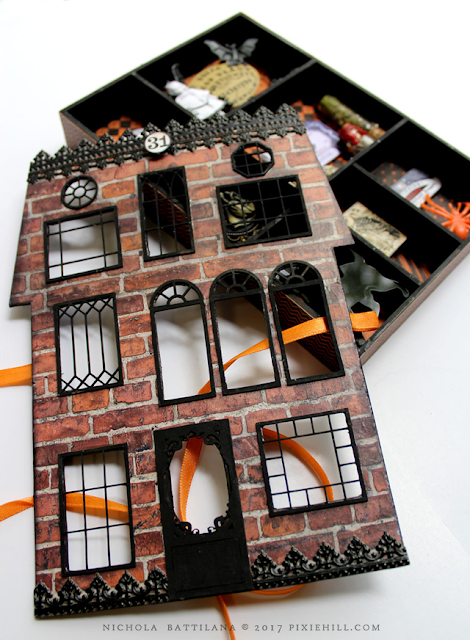
Inside a collection of spooky ooky bits

Haunted House Shadow Box - Nichola Battilana

I've kept the little spaces pretty simple and haven't cluttered them up too much since they'll be covered by the house exterior most of the time.

Haunted House Shadow Box - Nichola Battilana

The papers I used for the background are the Tim Holtz 8x8 Kraft Paper Stash. I like them a whole bunch! The simple black and orange patterns are nice and functional and easy to coordinate.

Haunted House Shadow Box - Nichola Battilana

If you know me at all, you know I'm a bit lazy when it comes to hinges. I've opted to not have hinges in this piece at all and simply use a length of ribbon that is tied around the back and hold the front of the front facade in place.

Haunted House Shadow Box - Nichola Battilana

Mine is filled with just a mish-mash of halloween images, but it would be a load of fun to create a themed house. A vampire abode. A monster mansion. Or maybe even include pics of your own family members in their Halloween regalia.

Haunted House Shadow Box - Nichola Battilana

Want to make your own haunted shadow box? Here's the goodies I used for this piece:

Mini Haunted House Kit
Small Haunted House Add-On Kit 
Red Brick Wall Scrapbook Paper
Small Haunted House Window Trims
Small Haunted House Shadowbox 
Halloween Labels Collage Sheet
Tim Holtz 8x8 Kraft Paper Stash - Halloween
Little Darlings Collage Sheet 
Baroque Dresden Borders - Black 

Brass Setting
Cameos
Plastic bats, and spiders
Ribbon
Acrylic Paint

Saturday, September 30, 2017

Halloween Hotrods with Tutorial

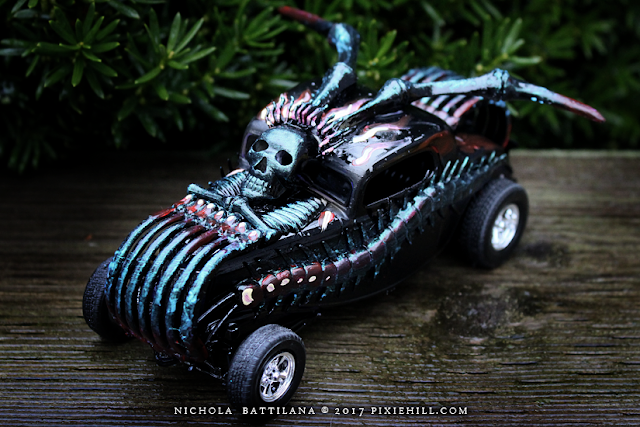
One of my very favourite projects from last year were the Mad Max hot rods built with my buddy Paula Mould. It's one of those projects that is just so much messy fun. I mean you COULD be neat and proper and make something stunning... or you can let loose and just glue crap to other crap and have a grand old time doing it.

Halloween Hotrods: Dollarstore project with video tute • Nichola Battilana

There's Halloween junk all over the Dollarstore aisles and it made me nostalgic and inspired to revisit that project. This time with a video tute (see below) for you to make your own monster machines.

Since this is a dollarstore, stash busting project, it's not going to break the bank.

Halloween Hotrods: Dollarstore project with video tute • Nichola Battilana

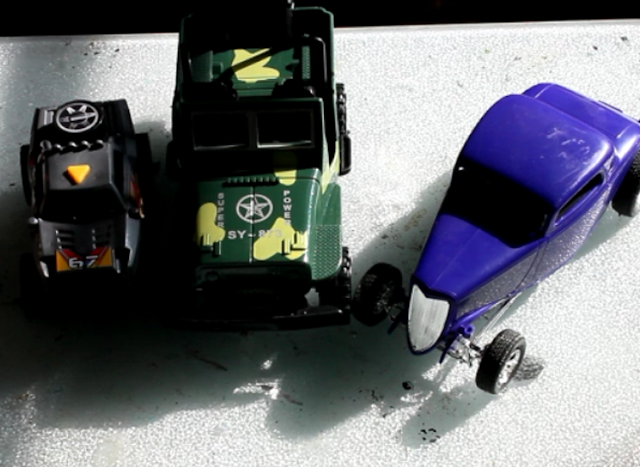
We're starting out with simple plastic toy cars and trucks.

Halloween Hotrods: Dollarstore project with video tute • Nichola Battilana

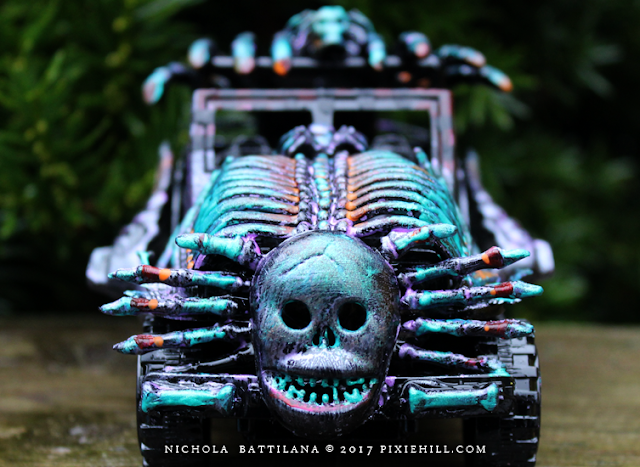
Embellishing the heck out of them. Giving them a knock out paint job. And ending up with something like this...

Halloween Hotrods: Dollarstore project with video tute • Nichola Battilana

They check off most of the boxes for a kid friendly project. They're cheap, fun, neatness isn't exactly a factor. You WILL need to supervise/modify the project depending on age appropriateness (i.e. glue guns are the devil) but it's do-able for and little hotrodders you know.

Halloween Hotrods: Dollarstore project with video tute • Nichola Battilana

I've just used my trusty old hot glue gun for this project. If you want something that can be handled (crashed? raced?) and remain somewhat intact, you'll need to invest/experiment with a better method of adhesion. Or, you know, let them be the $3 works of art they are and just enjoy the destruction.

Halloween Hotrods: Dollarstore project with video tute • Nichola Battilana

Here's your supply list:

Toy cars: trucks, busses, boats, planes... whatever strikes your fancy!
Halloween swag: skeletons, bugs, beads, bones, skulls, spiders, bats
Black spray paint: I used gloss in the tute... I MUCH prefer flat/matte

Acrylic paint: I mostly used a product from Colourarte called Silks Acrylic Glaze It has a nice pearlescent finish and it was in my stash. Metalics looks super cool.
Paint brush
Sponge brush
(for blending)
GLUE: I used hot glue because it's fast and easy. Do what works for you!
Cutting tools: for chopping up spiders and plastic skeletons
Tape: for covering any bits you don't want spray painted

Halloween Hotrods: Dollarstore project with video tute • Nichola Battilana

That's it weirdos! Go make something hotroddy!

Here's how to put them together.

Friday, September 29, 2017

Spooky Wee Houses

Halloween is just around the corner so I thought that this month I'd make something spooky for that sweet holiday. Using products from Gypsy Soul Laser Cuts,  Canvas Corp and 7Gypsies.


I've used the Cabana Row Houses as my base. There's 5 in the set and so you can create quite a nice little haunted neighbourhood!


Some of the houses are covered using papers from 7Gypsies. Some are simply painted white, decorated with Architextures™ Parchment Rub-Ons and then distressed.


Each of the houses uses pieces from the Miniature Bookplates Shape Set as windows. Creating the rooves was super simple with burlap pieces from Canvas Corp


There are plenty of embellishment opportunites. I've used Faux Metal Number Plates 1 to 25 but don't forget the larger Faux Metal Number Plates and Gears Shape Set would be super cool for a steampunk haunted neighbourhood. Go check out all the shapes available at Gypsy Soul and I'm sure you'll find some inspiration.

For a final touch I've added plastic spider and ants from the halloween aisle at the dollar store. 

Want to make your own? I've created a walk through with some simple practical tips HERE

And here are the goods I used in making my own little spooky neighbourhood.
7Gypsies Paper
Architextures™ Parchment Rub-Ons
Burlap from Canvas Corp
Plastic spiders
Vintage images
Twine/Ribbon
Acrylic Paint
Hot Glue
White Glue

Wednesday, October 12, 2016

Miniature Funeral Carriage

Something a little dark but (I think) lovely today. A miniature funeral carriage, inspired by beautiful Victorian horse drawn hearses.

The Funeral Coach base is a chipboard kit available from AlphaStamps. Inside I've slipped a 6 Inch Coffin Box

Makers note: I actually didn't include the coffin lid and simply used the main part box upside-down. I trimmed the coffin height down as I was considering adding flowers, or a traditional funerary wreath to the top and was thinking of the available space.


The whole carriage is painted in matte black and gussied up with LOADS of black dresden borders. (I think I have a serious dresden fetish. It's like Franks Red Hot. I put that s**t on everything!)


I've also added loads of ornamental do-dads using Creative Paperclay* and this Silicone Mold - Architectural Flourishes. That particular material works really well with the matte black finish.


19mm Fancy Metal Drawer Pulls act as finials accents for the top. And there is the most lovely little Antique Brass Mini Trunk Lock on the back doors. 

Makers note: the rear doors aren't actually hinged in place. I am a horror show with hinges! They never seem to work well for me and I just make an awful mess. Since I don't plan on opening and closing those doors often, and they sit quite nicely without much fuss, I'm taking the totally lazy route and leaving them free.


I've lined the interior with Bright Red Suede Paper. If you're looking for a more 'authentic' feel, line that sucker in black. (I personally love the shock of red inside.) Finally, the windows. Many funeral carriages had swags of lush drapery inside but I was liking the 'clean' look of this little coach. I put together this Filigree Funeral Carriage Windows Collage Sheet with vintage fancy framework that can be printed on transparency sheets and glued into place. 

I'm smitten with this piece. It looks great on my mantle, and is a good size at somewhere around 10" x 6". Although it's intended as a Halloween piece, it'll stay out year round in my spooky old house ;)

Want to make your own?  
ALL THE BITS in one place

The list of individual bits:
Funeral Coach
Filigree Funeral Carriage Windows Collage Sheet
6 Inch Coffin Box
Creative Paperclay
Silicone Mold - Architectural Flourishes
19mm Fancy Metal Drawer Pulls
Antique Brass Mini Trunk Lock
Bright Red Suede Paper
Black Suede Paper*
12mm Flat Fancy Bead Cap - Bronze*
Baroque Dresden Borders - Black
Black Zig Zag Dresden Borders
Half-Round Dresden Borders - Black
Thin Fleur Dresden Borders - Black
Thin Looped Dresden Borders - Black

Tuesday, August 23, 2016

Mystic Swami Board Revisited

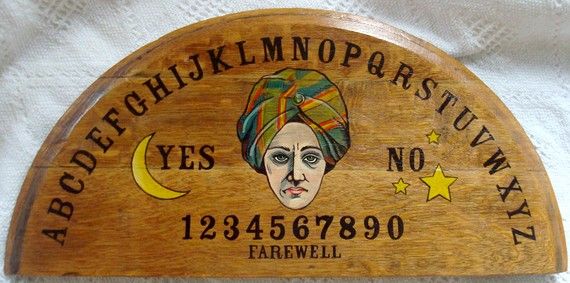
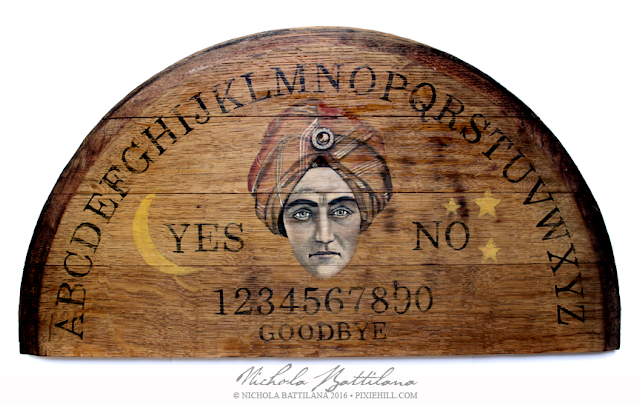
YEARS ago I made this 'Mystic Swami Spirit Board'.

Mystic Swami Spirit Board - Nichola Battilana

Recently someone inquired about it, and since I'm on a Halloweeny kick, and since the idea peaked my fancy, I decided to revisit the project.

Mystic Swami Spirit Board - Nichola Battilana

Look what few years of farting around with art and craft supplies can do! What a difference! I'm tempted to paint one of these every year to mark the improvement in my skills.

Mystic Swami Spirit Board - Nichola Battilana

He's looking a little pasty in this pic... let's just ignore that okay.

Mystic Swami Spirit Board - Nichola Battilana

Just like the original it's painted upon one half of a used wine barrel lid. Made with 1" thick oak staves, and measuring 22" wide, it's a hefty thing. 

Mystic Swami Spirit Board - Nichola Battilana

And I KNOW that some people have strong opinions about Ouiji and spirit boards so let me just say this: this is used wood with letters painted upon it. Glue guns on the other hand, now those things are pure evil.