Friday, August 07, 2015

Tall Garden Cottage Tutorial

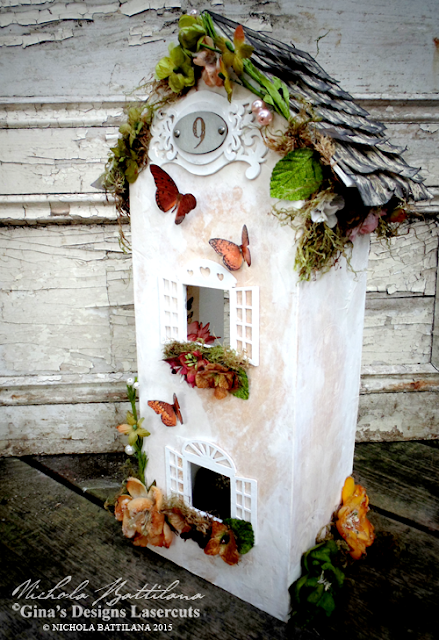
Every month I create a project with a tutorial for GinasDesigns.net. This month it's a biggy...

Tall garden Cottage with Tutorial - Nichola Battilana

There are loads of steps and it'll take some time to complete (especially when you factor in drying time), but I think it's worth it.

Tall garden Cottage with Tutorial - Nichola Battilana

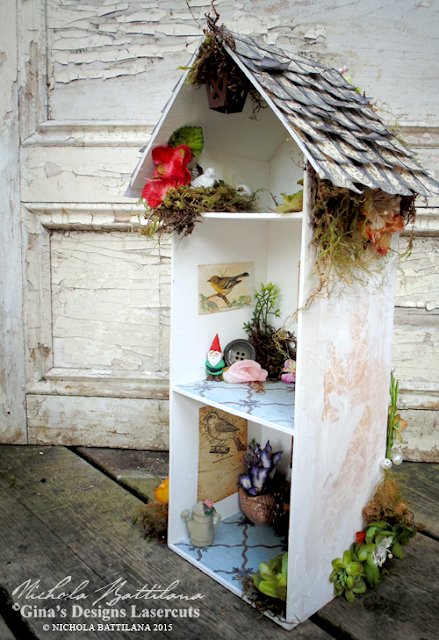
Created from Gina's 3 Story House, you could customize the contents to your own whims and tastes. Filled with little mementos, keepsakes and small photos it would make a wonderful gift for someone special. 


Tall garden Cottage with Tutorial - Nichola Battilana

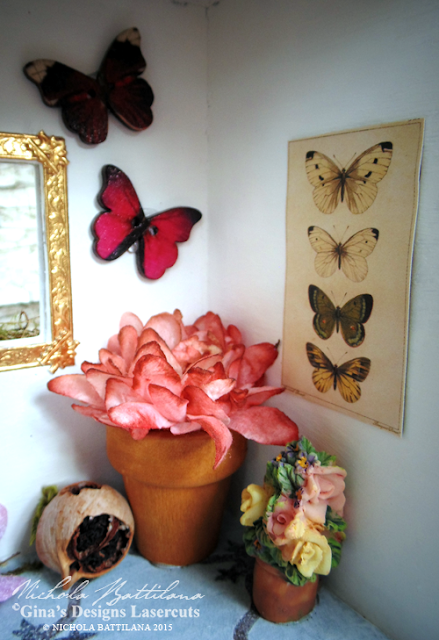
Mine isn't quite so sentimental and will be home to little gnome and elf figures and collectibles :)


Tall garden Cottage with Tutorial - Nichola Battilana

Don't feel rushed with this project. Enjoy the process of making it 'just-so' and the challenge of filling it with lovely little bits and bobs.


Tall garden Cottage with Tutorial - Nichola Battilana

I only had one piece of Honeycomb Fleur Cardstock from The Robin's Nest to cover the house, so I'll show you how to be a little sneaky if you're short on paper.


Tall garden Cottage with Tutorial - Nichola Battilana


You can find the full video tutorial HERE


If you have any questions or are unclear about anything, don't hesitate to ask.

Gina's Supply List:

The Robin's Nest Supplies:
Calamity Jane Diagonal Glitter Cardstock
Honeycomb Fleur Cardstock

Other Supplies:
White Tacky Glue
Spackling (I used one that goes on pink and dries white)
*And a quick link to all of the products used available via Alpha Stamps

Thursday, August 06, 2015

It could have been worse

Our family motto seems to be, "It could have been worse."

I know things have been a little quiet around here but life got sort of hectic last week with plumbing issues coming out the hoo-ha and the resulting messes. Let's just say that it's a good thing that I'm not above cleaning poop and leave it at that.

It could have been worse.

The plumbing problems could have happened this week while we were unplugged, camping, while my mother looked after the house and animals.

Yes, it could have been worse.

Speaking of camping. This was our drive to Murphy's Point Provincial Park.


We sleep in tents. 
This was worrying. 
But it could have been worse...


The skies cleared when we arrived and we were able to set up camp (extra tarps and all) before the skies opened up once more.
Our first night we heard rustling in our kitchen tent and in the morning found this...


It could have been worse.

Don't worry, that's not blood. We're diligent about storing food in the truck. This footprint is from a single kool-aid packet hidden behind the stove on the picnic table.

The other thing we discovered that morning... our air mattress had a slow leak and the ground was mighty uncomfortable.


But there was a Canadian Tire just 20 minutes from the camp, so it could have been worse.


On our last night the raccoons returned on their evening rounds. This time Mr. Pixie was heard thumping, rustling, rattling and shoo-ing for quite a long time. When he returned he told us that there had to have been 15 raccoons, all over our site! They were in the trees, in the tent and he had even evicted some babies from our trailer!


But when all is said and done, even after all those little disasters... it could have been worse.


In fact, it really wasn't bad at all.


Sunday, August 02, 2015

Sparkly Floral Crown with Petaloo

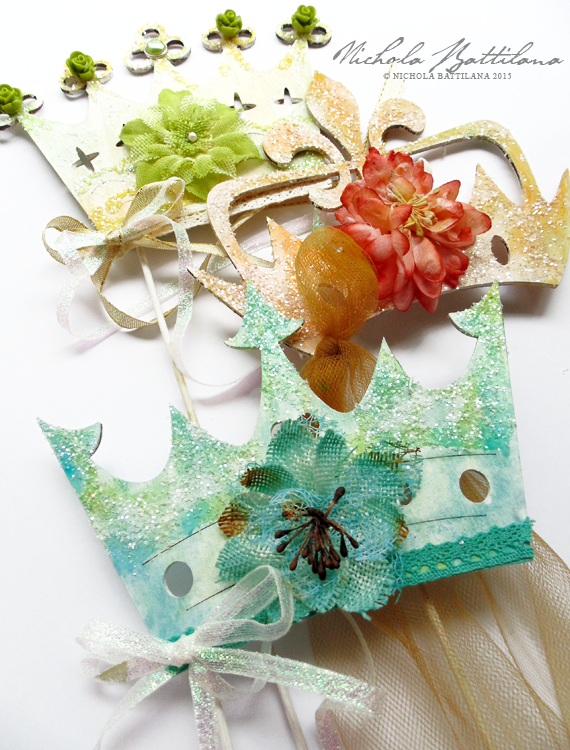
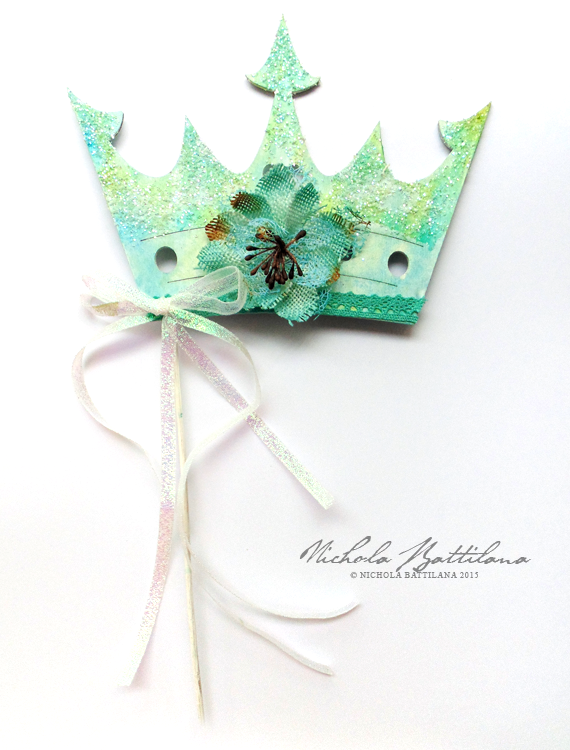
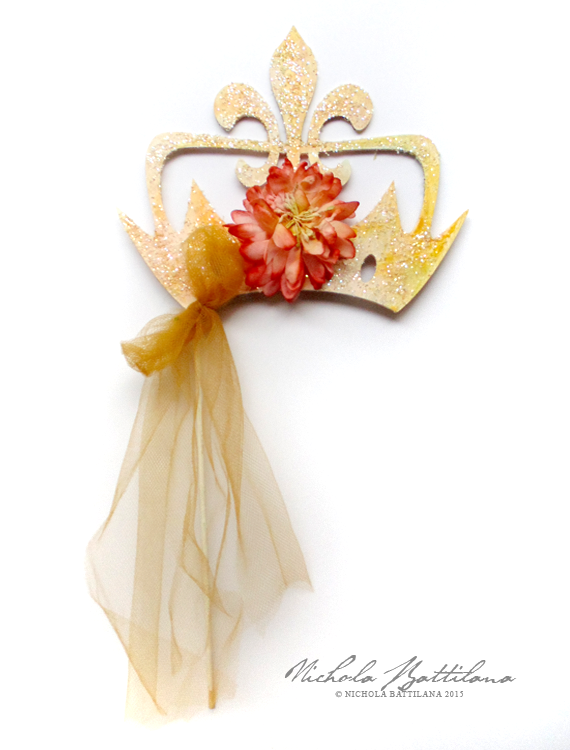
I found some simple wooden crown cut outs at Michaels. They have a little stick to hold the crown shape above your head during photographs or when meeting crown worthy dignitaries, all the while preventing unsightly 'crown head' hair.
Sparkly Floral Crown with Petaloo Blooms - Nichola Battilana

I thought the shapes were cute and a great kids project. After all, even if you can't find these wooden cutouts at your local craft store, it would be easy enough to create your very own from some cardboard and a bit of doweling. They would make a totally adorable "make and take" for birthday parties.
Sparkly Floral Crown with Petaloo Blooms - Nichola Battilana

I began by painting all of the pieces white, then sploshing some paint on them. Sploshing doesn't require being neat or tidy so it is perfectly appropriate for little hands. Eat a cookie or fresh fruit salad and wait for that sploshing to dry before adding some glitter (Tip: good quality glue will help avoid glitter from loosening). For this crown I've added Fancy Trimsalong the bottom edge and a coordinating Teal Burlap Blossom
Sparkly Floral Crown with Petaloo Blooms - Nichola Battilana

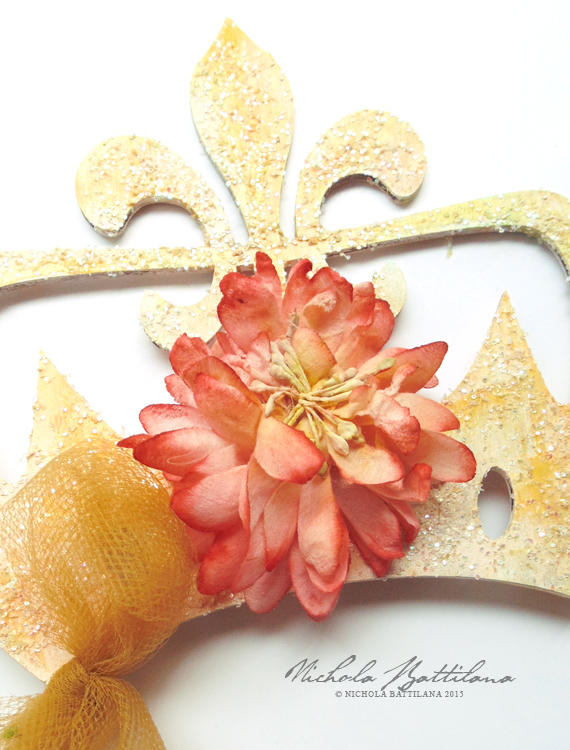
For this crown I've used a DIY-Mum which you can colour to match your project. (Note: I coloured this blossom with watercolour paint then dipped it in tea to soften the colour) Then I added a length of tulle to gussy up the handle.
Sparkly Floral Crown with Petaloo Blooms - Nichola Battilana

Those DIY blooms are pretty amazing and colouring them could be a fun project for kiddos in and of itself.
Sparkly Floral Crown with Petaloo Blooms - Nichola Battilana

Working with kids can be a lot of fun and there are many ways to include them in crafting. Let them make decisions about colour and trims. Let them do the sploshing. You can set limits if you like "Let's pic three flowers to add" but let them have some control. Be sure to have those little people help clean up afterwards too.
So get out there and make some crowns with your littles. And don't forget the tea party photo shoot afterwards.

Supply List:
Misc ribbons and trims
Wooden Crown cut outs or DIY crown shapes

Saturday, August 01, 2015

Tooth Fairy Letters

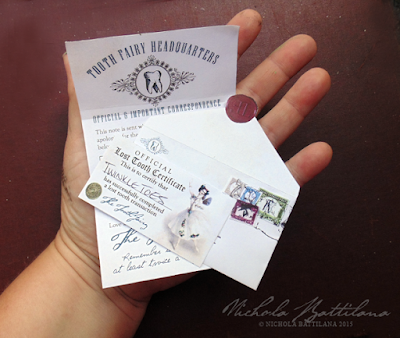
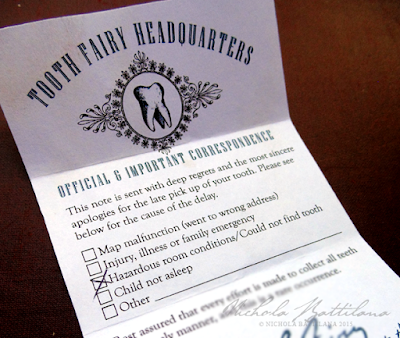
The other day I happened to run into the Tooth Fairy and we had a little chat. She said that she has been very busy lately and run ragged with all of the tooth collecting. Her schedule is so jam packed that she doesn't have time for any other fairy activities! Such a shame. I asked if there was anything I could do to help...

Tooth Fairy Letters - Nichola Battilana

I am asked about Tooth Fairy letters fairly regularly. While I do enjoy creating little the letters, they often take up quite a bit of precious limited time. Toothy and I (that's what I call her, we're pretty tight) came up with an idea.

Tooth Fairy Letters - Nichola Battilana

We created a template, an 'official Tooth Fairy sanctioned' correspondence, that parents and caregivers can print and assemble to give Toothy a bit of relief and help her get caught up.


Tooth Fairy Letters - Nichola Battilana

The PDF includes two letters (a 'thank-you' note and an apology for late tooth pick up) envelope template, tiny stamps, seals and a wee certificate for tooth collection completion.

The download is available in the etsy shop HERE.

P.S. Toothy asked me to remind you to brush at least twice a day and don't forget to floss.

Friday, July 24, 2015

A Fairy Godmother House

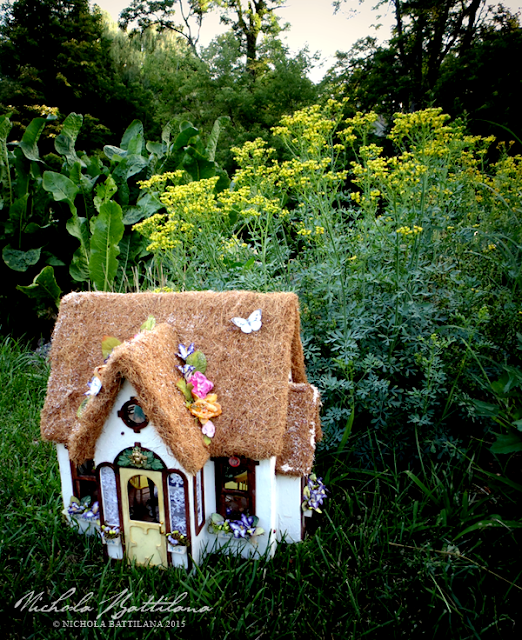
Ladies and gentlemen, "A Fairy Godmother House".

Fairy Godmother House - Nichola Battilana


The base of this house is the "Buttercup" by Greenleaf. The assembled size is 17" x 11” x 18”. If you're considering this model to create your own little masterpiece, there are a few notes at the very bottom of this post you may find helpful.
Now that's out of the way...


Fairy Godmother House - Nichola Battilana

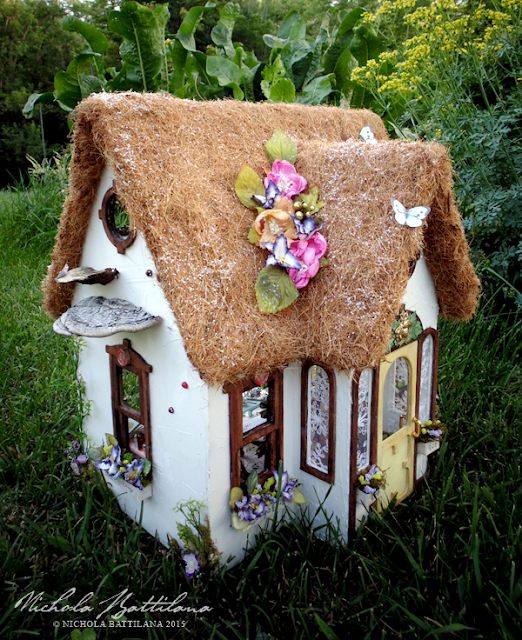
The "sort-of-thatched-roof" was done with coconut fiber from the garden centre, the same material used for hanging baskets. You can buy it in lengths just like fabric! It's pretty easy to work with, but it's messy (you have been warned). There's pretty paper flowers dotted all over the piece including my favourite, Petaloo Botanica Blooms.

Fairy Godmother House - Nichola Battilana

There are loads of handmade ladybugs too. Peek in that window you'll see some golden eggs.

Fairy Godmother House - Nichola Battilana

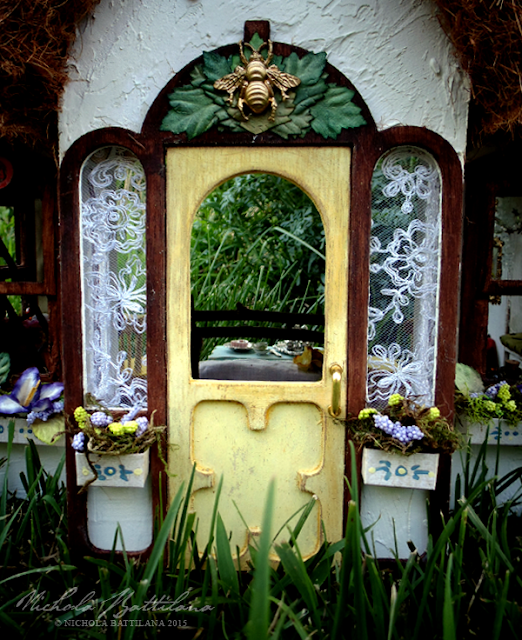
I thought about doing a red door but opted for yellow instead. It seems so cheerful, yet is said to be the colour of insanity. I imagine fairy godmothers to be joyful and little kooky so it seemed the perfect colour choice. Above the door a Giant Brass Bee, which I really adore.

And now the inside.

Fairy Godmother House - Nichola Battilana

Many of the miniature pieces I've done recently have used proper scale... that all goes out the window in this project. A fairy godmother lives here after all! The focus is on whimsy and magic, and scale doesn't matter one pip.

Let's look upstairs first...

Fairy Godmother House - Nichola Battilana

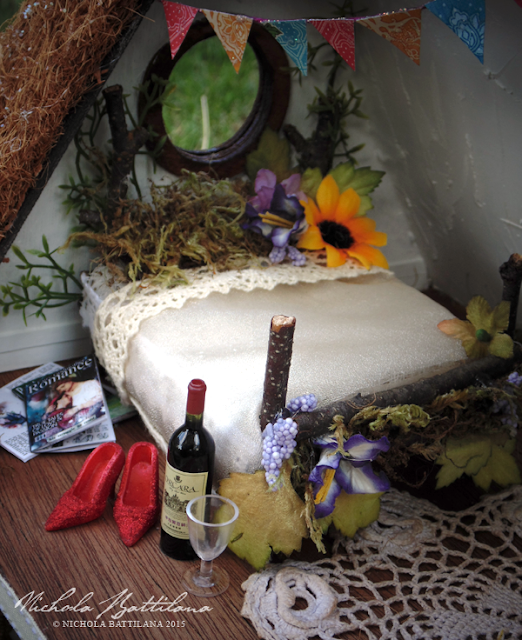
I sort of showed this off the other day. Glittery shoes, miniature "Fairy Godmother Romance" magazines, and a big fat bottle of red. BTW I do have 'scale' wine bottles in my stash, but this one seemed to be appropriate for my idea of a fairy godmother. Same goes for the shoes. They're big if you're looking at 'scale' but who's to say the gal doesn't have huge feet?

Fairy Godmother House - Nichola Battilana

Tucked into the little peaked alcove, a tiny fairy frock in icy blue.

Fairy Godmother House - Nichola Battilana

In another corner, a tiny pink castle that has been waiting for just this moment to shine.

Fairy Godmother House - Nichola Battilana

 And handmade books. LOTS and LOTS of books stacked here there and everywhere. 

Fairy Godmother House - Nichola Battilana

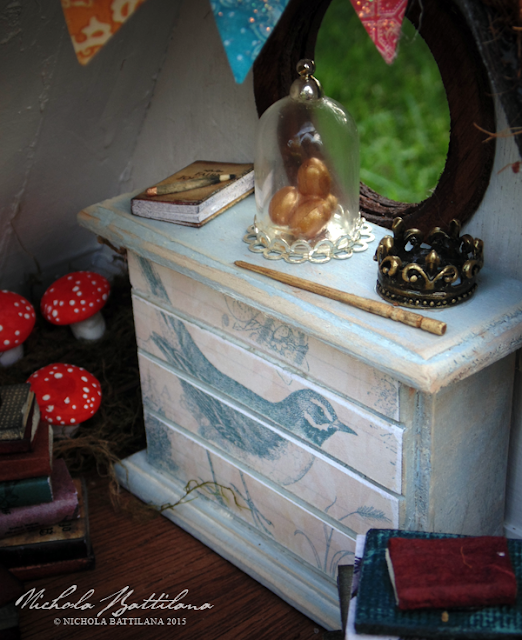
On top of the little dresser is a fairy journal and pencil, golden eggs under a Miniature Glass Dome, a wooden wand, and Golden Crown. That pretty bird is from Birds of a Feather from Graphic 45's Botanical Tea.

Let's go downstairs...
Fairy Godmother House - Nichola Battilana

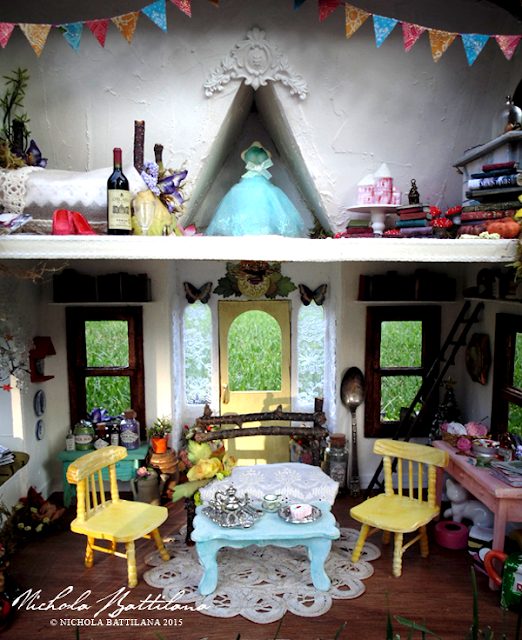
I LOVE the colours on the first floor. If I were a brave woman I would totally decorate in this colour scheme in my own home. I'm a wuss so that won't be happening. 

Fairy Godmother House - Nichola Battilana

Fairy Godmother House - Nichola Battilana

The furniture I've used in this piece is inexpensive wooden play furniture. I don't care that it's wonky. I don't care that it doesn't match. And it doesn't matter one bit that nothing is to scale. I'm more concerned about the impression and sense of fun rather than anything else. Plus, it's good to let go and just have fun with your work once in a while :)

Fairy Godmother House - Nichola Battilana

A celestial window seat for reading and daydreams.

Fairy Godmother House - Nichola Battilana

On the opposite side of the room there's candy, a year-round Christmas tree tucked into the corner, a crafting tables, shelves of books and buttons and bottled things. 

Fairy Godmother House - Nichola Battilana

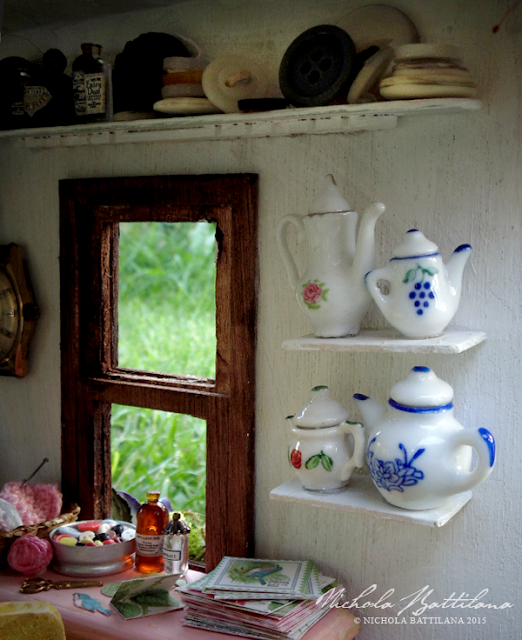
A good view of the fairy godmother's teapot collection.

Fairy Godmother House - Nichola Battilana

On the crafting table: a knitting basket, a tin of button, scissors, bottles of glue, fussy cut elements for a little card, and scrapbook paper... Graphic 45's Botanical Tea if you must know ;)

Fairy Godmother House - Nichola Battilana

That's the grand tour. There's bits I missed... but there's just so much jammed into that wee house it's hard to capture it all. Not focusing on scale (or sense) was great fun and I highly recommend it if you try a wee house of your own. I'm also pleased as punch that so much long-term stash finally found a home.

I'll be taking this piece with me to the fairys.com open house this weekend (I'm doing tea readings there... you should come visit!) and then it'll be off to Port Hope to show off at impresario.

The house is currently listed HERE

Inspired? Huzzah! Here are some of the products I used that you might find useful:

Miniature magazines
Miniature Wine Glasses
Graphic 45 Bohemian Bazaar 8x8 Pads (used for bunting)
Antique Bronze 3D Gnome House Charms* 
Birds of a Feather

Now if you'll excuse me, I'll be taking a bit of a break from the airy fairy and making a few things to satisfy my inner weirdo.

**Notes about the kit: fairly easy to assemble (slot and tab) and at under $30 it's a great price. However, I did find the wood dry and didn't like the 'feel' of it. Also, the trims are a bit 'chunky', not entirely my cup of tea, but you could certainly hobble your own. Finally, despite being 'true miniature scale' 1:12, it's a very awkward space to stage. Between the number of windows and the slanted ceilings, there is very little space to put larger furnishings. Just some things to keep in mind if you decide to try your hand at this model.**

Wednesday, July 22, 2015

Progress

I spent most of yesterday working on my August tutorial for Gina's Designs. I can't show it off yet, but I think you'll really like the project. It's a biggy, but the results will be worth a little bit of extra time. That goes live on August 7th, so be sure to pop by for a peek.

My evening was dedicated to my newest house. I was feeling stumped on how to fill this latest abode but I seem to have hit my stride and now have more ideas than space.

Fairy Bed - Nichola battilana

Here's a quick look at the floral bed with it's mossy pillow. You note the bottle of wine, red sparkly shoes and romance magazine beside the bed. 

I'll work into the wee hours again and think this one will be wrapped up soon. Then, I'm setting my sites on something less airy fairy to appease the weirdo in me ;)