Showing posts with label glitter. Show all posts

Thursday, March 21, 2019

Stardust, Moonshine and Smooches

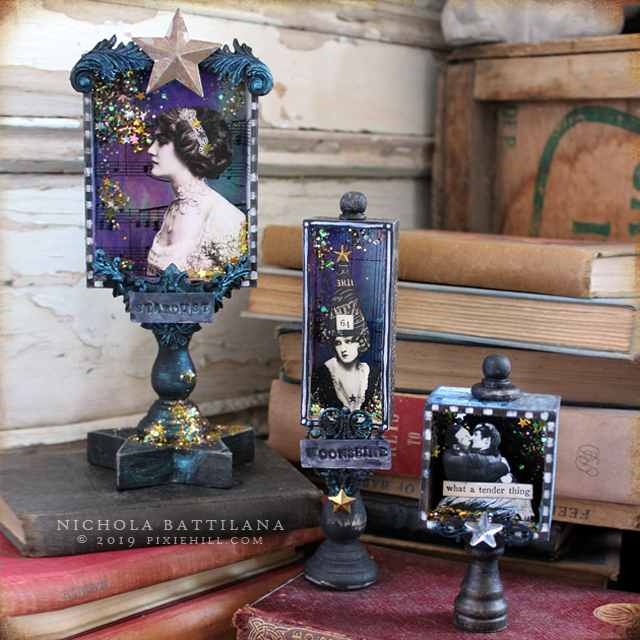
I got an incredible amount of work done while I was sick. Perhaps it was some sort of delirium. In any case, these three beauties popped off the worktable. All midnight and glitter *swoon*

Stardust, Moonshine and Smooches

Like most things I make they're hobbled from all sorts of bits and pieces with a nice splash of glitter for good measure.

Stardust Art Shrine

See the little wordplate? I've been playing with metal stamping and admittedly I'm not very adept at it (yet!). They say practice makes perfect... which suits me fine because whacking stuff with a hammer is good for getting the blahs out. The Stardust Shrine is listed HERE.

Moonshine Shrine

My inner wizard/witch lives for pointed hats and stars and moonshine.

Moonshine Shrine

And ohh that look. This is the exact look I would give to ridiculous requests when I was working as a graphic designer. I'm pretty sure if I were in charge of fulfilling wishes made on stars I would make this face once in while too. The Moonshine Shrine is listed HERE

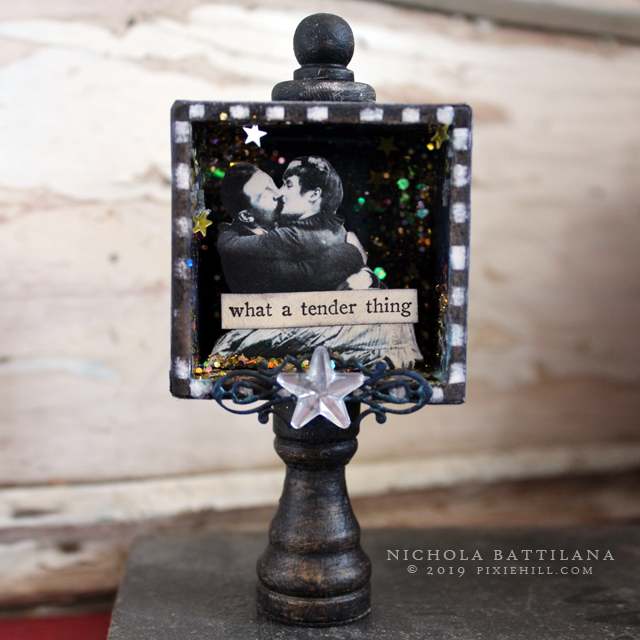
A Tender Little Shrine

There is something extraordinarily sweet about kisses in old photos. Perhaps because the sitters in old pics often look so dour. I understand they look that way because they had to remain still so long... but I'd much rather remain still while kissing like these two.

A Tender Little Shrine


And here is one of my favourite songs, "Tender" by Blur


"Come on come on come on, Get through it"
Hang in there. You got this, baby! xoxo


Saturday, July 29, 2017

Starry Tags with Tutorial for Gypsy Soul Laser Cuts

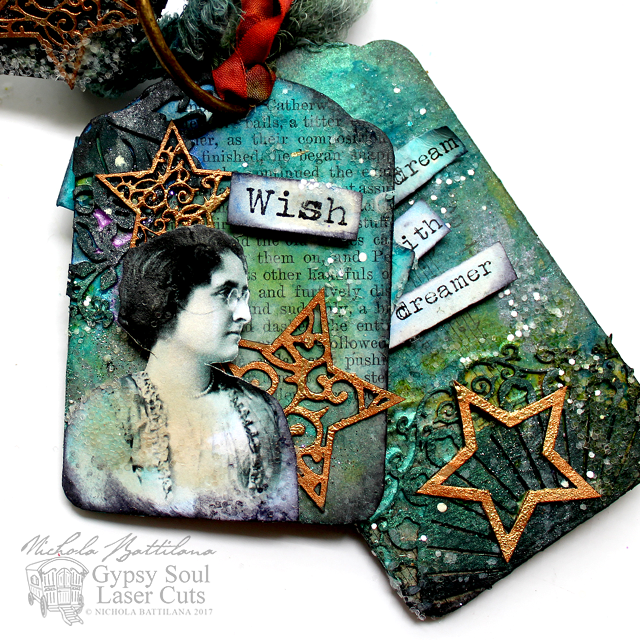
This month for Gypsy Soul Laser Cuts I've used their 3 tag set to create something starry and dreamy.

Starry Tags with tutorial - Nichola Battilana pixiehill.com gslcuts.com

With some layers of paint, chipboard stars and glitter those kraft coloured tags are transformed.

Starry Tags with tutorial - Nichola Battilana pixiehill.com gslcuts.com

They are the perfect backdrop for the sentiments and vintage images found on THIS Stars and Dreamers Collage Sheet (which is totally free to download because I love you.)

Starry Tags with tutorial - Nichola Battilana pixiehill.com gslcuts.com

If you need a little guidance putting these beauties together, I've put together a video tutorial for you.

Starry Tags with tutorial - Nichola Battilana pixiehill.com gslcuts.com

I do use a fair few layers of colour... but I honestly think that multiple washes add a depth of colour and visual interest that is incomparable to a slap of thick paint.

Starry Tags with tutorial - Nichola Battilana pixiehill.com gslcuts.com

But hey! if a thick coat of acrylic is your thing... go for it! Art and craft is all about YOU, the maker. I wholeheartedly encourage you to do what works for you.

Starry Tags with tutorial - Nichola Battilana pixiehill.com gslcuts.com

Here are all the bits I used to create these starry sparkly tags:

Gypsy Soul Tags
Keys Engraved
Printers Ornament Corners
Swirl Medallion Small
Deco Stars
Acrylic Paint (also used 
Glue
Glitter
Metal Ring
Ribbon/Fibers

Saturday, March 25, 2017

Magical Masquerade ATC's

This months kit at Alphastamps.com is themed "Beauty and the Beast" but I've run with the Midnight Masquerade papers and made a handful of pretty magical masquerade ATC's instead.


The colours are juicy and gem like and look lush with copper highlights. I applied some thick acrylic medium with the Quatrefoil Texture Sheet and Diamonds Texture Sheet to create some three dimentional texture.

NOTE: If you want to use your texture sheet over and over again, try a couple of coats of marine varnish to protect it and make the card super durable.


This card has adorable Small Mulberry Blossoms and pretty Lavender Purple Gardenias.


Those little Clear Iridescent Star Sequins on all of the cards are really quite nice and rather dreamy. I thought they seemed quite a bit thicker than most sequins I've worked with before.


And how gorgeous are those Gardenias in Mixed Cream Yellow Orange?


I think they turned out quite nicely. All dreamlike and rich.


See a card you like and want to swap? Shoot me a note and we can make a trade!

Want to make your own? Here's a list of all the bit's I used for these ones.

Friday, January 06, 2017

Pins for Every Type of Valentine

The plan was to create an organization project. But I don't feel much like organizing.

I'd rather get romantic-like and look ahead to Valentine's Day.

So I came up with a slew of simply made pins for every Valentine.


I've used a variety of Punchelements from Gypsy Soul Laser Cuts for the bases. (Only the round are currently listed on the site.) Not too long ago I scored a 1" round punch at the craft store so making these was super simple.

Paint the base, add sparkle, add image/sentiment, embellish and finish off with a pin back!


I've made them to suit just about every Valentine. There's pink and sparkly for the romantic.


And something glittery and red for the saucy types. There's a "Go Away" pin for those who would rather be left alone.


"I am crazy" for my buddy who says this is the reason she is single.


A number of the pins have images of Cupid and Psyche, a theme I think I might like to further explore some time.


A few of the pins are a little crass... but I like the way glitter and the indelicate work together.


Do you want to make your own? You can download a sheet of the saucy and silly, nice and naughty sentiments below. (Note: You may have to click for the full sized image.)


If you need a little more direction the video tutorial for creating these wee thing-a-ma-bobs can be found HERE.

Supplies:

Punchelements 1 inch Scalloped

Acrylic Paint
Glitter
Glue
Embellishments
Pin Backs


Now, prepare some sparkly Valentine's for the peeps you love!


Wednesday, December 07, 2016

Day 7 - SPARKLE BATH!

As far as I am concerned, there are two types of people in this world: those who loathe glitter and those who want to bathe in it.


I've made some sparkly, glittery, shiny, smelly, rose-budded bubble bath for the latter.

If you see someone with red sparkle, you'll know they were on my Christmas list.


P.S. These remind me of the year I had $36 to spend on all of my Christmas gifts. If memory serves, most of that was spent on toiletries that were rationed and prettily re-packaged. It stinks not having money, but it is painful not having money during the holidays. If your holiday funds are tight, I'm sorry. I know exactly what that's like. You'll get through. Everything will be ok. I promise.

Tuesday, December 06, 2016

Day 6 - A Wee Pinecone Tree

Mr. Pixie often says, "I'm the idea guy."

This usually means that he has a fantastical but outrageous idea that is an impossibility to bring to fruition. Once in a while his ideas are totally do-able. "You should make a little pinecone Christmas tree." Done!


A pinecone...


Some glitter...


And a tiny tin bucket.

Ta da!

Sunday, December 04, 2016

Day 4 - Little Snow Dudes with Tutorial

I'm not sure why I keep calling these guys 'Snow dudes' rather than 'Snowmen' but they keep insisting that IS what they are called, so I shall comply.


I made a slightly larger and more complicated version of these guys last year. This year, I've simplified the heck out of them while maintaining maximum cute.


And if you'd like to make your own HERE is the video tutorial...


And here's what you'll need:

styrofoam balls
jute twine
white/clear glitter
good quality white glue
hot glue
small metal brads
black seed beads
straight pins or flat head jewelry posts
toothpics
black and orange paint
small eye hooks

Wednesday, November 16, 2016

Shabby Chic Ornaments

Holiday making is in full swing. Yay! I'm hoping that all the glitter, and glue, and pretty Christmas pictures, kick my spirit in the pants so that I'm cheery as all heck this year. 


Last year was exhausting and I think aged me about 10 years. This year I want to enjoy myself. There are rumours of snow for this Monday, fingers crossed it comes and I'll be the holly jolliest mo' fo' you ever did see!


Until then, I'll settle for fake snow and glitter... which isn't so bad. This shabby set of ornaments is covered in the stuff.


They are made with laser cut wooden frames (last years post-christmas clearance, bought for pennies, hells yes!). I prepped the frames with blue paint then slopped those suckers with glue, white acrylic paint, glitter and faux snow. Add fake berries, burlap, snips of lace and tulle, vintage buttons and ta dahhh!

These lovelies are already on their way to their new home (hiya Ms Amy Love!), but if you'd like some Pixie Hill magic to arrive on your doorstep, skip over to my facebook page and enter my holiday giveaway.

Love you more! 
xoxo

Monday, November 23, 2015

Simple Mixed Media Canvas

I hosted a kids workshop at the studio this weekend. My goal was to create four gift quality projects that were also kid friendly. Participants could choose a project and it was wrapped/boxed before they left to ensure that there was no peeking by their grown ups. 

This little mixed media canvas was one of the projects offered.

Simple Mixed Media Canvas w/ Tutorial - Nichola Battilana

If you have little people to craft with, there's a video tute available on my youtube channel HERE or see below. (Note: I suggest keeping the kidlets away from the heatgun.)


Here is a list of all of the supplies I used:
4" canvas
Snowflake Shape Set
Cardstock Doily Set Intricates
Ornate Metal Keys from Graphic 45
Fancy Red Holly Berries Mix*
Silks Acrylic Glaze: Stargazer
twine
vintage image
clear glitter
white acrylic craft paint
white school glue
Aleene's tacky glue

And here are some of the other projects completed by my amazing workshop kiddies!


So proud of those little people :)

Friday, November 06, 2015

Winter Shrine Tutorial

First Friday of the month! That means a tutorial for a glittery magical something for GinasDesigns.net. Jack Frost and the holiday season are on the way but there's loads of time before the holiday madness to get your supplies for this super cute project. 


This snowy winter wonderland shrine was created using Gina's House Shrine Box. I really and truly love that little shrine house. It's such a great piece to apply your own style to. 

Below you can just peek at the roof texture. This is achieved by layering pieces from the Cardstock Doily Set Intricates. The result is really cool and I show exactly how to do it in the video tutorial that goes along with this project.


The shrine is embellished with pieces from the Snowflake Shape Set. They've been painted and glitterfied and look oh, so sweet. Alternatively, you could use the Winter Shape Set which also includes snowmen, icicles and other wintry icons.


Inside my wee shrine I've added some bottle brush trees and a carpet of moss. Fill that space with whatever you like! A little Santa figure or snow capped house would be adorable. 


Being a total glitter fiend, I used a lot of the sparkly stuff on this project. Feel free to leave it out if you like, but I think that it adds and special icy touch. You might think that white glitter would be ideal for a winter landscape, but I recommend using clear glitter for a snowy look. 


What do you say? Want to make your own? You can find the full video tutorial HERE.

And here are all the supplies you'll need:

Wallflower 12x12 Paper Stash (or paper of choice)
Clear glitter
Light blue ultra fine glitter
White acrylic paint
Glue
Moss
A piece of foam
Bottle brush trees

*Note: the shrine box used in the tutorial is slightly larger than the one listed on the Gina's site. If you really, really, really, truly, must have the bigger version, please contact Gina's for pricing.

Sunday, August 02, 2015

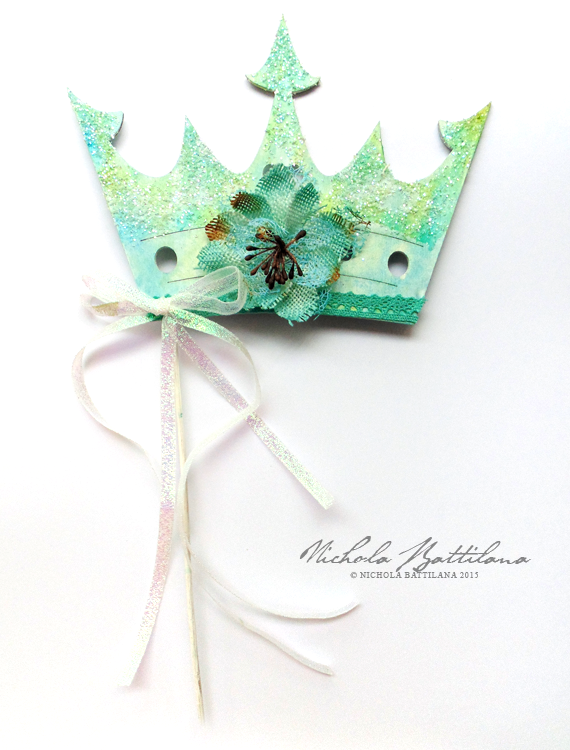
Sparkly Floral Crown with Petaloo

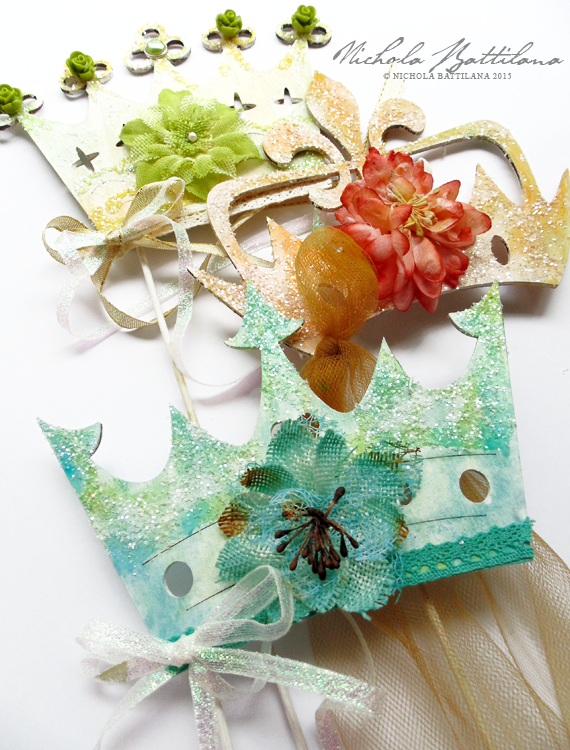
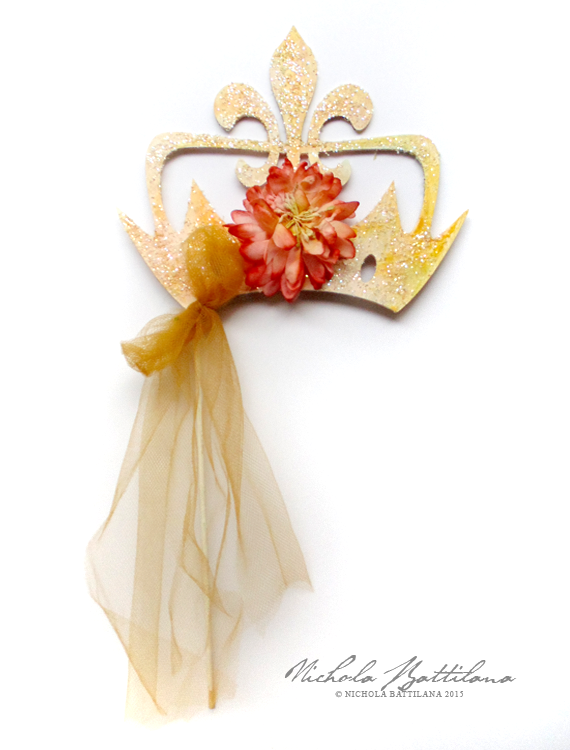
I found some simple wooden crown cut outs at Michaels. They have a little stick to hold the crown shape above your head during photographs or when meeting crown worthy dignitaries, all the while preventing unsightly 'crown head' hair.
Sparkly Floral Crown with Petaloo Blooms - Nichola Battilana

I thought the shapes were cute and a great kids project. After all, even if you can't find these wooden cutouts at your local craft store, it would be easy enough to create your very own from some cardboard and a bit of doweling. They would make a totally adorable "make and take" for birthday parties.
Sparkly Floral Crown with Petaloo Blooms - Nichola Battilana

I began by painting all of the pieces white, then sploshing some paint on them. Sploshing doesn't require being neat or tidy so it is perfectly appropriate for little hands. Eat a cookie or fresh fruit salad and wait for that sploshing to dry before adding some glitter (Tip: good quality glue will help avoid glitter from loosening). For this crown I've added Fancy Trimsalong the bottom edge and a coordinating Teal Burlap Blossom
Sparkly Floral Crown with Petaloo Blooms - Nichola Battilana

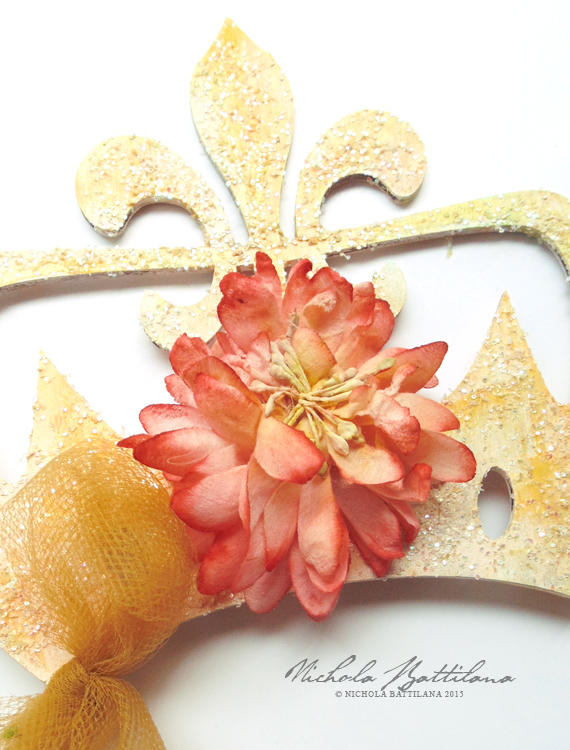
For this crown I've used a DIY-Mum which you can colour to match your project. (Note: I coloured this blossom with watercolour paint then dipped it in tea to soften the colour) Then I added a length of tulle to gussy up the handle.
Sparkly Floral Crown with Petaloo Blooms - Nichola Battilana

Those DIY blooms are pretty amazing and colouring them could be a fun project for kiddos in and of itself.
Sparkly Floral Crown with Petaloo Blooms - Nichola Battilana

Working with kids can be a lot of fun and there are many ways to include them in crafting. Let them make decisions about colour and trims. Let them do the sploshing. You can set limits if you like "Let's pic three flowers to add" but let them have some control. Be sure to have those little people help clean up afterwards too.
So get out there and make some crowns with your littles. And don't forget the tea party photo shoot afterwards.

Supply List:
Misc ribbons and trims
Wooden Crown cut outs or DIY crown shapes