Showing posts with label gina's designs. Show all posts

Friday, November 06, 2015

Winter Shrine Tutorial

First Friday of the month! That means a tutorial for a glittery magical something for GinasDesigns.net. Jack Frost and the holiday season are on the way but there's loads of time before the holiday madness to get your supplies for this super cute project. 


This snowy winter wonderland shrine was created using Gina's House Shrine Box. I really and truly love that little shrine house. It's such a great piece to apply your own style to. 

Below you can just peek at the roof texture. This is achieved by layering pieces from the Cardstock Doily Set Intricates. The result is really cool and I show exactly how to do it in the video tutorial that goes along with this project.


The shrine is embellished with pieces from the Snowflake Shape Set. They've been painted and glitterfied and look oh, so sweet. Alternatively, you could use the Winter Shape Set which also includes snowmen, icicles and other wintry icons.


Inside my wee shrine I've added some bottle brush trees and a carpet of moss. Fill that space with whatever you like! A little Santa figure or snow capped house would be adorable. 


Being a total glitter fiend, I used a lot of the sparkly stuff on this project. Feel free to leave it out if you like, but I think that it adds and special icy touch. You might think that white glitter would be ideal for a winter landscape, but I recommend using clear glitter for a snowy look. 


What do you say? Want to make your own? You can find the full video tutorial HERE.

And here are all the supplies you'll need:

Wallflower 12x12 Paper Stash (or paper of choice)
Clear glitter
Light blue ultra fine glitter
White acrylic paint
Glue
Moss
A piece of foam
Bottle brush trees

*Note: the shrine box used in the tutorial is slightly larger than the one listed on the Gina's site. If you really, really, really, truly, must have the bigger version, please contact Gina's for pricing.

Friday, September 04, 2015

Old Bird ATC Pocket Letter with tutorial

It's the first Friday of September (already!) which means it's my turn to share a tutorial using magnifique products from Gina's Designs Lasercuts. Woo hoo! This month I thought we'd do some nitty gritty paper crafting and create a sort of pocket letter.

ATC Pocket Letter for GinasDesigns.net - Nichola Battilana

I've been seeing these pop up all over my timeline and wanted to give it a try. 

What is a pocket letter, you ask? Janette Lane, the creator of Pocket Letters™, explains on her site:

"Basically, you fill all the pockets of a 9 Pocket Trading Card Protector and send the whole page to someone who wants to swap with you... You fill the pockets with anything you like (stickers, tea bags, a note, washi tape samples, pictures, etc.) A short note or letter is included and tucked into one of the pockets. Then the Pocket Letter is folded up and sent in a standard 10 size envelope."**


ATC Pocket Letter for GinasDesigns.net - Nichola Battilana

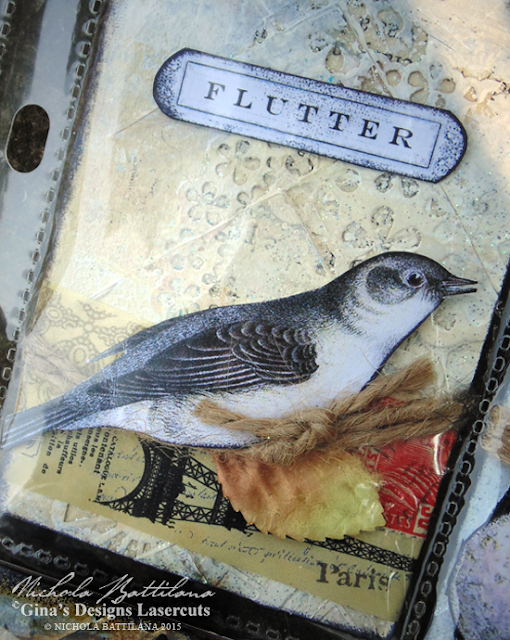
I am a huge fan of ATC's (Artist Trading Card: miniature works of art measuring 2.5" x 3.5") so I've created a cohesive set of birdy themed cards to fill those little pockets with. You can source your own public domain images, or purchase a collage sheet with all of those vintage birds and sentiments available HERE.

ATC Pocket Letter for GinasDesigns.net - Nichola Battilana

When creating your own piece, consider other little bits and pieces to tuck into those sleeves. Stamps, ephemera, feathers... little bits that match the theme or look of your cards.

ATC Pocket Letter for GinasDesigns.net - Nichola Battilana

Also consider the sleeves themselves. I've added clear stickers to the exterior.


Of course you could just create these pretty ATC's and trade/give them separately. There's nothing wrong with spreading the crafty love around.

ATC Pocket Letter for GinasDesigns.net - Nichola Battilana

If you're not keen on making these little bits of art, you may want to check out the tutorial anyway as it includes creating the textured background seen below.

ATC Pocket Letter Tutorial for GinasDesigns.net - Nichola Battilana

But enough blabble! HERE is the video tutorial. If you have any questions, don't hesitate to give me a shout. I'm happy to lend a hand or answer any questions you have. Seriously. Don't be shy ;)

ATC Pocket Letter Tutorial for GinasDesigns.net - Nichola Battilana


THE SUPPLY LIST
From Gina's:
Cardstock Doily Set 1
Cardstock Doily Set Intricates
Steampunk Fan
Ornamental Birdcages Shape Set
Pen & Ink Shape Set
Faux Metal Number Plates
Herringbone Stencil (available soon!)

Other things you'll need:
For the Birds Collage Sheet
Cardstock
Paper (I used pages from an old book)
Decorative scrapbook paper
Glue
White acrylic paint
Watercolour paint
Stamp pad
Clear stickers
Tim Holtz Long Mini Brads
Foam spacers
Ultra fine glitter
Jute twine

Washi tape
Buttons, stamps and other small embellishments and trinkets
ATC Pocket Pages

**For more information on Pocket Letters you can visit Janette Lane's YouTube Channel or join the Pocket Letter Pals Network


Sunday, August 16, 2015

A Fun Fairy Door for Gina's Designs

A wee fairy door project to share today for Gina's Designs. Isn't it cute as buttons?!

Fairy Door for GinasDesigns.net - Nichola Battilana

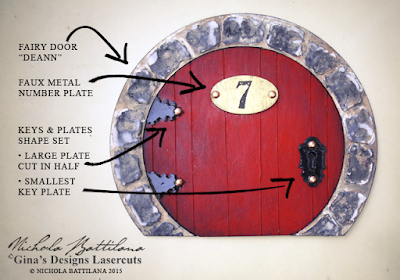
To create this adorable fairy entrance I've used Gina's Fairy Door 'Deann', Faux Metal Number Plates and Keys & Plates Shape Set.

Fairy Door for GinasDesigns.net - Nichola Battilana

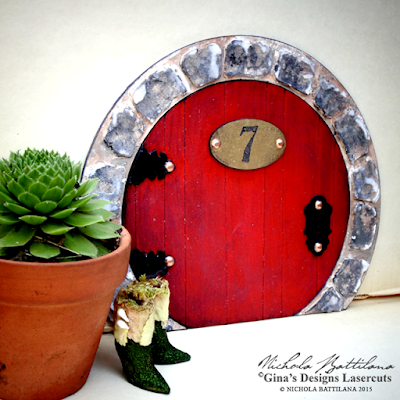
In this example I've used the stone door frame piece that comes with the Fairy Door as a stencil and applied a layer of spackling to give the texture of a stone doorway.

To create the illusion that the door is made of wooden planks, I've scored the chipboard with a stylus before painting. If you don't have a stylus, you could press very hard with a ball point pen to create the grooves. A light wash of dark paint allowed to seep into the impressed lines will emphasize the effect.

Fairy Door for GinasDesigns.net - Nichola Battilana

The 'hinges' are created by cutting a large keyhole in half, applying to the door and trimming.

Fairy doors are pretty dang adorable and an excellent way to include a bit of magic in your household. Be sure to get creative with them by adding a little plant, a welcome mat and other accessories... great curb appeal will be sure to entice the wee folk into your home ;)

Acrylic paint
Small metal brads
Spackling
Glue

Friday, August 07, 2015

Tall Garden Cottage Tutorial

Every month I create a project with a tutorial for GinasDesigns.net. This month it's a biggy...

Tall garden Cottage with Tutorial - Nichola Battilana

There are loads of steps and it'll take some time to complete (especially when you factor in drying time), but I think it's worth it.

Tall garden Cottage with Tutorial - Nichola Battilana

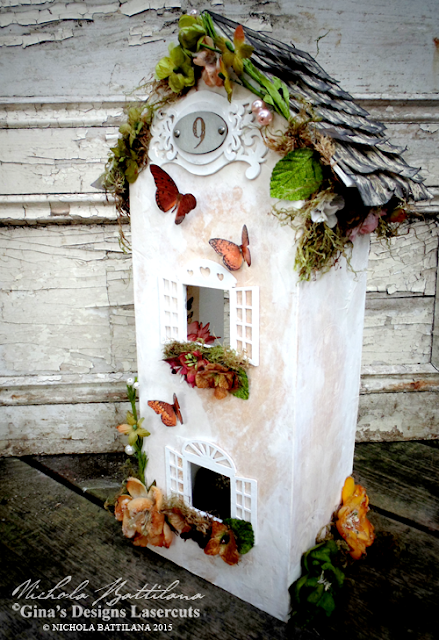
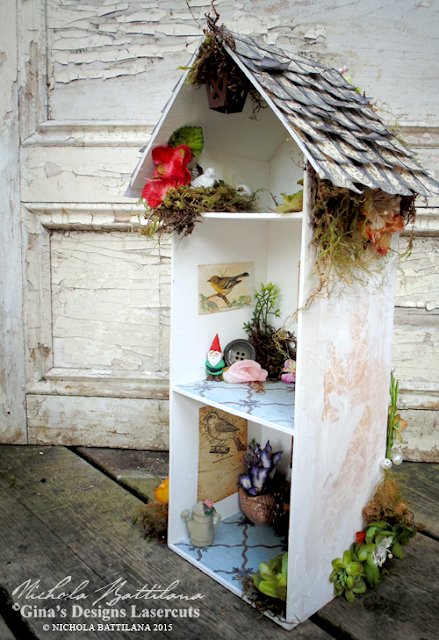
Created from Gina's 3 Story House, you could customize the contents to your own whims and tastes. Filled with little mementos, keepsakes and small photos it would make a wonderful gift for someone special. 


Tall garden Cottage with Tutorial - Nichola Battilana

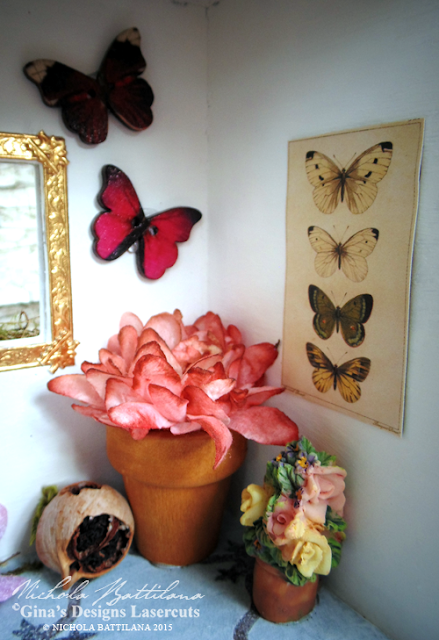
Mine isn't quite so sentimental and will be home to little gnome and elf figures and collectibles :)


Tall garden Cottage with Tutorial - Nichola Battilana

Don't feel rushed with this project. Enjoy the process of making it 'just-so' and the challenge of filling it with lovely little bits and bobs.


Tall garden Cottage with Tutorial - Nichola Battilana

I only had one piece of Honeycomb Fleur Cardstock from The Robin's Nest to cover the house, so I'll show you how to be a little sneaky if you're short on paper.


Tall garden Cottage with Tutorial - Nichola Battilana


You can find the full video tutorial HERE


If you have any questions or are unclear about anything, don't hesitate to ask.

Gina's Supply List:

The Robin's Nest Supplies:
Calamity Jane Diagonal Glitter Cardstock
Honeycomb Fleur Cardstock

Other Supplies:
White Tacky Glue
Spackling (I used one that goes on pink and dries white)
*And a quick link to all of the products used available via Alpha Stamps

Wednesday, July 08, 2015

"Sing Together" Altered Canvas

Sing together, sweet and beautiful - Nichola Battilana

A little textured canvas today. Four inches square, covered with pieces from Gina's Texture Sheet Gears and Gears Shape Set and some paperclay bits made with this Silicone Mold. Painted white and sploshed with Silks Acrylic Iridescent Glazes. Finished off with some beautiful Botanica Flowers from Petaloo. The final touch, some snippets from a vintage children's book. 

This piece is listed in the etsy shop HERE

Tuesday, July 07, 2015

A Pixie House Shrine

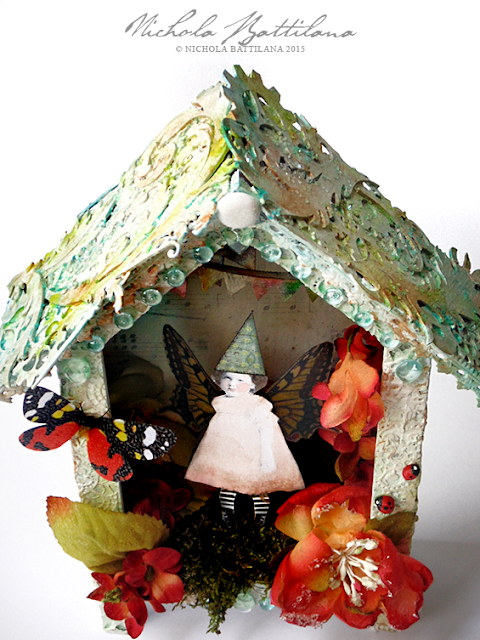
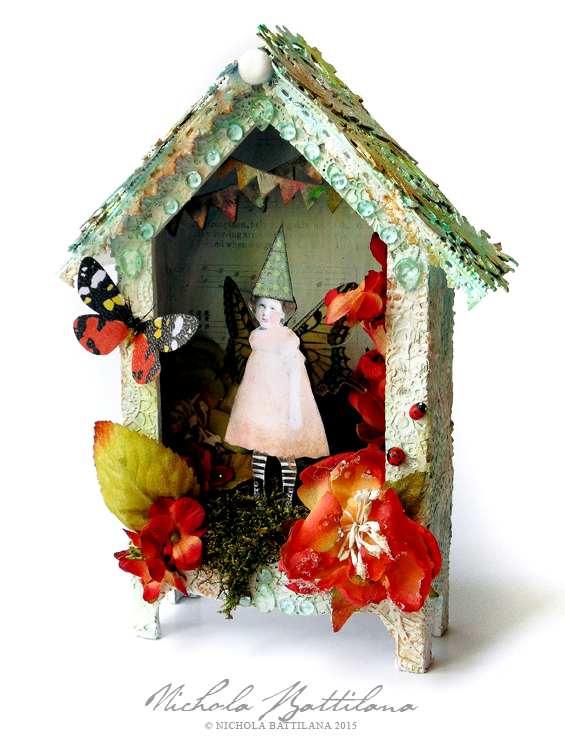
I altered this cute House Shrine Box for a colour challenge that I totally missed the deadline for. 

Pixie House Shrine - Nichola Battilana

I used to be terrified of colour but plowed through that wall. Now, I'm trying to consciously add texture to my pieces. This piece is chocked with textured elements. 


Here's the texture of the walls of this wee house. I've layered Cardstock Doily Set Intricates, painted them white and then added a smidge of colour with some ColourArte silks and H20's. I'm pretty smitten with the way it turned out.

Pixie House Shrine - Nichola Battilana

For the roof I used sturdier chipboard pieces. There are some Feathery Flourishes (quickly becoming one of my favourite embellishments!) and Steampunk Fan blades. Again I painted them white and added some colour with ColourArte products.

Pixie House Shrine - Nichola Battilana

The piece is finished off with some super cute Water Dew Drops from The Robins Nest, handmade ladybugs, a sweet winged vintage girlie and more. Here's the whole supply list kit-and-kaboodle.

White acrylic paint
Vintage image

This gal is currently listed HERE in the etsy shop.