Thursday, October 27, 2016

Starry Lacy Princess of Power Crown

A pretty something for Shabby is Chic Boutique today.


I've made a crown. Because A) I loves me a good crown and B) how could I NOT make a crown with that Gold Embroidered Tulle Lace

To create the crown, I began by making a base with a length of cotton fabric. I folded a long strip in half so that it was double thickness, then sewed it together to provide some stability, and prevent puckering. Then the ends were sewn together to make something that resembled an ugly headband.


Layers of lace were applied on top of that, then 'grungy' paint splashed on to sort of blend the different lace colours together.

I added Rows of Pearls Flatback Trim4mm flatback pearl trim-white and the Silver Wrap Filagree piece and star after staining the fabric.


To stiffen the peaks, I've applied gel medium. There are products available specifically for stiffening fabric, and they probably ARE more effective, but I wanted to use what was already on hand.

This will be a grand crown for lounging and lazing (especially on Mondays when crowns are needed most of all).

Rows of Pearls Flatback Trim
Embroidered White Rose Lace
4mm flatback pearl trim-white
Silver Wrap Filagree


Tim Holtz Mirrored Stars

Saturday, October 22, 2016

Miniature Weasley Burrow Clock

I have a thing for clocks. There are clocks scattered all over the Pixie house. I even have a cuckcoo clock hanging above my work table in my studio. Not a single timepiece in this home tells the correct time.

So, I was excited to learn that 'clocks' were the theme at AlphaStamps this month and as soon as I learned that grandfather clocks were on the menu I knew I needed a Weasley Burrow Clock.


I chose not to paper the clock, but rather cover it in wood filler and gesso. I applied each, layer by layer, allowing it to dry and sanding before the next application. Two healthy layers of each, and a little touch ups to cover the chipboard joints, seemed to do the trick.


The piece is covered with acrylic paint, metal embellishments added, and then washes of earth tones give it some age and grime.

Inside I've placed a Glass Tube Pendant and filled it with magical time glitter. (I said it, so it's a thing, right?)


I've only used three spoons as the hands on the face. (It really should be 9 golden hands if you want absolute authenticity.) Any more seems to get a bit thick where they overlap. If you wanted to add more, I would suggest cutting the handles and placing them 'just-so' to circumvent the issue of over thickness.


For the clock face and Weasley family pictures, I just did a quick google search.
There is a drawer that fits into that bottom area of the clock. After applying so many layers of filler and gesso it becomes a bit of a tight fit. I like the idea of the Weasley's tucking things into every available space so I've used this area for storage. Paper scrolls, Half Scale Wine Bottles that look just like little potion vials, Pumpkin Pods and a Mini Black Cauldron are all crammed into that little space.

And although he's a rotter, I've painted a Tiny Metal Mouse to look like 'Scabbers'. After all, I'm pretty sure he would have kept a close eye on where the family was at all times.


I realize that there are variations of the clock (Mrs. Weasley is said to carry it around the house with her) but I have always thought of it as a grandfather clock as it is in Harry Potter and the Goblet of Fire

Even if it ain't 100% accurate, I'm pretty darned pleased with my little burrow clock.


And bit by bit:
Tiny Metal Mouse
Glass Tube Pendant
Brass Flower Charms*
Bronze Branch Connectors
Half Scale Green Wine Bottle
Half Scale Red Wine Bottle
Mini Black Cauldron
Pumpkin Pods
Silver-Plated Teacup, Teapot, Spoon
Tiny Dot Dresden Borders - Black*
Victorian Drop or Handle - Raw Brass

Friday, October 21, 2016

Madness, Badassness and a Little Bit of Sadness

I'll be scarce over the next week-ish.


I've been cleaning like mad because my long-lost-uncle (seriously!) is coming to stay with us for a week. Being awkward in an awkward situation does nothing for my anxiety... but I hope that in all the weirdness that there's some fun too. He arrives today and at this point I'm just trying to focus on not having a panic attack (ugh!). Wish me luck!

My kid is excited about my uncles visit. I'm glad because lately he's been very teenagery.  We decided to cheer him a bit...


I baked him a cake and we had a fake birthday for him. (His birthday is March) He smiled. He laughed. We all ate cake. It was great :)

The Christmas making has begun and will be in full swing next week. There's a batch of unfinished snowballs having an orgy in the studio right this minute!


I didn't make any last year but I had a number of requests for them for this year. Sometimes, when you make the same thing over and over, it loses it's magic. I never want to feel like making things is a chore and I've enjoyed making this batch. Yay! Anyway, they won't be listed until after Halloween... maybe after Remembrance Day... I'll let you know when they're posted.

Finally, poor Pads. He's not feeling too well.


If you've got some sweet thoughts to spare, be sure to send them his way. I'll give him an extra scratch just from you and he'll be right as rain in no time at all.

Hope you're well and dandy and everything is candy and roses in your world.

Big squishes and kisses to you, from me.

Wednesday, October 19, 2016

In which some weirdos put on a show

"What's the title?"

"No, idea."

"Well, what is it?"

"Just a bunch of weirdos putting on a show."

"There's your title." 

That, right there, is a good example of why designing for AlpahaStamps is a pretty sweet gig.

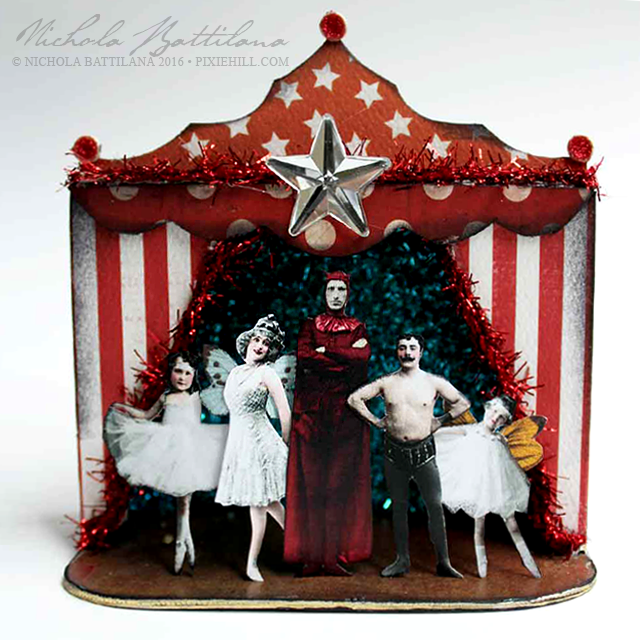
"A bunch of wierdos put on a show" miniature stage - Nichola Battilana

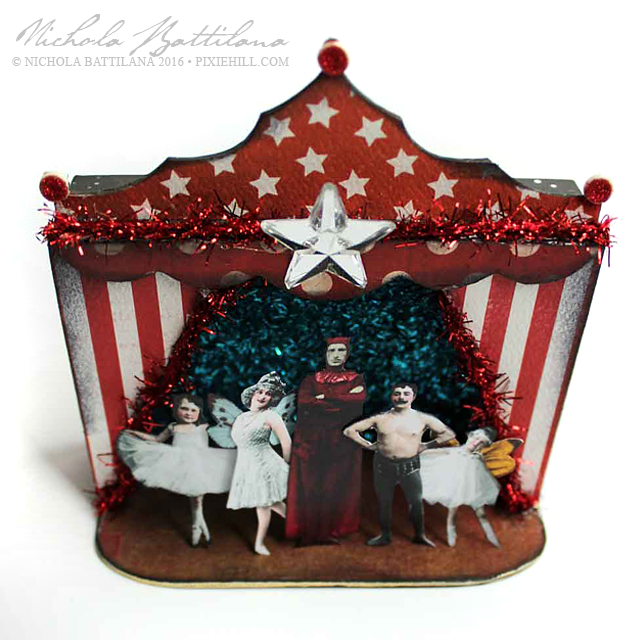
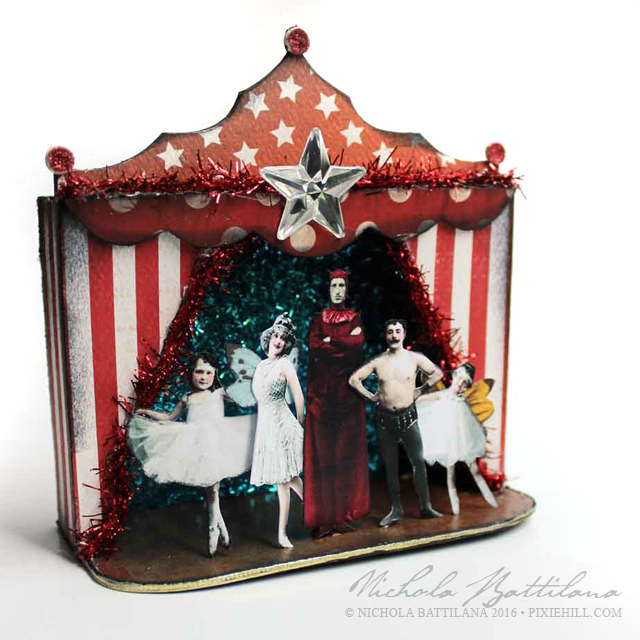
I was sent this Miniature Chipboard Stage and I just sort of set to work without much direction. I knew I wanted to have a glittery background. I knew I wanted red and white and stripes and stars and polka dots. Beyond that... ?

"A bunch of wierdos put on a show" miniature stage - Nichola Battilana

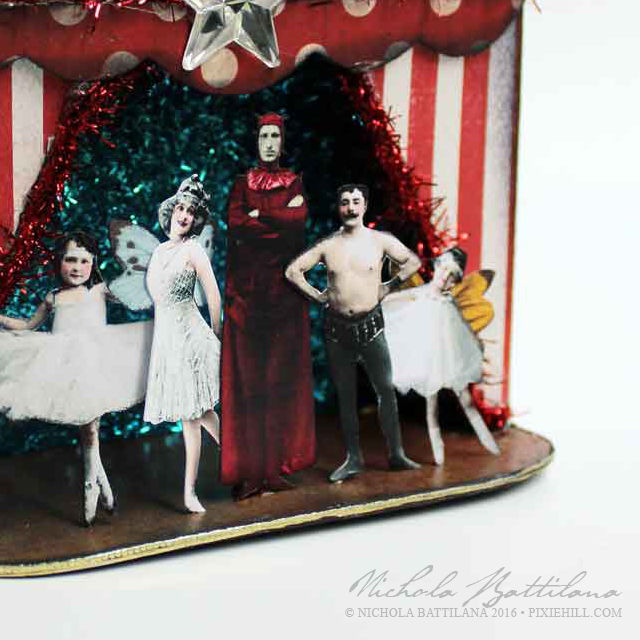
What a stage really needs are it's players. So I printed out the Little People Collage Sheet at 50%, fussy cut those suckers, and added wings. Note: I'm not entirely certain where that devilish fellow in the centre popped up from... he just sort of snuck in there!


"A bunch of wierdos put on a show" miniature stage - Nichola Battilana

There's touches of glitter and sparkle all over. Tim Holtz Mirrored Stars, Shiny Tinsel and Tiny Embossed Gold Dresden Borders.

"A bunch of wierdos put on a show" miniature stage - Nichola BattilanaReally, there's no great intention, meaning or reason behind this piece, it's just a sweet bit of nonsense."A bunch of wierdos put on a show" miniature stage - Nichola Battilana


If you'd like to create your own set of weirdos here are some of those bits and pieces.

Miniature Chipboard Stage
Little People Collage Sheet
Tim Holtz Mirrored Stars
Tinsel
Tiny Embossed Gold Dresden Borders.

Thursday, October 13, 2016

Shabby mojo bag

The beautiful Miss Amy Love invited me to guest design with Shabby is Chic Boutique and of course I said 'Yes!' because everything she carries is adorable!

When I saw this Cotton Drawstring Pouch in my package I knew I wanted to make a shabby mojo bag to encourage crafty inspiration!


First, what exactly IS a mojo bag? Basically it's a pouch, or bag, usually made of flannel, containing magical items used in hoodoo for spell work. Similar bags are used in other magical traditions for luck, protection and healing.

This is NOT a traditional mojo. I'm using the concept as a magical inspiration point.


My Cotton Drawstring Pouch is layered in Butterfly Dangle Trim and lace, then tea stained. I've added vintage buttons as accents, and centred a Filigree Wrap Around as a focal piece.


Silver Fairy Wand CharmSilver Fairy Charm, and a cute Witch Hat Charm are attached to the filigree and hopefully supply an added dash of fairy magic.


Finally, the most adorable Gold Plated Spoon is attached to the drawstring. I love it sooo much and imagine I'll use it for scooping glitter!


The contents?  Well, these sorts of bags are kind of like birthday wishes - you really aren't supposed to tell. 


To encourage crafty inspiration you may want to add items that reflect the colours, textures, motifs, mediums and themes that you love. Or, you could add herbs and flowers that encourage inspiration to make a magical sachet. And if magic ain't your jive, you could always use it to store something small and pretty.


Wednesday, October 12, 2016

Miniature Funeral Carriage

Something a little dark but (I think) lovely today. A miniature funeral carriage, inspired by beautiful Victorian horse drawn hearses.

The Funeral Coach base is a chipboard kit available from AlphaStamps. Inside I've slipped a 6 Inch Coffin Box

Makers note: I actually didn't include the coffin lid and simply used the main part box upside-down. I trimmed the coffin height down as I was considering adding flowers, or a traditional funerary wreath to the top and was thinking of the available space.


The whole carriage is painted in matte black and gussied up with LOADS of black dresden borders. (I think I have a serious dresden fetish. It's like Franks Red Hot. I put that s**t on everything!)


I've also added loads of ornamental do-dads using Creative Paperclay* and this Silicone Mold - Architectural Flourishes. That particular material works really well with the matte black finish.


19mm Fancy Metal Drawer Pulls act as finials accents for the top. And there is the most lovely little Antique Brass Mini Trunk Lock on the back doors. 

Makers note: the rear doors aren't actually hinged in place. I am a horror show with hinges! They never seem to work well for me and I just make an awful mess. Since I don't plan on opening and closing those doors often, and they sit quite nicely without much fuss, I'm taking the totally lazy route and leaving them free.


I've lined the interior with Bright Red Suede Paper. If you're looking for a more 'authentic' feel, line that sucker in black. (I personally love the shock of red inside.) Finally, the windows. Many funeral carriages had swags of lush drapery inside but I was liking the 'clean' look of this little coach. I put together this Filigree Funeral Carriage Windows Collage Sheet with vintage fancy framework that can be printed on transparency sheets and glued into place. 

I'm smitten with this piece. It looks great on my mantle, and is a good size at somewhere around 10" x 6". Although it's intended as a Halloween piece, it'll stay out year round in my spooky old house ;)

Want to make your own?  
ALL THE BITS in one place

The list of individual bits:
Funeral Coach
Filigree Funeral Carriage Windows Collage Sheet
6 Inch Coffin Box
Creative Paperclay
Silicone Mold - Architectural Flourishes
19mm Fancy Metal Drawer Pulls
Antique Brass Mini Trunk Lock
Bright Red Suede Paper
Black Suede Paper*
12mm Flat Fancy Bead Cap - Bronze*
Baroque Dresden Borders - Black
Black Zig Zag Dresden Borders
Half-Round Dresden Borders - Black
Thin Fleur Dresden Borders - Black
Thin Looped Dresden Borders - Black

Friday, October 07, 2016

The Good Witch's Tea Party

It's October and I've been thoroughly enjoying myself, making all sorts of Halloween goodies. While so much of the focus of Halloween (especially retail) is on skeletons and coffins and monster mashes, for some it's much more about the magic that takes place this time of year. Halloween isn't all doom and gloom. For some of us it's a joy! And so, here is the 'Good Witch's Tea Party', a sweet, not-at-all-grim celebration!


I've used the Round Table and Chairs and very simply painted them white. Narrow Gold Fleur Dresden Borders* have been added as a simple accent and these Victorian Drop or Handle - Raw Brass pieces fit just so as a decorative element on the back of the chairs.


Then it's just a matter of adding tiny bits and pieces! I've added things a good witch would like for her tea party. There's a little crystal ball, a cup with tea leaves, cakes and jam... all sorts! If witchery isn't your jive, create your own theme and add elements that complement or reflect that.


Work in layers and try to create some height to make your little scene visually interesting. Have fun with the details and let your imagination soar! Try making a list of all the things you'd like to include. I'm sure you'll fill that tiny table in no time at all.


Although it's very simple to assemble the Round Table and Chairs I do have a very quick video of it's construction.


If you're interested in going even tinier (crazy, I know!) Gypsy Soul has an itty bitty 1:24 scale version of the round table and chairs too.

But here's the supply round up for this particular version:
1:12 Scale Round Table and Chairs

Narrow Gold Fleur Dresden Borders* Victorian Drop or Handle - Raw Brass

Some of the miniature accessories include:
Pumpkin Pods
Pewter Dollhouse Dishes
Mini Resin Honey Jars
Mini Silicone Cake Mold Set
and loads of other miniature accessories available HERE