Saturday, November 14, 2015

Pocket and Tag Christmas Countdown Organizer

I am disorganized.

There is no doubt about it.

Given the opportunity to create a sort of advent calendar with Alpha Stamps new Victorian Christmas Tags Kit and Library Pocket Organizer Box* I thought 'What better way to get my holiday butt in gear!'


So here is my box gussied up and filled with pretty altered tags and pockets.


The finish on the box was soooo easy! I gave it a crackled paint finish, wrapped some burlap and Mini Red Pip Berry Garland* around it, then finished it with a wee bunch of Fancy Red Holly Berries and Miniature Pinecone Picks* You don't need any fancy products to achieve a crackle finish. HERE is a tutorial for the finish. For this project I didn't even do a base coat of paint. Just a layer of glue then a white paint.


Now, as for all those tags and pockets. The front of all those bits and bobs are pretty as a picture and numbered with Faux Metal Number Plates 1 to 25*  (which I love BTW). Here's the part where I get organized. I thought that each day could have a little note, a reminder for what needs to be done, written on the back or attached with a clip.

"Make sugar cookies"
"Tidy the guest room"
"Write holiday cards"
"Prepare packages for mailing"

Here's a good look at the front of all those pockets, tags and Library Pocket Tabbed Dividers*.


So maybe, just maybe, if I give myself gentile reminders I'll actually get the cards and sugar cookies done this year. The goal being to get everything done piece by piece instead of the panicked last minute insanity that usually takes over.


And if my plan fails and I'm still a hot mess this holiday season? Well I've still got something pretty to show for it ;)


Or an itemized supply list below:

Prima - A Victorian Christmas Scrapbook Paper Set 

Burlap ribbon from Fall Fiber Set


Friday, November 13, 2015

Notes from the North Pole

I M P O R T A N T
FOR IMMEDIATE RELEASE

Attn: North Pole Representatives and Christmas Helpers

2015 has been an exceptional year and we are pleased to announce that Santa's "Nice List" numbers are higher than they have ever been.

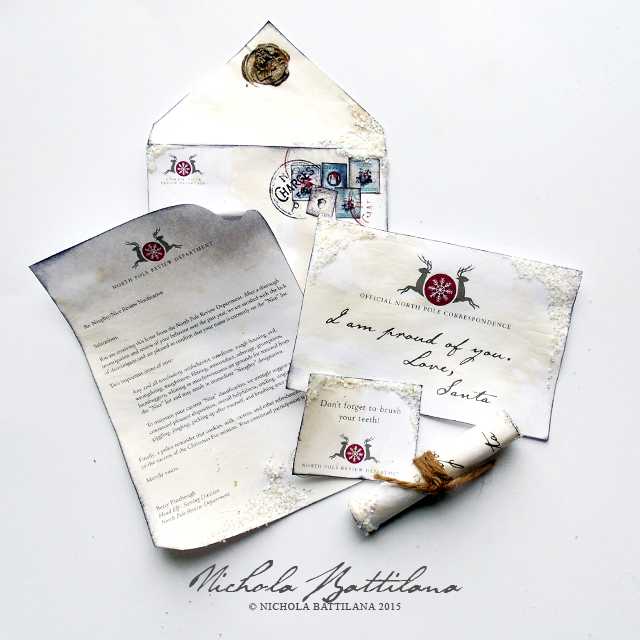
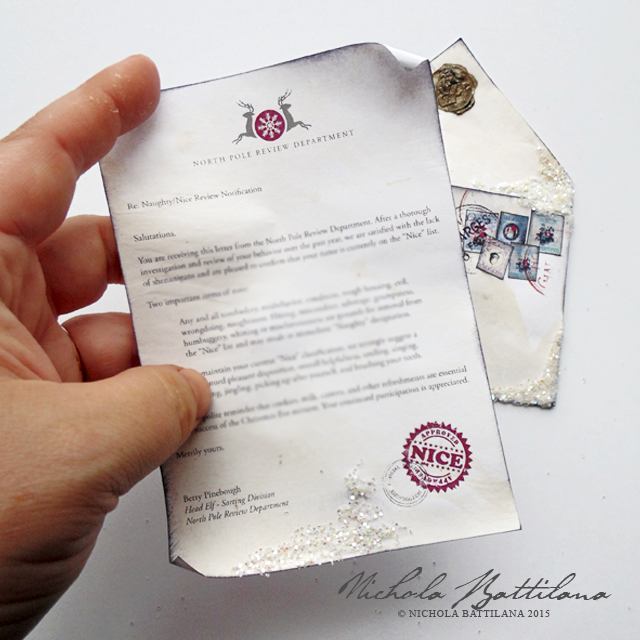
Nice List Notification and Notes from the North Pole - Nichola Battilana

In order to facilitate the distribution of Nice List Notifications to good (and mostly good) children, Mr. Claus is requesting your assistance. 

Nice List Notification and Notes from the North Pole - Nichola Battilana

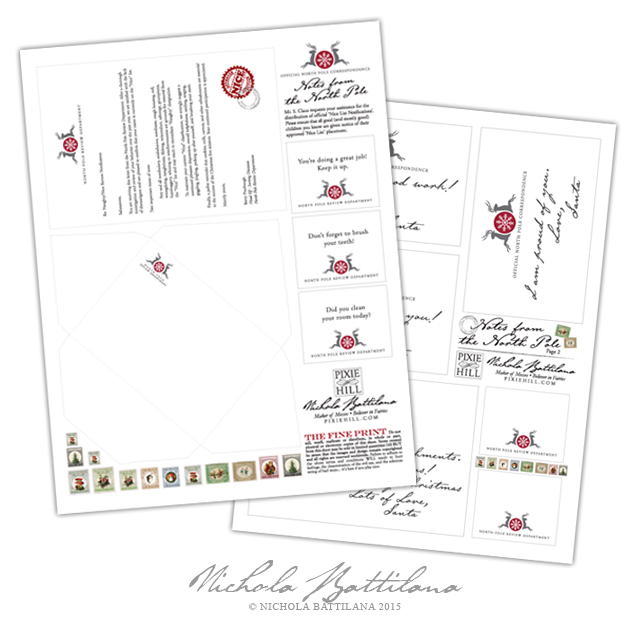
"Notes from the North Pole", a two page digital download, is available HEREThe PDF includes:

• an official "nice list notification"
• a North Pole envelope template
• elf sized postage stamps
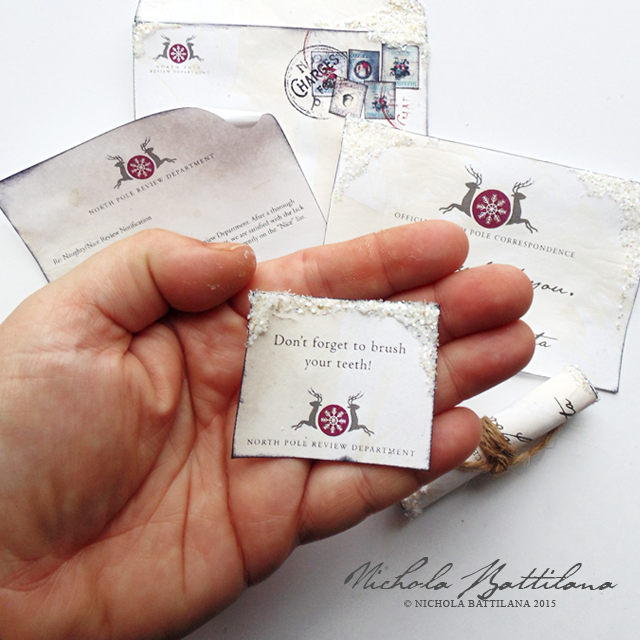
• three notes of encouragement from the North Pole Review Department + 2 blank notes
• three memos from Santa
• a short thank-you note from Santa for Christmas eve refreshments

Nice List Notification and Notes from the North Pole - Nichola Battilana
That is a small letter, not a giant hand.
Please note:

• Any grunging, sparkling, distressing, tearing, smudging or embellishing is to be done in your own workshop. 


• Final letters can NOT be mailed through the silly muggle post. If your notifications require mailing, sending inside a full sized envelope with a note of explanation is suggested.


Nice List Notification and Notes from the North Pole - Nichola Battilana

Mr. Claus is grateful for your assistance and appreciates your contribution in the creation of holiday magic.

Thank you

"Notes from the North Pole"

Edit: Christmas Helpers who prefer print form, hard copies are available via Alpha Stamps.

Thursday, November 12, 2015

Pretty Holiday Packages with Petaloo and Claus & Co.

I think that the Claus & Co. collection from Simple Stories is absolutely adorable. Paired with Petaloo blooms and trims, the everything just shines and sings. Don't get me wrong, I love shabby, frilly, Victorian holiday goodness... but this pairing is just good ole holiday fun.


I thought I'd put the snippets and components of from Claus & Co to practical use, and gussy up some gift boxes.

First, some tiny premade boxes embellished with trims, stickers and brads. There is something precious about small boxes and they often contain the sweetest gifts. And you truly don't have to go overboard to create a prettily packaged present. A bit of Glitz trims, a Claus & Co Bradz and a Pine Pick with cones and berries looks pretty dang cute


... but sometimes going overboard and making your own boxes right from scratch is fun too! Here's "Oh Joy" and "Ho Ho Ho" made into little boxes and embellished with Petaloo's Glitz trims and Burlap Pointsettias

.

And sometimes, just once in while, it's nice to add a whole lot of sparkle too. Who am I kidding? I throw glitter on all the things! All the time!


Want to gussy up some boxes to create some darling presents? Here's the supply round up:

Glitz trims
Burlap Pointsettias

Pine Pick with cones and berries
Textured Elements

Simple Stories, Claus & 
Co Collection Kit
Claus & Co Bradz

GLITTER!
glue
boxes

Wednesday, November 11, 2015

Monday, November 09, 2015

Pixie Dust and Moonbeams

I've been working like mad preparing for a craft show this weekend and getting my Christmas haul made. Last night I was up till 4 am (what?!?) watching Blacks Books on Netflix and blending glitter for these vials.

Bottled pixie dust and moonbeams - Nichola Battilana

I don't think the pictures do them justice. They are much more magical in person.

Bottled pixie dust and moonbeams - Nichola Battilana

Bottled pixie dust and moonbeams - Nichola Battilana

Bottled pixie dust and moonbeams - Nichola Battilana

I made a HUGE batch of the things and I am COVERED in glitter. It's ok, sparkling makes me feel better about being sleepy ;)

Bottled pixie dust and moonbeams - Nichola Battilana

Have you started work on your holiday haul yet? What lovely things are you making?

Friday, November 06, 2015

Winter Shrine Tutorial

First Friday of the month! That means a tutorial for a glittery magical something for GinasDesigns.net. Jack Frost and the holiday season are on the way but there's loads of time before the holiday madness to get your supplies for this super cute project. 


This snowy winter wonderland shrine was created using Gina's House Shrine Box. I really and truly love that little shrine house. It's such a great piece to apply your own style to. 

Below you can just peek at the roof texture. This is achieved by layering pieces from the Cardstock Doily Set Intricates. The result is really cool and I show exactly how to do it in the video tutorial that goes along with this project.


The shrine is embellished with pieces from the Snowflake Shape Set. They've been painted and glitterfied and look oh, so sweet. Alternatively, you could use the Winter Shape Set which also includes snowmen, icicles and other wintry icons.


Inside my wee shrine I've added some bottle brush trees and a carpet of moss. Fill that space with whatever you like! A little Santa figure or snow capped house would be adorable. 


Being a total glitter fiend, I used a lot of the sparkly stuff on this project. Feel free to leave it out if you like, but I think that it adds and special icy touch. You might think that white glitter would be ideal for a winter landscape, but I recommend using clear glitter for a snowy look. 


What do you say? Want to make your own? You can find the full video tutorial HERE.

And here are all the supplies you'll need:

Wallflower 12x12 Paper Stash (or paper of choice)
Clear glitter
Light blue ultra fine glitter
White acrylic paint
Glue
Moss
A piece of foam
Bottle brush trees

*Note: the shrine box used in the tutorial is slightly larger than the one listed on the Gina's site. If you really, really, really, truly, must have the bigger version, please contact Gina's for pricing.

Thursday, November 05, 2015

Bread and Pastry Tutorial

I'm going to show you how I created these little treats for my Miniature Floral Tea Cottage using these silicone molds.

Bread and pastry tutorial - Nichola Battilana

You can use polymer clay with the molds but I made my little treats with Creative PaperclayYou WILL need to plan ahead to allow for drying time (make the pieces the day before you need them) but the actual 'working' time is just minutes.

I begin by pressing the clay into the mold. Give it a good push to ensure all the details are imprinted. I allow the clay to become firm before removing from the mold, then allow the pieces to dry completely before the next step.


Using some REALLY watered down yellow ocher acrylic paint I cover all of my pieces.


Wipe off any excess paint. Apply another coat of the wash if the coverage is too light.


Breads are often darker than pastries and cakes, and are darker still on their top crust and bottoms. Add a wash of dark burnt umber or other dark earth colour. (Note: You can also colour your pieces with powdered chalk pastel by applying with a dry brush.) As a final step I've dusted a little corn starch to the surface.


You can use Diamond Glaze to create a few different finishes on your pieces. Some breads have a light sheen on their surface (i.e. croissants). This look can be achieved by adding some water to the glaze and applying sparingly. To create a 'glazed' look just brush on a good layer.


You can also add colour to diamond glaze and apply thickly to look like a jammy glaze or filling.


Let all those bits and bobs dry and their ready to go! So simple. So effective.

Bread and pastry tutorial - Nichola Battilana

Happy making!