Showing posts with label winter. Show all posts

Monday, November 19, 2018

Big Fat Christmas Greeting Matchbox

I think my forced break from crafting while I was on my trip kind of reinforced the notion that crafting helps to keep me sane. It quietens the world around me. Although I do feel like I'm playing catch up with laundry and dishes and cleaning... I've been thoroughly enjoying making things, and savouring the 'stillness' creating brings.


But enough deep thoughts! Can we talk about the Christmas Vintage 12×12 Paper Pad? It's from Stamperia and it is full of old Christmas charm. Here I've used some sweet chickadees and cut out a rustic winter scene. I've fussy cut loads of holly and berries too (fyi there's some great Christmas puddings and cakes in the collection too.)


In addition to the background sky, I've added some clear glitter to the edges of the buildings and on the tops of the hills. It think it catches the light just right.


The top corner has a nice grouping of chickadees and holly and baubles. 

On a side note, the chickadees are out in full force here! They peck at the feeders and make a huge mess on the ground below. It's all good though the snowbirds prefer to forage and clean up after them. The whole while we have blue jays who swoop in and squawk like maniacs. Seriously, you'd link such handsome fellows would have a beautiful strong whistle. Nope!


But back to beautiful things!

This scene is set in a nice fat  Big Chunky Matchbox with Window and topped with a wired bow.

Want to make your own? Here's the list of making!

Big Chunky Matchbox with Window
Christmas Vintage 12×12 Paper Pad
Christmas In The Village Tiny Houses (background)
Wired ribbon
Clear Glitter

*I am an absolute stinker and have no idea which holly paper was used on the exterior of the box but I CAN say that it can be found in the Christmas Paper section at AlphaStamps

Saturday, November 10, 2018

Pretty Pink Christmas Things

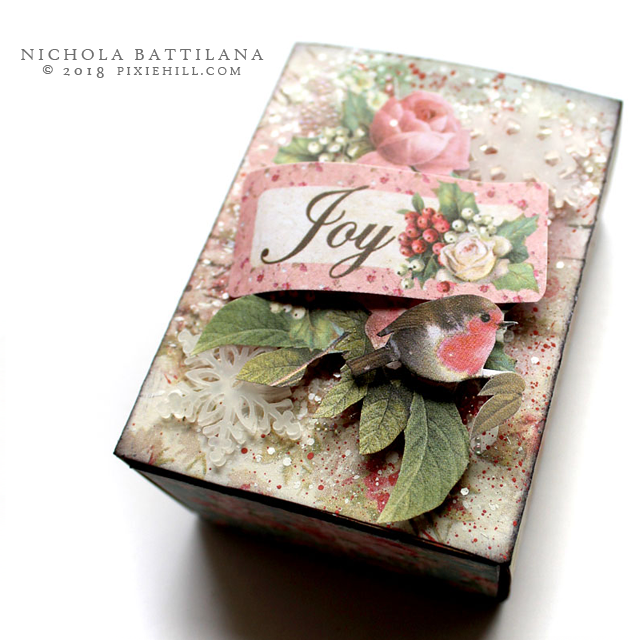
A few years ago I would have laughed if you told me I'd be all about pink Christmas. This year I'm all about the pink Christmas.

AlphaStamps.net Pretty Pink Christmas - Nichola Battilana

I've used two paper collections: Pink Christmas 12x12 Paper Pad and Christmas Vintage 12x12 Paper Pad for the following projects and I'm loving the way they work together.
AlphaStamps.net Pretty Pink Christmas - Nichola Battilana

Add some faux snow and a Gold Dresden Christmas Tree swoon!

AlphaStamps.net Pretty Pink Christmas - Nichola Battilana

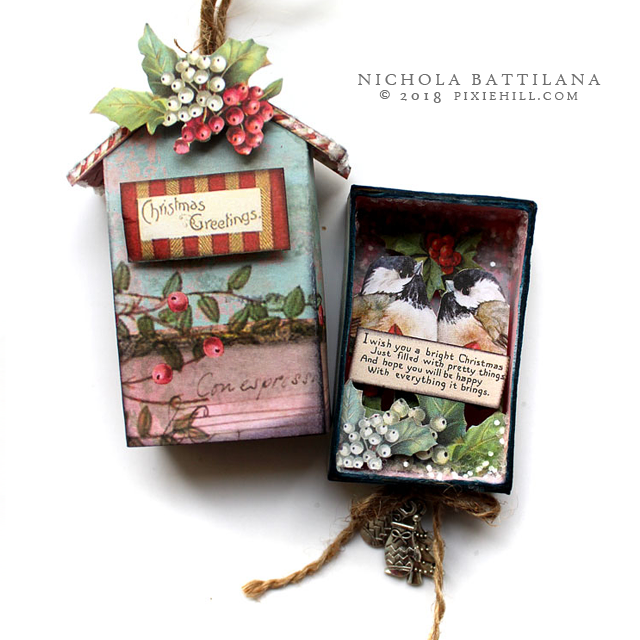
There was a quite a bit of fussy cutting involved in these projects, but the results are terribly sweet. Just look at this Peaked Roof Matchbox...

AlphaStamps.net Pretty Pink Christmas - Nichola Battilana

...and those little birds and inside. 

AlphaStamps.net Pretty Pink Christmas - Nichola Battilana

What a lovely holiday treat for someone nice.

AlphaStamps.net Pretty Pink Christmas - Nichola Battilana

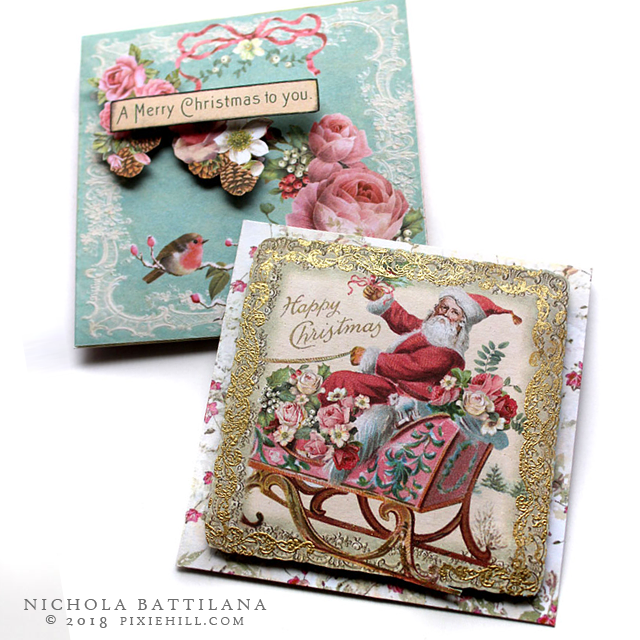
It's totally worth mentioning that the Pink Christmas 12x12 Paper Pad has a super cute tag, envelope, ephemera elements that come together really, really swiftly. 

AlphaStamps.net Pretty Pink Christmas - Nichola Battilana

I did some gold embossing around the edge of the vintage Santa image and it looks so authentically old timey. And while old envelopes probably would have been plain white, the envelope element is the perfect compliment. Swoon!

AlphaStamps.net Pretty Pink Christmas - Nichola Battilana

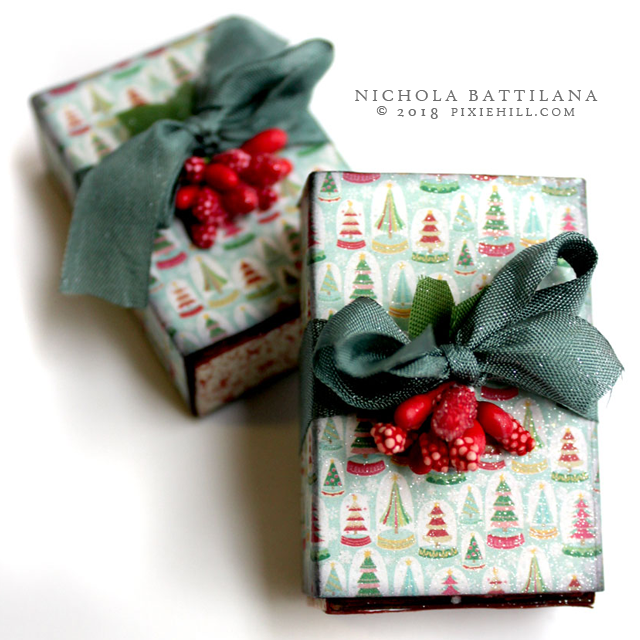
The final two pieces (yes there's more!) are more of a kitchy rather than antique vintage. Still totally cute though.

AlphaStamps.net Pretty Vintage Christmas - Nichola Battilana

Here I've used Jingle 6x6 Paper Pad and Tree Ornament Matchboxes. I'm thinking that i might pop these on top of presents instead of a standard bow. Afterall, what could be nicer than a gift topped with another wee surprise?!

AlphaStamps.net Pretty Vintage Christmas - Nichola Battilana

I usually start Christmas crafting in September so this is a very late start for me, but I gotta admit, I'm really enjoying it this year. It's far less work and much more pleasure this time around. I hope you're enjoying holiday creating too.

NOW, if you want to make your own slew of pretty pink Christmas things, here's the supply list:

Thursday, November 09, 2017

MOTHER EFFIN' SNOWBALLS! with tutorial

Today was supposed to be the first snow of the season. Because it's daylight savings and now dark at 2 in the afternoon (not really, but it feels like it) I have no idea if it actually did snow today BUT there's these dudes. The yearly Cheeky Snowballs.

Cheeky Snowball Ornaments with Tutorial - Nichola Battilana

I've been making these guys for nearly 10 years. TEN FREAKING YEARS! They started out as emotional snowballs and transformed into the cheeky variety.

Cheeky Snowball Ornaments with Tutorial - Nichola Battilana

This year I've decided to do a tutorial so people can create their own. The video is available HERE on my YouTube channel. If you create your own, please share on social media and tag me. Seriously, it's appreciated and I totally want to see what you make.

Cheeky Snowball Ornaments with Tutorial - Nichola Battilana

A couple of things I KNOW are going to come up.

1. Can I use a different clay?  
I REALLY recommend you use Creative Paperclay for this project. It's super light weight so your ornament won't drag down the Xmas tree branches. It gives a beautiful finish. There may be a bit of a learning curve if you're used to other materials... but  In my opinion it's absolutely worth $ and time. 

2. It's taking SOOO LONG! Can I speed up the drying?
I prefer to let things dry naturally. There seems to be less warping, and cracking when I let things take their course. Plus, do you really want to put styrofoam in the oven? Nah.

3. Clear glitter?
Never mind fancy stuff, head over to the kids aisle in Micheal's and grab a big ole jar of Creatology "Crystal Clear" glitter. It looks like this...
What is most important is that your glitter of choice is NOT SOLID WHITE. The flecks in this product are transparent. This is important. You want a product that will allow the underlying paint colour to show through. Just look for something transparent or translucent.

4. I can't find tiny eye hooks!
I use teeny tiny eye hooks for hanging on my snowballs. If you can't find any small enough, try the jewellry section of the craft store and look for findings like these Tiny Silver Eye Pins*. Poke a hole with a straight pin, add a dab of glue, and slide it in. They'll work in a pinch.

5. What kind of glue do you use?
I'm using Elmer's School Glue in the tutorial. The better the quality glue you use (i.e. Aleene's Tacky Glue) the more glitter will remain on your snowballs in the long run.

6. Can I (insert other subsitution/method/madness)?
Part of the joy of creating is experimentation. Have an idea? Give it a try! Maybe it'll turn out a bazillion times better than my snow dudes!


Cheeky Snowball Ornaments with Tutorial - Nichola Battilana

THE LIST OF SUPPLIES!
- styrofoam balls (2" - 2.5" makes a nice size)
- Creative Paperclay
- white glue
- clear/transparent/translucent glitter
- pink, black paint
- mini eyehooks
- fake snow
- clear gloss medium like Diamond Glaze, Glossy Accents or Dimensional Magic

Sunday, December 04, 2016

Day 4 - Little Snow Dudes with Tutorial

I'm not sure why I keep calling these guys 'Snow dudes' rather than 'Snowmen' but they keep insisting that IS what they are called, so I shall comply.


I made a slightly larger and more complicated version of these guys last year. This year, I've simplified the heck out of them while maintaining maximum cute.


And if you'd like to make your own HERE is the video tutorial...


And here's what you'll need:

styrofoam balls
jute twine
white/clear glitter
good quality white glue
hot glue
small metal brads
black seed beads
straight pins or flat head jewelry posts
toothpics
black and orange paint
small eye hooks

Saturday, December 03, 2016

Day 3 - Tiny snowy house

Just something small and sweet today.

I think this will be a perfect thing to abandon with a note of holiday cheer.

The dome has been in my stash for quite a long while. THIS little tree was coloured green and dusted with some faux snow. The house is one which was pit fired in my back garden. And the gold is a snip from one of these dresden trims.


On top, a little bow with ribbon from THIS set, with a tiny snip of green and some colour from this Fancy Red Holly Berries Mix.

Ta dahhh! How's YOUR holiday cheer chugging along?


Thursday, December 17, 2015

Walnuts and Memories

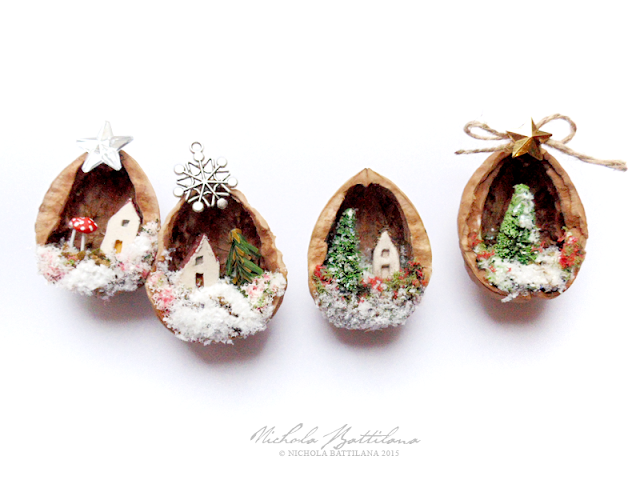
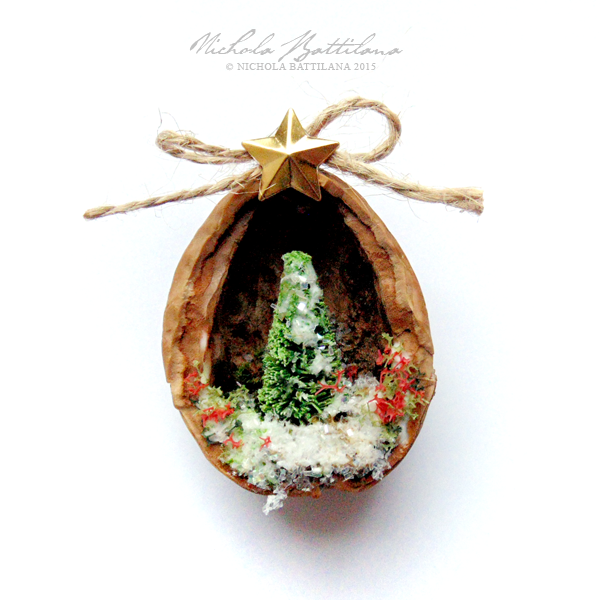
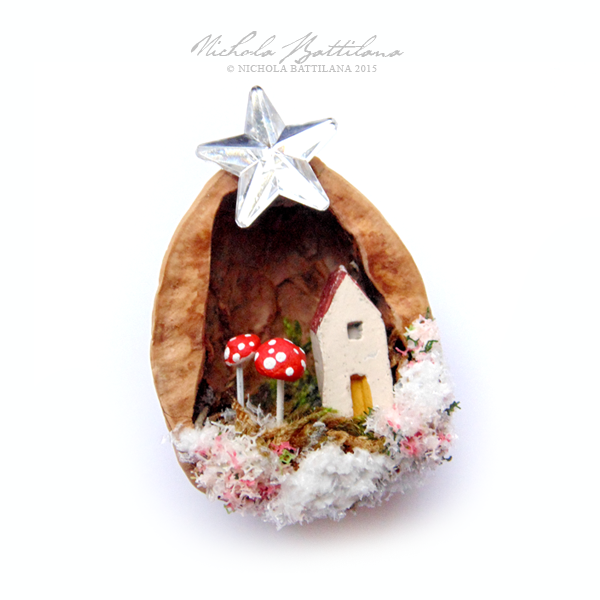
I made this little Christmas in a nutshell while waiting for glue to dry on some other projects.

Wee Little Winter Walnut - Nichola Battilana


You never know what people will react to. Spend a week on something and no one bats and eye. Spend a few extra minutes and everyone loves it. I don't really mind though, especially when the reason for the reaction is because memories are revived.

Wee Little Winter Walnut - Nichola Battilana

A number of people said that they reminded them of German baubles that their parents or grandparents had decades ago. That's a nice thing.


Wee Little Winter Walnut - Nichola Battilana


I could see loads of conversations, people planning to make their own. "We need to buy walnuts!"


Wee Little Winter Walnut - Nichola Battilana


I'm all for encouraging a handmade Christmas (or just handmade in general really) so I cut into my holiday baking and cleaning time and put together a quick tutorial found HERE.


Wee Little Winter Walnut - Nichola Battilana


Below is a list of products I used. Feel free to substitute to create your own miniature masterpiece.

Walnuts
Hot glue
White glue
Moss
Frosted White Sisal Trees (painted them green) / aka Bottle brush trees
Wired Pine Needle Stems (or anything similar to cut into tree shape)
Flat-Back Gold Star Studs - 12mm*
Tim Holtz Mirrored Stars
Snowflake charms
Wee clay houses
Handmade Toadstools
Flower Soft
clear glitter
Buffalo Snow

Enjoy!

Monday, December 07, 2015

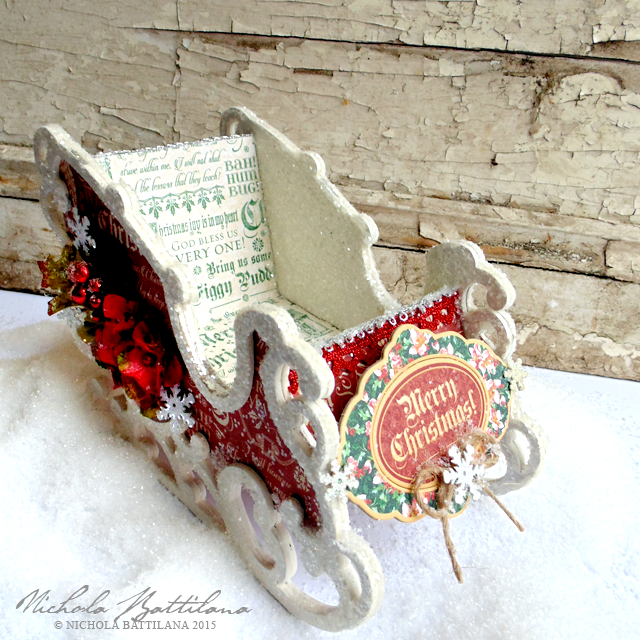
Wintry Sleigh and Card with Petaloo and Graphic 45

What a lovely holiday treat to have the chance to work with the Christmas Carol collection from my old friends at Graphic 45. The gorgeous, vibrant colours work so well with Petaloo's blooms. Whether it's red, green or blues... they all coordinate beautifully.

Graphic 45 / Petaloo Sleigh - Nichola Battilana

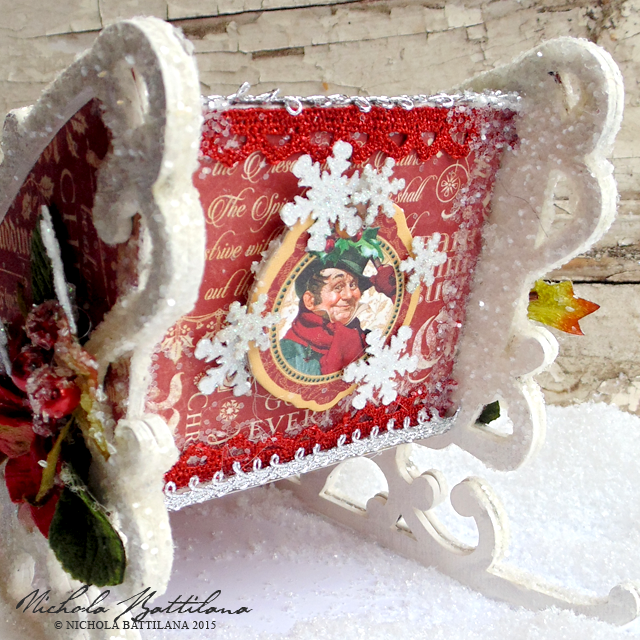
I've embellished this Chipboard Sleigh which is perfectly sized to hold your holiday cards and tags. The sleigh is embellished with Bah Humbug and Graceful Garland  from Christmas Carol. A sweet bough of blooms adorns each side.
  
Graphic 45 / Petaloo Sleigh - Nichola Battilana

A bough of Sugared Berrys ClusterChantilly-VelvHydrangeas and White Glitter Snowflakes adorn each side of the sleigh.

Graphic 45 / Petaloo Sleigh - Nichola Battilana

The front and back have Christmas Carol Journaling Chipboard embellishments, accented with White Glitter Snowflakes

Graphic 45 / Petaloo Sleigh - Nichola Battilana
  
Finally, a bit of bling with Fancy Trims and a whole lot of glitter.

Graphic 45 / Petaloo Cards - Nichola Battilana

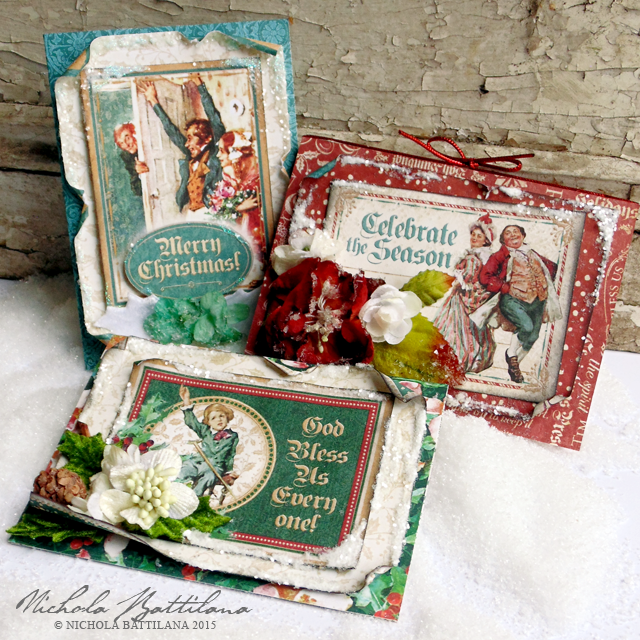
Here are the handmade cards I've filled my little sleigh with. Made with all sorts of papers from the 12" Christmas Carol pad. I've embellished with white and green Velvet Holly LeavesSugared Blooms, Botanica Petite’s and Sugared Mini's

Graphic 45 / Petaloo Card - Nichola Battilana

Graphic 45 / Petaloo Card - Nichola Battilana

Graphic 45 / Petaloo Card - Nichola Battilana


And here's the supply round up if you want to create your own sparkly winter sleigh to hold your Christmas Treasures:

Petaloo:
Graphic45:
Chipboard Sleigh
Glitter


Happy crafting!

Friday, November 06, 2015

Winter Shrine Tutorial

First Friday of the month! That means a tutorial for a glittery magical something for GinasDesigns.net. Jack Frost and the holiday season are on the way but there's loads of time before the holiday madness to get your supplies for this super cute project. 


This snowy winter wonderland shrine was created using Gina's House Shrine Box. I really and truly love that little shrine house. It's such a great piece to apply your own style to. 

Below you can just peek at the roof texture. This is achieved by layering pieces from the Cardstock Doily Set Intricates. The result is really cool and I show exactly how to do it in the video tutorial that goes along with this project.


The shrine is embellished with pieces from the Snowflake Shape Set. They've been painted and glitterfied and look oh, so sweet. Alternatively, you could use the Winter Shape Set which also includes snowmen, icicles and other wintry icons.


Inside my wee shrine I've added some bottle brush trees and a carpet of moss. Fill that space with whatever you like! A little Santa figure or snow capped house would be adorable. 


Being a total glitter fiend, I used a lot of the sparkly stuff on this project. Feel free to leave it out if you like, but I think that it adds and special icy touch. You might think that white glitter would be ideal for a winter landscape, but I recommend using clear glitter for a snowy look. 


What do you say? Want to make your own? You can find the full video tutorial HERE.

And here are all the supplies you'll need:

Wallflower 12x12 Paper Stash (or paper of choice)
Clear glitter
Light blue ultra fine glitter
White acrylic paint
Glue
Moss
A piece of foam
Bottle brush trees

*Note: the shrine box used in the tutorial is slightly larger than the one listed on the Gina's site. If you really, really, really, truly, must have the bigger version, please contact Gina's for pricing.