Thursday, January 10, 2019

Murderous (and other) Mini Scrapbooks with Tutorial

I love projects that are made just because. Just because I'm enthralled with something and want to explore and celebrate whatever is clunking around in my head and tickling my fancy.

Today I'm showing off one of those projects AND I have a tutorial so you can embrace your own weirdness.

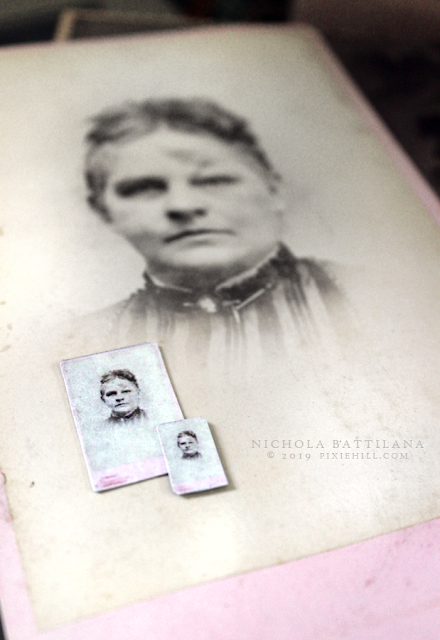
I've been making miniature scrapbook albums of the crazy variety.

Serial killer miniature scrapbook - Nichola Battilana pixiehill.com

I've gone absolutely coo-coo for true crime podcasts over the past few months. I've become well versed in all things serial killer. I am overflowing with terrible information that is probably inappropriate table conversation (which in no way prevents me from talking about it endlessly at dinner.) This led to UFO's and Bigfoot and... and... and...

Bigfoot miniature scrapbook - Nichola Battilana pixiehill.com

I really like these books. They lay flat, open easily, there's space to add pictures and snippets without too much bulk and they are fairly fuss free to make. They aren't made to a particular scale, and I'm fine with that. (If scale IS important to you, you could adjust the measurements.) They're big enough to be handled and I think they'll be fun for those who are interested in mini things, without getting too complicated.

UFO miniature scrapbook - Nichola Battilana pixiehill.com

While I love, love, love all this murder and mystery, I have not forgotten my sweet and squishy side.

"Vintage" miniature scrapbook - Nichola Battilana pixiehill.com

I also made mini albums with tea stained pages and vintage mini goodness... 


And a fairy believer's album too!

"Fairy Sightings" miniature scrapbook - Nichola Battilana pixiehill.com

So how you make these precious little books? The video tutorial can be found at the bottom of this blog post (or jump directly to my channel HERE).

Here is some of the other information you'll need.

Supplies:
Cardboard (i.e. serial box)
Card stock for the inside pages (heavy/cover paper/scrapbook paper)
Scrapbook paper for the cover
Glue stick
Scissors

Optional but recommended tools:
Roller/brayer (Honestly, it makes everything stick so much better.)
Paper cutter
Scoreboard

Measurements:
Card stock: Cut into 2.5" strips, score at .25" from edge, then cut into 1.75" pieces
Cover cardboard: 2.25" x 1.75"
Scrapbook paper: 3.5" x 3" (this gives a large fold)

How many pages you add is up to you. Decide on a number then add 2 to account for the pages that attach to the cover. I'd recommend starting out with 8 to 10 pages. It can be surprisingly difficult to fill those small pages! 

The filling!
Looking for bits to fill these wee books? I've got you covered.

Want to resize your own snaps? Skip over here for a quick how-to.

Ok, so now that you're all ready, here's the tute. Have fun!


Making wee photos

I have a really lovely collection of old cabinet cards and Carte-de-Visites. I've been meaning to scan them for years, but I the process seems so overwhelming.

I got it in my head to reproduce some of the photos in miniature. I photographed the front and back (some of the reverse sides have beautiful graphics!) to achieve totally accurate reproductions. Yes, they looked great... but what a pain in the bum! Recreating the backsides was quickly abandoned.


BUT!!! I did forge ahead and make a few batches of 1:6 and 1:12 scale of some of my photos.


Just like the life sized versions there is variation in their finished sizes. I think this makes them rather more special. Wonkiness usually does.


Aside: what is your favourite scale to work in? I think that making thing as teeny as possible is challenging and impressive but larger playscale is a bit more enjoyable.


Someone mentioned that they'd like to convert their own photos into miniatures. If you're just looking to make minis of your snapshots and have basic photoshop knowledge, I've got a bit of a solution for you. 

Create a folder and add the photos that you'd like to miniaturize (I make copies so that I can just delete the whole folder when done.)

Open the folder and change the 'view' to 'large icons'

Adjust the window so that there are 5 or 6 columns of photos like so...


Now, either take a screen shot then crop the thumbnail area, or use your computers snipping tool to create an image file like so.


You could just print this screen-grab file but to be honest I think it looks a bit fuzzy and the thumbs are tad too big for my liking. Instead, I create a new document in Photoshop (or other photo editing software) at 8.5" x 11" 200dpi, then copy and paste the image into the new document. Then print that sucker out!


This makes the thumbnails just the right size to use with THIS mini scrapbook.

Cut out those thumbs and pop them inside!


If  all of that is a little too complicated for you, and you'd like some wee vintage photos, I have 1:6 playscale photos available HERE and smaller 1:12 dollhouse scale listed HERE.


The truth is out there - Confidential Top Secret Files

Ok. So. I tried to make something pretty. AlphaStamps sent me some gorgeous papers to use with their tent card frames but it was not happening. I'm going to blame my recent podcast listenings for what happened.


I went about as far from pretty as one can get and found myself in a deep dark conspiracy hole.


Not a pink floral paper in sight! Instead I've taken a trip into the basement of the J Edgar Hoover building and gone rummaging through the X-Files. (I'd totally wink at Foxy Mulder circa 1993.)


Flip those folders open (You HAVE to peek when something is marked "top secret" and "confidential") and you'll find top secret office memos and case files. What could possibly be so ultra important?!?!


Photographic evidence of aliens and Bigfoot of course!


They're grungy. They're messy. They ain't pretty... but I kinda love them!


There's a teeny tiny supply list to create these and I've put together a super cool collage sheet for you to make your own top secret files.

Here's everything you'll need:

Tent Card Frame - Oval
Tent Card Frame - Round Top Frame
Classified UFO Collage Sheet 
Glue

That's it! No foolin'.

Get out there and spread the truth!


Trust no one.


Saturday, December 29, 2018

Butterfly Specimen Display

I love museums and old school museum displays. I also love butterflies.

Butterfly Specimen Tray - Nichola Battilana for gslcuts.com

I've created my own butterfly specimen display using a ATC Display Tray, adding a few extra details, and boatload of fussy cut butterflies.

Butterfly Specimen Tray - Nichola Battilana for gslcuts.com

I've kept the embellishments conservative on this project but I haven't left it completely plain. The corners each have a piece from the Petal Corners set added, and I've added a sort of name plate using the Stackable Labels Shape Set.

Butterfly Specimen Tray - Nichola Battilana for gslcuts.com

I've also numbered the specimens with the Tiny Number Plates - Silver

Butterfly Specimen Tray - Nichola Battilana for gslcuts.com

I'm really pleased with the result. Best of all, it didn't take ages to create this piece!

Butterfly Specimen Tray - Nichola Battilana for gslcuts.com

If you'd like to see how this all came together I have a video walk-through for you HERE

Butterfly Specimen Tray - Nichola Battilana for gslcuts.com

And here are all the bits and pieces you'll need to make your very own specimen tray:

ATC Display Tray
Tiny Number Plates - Silver
Petal Corners
Stackable Labels Shape Set

Butterfly Specifics from Graphic 45 Olde Curiosity Shoppe Deluxe Collector's Edition
Old book pages
Acrylic paint
Ribbon
Large jump ring
Glue

Butterfly Specimen Tray - Nichola Battilana for gslcuts.com

Friday, December 21, 2018

Teeny Tiny Gnome Cross Stitched Goodness

Happy Yule!!!! Merry solstice!

Today I have something kinda super adorable...

Mini Gnome Cross Stitch with Free Pattern Download - Nichola Battilana pixiehill.com

Teeny tiny gnomey cross stitched goodness!

Mini Gnome Cross Stitch with Free Pattern Download - Nichola Battilana pixiehill.com

 This is the largest of the bunch with a slightly larger gnome dude.

Mini Gnome Cross Stitch with Free Pattern Download - Nichola Battilana pixiehill.com

But it's these wee tiny guys that I'm most pleased with

Mini Gnome Cross Stitch with Free Pattern Download - Nichola Battilana pixiehill.com

How stinkin' cute!?!

Mini Gnome Cross Stitch with Free Pattern Download - Nichola Battilana pixiehill.com

They're so wee and precious.

Mini Gnome Cross Stitch with Free Pattern Download - Nichola Battilana pixiehill.com

I've created a download of all of the elements used in the tiniest frames for you to create your own stitchy goodness. You can simply download the graphic below, OR if you'd like to send a little something my way, you can purchase the file for just $1.50 HERE

Mini Gnome Cross Stitch with Free Pattern Download - Nichola Battilana pixiehill.com

Whichever option you choose, have fun!

Mini Gnome Cross Stitch with Free Pattern Download - Nichola Battilana pixiehill.com

Make something small and sweet for someone nice.

Mini Gnome Cross Stitch with Free Pattern Download - Nichola Battilana pixiehill.com

Or maybe something for yourself ;)

Mini Gnome Cross Stitch with Free Pattern Download - Nichola Battilana pixiehill.com

Have a beautiful yuletide season, my friends. Bright blessings to each and every one of you.


Monday, December 17, 2018

Goblins of the Wifi variety

I've been having massive problems with my Wifi over the past couple of months. It's been particularly bad over the last few weeks. These guys started out as elf heads (tis the season and all that) but I then they decided they to manifest as strange little goblin-sorts instead.


Thinking of them as the little jerks who have been messing with my Wifi makes me feel zero remorse for mounting their heads.


Each wifi dinkus is made with paperclay and has wool hair, whiskers and eyebrows.


This guy has fur bristles poking out of his ears and nose... of course!


They are each mounted on a wooden plaque measuring approximately 3" x 5".

They are each smelly and terrible nuisances and I will be glad when they find new homes.

If you're feel like you need more chaos in your life they are listed HERE.


P.S. No word of a lie, just as I was finishing up this post my internet provider called to ask if I've been experiencing issues. They said they've noticed weirdness and aren't sure what the problem is. IT'S WIFI GOBLINS YOU FOOLS!!!!


Sweet and Simple #G45Tags

As much as I adore bright and colourful Christmas wrap, there’s something lovely about “brown paper packages tied up with string”. They really are one of my favourite things!


I’ve made some sweet and simple #G45tags as a perfect finishing touch to those packages.


I’ve used papers from the Christmas Magic Patterns & Solids Pad with flower and leaf dies from the Large Tag, ATC Tag and Flower Dies Set


I added paper leaf sprigs and a single assembled flower (made with the two smallest flower dies) to Artist Trading Tags–Kraft along with a few faux berries.


If I had beautiful handwriting I’d add pretty writing to the tags… alas I have a decidedly messy scrawl so I opted for a simple stamped initial in gold embossing powder.


A length of twine, a touch pine (or maybe a candycane or two!) these sweet wee tags add such a nice homey handmade touch.


To show you just how easy these are to put together I have a quick little video to show you exactly how I made them.

And here are all of the supplies you’ll need:

Graphic 45 Supplies:
Christmas Magic Patterns & Solids Pad
Large Tag, ATC Tag and Flower Dies Set
Artist Trading Tags–Kraft

Other Supplies:
Faux berries
Hot glue
Embossing powder
Twine

Happy Papercrafting!