Tuesday, September 29, 2015

Old Timey Tuesday

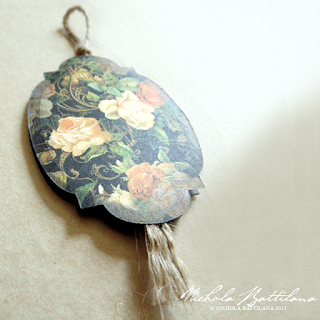
Old grungy pictures from my personal collection for use in your art and craft projects.


You may NOT sell, give or distribute the images, digitally or printed, alone or as part of a collection, collage sheet or group.

Violators will be turned into toads... I mean it... It won't be pretty.

Monday, September 28, 2015

Out of the fire

I made these little clay houses a couple of weeks ago.


Yesterday I popped them into a fire pit. 


This morning I pulled out some lovely little rustic houses!


I really have no idea what I'm doing when it comes to clay. I've learned a lot with the few firings I've done, but I am by no means a 'potter'. I'm not looking to make a tea set or food-safe dishes. If I manage a few primitive pieces in the process of playing and experimenting, I'm happy.

Those little houses may not look like much to a seasoned potter, but today they make me pretty happy :)

Saturday, September 26, 2015

Two Haunted Houses for AlphaStamps

More spookiness today. This time little cardboard houses!
Altered Art Haunted Houses - Nichola Battilana
These were a lot of fun to make. It made me realize how much I miss altered art paper crafting. The best thing about this type of crafting is that you really don't need much to get started, but can get as elaborate as you choose. I digress. HERE is the Haunted House Kit I used.

Altered Art Haunted Houses - Nichola Battilana

With an old story book in hand I clipped words to create ooky snippets. If you don't have time (or the inclination) to scour a book for wicked little sayings, AlphaStamps has put together a collage sheet.

Altered Art Haunted Houses - Nichola Battilana

You may notice a few spider webs on the peak of the house above and covering the fence on the piece below. Can you guess what they are made from? Hot glue! For once I've created hot glue strands and fly-aways on purpose to create those webs.
Altered Art Haunted Houses - Nichola Battilana

I think these two little weirdos are my favourite.

Altered Art Haunted Houses - Nichola Battilana

And I use the term weirdo in the most endearing way!

Happy haunting lovely crafters!

Supply List:
September kit: Haunted House
Haunted House Add-On Kit
Cream Adhesive Pearls 
Halloween Owl Cameo*

Or simply click here for all of the supplies in one place :)


Wednesday, September 23, 2015

Halloween Tree with Ornament Tutorial

Grrrr... moan.... BRAINS.... uugghhh!

Halloween Tree - Nichola Battilana

I feel like I totally missed Halloween last year, so I'm really digging all the spooky stuff from Alpha Stamps over the past couple of months. I know that creepy isn't for everyone... but I love to get ghoulish!

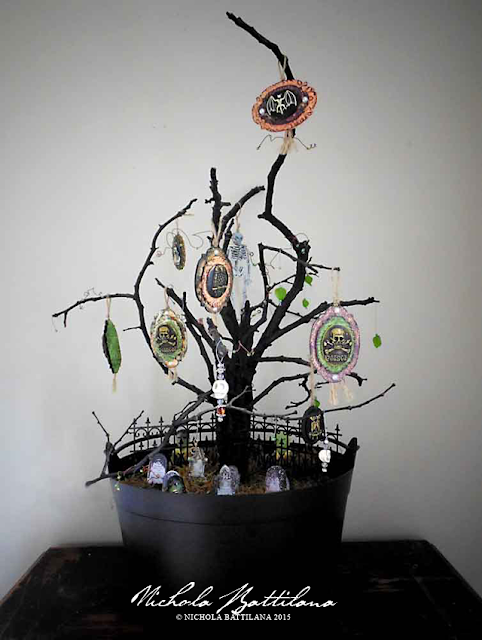
I've wanted a Halloween tree for some time and I decided to finally make myself one to hold all my tiny terrifying trinkets and charms.

Halloween Tree - Nichola Battilana

Let me just say that big things are a pain to photograph. This actually looks pretty dang magnificent on my dining room table with all those spindly branches poking this way and that. Unfortunately, those same spindly branches don't translate well in a single image. (Poo!)

Halloween Tree - Nichola Battilana

ANYWAY, I created the tree by binding several branches together with wire, then spray painting the whole kaboole in matte black. The 'tree' sits in a cauldron with zombie infested cemetery scene using pieces from the August Cemetery Kit.

Halloween Tree - Nichola Battilana

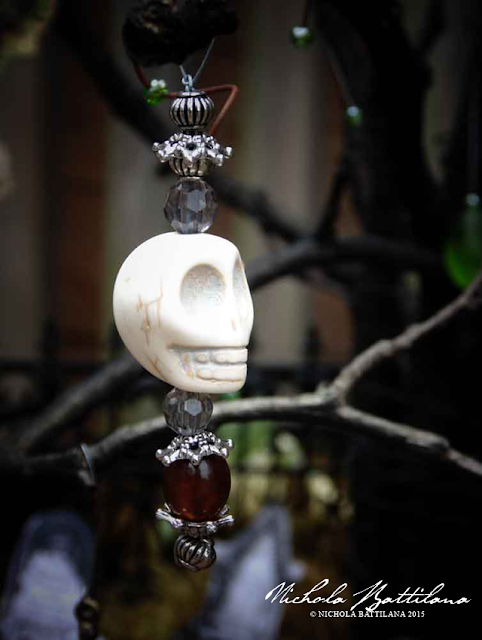
On the branches of the tree I've created some little ornaments, stringing together beads and gruesome things like this Large White Turquoise Skull Bead.

Halloween Tree - Nichola Battilana

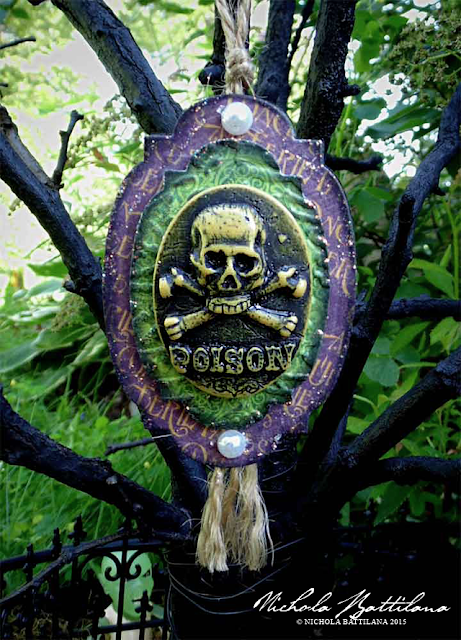
I also created a bunch of simple paper ornaments and to show off some spooky doodads like this  Halloween Poison Cameo.

Want to make your own? Here's how:

Halloween Tree Ornament Tutorial - Nichola Battilana

1. Cut two large shapes and one smaller shape. 
and cut pieces from Graphic 45's An Eerie Tale 8x8 Paper Pad 

Halloween Tree Ornament Tutorial - Nichola Battilana

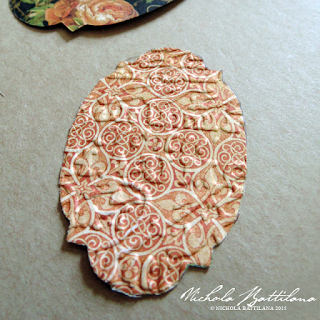
2. Add some texture to the smaller piece with an embossing folder. 

Halloween Tree Ornament Tutorial - Nichola Battilana

3. Ink the edges and raised embossed areas with an old stamp pad.

Halloween Tree Ornament Tutorial - Nichola Battilana

4. Apply some foam squares to the piece like so and
add a loop of jute twine for hanging.


Halloween Tree Ornament Tutorial - Nichola Battilana

5. Affix the two large pieces together with the twine
sandwiched between the layers.

Halloween Tree Ornament Tutorial - Nichola Battilana

6. Apply the smaller shape on top.

Halloween Tree Ornament Tutorial - Nichola Battilana

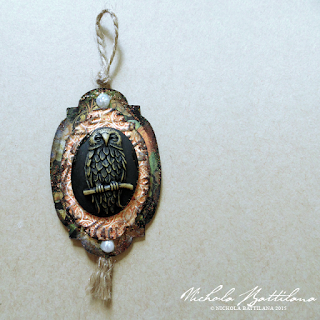
7. Add some decorative elements like Cream Adhesive Pearls and a focus piece such as this Halloween Owl Cameo* 

Halloween Tree Ornament Tutorial - Nichola Battilana

8. For one last finishing touch, apply a bit of sparkle with some Diamond Stickles

These ornaments are simple to make and could be altered to fit any occasion. Prepare the pieces ahead of time and they'd be a great project for even the littlest 'helper' to assist in making them.

Here's all the doods and dads for making the bits in this post:

THE HALLOWEEN TREE
August 2015 - Cemetery Kit
Mini Black Wrought Iron Fence 
Zombie Finger Puppets
Sheet Moss*
large plastic cauldron
branches
wire
black matte spray paint


PAPER ORNAMENTS
Diamond Stickles 
Cream Adhesive Pearls 
Halloween Owl Cameo*
Tim Holtz - Embossing Folders - Eiffel Tower & French Script Set 

Tim Holtz Thinlits Mini Labels Die Set
An Eerie Tale 8x8 Paper Pad
adhesive foam squares
jute twine


Spooky Book of Spells for Petaloo

I adore Halloween. I love creepy, kooky and ooky things. Old, grimy, scuffed and icky sticky things are my favourite. And so, here's a wee horrific project created with Petaloo goodies for Halloween.

Book of Shadows - Nichola Battilana

The base is a book box that are fairly easy to find this time of year in most craft supply stores. I've painted it black and green with a bit of cracklish aging.

Book of Shadows - Nichola Battilana

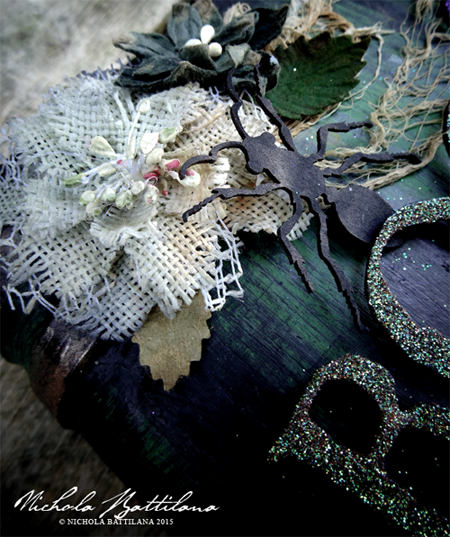
These DIY burlap flowers have been distressed slightly with some murky water. If you work in washes, allowing to dry between layers, you can a achieve a really great stained look. They look great next to a little cheesecloth that has been stained and stretched.

Book of Shadows - Nichola Battilana

Add some bugs and Darjeeling leaves and blossoms and your all set to store some spooky supplies in your embellished Spell Box!

Supplies:

Book box
Cheesecloth
Bug Collector Shape Set
B
ook Of Shadows Cutout (available Oct 1 from GinasDesigns.net)
Acrylic Paint
Glitter

Tuesday, September 22, 2015

Old Timey Tuesday

Old grungy pictures from my personal collection for use in your art and craft projects.


You may NOT sell, give or distribute the images, digitally or printed, alone or as part of a collection, collage sheet or group.

Violators will be turned into toads... I mean it... It won't be pretty.

Wednesday, September 16, 2015

Night Sky Dotee

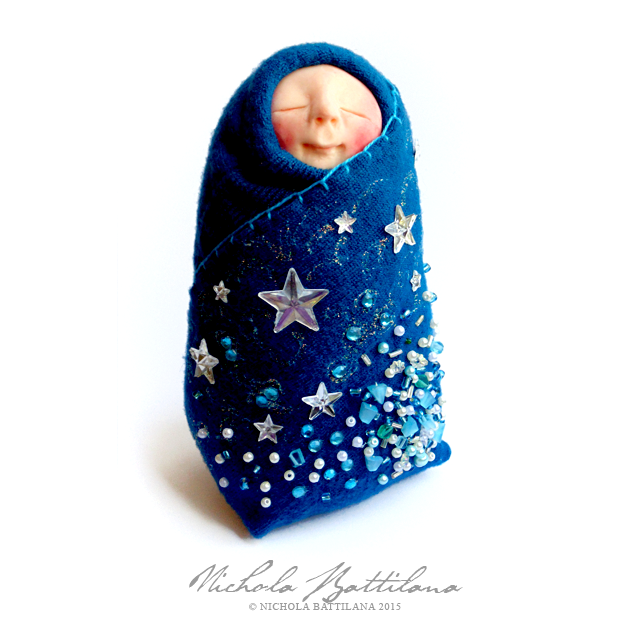
It's been a long while since I created any art dolls. Having a few polymer clay faces left over from the bundled pixie workshop last weekend, I decided to do a bit of playing. Here's the first bundle... 

Night Sky Dotee - Nichola Battilana

This is how I feel under the stars.

Some people feel small.

I feel enveloped, cloaked in the night sky.


Night Sky Dotee - Nichola Battilana

The face of this piece is cast in polymer clay from the mold I created for my kiddy workshop. The body is plush and covered with felted blue wool. The beads are all sewn on by hand, the stars fixed in place with fabric adhesive. Measures approximately 7.5" tall.

This sweet little dreamer is listed HERE in the etsy shop.


Tuesday, September 15, 2015

Old Timey Tuesday

Old grungy pictures from my personal collection for use in your art and craft projects.


You may NOT sell, give or distribute the images, digitally or printed, alone or as part of a collection, collage sheet or group.

Violators will be turned into toads... I mean it... It won't be pretty.

Monday, September 14, 2015

The weekend

It's Monday morning. I survived the weekend. (Thanks for all the well wishes by the way!)

It was a complete and utter blur. It all went by so fast and I was so busy bustling about with this-that-and-the-other and attempting to remain sane. Trying to make time for chit-chat, and breathing feels impossible when it takes so long for me to 'warm-up'. It seems so easy for some people to mingle and converse... for me it's a long process to endure. 


But everyone looks happy. I hope they were. At the very least their bellies were filled, their glasses full and soft beds were waiting for them. (Although my poor cousin had to endure a bit of snoring from her room mate!)

In addition to the brood of family visiting, I had a studio of young artists on Saturday making bundled pixies.


They were so much fun to work with. I love working with kids and think they deserve far more credit than they get. I was so proud of those funny, patient, creative and sweet girls. Each one was an absolute delight even the very silly ones :)

And then, before I knew it, it was time for everyone to leave, but not before some goofy pictures.


That was suppose to be just the girls but Mr. Pixie decided a photo bomb was in order.

And despite the awkwardness of meeting a relative separated by distance and time, I think it went ok. We'll definitely need more visits, more time and more cookies... but we've started and that's the important bit.


Besides, I think Uncle Bob and I look pretty good together.


Sunday, September 13, 2015

Pretty autumn tags for Petaloo

I love fall. Seriously smitten with it. The colours, the smells... don't even get me started on the tastes! Fall is just around the corner and I've created these cute autumnal themed tags to herald it's arrival.

Tags are pretty dang handy to have around as an alternative for a card or bow. While my husband would have no problem handing a hostess a bottle of wine in a crumpled paper bag... I think I'll opt for adding a pretty tag thank-you-very-much.


For these particular taggy beauties, I've used some Graphic 45 tags, November Flourish and November Cut Apart from Time to Flourish. They pair wonderfully with those sweet Petaloo burlap leaves:Fall Maple Leaf
To the larger tag I've added a Small Burlap Sunflower. The smaller tag has a DIY Burlap Blossom that has been tinted with a bit of watered down acrylic paint.

A little acorn cap, pairing so well with those burlap leaves and looking cute as a button :) And finally, I've added Burlap Trims as a tassel, unraveling them to add to the rustic look of these fellows.


SUPPLY LIST:

Thursday, September 10, 2015

And now for a panic attack...

The countdown is on! My house will be invaded tomorrow and I'm not nearly ready. I'm at the cusp of either throwing my hands in the air and proclaiming "It is, what it is. Deal with it, baby!" or having a full blown panic attack. Could go either way.

To make matters worse I had a little accident and lobbed off a good chunk of my finger. I'll be fine... but it's slowing things down.


On a brighter note, this happened... 


I went through all my linens, washed like stain removal boss, and now have a pristine collection that I'm thinking I should probably never, ever touch because it'll never be this pretty again.

Throughout all this cleaning madness I've realized something; I DO like having clean and orderly things... but I NEED my mess too. My jumbled shelves of stuff calms. The clean spaces make me an uptight crank (ask my kid, he'll totally agree.)


Anyway, wish me luck. I've got about 24 hours to do a chore list I can't see the end of. Maybe I'll just pitch tents in the yard and make every one fend for themselves ;)

Tuesday, September 08, 2015

Old Timey Tuesday

Old grungy pictures from my personal collection for use in your art and craft projects.


Isn't he fab? Beautiful ladies and sweet little children are just dandy... but that moustache! 


You may NOT sell, give or distribute the images, digitally or printed, alone or as part of a collection, collage sheet or group.

Violators will be turned into toads... I mean it... It won't be pretty.

Monday, September 07, 2015

School Memory Jar for Petaloo

Tomorrow it's back-to-school for my kidlet. I'm going to miss having that boy around all day.

I have to be honest, I'm usually completely stumped when challenged to create a 'back to school' project. This year however I was a woman on a mission! I knew that I wanted to create a project for keeping memories.


I've taken a good sized jar with a wide mouth. The lid has been gussied up with a bit of paper from Graphic 45's ABC Primer Deluxe Collector's Edition and I've added trims and flowers from Petaloo.


A length of wide Crochet Lace Trim and Burlap Trim are wrapped around the jar, then Burlap Small SunflowersBurlap Wild Sunflowers and a sprig of DIY-Baby’s Breath is added. A tag and key are the final touches.


So now I have a place to store all of my son's memories from grade 7. Notes from his adventures, snapshots and small treasures found in his pockets. They'll fill this jar and be kept safe and sound. 

Here's hoping grade 7 is the best year ever :)

Petaloo Supplies
Crochet Lace Fancy Trim 2.25 ydsBurlap TrimBurlap Small SunflowersBurlap Wild SunflowersDIY-Baby’s Breath


Other:Graphic 45's ABC Primer Deluxe Collector's Edition1 Inch Wide Wooden Finial 
Glass jar
Glue

Sunday, September 06, 2015

Paper Gypsy Wagons Galore!

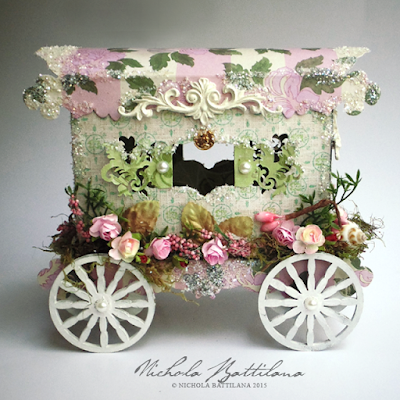
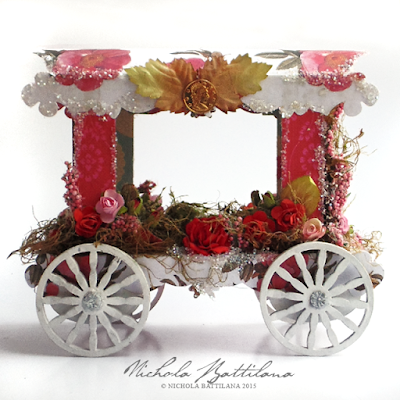
I've been making a series of paper gypsy wagons for a commission. Here are a few I finished up this weekend.

Paper Gypsy Wagon - Nichola Battilana

They have been great fun to create.

Paper Gypsy Wagon - Nichola Battilana

The wheels on these ones are from Gina's Designs and can be found HERE. I coaxed Gina into making them and I ADORE them. If you create small wheeled things they are so useful. They are especially good for use with lightweight and paper projects. I found that some of the wheels I've used on other projects added too much weight. These are damned near perfect.

Paper Gypsy Wagon - Nichola Battilana

The little mushrooms here are handmade with Paperclay. The wee flowers, leaves and buds are from AlphaStamps (I usually get the small 1/2" buds).

Paper Gypsy Wagon - Nichola Battilana

You can find those Gypsy coins from AS too. The papers are a mish-mash of G45, Marion Smith and Sanctuary Scrapbook Papers (which I'm totally smitten with at the mo'). 

Paper Gypsy Wagon - Nichola Battilana

If you have a question about any other supplies I've used, ask away. I'll have another post with a better supply list soon.