Saturday, September 30, 2017

Halloween Hotrods with Tutorial

One of my very favourite projects from last year were the Mad Max hot rods built with my buddy Paula Mould. It's one of those projects that is just so much messy fun. I mean you COULD be neat and proper and make something stunning... or you can let loose and just glue crap to other crap and have a grand old time doing it.

Halloween Hotrods: Dollarstore project with video tute • Nichola Battilana

There's Halloween junk all over the Dollarstore aisles and it made me nostalgic and inspired to revisit that project. This time with a video tute (see below) for you to make your own monster machines.

Since this is a dollarstore, stash busting project, it's not going to break the bank.

Halloween Hotrods: Dollarstore project with video tute • Nichola Battilana

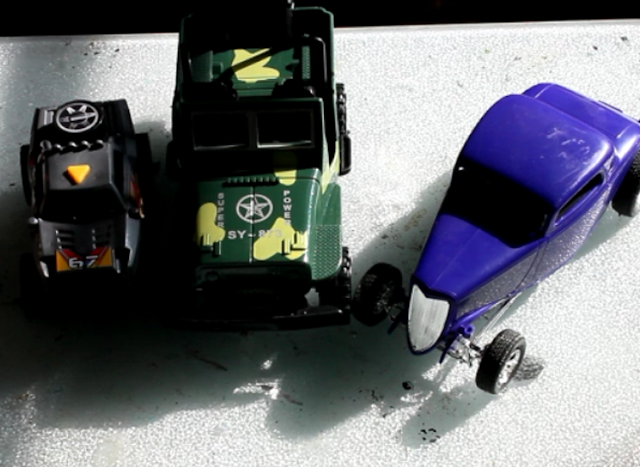
We're starting out with simple plastic toy cars and trucks.

Halloween Hotrods: Dollarstore project with video tute • Nichola Battilana

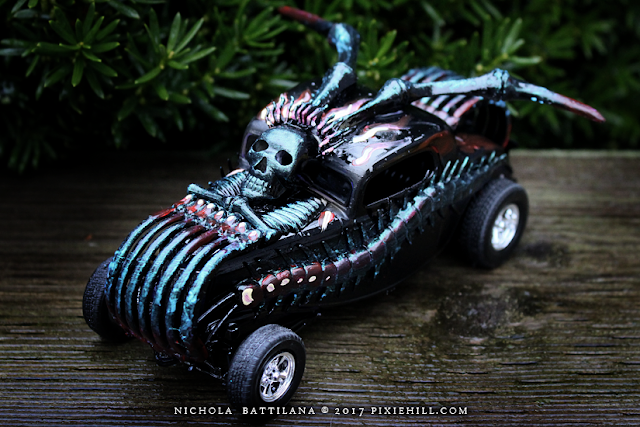
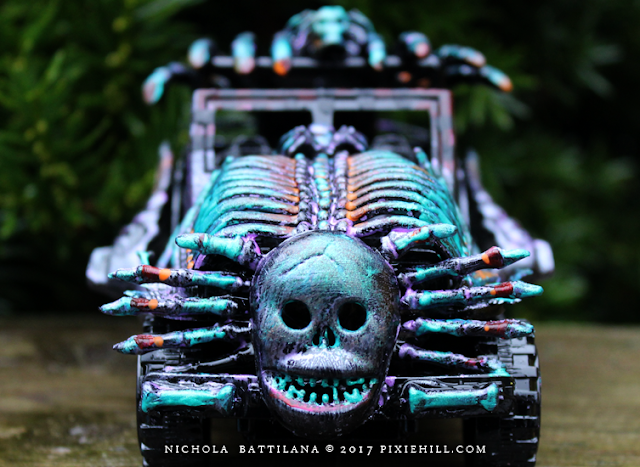
Embellishing the heck out of them. Giving them a knock out paint job. And ending up with something like this...

Halloween Hotrods: Dollarstore project with video tute • Nichola Battilana

They check off most of the boxes for a kid friendly project. They're cheap, fun, neatness isn't exactly a factor. You WILL need to supervise/modify the project depending on age appropriateness (i.e. glue guns are the devil) but it's do-able for and little hotrodders you know.

Halloween Hotrods: Dollarstore project with video tute • Nichola Battilana

I've just used my trusty old hot glue gun for this project. If you want something that can be handled (crashed? raced?) and remain somewhat intact, you'll need to invest/experiment with a better method of adhesion. Or, you know, let them be the $3 works of art they are and just enjoy the destruction.

Halloween Hotrods: Dollarstore project with video tute • Nichola Battilana

Here's your supply list:

Toy cars: trucks, busses, boats, planes... whatever strikes your fancy!
Halloween swag: skeletons, bugs, beads, bones, skulls, spiders, bats
Black spray paint: I used gloss in the tute... I MUCH prefer flat/matte

Acrylic paint: I mostly used a product from Colourarte called Silks Acrylic Glaze It has a nice pearlescent finish and it was in my stash. Metalics looks super cool.
Paint brush
Sponge brush
(for blending)
GLUE: I used hot glue because it's fast and easy. Do what works for you!
Cutting tools: for chopping up spiders and plastic skeletons
Tape: for covering any bits you don't want spray painted

Halloween Hotrods: Dollarstore project with video tute • Nichola Battilana

That's it weirdos! Go make something hotroddy!

Here's how to put them together.

Friday, September 29, 2017

Spooky Wee Houses

Halloween is just around the corner so I thought that this month I'd make something spooky for that sweet holiday. Using products from Gypsy Soul Laser Cuts,  Canvas Corp and 7Gypsies.


I've used the Cabana Row Houses as my base. There's 5 in the set and so you can create quite a nice little haunted neighbourhood!


Some of the houses are covered using papers from 7Gypsies. Some are simply painted white, decorated with Architextures™ Parchment Rub-Ons and then distressed.


Each of the houses uses pieces from the Miniature Bookplates Shape Set as windows. Creating the rooves was super simple with burlap pieces from Canvas Corp


There are plenty of embellishment opportunites. I've used Faux Metal Number Plates 1 to 25 but don't forget the larger Faux Metal Number Plates and Gears Shape Set would be super cool for a steampunk haunted neighbourhood. Go check out all the shapes available at Gypsy Soul and I'm sure you'll find some inspiration.

For a final touch I've added plastic spider and ants from the halloween aisle at the dollar store. 

Want to make your own? I've created a walk through with some simple practical tips HERE

And here are the goods I used in making my own little spooky neighbourhood.
7Gypsies Paper
Architextures™ Parchment Rub-Ons
Burlap from Canvas Corp
Plastic spiders
Vintage images
Twine/Ribbon
Acrylic Paint
Hot Glue
White Glue

Saturday, September 23, 2017

Coffin Shrines and Tags

OMG IT'S ALMOST HALLOWEEN!


I was pleased to find a Half Scale Coffin with Lid in my AlphaStamps design kit this month. I actually had a few 4 Inch Coffin Boxes on hand already, but this smaller version poked me in the ribs and prompted me to finish up all those bits and pieces.


I am totally for making materials stretch and using every bit and bob. So I decided to use the box part of these coffins as a sort of shrine, and the lids as chunky tags. Two projects, one product. This also means no fiddling or fuss to ensure the top fits perfectly with the bottom. Huzzah!


For the shines... just embellish the exterior, fill with tulle, add a little dude like this guy from Little Darlings Collage Sheet and gussy him up with some dodads from the Halloween Dress Up Half Sheet.


A small bit of moss tucked into the bottom will help your wee person stand sturdy.


The tags are super simple too. Assemble, cover exterior, add some trim and some cute Halloweeny images from Halloween Clock Spinners Collage Sheet. Attach a little loop of ribbon and you're ready to go!

I've got a super duper fast video of the assembly of the tag on the far left above if any of that isn't clear.


Here's the list of goodies I used for making these cute Halloweeny dodads.

Half Scale Coffin with Lid
4 Inch Coffin Boxes
1/2 Inch Loop Braid - Black
4mm Orange and Black Button Mix
Acrylic Black Bat Cut-Outs*
Black and Orange Mini Gingham Check Ribbon
Halloween Clock Spinners Collage Sheet
Halloween Dress Up Half Sheet
Little Darlings Collage Sheet
Little Ghouls Kit - September 2017
Little Imps Collage Sheet
Transatlantic Travel 6x6 Paper Pad

And here is eveything in one spot for your convience.

*That skully guy tag uses Rare Oddities from Graphic 45