Showing posts with label video. Show all posts

Tuesday, April 16, 2019

A Full Moon Mobile

Some people love the sea... I love the night sky and light of the moon. I've made myself a little mobile so that I might have a slice of that celestial magic inside.


I'm really pleased with how it came out and it was really quite simple. I even have a tutorial for you below, but first a  couple of notes about this project:

• Don't fret if you can't find the wooden shapes I used. You can absolutely cut your own from cardboard

• Really, really, really play around with balance to find where the best placement of your stars and moon, and also where to place the hanging wire.

• I 100% DO NOT recommend this project for above a baby crib. Bark, fishing line, glitter and tiny stars that might come loose may all pose a danger to little ones. Don't risk it!

• I only decorated the front of the pieces because I'll be hanging my mobile against a wall. If you want to suspend yours you may want to decorate both sides of your stars and moon.


Okay? Okay.

Here are all the things I used:
Wooden circle and stars
Old sheet music
Glue
Acrylic Paint
Nail file
Glitter
Twig
Acrylic stars
Fishing line

And, finally, here's how it's made it:


If you make your own, please tag me when you're showing off. It really is the best compliment and it helps promote my little crafty mess making heaps and heaps. Plus, I just love to see what you're making ;)

NOW GO MAKE SOME MOON MAGIC!!!!

Saturday, September 30, 2017

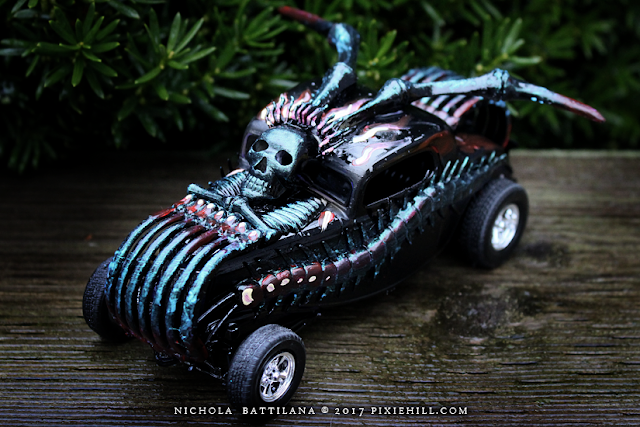
Halloween Hotrods with Tutorial

One of my very favourite projects from last year were the Mad Max hot rods built with my buddy Paula Mould. It's one of those projects that is just so much messy fun. I mean you COULD be neat and proper and make something stunning... or you can let loose and just glue crap to other crap and have a grand old time doing it.

Halloween Hotrods: Dollarstore project with video tute • Nichola Battilana

There's Halloween junk all over the Dollarstore aisles and it made me nostalgic and inspired to revisit that project. This time with a video tute (see below) for you to make your own monster machines.

Since this is a dollarstore, stash busting project, it's not going to break the bank.

Halloween Hotrods: Dollarstore project with video tute • Nichola Battilana

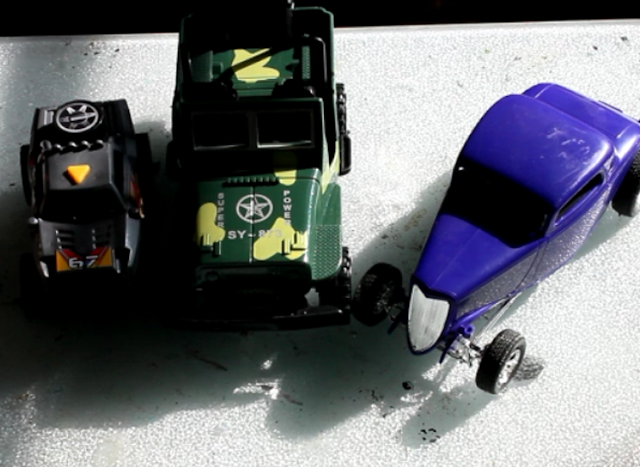
We're starting out with simple plastic toy cars and trucks.

Halloween Hotrods: Dollarstore project with video tute • Nichola Battilana

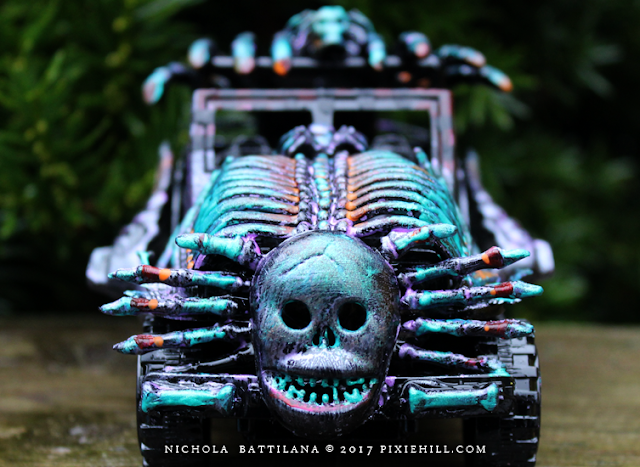
Embellishing the heck out of them. Giving them a knock out paint job. And ending up with something like this...

Halloween Hotrods: Dollarstore project with video tute • Nichola Battilana

They check off most of the boxes for a kid friendly project. They're cheap, fun, neatness isn't exactly a factor. You WILL need to supervise/modify the project depending on age appropriateness (i.e. glue guns are the devil) but it's do-able for and little hotrodders you know.

Halloween Hotrods: Dollarstore project with video tute • Nichola Battilana

I've just used my trusty old hot glue gun for this project. If you want something that can be handled (crashed? raced?) and remain somewhat intact, you'll need to invest/experiment with a better method of adhesion. Or, you know, let them be the $3 works of art they are and just enjoy the destruction.

Halloween Hotrods: Dollarstore project with video tute • Nichola Battilana

Here's your supply list:

Toy cars: trucks, busses, boats, planes... whatever strikes your fancy!
Halloween swag: skeletons, bugs, beads, bones, skulls, spiders, bats
Black spray paint: I used gloss in the tute... I MUCH prefer flat/matte

Acrylic paint: I mostly used a product from Colourarte called Silks Acrylic Glaze It has a nice pearlescent finish and it was in my stash. Metalics looks super cool.
Paint brush
Sponge brush
(for blending)
GLUE: I used hot glue because it's fast and easy. Do what works for you!
Cutting tools: for chopping up spiders and plastic skeletons
Tape: for covering any bits you don't want spray painted

Halloween Hotrods: Dollarstore project with video tute • Nichola Battilana

That's it weirdos! Go make something hotroddy!

Here's how to put them together.

Sunday, July 23, 2017

Wild Faerie Wands

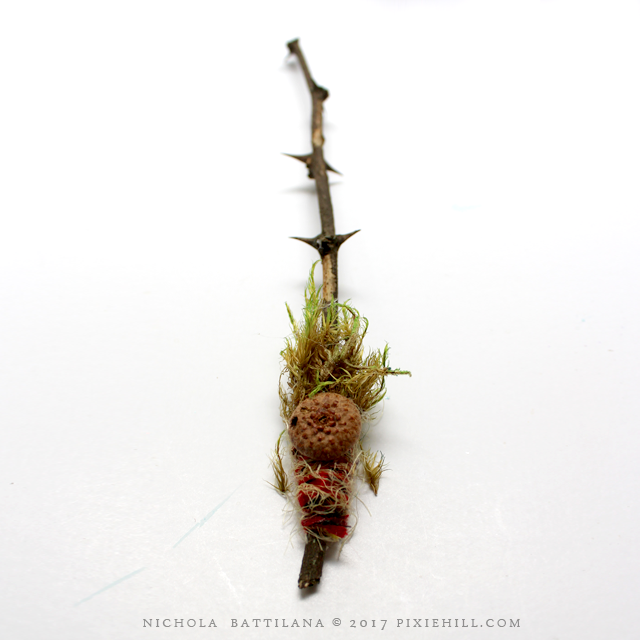
Not all sticks are plain old twigs. Some are faerie wands hidden in plain sight! (I've mentioned this before)

I happened across a fair number of wands this weekend. I'm sure the weather has the wee folk a little more fumbly and droppity than usual.

Wild Faerie Wands - Nichola Battilana pixiehill.com

With the plethora of wands scattered about, I thought I'd share some thoughts on embellishing wild faerie wands.

Wild Faerie Wands - Nichola Battilana pixiehill.com

There are a number of things to consider when encouraging the wand to reveal it's magical nature. 

The type of tree the wand is from is the biggest determining factor to the type of magic that the wand will best preform. Here are some simple examples:

Locust (above): protection
Apple: fertility
Oak: truth and knowledge
Willow: emotion
Ash: wisdom
Cedar: cleansing

A quick google search for "magical properties of wood" will lead you to a wealth of information on the subject.

Wild Faerie Wands - Nichola Battilana pixiehill.com

Charms can add to the magical purpose too! A key might be helpful for magic that opens the way to you. I think that acorn caps, buttons and found objects hold a great deal of magic in them. You could also sew beads and gems to those magical wands.

Wild Faerie Wands - Nichola Battilana pixiehill.com

You might carve and shape your wand. Whittle a point, or carve patterns or symbols into the bark.

Wild Faerie Wands - Nichola Battilana pixiehill.com

Colour can add to the magic too! Again, a little research will provide you with a lot of information on colour and magical associations... but don't neglect your intuition*. Faeries in your particular region may have a very different opinion of the colour yellow than the faeries in my back garden.

For a little more 'how-to' I've made a little video. Hop over to youtube and give it a gander...


*I have always read that faeries love milk. That leaving a small dish would be an appropriate offering. Mine HATE milk! The last time I left them some they turned all the milk in the house sour. So trust your experience over what some silly website says... even this one.


Saturday, July 15, 2017

Old Glass and Another Apothecary

This is a much smaller version of the Fairy Apothecary I showed off earlier in the week. I had a couple of requests for a tutorial and an AlphaStamps deadline looming so... ta dah!


This is probably about 1/4 the size of the earlier version, but crammed with just as many wee jars and bottles and vials. Overall size is approximately 3" x 5.7".


I've skipped over the box assembly in the video tutorial. It's easy peasy and you can look at the old vids on my channel to see how I generally stick stuff together and cover with paper.


Instead I've focused on recreating the look of authentic old glass. It's not over the top grungy... but it absolutely replicates the appearance fairly accurately.


So hop over to the tutorial HERE


And grab all of the supplies you need HERE

Or here's all the bits listed separately:


Wednesday, May 18, 2016

Looking Glass Mini-Shrine with Faux Plaster Tute

I've created two "Alice" projects for AlphaStamps.com this month. First there was Alice's Altoid Manor House and now a second little tin shrine inspired by the mirror that inspired Lewis Caroll to write "Through the Looking Glass". If you peek to that link, you'll see they look nothing alike, but it's that lovely old ornamentation I was after, not really replication.


The base of this piece uses one half of a Small Hinged Tin and one panel of this Small Altoids Tins Triptych FrameIt's quite small, with the base tin measuring just 2-1/2" tall.


Inside is filled with moss and Mini Rose Buds with some sweet Flower Soft blossoms.


While I am usually all about tiny floral elements, it's the fake plaster details that are my favourite this time around. Can you guess what they are made from? Hot glue!

Normally I'd make these elements with Creative Paperclay but I was feeling impatient. Some leafy silicone molds, hot glue, layers of gesso and white paint, and voila! Held side by side with resin, you can't tell the difference, and adding additional layers of gesso and paint softens the details and makes it look quite like plaster.


AND because I love you (and Leslie asked so nicely) I've made a video of that technique HERE.


Just look at this plastic frame with 'faux plaster' leaf embellishments! I can't wait to see what you make with them :)

Supply round up:
Small Hinged Tin
Small Altoids Tins Triptych Frame
Large Leaves Silicone Mold*
Multi-Sizes Leaves Silicone Mold*
Flower Soft - Sweet Pea
Mini Rose Buds - Red*
Pink Rose Garland* (leaves)
Small Round Silver-Plated Pendants (not shown, applied to back of shrine for hanging)
Moss
Hot glue!
Gesso and white acrylic craft paint


Friday, May 06, 2016

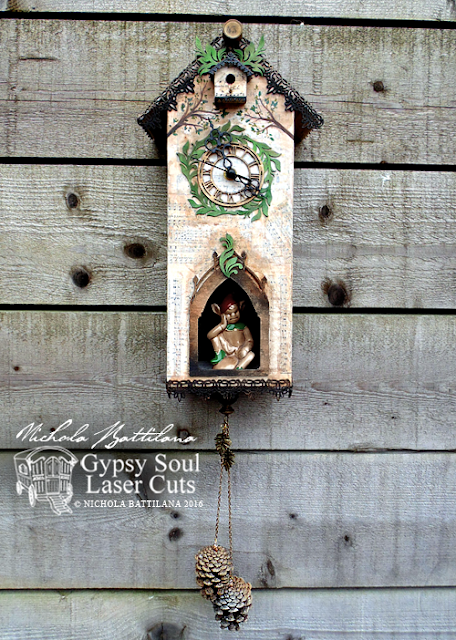
The Tale of the Crow's Clock

Clocks have always fascinated me. Mantle clocks, wall clocks, clock towers, grandfather clocks. They give measure to the passing of time, keep us in order, but there's something quite mystical about them too.  

The Tale of the Crow's Clock - Nichola Battilana

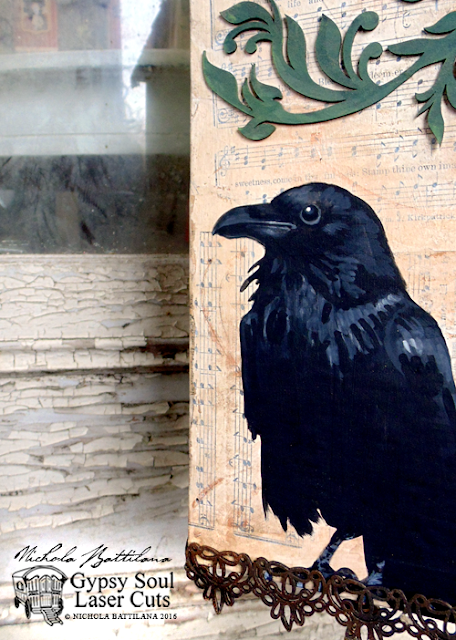
I thought of making a cuckoo clock for a while. Shortly after making the 'Goblin Throne' last month, a crow perched outside my window and nudged me to make a 'Crow's Clock' instead of a clock of the cuckoo variety. Who am I to argue with a crow?

The Tale of the Crow's Clock - Nichola Battilana

The base of the clock is one of my favourite products from Gypsy Soul Laser Cuts, the 3 Story House. It's a great size to work with and I think it's practically perfect as a clock body. I carved out an arch on the front and framed it with an Reliquary - Tower Top.

The Tale of the Crow's Clock - Nichola Battilana

Lace and Shell Border Sticks are used as edge embellishments and shingles for the roof.  For the
Little Bird House at the top, I used Dresden borders to repeat the patterned edge. At the tippy top you can see a wooden round thing... that's a vintage French lottery number, but don't worry if you don't have one of those in your stash, you could easily trade it out for one of the pieces from the Faux Typewriter Keys Symbol SetThose cute leafy frame and filigree bits are these Fanciful Elements.


The Tale of the Crow's Clock - Nichola Battilana

The clock does work and I've used the mechanism from the Desk Clock Standard. I did replace the hand with this Clock Hands Shape Set and swapped out the numbers with a frame from this Hanging Clock SetTotally not necessary to replace all those parts, but I like the way all these pieces fit together.

The Tale of the Crow's Clock - Nichola Battilana

Cuckoo clocks have weights in the shape of pine cones that drive the clock. Although my clock isn't weight driven, I wanted to include this traditional element by adding some real pine cones on a length of chain, along with some oak leaf charms.

The Tale of the Crow's Clock - Nichola Battilana 

This is a such a great project if you like adding embellishments and borders and you could go totally over the top if you wanted. If you'd like to make your own, check out my video that tells "The Tale of the Crow's Clock" and how it came together. 

Here are the supplies I used in my Crow's Clock
Clock Hands Shape Set
Little Bird House
Faux Typewriter Keys Symbol Set *alternative suggestion*

Old music papers
Brass chain and charms
Masking Tape
Paint
Glue

Friday, January 08, 2016

Mashed up update post

I have not fallen off the face of the earth.

I've been napping, and relaxing and clearing away the Christmas hub-bub. I've been tidying my studio (ha!) and basically farting around and taking it easy. Totally unlike me but I think it has de-stressed me so much that I might actually avoid my usual post-Christmas 'oh-my-god-kill-me-now' sickness!

Anyway... today is Mr. Pixie's birthday and marks the last of the holiday celebrations in our house. Feeling fine and dandy (knock on wood) I'll be back to being a crafting machine next week.

Two little side notes:

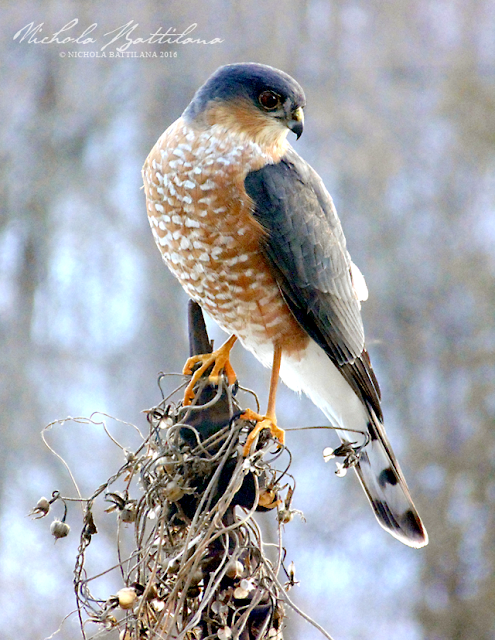
This guy showed up on my deck yesterday.

Sharp Shinned Hawk - Nichola Battilana

He was pretty bold and watched me watching him from just a few feet away through the kitchen window. I admired him for a few minutes before running to grab my camera. He stayed put, just fluttering from spot to spot, and let me get a few shots in before taking off. He's a Sharp Shinned Hawk if you're interested in that sort of thing. 

Dark Eyed Junco - Nichola Battilana

He doesn't seem to have scared off the Dark-Eyed Juncos that hang around here every winter. They were still flying about, getting their fill of seed and bossing one another around. I'll have to keep my eye out though. As beautiful as that hawk is, I don't want to make those wee songbirds easy pickin's for him.

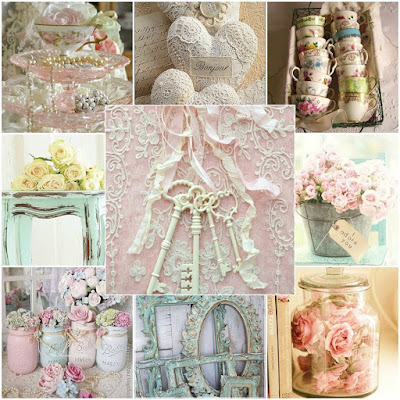
Lastly, my January kit from Tresors de Luxe arrived yesterday and I have a video reveal of the kit and review of the projects I created for them last month (see very bottom of this post for embedded vid). Tresors de Luxe is now selling the same Design Team Kits they provide their designers with if you want to play along. They have also introduced a monthly mood/inspiration board challenge with three prizes up for grabs. Here is this months board...

Tresors de Luxe Mood Board Challenge January


That's all for now. Hope 2016 is being kind to you!

Thursday, April 16, 2015

Because you asked so nicely...

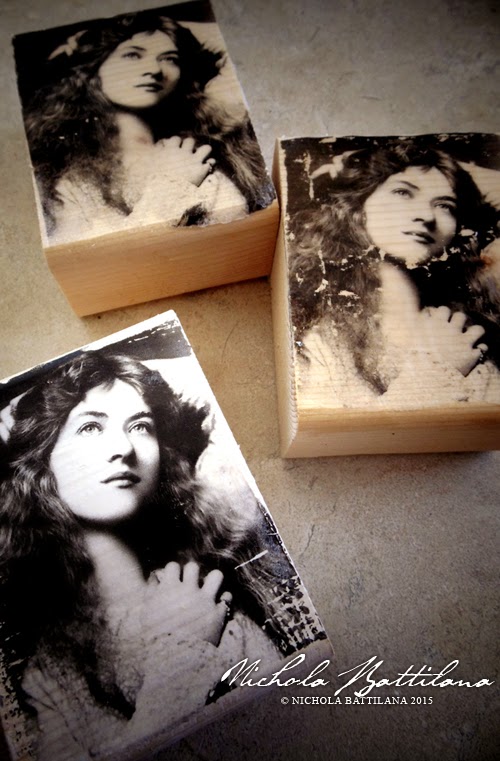
There were a number of requests for an image transfer tutorial after posting my Petaloo project the other day. There are LOADS of videos and online tutorials available demonstrating this technique. I learned by watching others and you should absolutely view a number of tutorials, get as much information as you can, then experiment for yourself.

Image transfer tutorial and comparison with Gel Medium and Mod Podge - Nichola Battilana

I've done a fair bit of my own experimenting over the past week and put together a quick video tutorial with a basic 'how-to', a couple of variations, and the results using different materials.


Here are a few points I didn't include (err... yes, I forgot) but are worth a mention...

Paint
In my demonstration I show an example where a wood block is primed with a wash of white paint before applying the transfer. I think this looks fab and provides a solid base, creating greater contrast in the finished image. Keep in mind that you will be saturating and rubbing your piece. Will your paint be able to hold up or rub off and take the transfer with it? Just some things to keep in mind.

Heat
Some people say that heat may help the transfer. You can create a weak transfer with heat alone after all. When I attempted to speed up the drying process with a heat gun the results were not pretty. I would even go so far as to recommend avoiding hot water when removing the paper.

Patience
It really does pay to wait. I know others have had success lifting the paper soon after application but in my trials I found that the longer I waited wait, the stronger the transfer was. Let that sucker dry!

More Patience
Let your piece dry before applying a top coat or sealant. Some of those paper fibers can be pretty sneaky! By allowing the piece to dry you can spot those smokey, foggy areas where some paper residue has been missed. Simply re-wet that area and rub the paper away. When satisfied with your piece after it has dried apply a fancy pants top coat or simply apply a layer of gel medium or Mod Podge.

Practice
In this case practice doesn't exactly make perfect, but you will learn a lot! Don't expect perfection. If you are okay with some distressing and having fun with your mess making, the entire experience and results will be much more satisfying.

The tute supply list: Golden Heavy Gel (matte), Mod Podge (matte), wood bock, laser print of vintage image from thegraphicsfairy.com, water, paintbrush

**Mod Podge does have a product specifically for image transfers. It was unavailable in my area but it does have good reviews.**