Showing posts with label paperclay. Show all posts

Tuesday, February 14, 2017

The Little Death Matchbox Shrine

Do you celebrate Valentine's Day?

We don't...

Well, not really...

Okay, I confess, last year asked for chocolates and a card. After almost 25 years with the fella with no romantic demands, I don't think it was asking too much.

This year Mr Pixie asked what I wanted for Valentine's. I said "Nothing" but quickly changed my mind and requested a cheesecake and his spot on the couch.

Mr. P has actually been quite woo-ey over the past few months. It's so out of the ordinary that family members have asked if one of us is dying. For the record, we're both fine. *knock on wood*

Speaking of death....

The Little Death Matchbox Shine for Love and Lovers w/ tute - Nichola Battilana

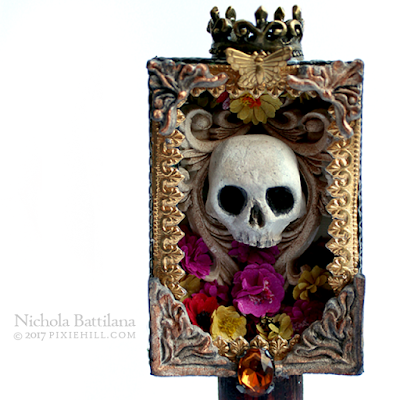
I made this piece specifically to celebrate Valentine's Day. "The Little Death" matchbox shrine is a bit of a cheeky joke with "La petite mort" a metaphor for sexual orgasm.

The Little Death Matchbox Shine for Love and Lovers w/ tute - Nichola Battilana

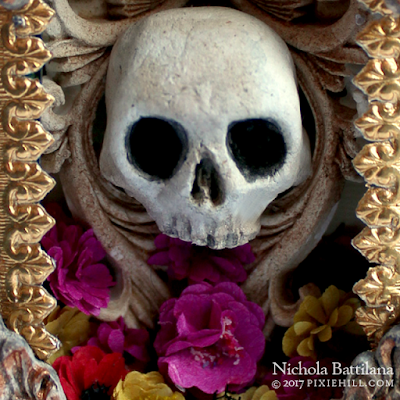
Despite there being a little skull smack dab in the middle, and it being called 'The Little Death', this isn't about doom and gloom. It's sex, love and romance baby!

The Little Death Matchbox Shine for Love and Lovers w/ tute - Nichola Battilana

Some of those little paper flowers look like chrysanthemums, a symbol of joy and optimism. Maybe they are asters, talisman of love and a symbol of patience.

The Little Death Matchbox Shine for Love and Lovers w/ tute - Nichola Battilana

There's a golden butterfly, the symbol of the soul and positive transformation.

That shiny amber something at the bottom of the shrine? A nod to Freya, the Norse goddess of love, sex, beauty and death. Freya would weep amber tears while waiting for her beloved husband to return to her from his extended journeys.

The Little Death Matchbox Shine for Love and Lovers w/ tute - Nichola Battilana

Ok, maybe there is a tiny bit of death in all of this, but so many symbols associated with love, sex and life also share a connection with death. And why not, that's what we do isn't it? We live, we love, we die... hopefully we do it all well.

If you're interested in seeing "The Little Death" being made, hop over HERE or watch below


And here's a list of the supplies I used to create that wee shrine.

• coloured tissue paper
Creative Paperclay
• standard match box
• chess rook
• paper (I used a vintage love poem and G45 scrapbook paper)
• charms (metal crown, stamped brass butterfly)
2 Symmetrical Flourishes Silicone Mold
Flower Soft (used for flower centres)
Narrow Gold Fleur Dresden Borders*
Tiny Dot Dresden Borders - Gold*
• acrylic paint
• glue

Note: The tool I mention in the video is a ball stylus... not necessary, but a handy thing to have around.

Whether you're celebrating today or not, I'm sending a little love your way.

Happy Valentine's Day, sweetie pies!

Thursday, November 05, 2015

Bread and Pastry Tutorial

I'm going to show you how I created these little treats for my Miniature Floral Tea Cottage using these silicone molds.

Bread and pastry tutorial - Nichola Battilana

You can use polymer clay with the molds but I made my little treats with Creative PaperclayYou WILL need to plan ahead to allow for drying time (make the pieces the day before you need them) but the actual 'working' time is just minutes.

I begin by pressing the clay into the mold. Give it a good push to ensure all the details are imprinted. I allow the clay to become firm before removing from the mold, then allow the pieces to dry completely before the next step.


Using some REALLY watered down yellow ocher acrylic paint I cover all of my pieces.


Wipe off any excess paint. Apply another coat of the wash if the coverage is too light.


Breads are often darker than pastries and cakes, and are darker still on their top crust and bottoms. Add a wash of dark burnt umber or other dark earth colour. (Note: You can also colour your pieces with powdered chalk pastel by applying with a dry brush.) As a final step I've dusted a little corn starch to the surface.


You can use Diamond Glaze to create a few different finishes on your pieces. Some breads have a light sheen on their surface (i.e. croissants). This look can be achieved by adding some water to the glaze and applying sparingly. To create a 'glazed' look just brush on a good layer.


You can also add colour to diamond glaze and apply thickly to look like a jammy glaze or filling.


Let all those bits and bobs dry and their ready to go! So simple. So effective.

Bread and pastry tutorial - Nichola Battilana

Happy making!