Showing posts sorted by relevance for query little snowmen. Sort by date Show all posts

Friday, November 24, 2023

Roly Poly Snowmen with Tutorial

How stinking cute is this family?!
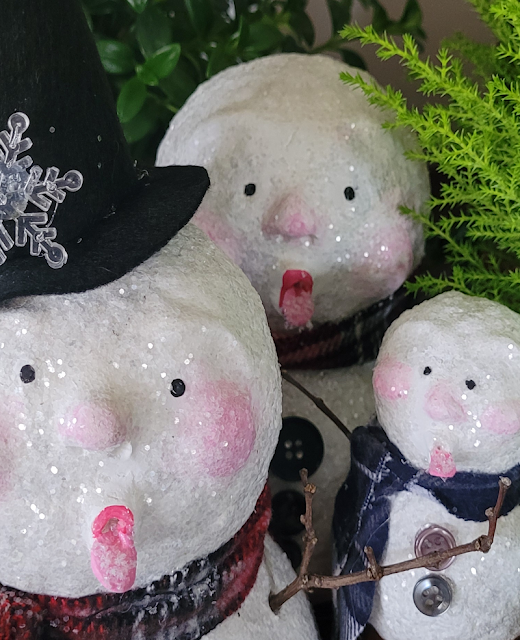
Want to add a little something to your holiday 'to-do' list? How about making a fleet of snowmen to assist you with holiday world dominance? Too much? How about just one roly poly snow dude to keep you company?

Ok? Let's go!


While these are pretty simple to make, you're going to need to take into account drying times. You'll need a few days to put these guys together, but they're totally worth the wait.

Here is your supply list:

• 2 styrofoam balls, one slightly smaller than the other (the size will determine your finished snowman size, 2 balls makes one snowman)
• skewer, poky stick, or small dowel
• paper napkin & painters or masking tape
• paper mache *see note below
• Creative Paper Clay
• white glue
• hot glue
• white, pink, black craft paint
• clear, transparent or translucent craft glitter **see other note below
• Mod Podge Dimensional Magic
• a tiny pinch of fake/buffalo snow (or more glitter!)
• twigs
• buttons
• fabric for scarf
• optional - felt for hat & other accessories


*Notes about paper mache:

Dry, prepared paper mache fibre/cellulose in which you simply add water is available to purchase, but you can absolutely make your own for very little money.

For this project, I made my own paper mache clay by tearing up an egg carton and toilet paper then covering that with hot water. After an hour or so I blended the softened papers in a food processor then poured that slurry through a sieve and squished out most of the water. To that I added a handful of flour, cheap white glue and a splash of vinegar. I mixed up that mess and kept in the fridge until ready to use. If you need exact measurements there are loads of recipes online (I found THIS page really helpful and informative) but honestly, precise measurements aren't necessary.

Or, you could go really old school and use strips of paper with four paste.


** Note about glitter

I use Creatology Glitter in the colour "clear", which can be found in the kids crafting area of Michael's. It's transparent, sparkly and cheap. Here's what the package looks like: 


I prefer using clear/transparent/translucent glitter over white glitter because it allows the colour of the rosy cheeks to show through. I also like this glitter because it does not scratch. Some clear glitter is made from glass and is actually quite sharp and scratchy.

If you have a preference for other materials, just do a little experimenting on your own and see what works best for you. The only 'right' way, is the way that works best for you.

Got all that? Great! Now here's how to put all those things together to make your own roly poly snow dudes... Have fun!


Monday, November 18, 2013

Roly Poly Snowmen

I use a product called 'Creative Paperclay' quite a bit in my work. It's gorgeous stuff. Light weight, air dries, can be sanded or carved when dry, takes paint like a charm, magnificent for detailing... but pretty pricey for an old cheapskate like myself.

I've been trying to come up with a recipe for my own version for the body/bulk of larger pieces to reduce costs. The first batch I made was really heavy and, although touch as nails, not the smooth light material I was looking for. Below is my second attempt.


An improvement over my first batch, this dried lightweight and was fairly smooth. In the end my biggest issue with this batch was that it was too papery when dried and not quite smooth enough for my needs. BUT I did manage to make these fellow with it...


Roly Poly Snowmen! I used the commercial product for the noses and lips and my homemade concoction for the rest. They're fairly big, standing at around 9 inches, so using my own mix cut costs significantly. And yes, I did knit those little scarves, but I am TERRIBLE at knitting so it's not much of a feat :P

ALSO, I know that my American friends are looking forward to Thanksgiving. If you're lucky enough to be entertained (rather than entertaining) why not take a bottle of something nice as a hostess gift and gussy it up? This 'thank you' tag was created using products from Alpha Stamps November 2013 Kit - Fall Foliage


The Miniature Pine Cones are adorable!

Tuesday, November 18, 2014

A tiny winter wonderland!

I am very fortunate to know many thoughtful people who collect all sorts of 'other peoples junk' for me to make and create with. My cute as a button neighbour brought me a clock box the other week and I knew right away that I wanted to place a little winter wonderland inside.


I whitewashed the exterior and gave it some distressing. I've used January Flourish from Graphic 45's newest collection Time to Flourish (which is absolutely LUSH by the way... seriously) and Ladies Dancing from their 12 Days of Christmas line. I then applied another whitewashed layer.


Inside is filled with glittery snow and bottlebrush trees. The piece can be viewed from both sides so one side features a handmade cottage and the other a tiny snowman.


Outside I've placed some inexpensive acrylic snowflakes and some Sugared Berry Clusters from Petaloo.


And just for good measure, here's a better look at those tiny snowmen. This fellow is the little brother the one inside my wonderland :)

Friday, November 06, 2015

Winter Shrine Tutorial

First Friday of the month! That means a tutorial for a glittery magical something for GinasDesigns.net. Jack Frost and the holiday season are on the way but there's loads of time before the holiday madness to get your supplies for this super cute project. 


This snowy winter wonderland shrine was created using Gina's House Shrine Box. I really and truly love that little shrine house. It's such a great piece to apply your own style to. 

Below you can just peek at the roof texture. This is achieved by layering pieces from the Cardstock Doily Set Intricates. The result is really cool and I show exactly how to do it in the video tutorial that goes along with this project.


The shrine is embellished with pieces from the Snowflake Shape Set. They've been painted and glitterfied and look oh, so sweet. Alternatively, you could use the Winter Shape Set which also includes snowmen, icicles and other wintry icons.


Inside my wee shrine I've added some bottle brush trees and a carpet of moss. Fill that space with whatever you like! A little Santa figure or snow capped house would be adorable. 


Being a total glitter fiend, I used a lot of the sparkly stuff on this project. Feel free to leave it out if you like, but I think that it adds and special icy touch. You might think that white glitter would be ideal for a winter landscape, but I recommend using clear glitter for a snowy look. 


What do you say? Want to make your own? You can find the full video tutorial HERE.

And here are all the supplies you'll need:

Wallflower 12x12 Paper Stash (or paper of choice)
Clear glitter
Light blue ultra fine glitter
White acrylic paint
Glue
Moss
A piece of foam
Bottle brush trees

*Note: the shrine box used in the tutorial is slightly larger than the one listed on the Gina's site. If you really, really, really, truly, must have the bigger version, please contact Gina's for pricing.

Sunday, December 04, 2016

Day 4 - Little Snow Dudes with Tutorial

I'm not sure why I keep calling these guys 'Snow dudes' rather than 'Snowmen' but they keep insisting that IS what they are called, so I shall comply.


I made a slightly larger and more complicated version of these guys last year. This year, I've simplified the heck out of them while maintaining maximum cute.


And if you'd like to make your own HERE is the video tutorial...


And here's what you'll need:

styrofoam balls
jute twine
white/clear glitter
good quality white glue
hot glue
small metal brads
black seed beads
straight pins or flat head jewelry posts
toothpics
black and orange paint
small eye hooks