Showing posts with label magic. Show all posts

Saturday, October 22, 2016

Miniature Weasley Burrow Clock

I have a thing for clocks. There are clocks scattered all over the Pixie house. I even have a cuckcoo clock hanging above my work table in my studio. Not a single timepiece in this home tells the correct time.

So, I was excited to learn that 'clocks' were the theme at AlphaStamps this month and as soon as I learned that grandfather clocks were on the menu I knew I needed a Weasley Burrow Clock.


I chose not to paper the clock, but rather cover it in wood filler and gesso. I applied each, layer by layer, allowing it to dry and sanding before the next application. Two healthy layers of each, and a little touch ups to cover the chipboard joints, seemed to do the trick.


The piece is covered with acrylic paint, metal embellishments added, and then washes of earth tones give it some age and grime.

Inside I've placed a Glass Tube Pendant and filled it with magical time glitter. (I said it, so it's a thing, right?)


I've only used three spoons as the hands on the face. (It really should be 9 golden hands if you want absolute authenticity.) Any more seems to get a bit thick where they overlap. If you wanted to add more, I would suggest cutting the handles and placing them 'just-so' to circumvent the issue of over thickness.


For the clock face and Weasley family pictures, I just did a quick google search.
There is a drawer that fits into that bottom area of the clock. After applying so many layers of filler and gesso it becomes a bit of a tight fit. I like the idea of the Weasley's tucking things into every available space so I've used this area for storage. Paper scrolls, Half Scale Wine Bottles that look just like little potion vials, Pumpkin Pods and a Mini Black Cauldron are all crammed into that little space.

And although he's a rotter, I've painted a Tiny Metal Mouse to look like 'Scabbers'. After all, I'm pretty sure he would have kept a close eye on where the family was at all times.


I realize that there are variations of the clock (Mrs. Weasley is said to carry it around the house with her) but I have always thought of it as a grandfather clock as it is in Harry Potter and the Goblet of Fire

Even if it ain't 100% accurate, I'm pretty darned pleased with my little burrow clock.


And bit by bit:
Tiny Metal Mouse
Glass Tube Pendant
Brass Flower Charms*
Bronze Branch Connectors
Half Scale Green Wine Bottle
Half Scale Red Wine Bottle
Mini Black Cauldron
Pumpkin Pods
Silver-Plated Teacup, Teapot, Spoon
Tiny Dot Dresden Borders - Black*
Victorian Drop or Handle - Raw Brass

Thursday, October 13, 2016

Shabby mojo bag

The beautiful Miss Amy Love invited me to guest design with Shabby is Chic Boutique and of course I said 'Yes!' because everything she carries is adorable!

When I saw this Cotton Drawstring Pouch in my package I knew I wanted to make a shabby mojo bag to encourage crafty inspiration!


First, what exactly IS a mojo bag? Basically it's a pouch, or bag, usually made of flannel, containing magical items used in hoodoo for spell work. Similar bags are used in other magical traditions for luck, protection and healing.

This is NOT a traditional mojo. I'm using the concept as a magical inspiration point.


My Cotton Drawstring Pouch is layered in Butterfly Dangle Trim and lace, then tea stained. I've added vintage buttons as accents, and centred a Filigree Wrap Around as a focal piece.


Silver Fairy Wand CharmSilver Fairy Charm, and a cute Witch Hat Charm are attached to the filigree and hopefully supply an added dash of fairy magic.


Finally, the most adorable Gold Plated Spoon is attached to the drawstring. I love it sooo much and imagine I'll use it for scooping glitter!


The contents?  Well, these sorts of bags are kind of like birthday wishes - you really aren't supposed to tell. 


To encourage crafty inspiration you may want to add items that reflect the colours, textures, motifs, mediums and themes that you love. Or, you could add herbs and flowers that encourage inspiration to make a magical sachet. And if magic ain't your jive, you could always use it to store something small and pretty.


Friday, January 29, 2016

Weathered Magic Potion Bottle for Tresors de Luxe

I've seen a lot of stunning altered bottles that have been embellished with bits of lace and wanted to give it a try myself.

My bottle is on the smaller side but I think it's perfectly sized as a sort of fairy tale potion bottle.


To embellish, I deconstructed three different laces from the January Blog Design Team Kit to fit just-so.


From this angle you can see the little flowers around the top of the bottle. They are from this Ivory Lace Trim. (They totally remind me of four leafed clovers so I would be sorely tempted to turn this into a bottle of good luck!) The pieces that drip down the sides are snipped from this White Lace Trim. Around the bottom I've wrapped a length deconstructed from this White Lace Trim.


I really wanted to create a weathered forest fairy-tale look so I brushed some tea onto the lace to give a bit of age. I pushed some wiry moss into the mouth of the bottle, then pushed the cork into place. To finish it off I've added a some ornate keys and Stamped Metal Brad. Ta da! Little magic potion bottle!

Supply round-up
Ivory Lace Trim BN-029
Small glass bottle
Moss
Tea

Friday, January 01, 2016

Fairy Godmother Travelling Sales Wagon

There's a special place in my heart for fairy godmothers. Those fluttery, frilly, silly ladies make me positively giddy. I've often wondered where they get their godmotherly supplies from. Is there a shop? A fancy boutique? A traveling salesman!

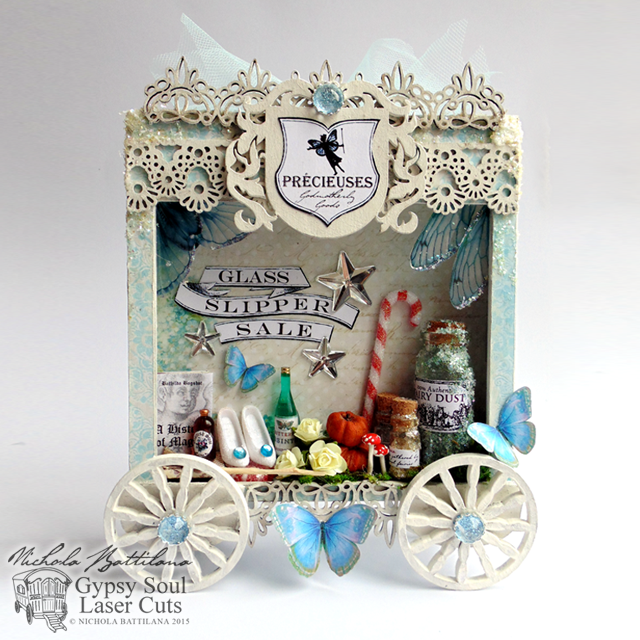
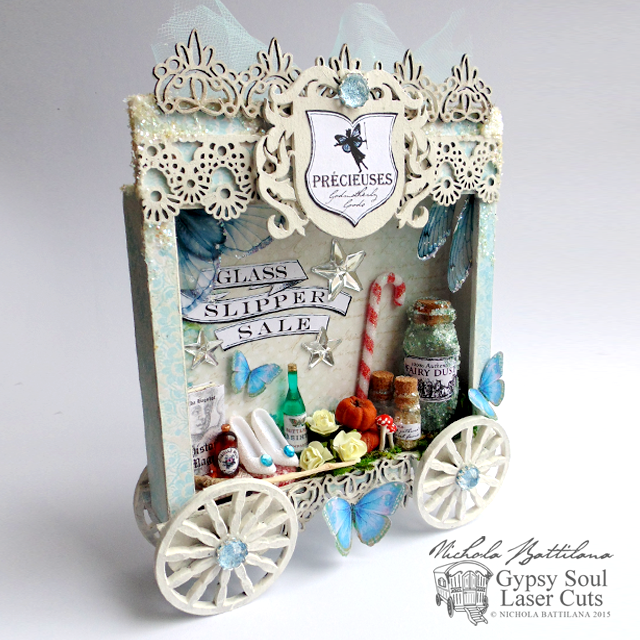
And so this month I've created a tiny traveling sales wagon for Gypsy Soul Laser Cuts with magical and glittery godmother paraphernalia.

Fairy Godmother Sales Wagon w/ Tutorial - Nichola Battilana

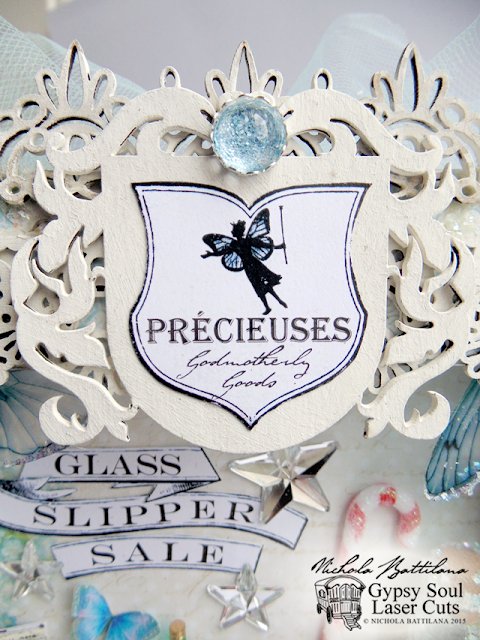
The base is a square shrine shadowbox to which I have added 1 inch Fancy Wheels Wheels. I've also added Floral and Lace border sticks for some flourish. A small chipboard crest heralds potential customers to the godmotherly goods.

Fairy Godmother Sales Wagon w/ Tutorial - Nichola Battilana

The wee sign reads "PrĂ©ciosites", a term I came across when doing some godmotherly research. *It is a French literary style born from the lively conversations and playful word games of witty and educated intellectual ladies from 17th century France... they also happened to retell fairy tales. *according to the Wiki page anywho

Fairy Godmother Sales Wagon w/ Tutorial - Nichola Battilana

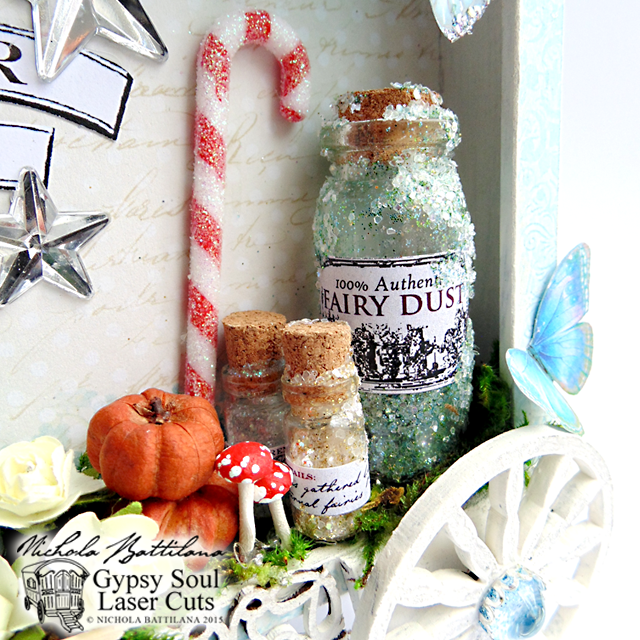
Inside the wagon, all manner of items required for godmotherly duties. Fairy dust, candy, pumpkins to turn into carriages.

Fairy Godmother Sales Wagon w/ Tutorial - Nichola Battilana

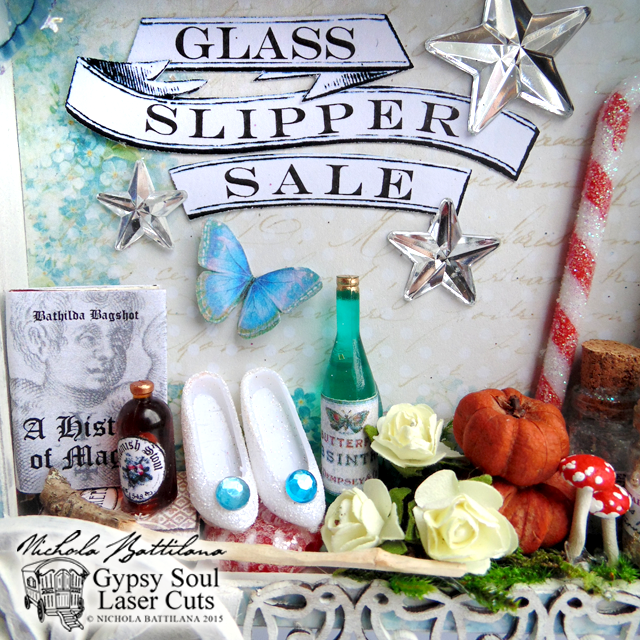
Absinthe and stout to whet the pallet, magical books, tiny sparkly shoes, wooden wands and wishing stars (and a few butterflies for good measure).

Fairy Godmother Sales Wagon w/ Tutorial - Nichola Battilana

If you'd like to create your own version of this wee travelling sales-fairy wagon, you can check out the video walk-through for this project HERE.

Don't limit yourself to Fairy Godmothers! If goblins are more up your ally, go for it! What about baby bits and bobs for a sweet shower gift? Really, you could pick any theme and make your very own unique version of this project.

Here are a list of supplies I used:

Square Shrine Shadowbox
1 inch Fancy Wheels
Floral and Lace border sticks
Mini Crest Sign

Scrapbook paper (I used Forget-Me-Not from Lemoncraft)
Misc Fairy Godmother Goods such as:
starsbottlesflowerspumpkinswingsfairy dust, wee books or whatever you can dream up!


Psst, here's a graphic you can use in your own piece.
For personal use only or I'll turn you into a toad ;)

Friday, December 04, 2015

Fairy Lantern with Tutorial

** Please read to the bottom of this post for answers to common questions. Or visit THIS PAGE**


Gina's Designs Laser Cuts has a brand new name: Gypsy Soul Laser Cuts and I have a brand new tutorial for you!

I was sort of hesitiant about using this as a design team project because it's so easy and requires just a few simple supplies... but it's soooo stinkin' cute!

Fairy Lanterns with Tutorial - Nichola Battilana

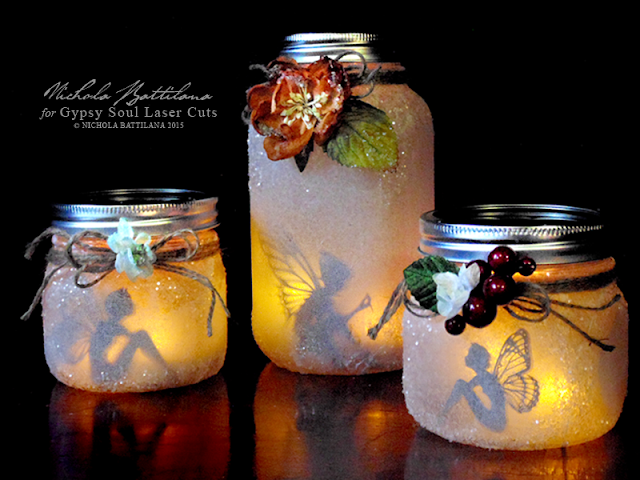
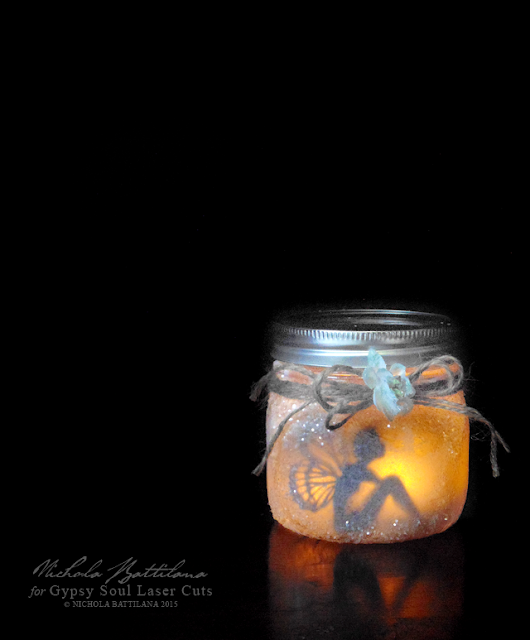
Fairy lanterns! Now, anyone who has experience with real fairies knows that it is not a good idea to stuff them into jars. They will pinch and nip and basically make your life unpleasant if you treat them rudely. These jars are a fairy friendly alternative. Perfectly dreamy as a little nightlight, or magical accent.

Fairy Lanterns with Tutorial - Nichola Battilana

Gypsy Soul Laser Cuts carries the Garden Fairy cutouts in three different sizes so you can create a variety of lanterns in an assortment of jars. And if fairies aren't your thing... well, there's always baby dragons from the Dragons Shape Setfloral elements, or whatever suits your fancy!

Fairy Lanterns with Tutorial - Nichola Battilana

The tutorial can be found HERE on my YouTube channel (and below), but here are a few tips:

• Sticking the figures directly on the glass (generally) yields better, more detailed results
• Use two or three battery powered tea lights. More light = stronger silhouette effect.
• Take care how many layers of paper you use, how much overlap there is. (A little is ok.)
• Use thinner school glue for the paper and thicker tacky glue for the glitter
• DO NOT use real candles inside


Finally, the supply list:
Gypsy Soul Garden Fairy cutouts
• Glass jam jars with lids
• Thin tissue paper
• White school glue
• Quality white glue
• Clear glitter
• Twine
• Floral embellishments (THESE sugared blooms from Petaloo are gorgeous)
• Battery powered tealights or led string lights

NOTE: Please DO make for friends, as gifts, as a group project but remember that making them commercially (including teaching as a paid class) is not permitted.

___________________________

EDIT: to answer a few questions

1. The cutouts are available here: Gypsy Soul Garden Fairy cutouts
2. YES she does ship internationally. International customers might want to try placing an order via Alpha Stamps HERE. I also have a few listed in my etsy shop HERE.
3. The size you buy would depend on the size of the jar you are using. If using a pint sized canning jar small or medium is probably a safe bet.
4. "Can I use/do/change x,y,z ?" Give it a try! Experimenting is part of the fun of making.
5. DO NOT use real candles. Safety first!
6. NO, selling replicas of this project is NOT permitted. Seriously, just be inspired, add your own style and vision, and create your own version of a fairy lantern.  If you are selling handmade you should be selling YOUR ideas and style, not mine. Think of it this way, you wouldn't copy a book word for word... don't carbon copy this project. For fun? Make as many as you like. For profit? Make your own version.

Note: I am not the owner of Gypsy Soul Laser Cuts or Alpha Stamps. They send me products, I use them in my work, that is all. If you have a question about ordering products, please direct them to the company you are ordering from.

Sunday, August 16, 2015

A Fun Fairy Door for Gina's Designs

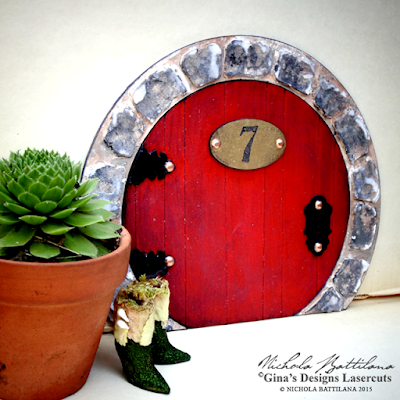
A wee fairy door project to share today for Gina's Designs. Isn't it cute as buttons?!

Fairy Door for GinasDesigns.net - Nichola Battilana

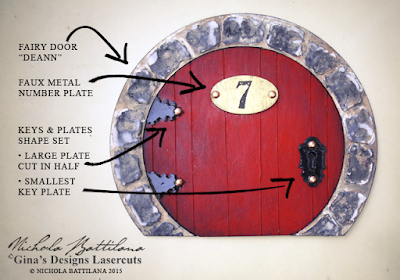
To create this adorable fairy entrance I've used Gina's Fairy Door 'Deann', Faux Metal Number Plates and Keys & Plates Shape Set.

Fairy Door for GinasDesigns.net - Nichola Battilana

In this example I've used the stone door frame piece that comes with the Fairy Door as a stencil and applied a layer of spackling to give the texture of a stone doorway.

To create the illusion that the door is made of wooden planks, I've scored the chipboard with a stylus before painting. If you don't have a stylus, you could press very hard with a ball point pen to create the grooves. A light wash of dark paint allowed to seep into the impressed lines will emphasize the effect.

Fairy Door for GinasDesigns.net - Nichola Battilana

The 'hinges' are created by cutting a large keyhole in half, applying to the door and trimming.

Fairy doors are pretty dang adorable and an excellent way to include a bit of magic in your household. Be sure to get creative with them by adding a little plant, a welcome mat and other accessories... great curb appeal will be sure to entice the wee folk into your home ;)

Acrylic paint
Small metal brads
Spackling
Glue

Monday, May 25, 2015

Wand Specimens

Faerie Wand Specimens - Nichola Battilana

Wands are often lost, misplaced or discarded by the fair folk. Their size, and the natural materials with which they are made, provide excellent camouflage making them difficult to uncover. Today we will take a look at several varieties of faerie wands found at Pixie Hill.
Faerie Wand Specimens - Nichola Battilana

Fig.1 The 'Thorned Goblin Rod' provides all of the magical qualities of a wand and may also be used a weapon. Created from a young black locust branch, the thorns aren't just dangerous in appearance, they are poisonous. A scratch from the sharp points will cause pain that may last for several days.

Faerie Wand Specimens - Nichola Battilana

Fig. 2: The 'House Brownie Wand' is completely utilitarian. It is free from excess embellishment or flamboyance. The wood used in its creation is maple, a good all 'round magical wood. This specimen has a handle of well worn cotton. (Note: If you find a similar wand near your home do not pick it up. Your house brownie likely put it down momentarily and will return for it.)

Faerie Wand Specimens - Nichola Battilana

Fig. 3: This natural bone wand has a moss wrapped handle. Bone wands are far less common than wooden wands but not unheard of. Found in on the mossy ground beneath the big pines on the back lawn, it is likely that this once belonged to a forest dwelling faerie. Possibly dropped by a migratory Duwende.


Faerie Wand Specimens - Nichola Battilana

Fig.4: This very small wooden wand has a decorative carved handle. Although it's carving suggests elf or gnome origins, its size is more indicative of imp ownership. More exploration may be warranted to see if pygmy elves are inhabiting the grounds.

Faerie Wand Specimens - Nichola Battilana

Fig. 5: This small wand has a webbed grip indicating that it's owner was in good standing with spiders and other insects. Flower faeries are known to have an excellent relationship with arachnids, often working together to aid in the maintenance and care of gardens.

Faerie Wand Specimens - Nichola Battilana

Fig. 6: It is well known that most creatures with fae blood are repulsed by iron, steel, silver and other metals. There are a few examples to the contrary, dwarfs, ogres and some trolls, creatures who mine and forge are less affected by some metals. This delicate tiny wand seems unlikely to have been wielded by a troll so one must wonder.... to whom did it belong?

This collection of wands and other faerie artifacts will be on display at the studio throughout the summer. Please check the events page for open house dates.

Wednesday, April 01, 2015

Two small somethings

Small Thing Number 1
I've created an entire collage sheet of teeny Fairy and Pixie Dust labels which are available exclusively via AlphaStamps. The sheet contains over 100 labels in a variety of styles and sizes to fit all sorts of little glass vials. Some of them are extremely tiny. A great buy (if I do say so myself) if you're planning on making multiple fairy dust pendants as gifts or for sale.

Fairy and Pixie Dust labels for miniature vials - Nichola Battilana

These cute little vials will be featured in my first project for Gina's Designs this Friday. If you believe in magic I think you'll like what I have in store! Be sure to check back for the adorable project and step by step video tutorial.

Small Thing Number 2
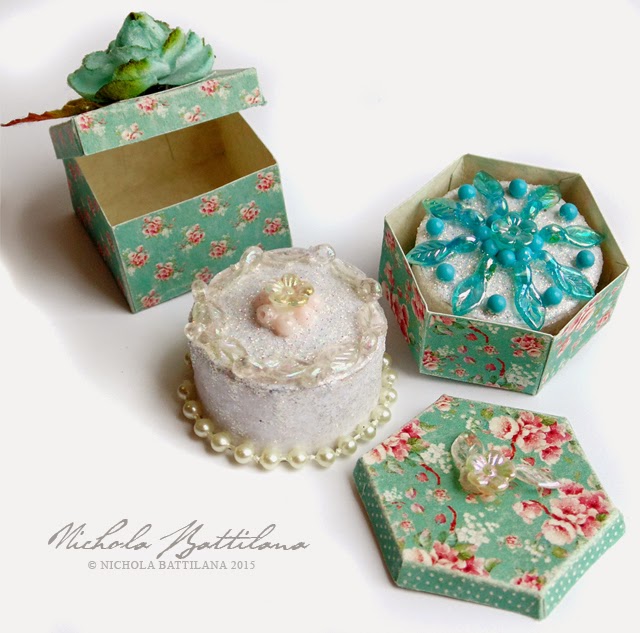
I jumped at the chance to play with the new Little Rococo Boxes Collage Sheet. The sheet includes miniature boxes suitable for tiny fancy hats, fairy crowns, shoes and cakes. Being a fan of sweets I opted for the latter.

Miniature cake boxes and paper & bead cakes - Nichola Battilana

Believe it or not, those cakes are made form paper. I simply made a sort of stubby tube, capped the end, and applied tiny beads and acrylic accents. A healthy slathering of Diamond Stickles for the icing and you've got yourself a fancy fairy cake ;)