Monday, October 13, 2014

Halloween Cards with Petaloo & Authentique

Although I do enjoy making cards, I don't do it often. When I saw the Spirited Card Making Stack from Authentique in my design team package however, I had an overwhelming urge to make a few spooky greetings.

NBattilana_Petaloo_cards5

Using the Authentique Spirited papers "circles & scallops", "stamp blocks", "components", and "enhancements" the cards came together really easily.

NBattilana_Petaloo_card1

The addition of some winding 'vines' of Floral Ephemera is perfectly petrifying :P

NBattilana_Petaloo_cards

Some tattered Crochet Lace Fancy Trim gives a nice textured detail.

NBattilana_Petaloo_cards2

The Textured Elements Burlap Blossoms and Mixed Textured Layers are perfect for Halloween embellishments.

NBattilana_Petaloo_cards3

And sometimes just a little bling in the form of some shiny green Embellishment Brads is all you need for the finishing touch.

NBattilana_Petaloo_cards4


Authentique Spirited Papers
- Spirited Card Making Stack
- "circles & scallops"
- "stamp blocks"
- "components"
- "enhancements"

Friday, October 10, 2014

An Eerie Tale Domino Pendants

I adore the images used on the pages of An Eerie Tale. I am, in fact, so smitten with them that I would wear them with pride on my personage! So I decided that to create some simple (yet totally eerie and adorable) domino pendants with some of my favourite images. 


Best of all you can use the tiniest of precious scraps to create these wee cuties. You do save your scraps, don’t you?


I happened to have some dominoes in my stash but I’ve seen boxes a-plenty in thrift shops. First I used a domino as a stencil to cut out the appropriate shape, inked the edges, then applied a layer of quality white glue to adhere the image to the surface of the domino. When dried, I applied a thick top coat of Mod Podge Dimensional Magic and added a blank pendant with a bail on the back. Easy peasy!


Here's the complete supply list:

An Eerie Tale
> You Bewitch Me> Run and Hide> Fanciful FableDominoes
Blank pendant with bail
Quality white glue
Mod Podge Dimensional Magic
E6000

And your daily dose of Hallowe'en from my 1912 book of games...


Thursday, October 09, 2014

Hallowe'en and a Sneak Peek

I'm sure I've shared this book before. Despite it's pages being filled with scribbles it's one of my favourite possessions.


The book is dated 1912 and the pages are filled with 'games' and 'charms' meant to be enjoyed on Hallowe'en. Most of the activities involve finding out who your true love is, but there are a few other gems in there. I'll be posting a few of the entries this month... because HALLOWEEN!

To kick things off, here is the suggested invitation wording to your spooky gathering...


I would be thrilled to attend Miss Ethel Jones' party!

And now a sneak peek at something rather lovely...


Graphic 45's newest collection "Time to Flourish". Isn't it delish?!? Not sure on the actual release date but I seriously can not wait to get my hands on it :)

Wednesday, October 08, 2014

A Faerie Bed

It is a well known fact that our house is infested with faeries. We're quite lucky that they are (mostly) of the nice variety and that we get along swimmingly. It is inadvisable to spoil faeries, they find it insulting and overbearing, I do believe that an occasional treat is acceptable. 

And so, today I'm sharing this little bed I created for my resident faeries... because even the fair folk get sleepy.


The base of the bed is made from fallen twigs found in our yard. A small mattress was created with some quilting batting and a small square of cotton fabric. The beautiful covers on the bed are laces from Tresors de Luxe, including Lace Trim Venice Floral and Gold Venice Lace Applique.


For the tiny pillow, I have taken two segments from this White Venice Lace Trim, filled with the tiniest bit of cotton batting, and sealed the edges.

  
The posts of the little bed are decorated with deconstructed Rustic Shabby Chic Flower Embellishments and White Acrylic Flower Sprays.


If you have sleepy faeries and would like to construct your own bed, here are the supplies I used to create this piece:
Lace Trim Venice Floral
Gold Venice Lace Applique

White Acrylic Flower Spray
Rustic Shabby Chic Flower Embellishments
twigs
cotton fabric

quilt batting

Friday, October 03, 2014

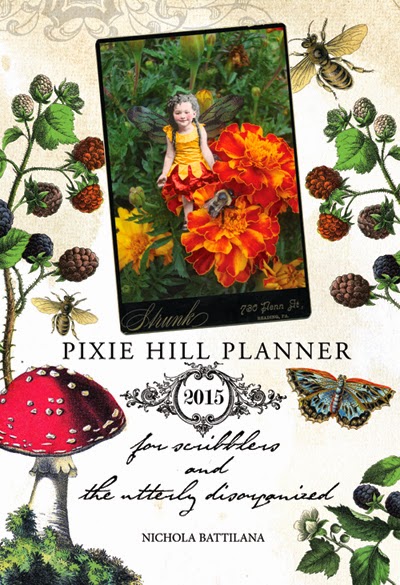
Garden faeries and something to scribble in

Last year I started taking photos of the faeries in my garden. The photos are inspired by the Cottingley fairies, and in that spirit involve very little funny business. The photos are shot just as they appear, with only minor photoshopping and colour editing.


The bee in this particular photo was so very cooperative! He just sort of hung out while I did my thing :)


This fellow regaled me with tales of his strength. He told me he can lift a twig three times his size! Hubba, hubba.


Finally, this pretty girl was twirling in this cluster of mushrooms near the old maple tree. I think she was waiting for a parcel to be delivered to fairy mail box.

And for the something to scribble in...

http://www.blurb.com/b/5616349-pixie-hill-planner-2015


If you follow the link you can preview the entire book. There are no holidays or events marked, just basic monthly calendars. There are pictures of my garden faeries inside, but the pages aren't coated or fancy so you should feel no guilt whatsoever about doodling and drawing in it.


P.S. I realize that Blurb shipping prices to non-US addresses is ridiculously high. I am sorry about that and I wish there was some way to curb them. (Seriously, because I get dinged by them too!)


Thursday, October 02, 2014

Little Altered Art Frames with Graphic 45

It never fails. As soon as I see a cool altered object project, the object in question becomes impossible to find.


While looking for something entirely different the other week, I saw bag of small frames at a very reasonable price. I snagged them and set to work creating a pretty little set of altered art. 


With a little love, Come Away with Me, and Shabby Chic Staples, I've turned those sad little frames into tiny treasures. And you can too!  I've created this snapguide to show you how :) 

Check out How to Make Shabby Chic Altered Art Frames by Nichola Battilana on Snapguide.

How fun would they be as party favours, small thank-you gifts, or abandoned as random acts of kindness for strangers to find? Come on... I know you can do this!


My supply list:

P.S. You can hop over the Graphic 45 blog for even more pictures AND take a gander at a super fun project by the amazing, talented and all around lovely Rhea Freitag :)

Wednesday, October 01, 2014

Shabby Christmas Tree with Tresors de Luxe

There's less than 85 days until Christmas! As a crafter this means panic mode is already setting in and I'm thinking of holiday treats, gifts and decorations so that I'm not caught behind like last year (Who am I kidding? I'll always be behind!)


I created this lacy tree just as the panic started to set in. I'm sort of in love with this one and think I'll keep it for myself but I do plan on creating a whole forest for gifts.


I've painted a sturdy paper mache cone white then wrapped all sorts of Tresors de Luxe laces around it. Different weights, widths and even some variation in the brightness of the whites of the laces all lend themselves to creating a lovely, interesting texture.


My tree is topped with a Rusty Star and embellished with rusty little snowflakes and a bit of Star Tinsel. The whole thing sits atop a skinny log to give the look of a tree trunk.


This cone measures 14" tall and I've used about 12 different types of lace to cover it. Some of the lace, particularly near the top, were small scrap ends. Buy a variety of Tresors de Luxe laces that appeal to you and combine them to create something beautiful :)