Showing posts with label alice in wonderland. Show all posts

Monday, October 29, 2018

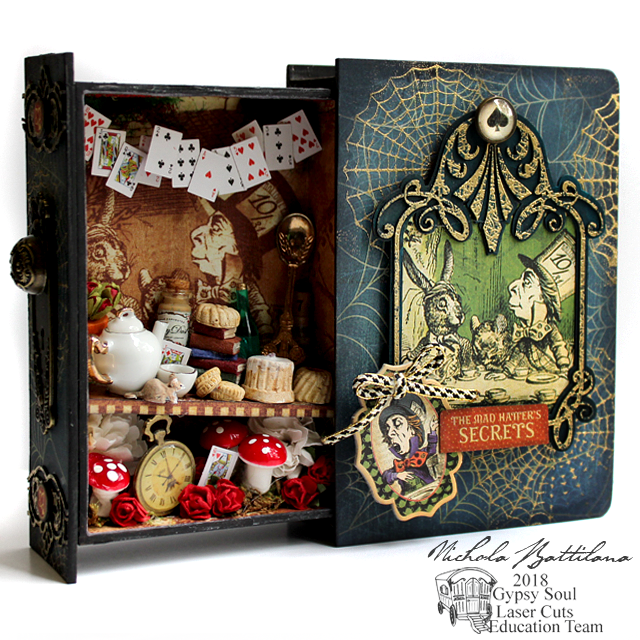
"The Mad Hatter's Secrets" Hidden Drawer Book Box with Tutorial

This is one of those projects that just kind of sprouted. All the supplies just kind of jumped up and shouted "ME! ME!". I'm glad they did because I'm smitten with this project.

Mad Hatters Secrets Hidden Drawer Book - Nichola Battilana


I've used the 6" Hidden Drawer Book Box as my base and then ran with the Mad Hatter theme from the Hallowe'en in Wonderland Deluxe Collectors Edition from Graphic 45.

I've repeated the cobweb theme of the scrapbook paper with a wed stamp and gold embossing powder.

Mad Hatters Secrets Hidden Drawer Book - Nichola Battilana

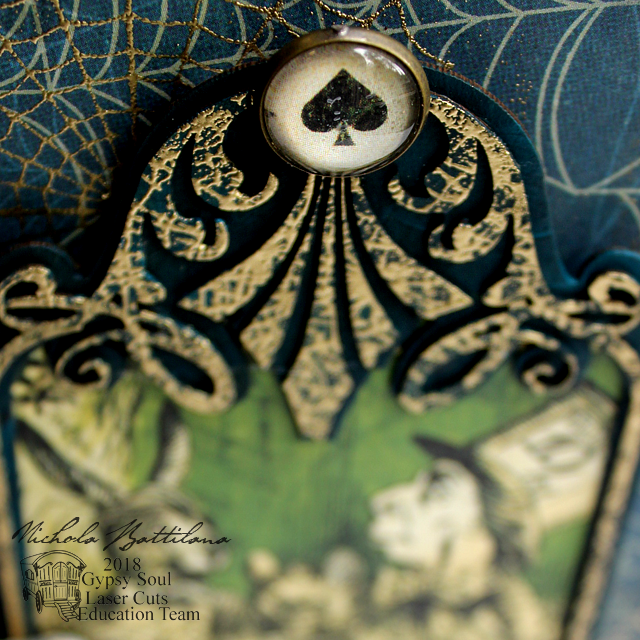
I used that same stamp, repeatedly, on a Layered Frame Aria then added a spade charm to the tippy top for some added interest.
Mad Hatters Secrets Hidden Drawer Book - Nichola Battilana

I used the same stamping and embossing technique for the top and bottom elements on the spine. I used a Deco Frame, then trimmed the elements I wanted to use.

Mad Hatters Secrets Hidden Drawer Book - Nichola Battilana

Also on the spine and cover, I've used more elements from Hallowe'en in Wonderland Deluxe Collectors Edition and added a Metal Door Plate and Knob.

Mad Hatters Secrets Hidden Drawer Book - Nichola Battilana

Inside, the Hatter's Tea Party! I really just sort went to town and filled the interior with suitable miniatures already in my stash including: a pocketwatch pendantminiature wine bottle, a dormouse, playing cards, cakes and cookies and more. 

Mad Hatters Secrets Hidden Drawer Book - Nichola Battilana

If you'd like to see the process of making this piece, take a gander over HERE for the video walkthrough.

And here is the list of supplies I used:
6" Hidden Drawer Book Box
Layered Frame Aria
Deco Frame
Web Stamp (available soon!)
Embossing powder
Acrylic paint
Hot glue and white glue
Foam squares
Bits and pieces for the interior

Monday, October 22, 2018

Hallowe'en in Wonderland Nonsense Clock #G45DarkSide

The challenge this month over at Graphic 45 is to create a project using a dark colour pallet. I did create another project, which I can't show off just yet, but I couldn't help but make another with the #G45DarkSide theme when Hallowe'en in Wonderland arrived in the mail.

Hallowe'en in Wonderland Clock #G45DarkSide Nichola Battilana

I've used a chipboard Grandfather Clock 1:12 from gslcuts.com as the base. It measures just 7.5" tall but if you're not comfortable with that tiny scale, there is a larger 11" version available too.

Hallowe'en in Wonderland Clock #G45DarkSide Nichola Battilana

I toyed with the idea of putting a working watch face in the top of the clock, but opted for an antique metal clock key with the stem chopped off, and an ornate metal key hole with the top and bottom loops snipped off to fit. There are some brass stamped metal brads there too. I've snuck a Tim Holtz clock key from my stash on the top.

Hallowe'en in Wonderland Clock #G45DarkSide Nichola Battilana

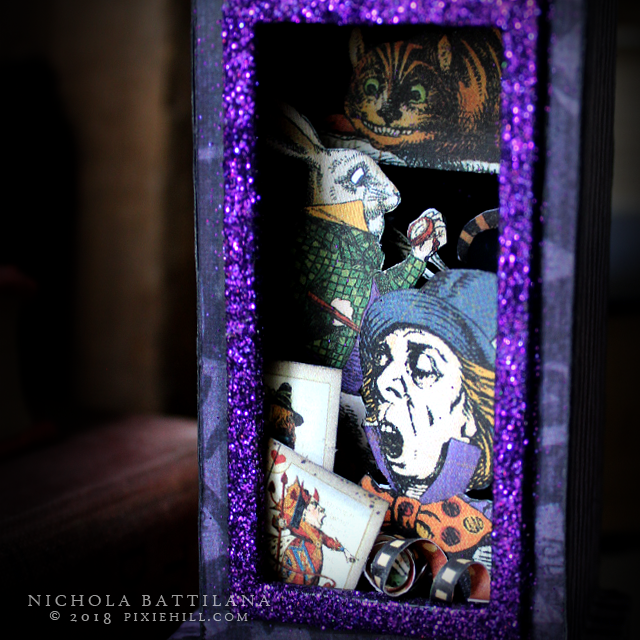
The bottom area, where there would normally be the clockwork pendulum, all of the characters have jumped in and are doing their thing. The Queen is shouting, the Hatter is spouting nonsense, Rabbit is checking the time, and the Cheshire cat is smiling.

Hallowe'en in Wonderland Clock #G45DarkSide Nichola Battilana

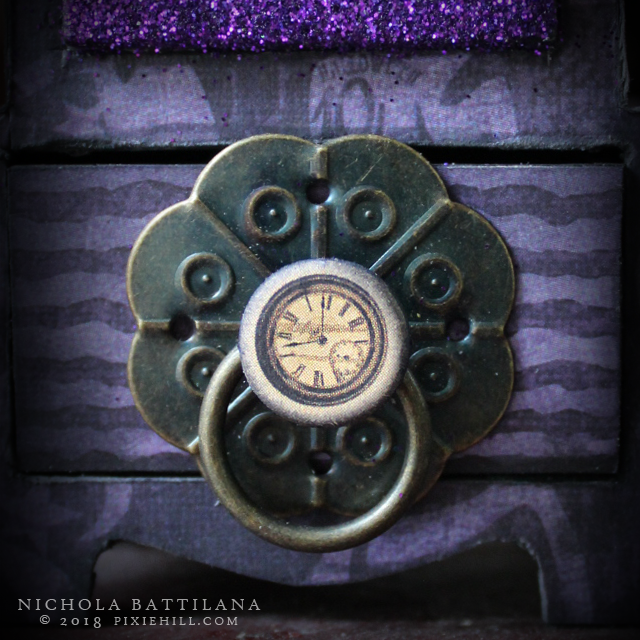
The bottom The little drawer at the bottom (which I have thoughtfully accidentally glued shut) has a brass pull and a little chippy accent from Hallowe'en in Wonderland.

Hallowe'en in Wonderland Clock #G45DarkSide Nichola Battilana

A bit of glitter, fussy cutting and curls and my clock is done! And because Alice is all about nonsense, and what could make more sense than a clock that doesn't actually tell time and with a drawer that doesn't open?!

Hallowe'en in Wonderland Clock #G45DarkSide Nichola Battilana

Want to make your own? Here's the bits and pieces list:

Hallowe'en in Wonderland Deluxe Collectors Edition
Grandfather Clock 1:12
Antique Metal Clock Keys
Tim Holtz Clock Key
Brass Drawer Pull
Glue
Acrylic Paint
Glitter


Wednesday, May 18, 2016

Looking Glass Mini-Shrine with Faux Plaster Tute

I've created two "Alice" projects for AlphaStamps.com this month. First there was Alice's Altoid Manor House and now a second little tin shrine inspired by the mirror that inspired Lewis Caroll to write "Through the Looking Glass". If you peek to that link, you'll see they look nothing alike, but it's that lovely old ornamentation I was after, not really replication.


The base of this piece uses one half of a Small Hinged Tin and one panel of this Small Altoids Tins Triptych FrameIt's quite small, with the base tin measuring just 2-1/2" tall.


Inside is filled with moss and Mini Rose Buds with some sweet Flower Soft blossoms.


While I am usually all about tiny floral elements, it's the fake plaster details that are my favourite this time around. Can you guess what they are made from? Hot glue!

Normally I'd make these elements with Creative Paperclay but I was feeling impatient. Some leafy silicone molds, hot glue, layers of gesso and white paint, and voila! Held side by side with resin, you can't tell the difference, and adding additional layers of gesso and paint softens the details and makes it look quite like plaster.


AND because I love you (and Leslie asked so nicely) I've made a video of that technique HERE.


Just look at this plastic frame with 'faux plaster' leaf embellishments! I can't wait to see what you make with them :)

Supply round up:
Small Hinged Tin
Small Altoids Tins Triptych Frame
Large Leaves Silicone Mold*
Multi-Sizes Leaves Silicone Mold*
Flower Soft - Sweet Pea
Mini Rose Buds - Red*
Pink Rose Garland* (leaves)
Small Round Silver-Plated Pendants (not shown, applied to back of shrine for hanging)
Moss
Hot glue!
Gesso and white acrylic craft paint


Wednesday, May 11, 2016

Alice's Altoid Manor House

This month's Alpha Stamps kit is *drumroll* Alice in an Altoids Tin!

I'm really excited to share this particular tin, which I've named Alice's Altoid Manor House, because it's actually quite simple to put together.


I simply applied the Altoids Tin Book Covers to the front and back of the tin. I didn't even bother with the book spine (though I'm sure it'll come in handy for something). Then a Window Pediment - Federal was added to the front top edge and the Window Pediment - Yorktown to the bottom front edge. A snip of Thin Fleur Dresden Border is applied under the top pediment, then whole shebang is painted grey.


The windows are just little paper frames I cut out. I placed some Alice charaters from the Wonderland Rabbits and Hares Collage Sheet in the squares and added a layer of Diamond Glaze to make the 'windows' glossy. The door is framed with some snippets of wood and topped with little bit of filagree that broke off something-or-other that I kept for just such an occasion. Finally I finished the exterior with a Bronze Stopwatch Clock Charm and some Flower Soft.

I've kept the inside fairly simple too.


On the shallow tin lid I just placed an image from the Alice Covers Collage Sheet adjusting the size to fit. Tip: If you want your book/house/tin to close tightly, you'll want to avoid adding much thickness to this part of the tin, especially around the edges.

Finally, the fat portion of the tin. I've taken an image from the Alice Herself Collage Sheet (printed slightly larger to fit the tin) and cut out each of the elements, layering them in a simple paper tole style. The last touch, a little cake made of paper clay and a glass bead 'drink me' bottle.

So now it looks as though I've written a darned novel, but I promise, this was a practically painless project! Sure the sides aren't covered... but the tin opens and I didn't have a meltdown attempting to apply hinges. (I often have hinge related meltdowns.)

Here is your supply round up:
Altoids Tin Book Covers
Blank Altoids Tins
Window Pediment - Federal
Window Pediment - Yorktown
Bronze Stopwatch Clock Charm
Mini Silicone Cake Mold Set
Thin Fleur Dresden Borders - Turquoise
Flower Soft - Peony Pink
Flower Soft - Meadow Green
Creative Paperclay*