Showing posts with label cute as buttons. Show all posts

Thursday, November 09, 2017

MOTHER EFFIN' SNOWBALLS! with tutorial

Today was supposed to be the first snow of the season. Because it's daylight savings and now dark at 2 in the afternoon (not really, but it feels like it) I have no idea if it actually did snow today BUT there's these dudes. The yearly Cheeky Snowballs.

Cheeky Snowball Ornaments with Tutorial - Nichola Battilana

I've been making these guys for nearly 10 years. TEN FREAKING YEARS! They started out as emotional snowballs and transformed into the cheeky variety.

Cheeky Snowball Ornaments with Tutorial - Nichola Battilana

This year I've decided to do a tutorial so people can create their own. The video is available HERE on my YouTube channel. If you create your own, please share on social media and tag me. Seriously, it's appreciated and I totally want to see what you make.

Cheeky Snowball Ornaments with Tutorial - Nichola Battilana

A couple of things I KNOW are going to come up.

1. Can I use a different clay?  
I REALLY recommend you use Creative Paperclay for this project. It's super light weight so your ornament won't drag down the Xmas tree branches. It gives a beautiful finish. There may be a bit of a learning curve if you're used to other materials... but  In my opinion it's absolutely worth $ and time. 

2. It's taking SOOO LONG! Can I speed up the drying?
I prefer to let things dry naturally. There seems to be less warping, and cracking when I let things take their course. Plus, do you really want to put styrofoam in the oven? Nah.

3. Clear glitter?
Never mind fancy stuff, head over to the kids aisle in Micheal's and grab a big ole jar of Creatology "Crystal Clear" glitter. It looks like this...
What is most important is that your glitter of choice is NOT SOLID WHITE. The flecks in this product are transparent. This is important. You want a product that will allow the underlying paint colour to show through. Just look for something transparent or translucent.

4. I can't find tiny eye hooks!
I use teeny tiny eye hooks for hanging on my snowballs. If you can't find any small enough, try the jewellry section of the craft store and look for findings like these Tiny Silver Eye Pins*. Poke a hole with a straight pin, add a dab of glue, and slide it in. They'll work in a pinch.

5. What kind of glue do you use?
I'm using Elmer's School Glue in the tutorial. The better the quality glue you use (i.e. Aleene's Tacky Glue) the more glitter will remain on your snowballs in the long run.

6. Can I (insert other subsitution/method/madness)?
Part of the joy of creating is experimentation. Have an idea? Give it a try! Maybe it'll turn out a bazillion times better than my snow dudes!


Cheeky Snowball Ornaments with Tutorial - Nichola Battilana

THE LIST OF SUPPLIES!
- styrofoam balls (2" - 2.5" makes a nice size)
- Creative Paperclay
- white glue
- clear/transparent/translucent glitter
- pink, black paint
- mini eyehooks
- fake snow
- clear gloss medium like Diamond Glaze, Glossy Accents or Dimensional Magic

Thursday, November 17, 2016

Sweet Little Peg Fairies

*gasps!* How cute is this years batch of peg fairies?! I made these ones with embellishments and trims from Shabby is Chic Boutique.


I'm so smitten with them. This Folded Tulle Trim is absolutely perfect for the little skirts. The little flatback pearly embellishments are also from Shabby is Chic Boutique. I didn't include them here, but these Silver Fairy Wand Charms would be a super cute addition!


I just love their floofy hair made from real wool roving.


In all different colours.


They're such happy little things.


With their acorn caps and their butterfly wings.


I hope you'll make some too!


And spread a little sweetness to those around you.


Love you this much!

xoxo

Tuesday, May 10, 2016

The Cure for Monday Blahs

A very short while ago I posted about the Pixie Hill fairies writing to a kindergarten class who were learning about the little people. Yesterday I was delighted to discover some replies from the class.


One of the fairies who wrote to the class lamented about his lost button. It was a favourite button, so his distress was quite understandable. The class very thoughtfully sent replacement buttons.


There were some fine portraits too! Those wings and wands are practically perfect. There were also some very good pictures of jam. And if you're curious, it seems strawberry is the preferred jammy flavour.


I was quite the grump yesterday and it seemed as though the whole day was one disaster after another, but these papery bits of thoughtfulness totally brightened my day (as well as the Pixie Hill fairies!) and I'm certain they've brought a bit of luck with them too.

Thank you Mrs. Butcher and to all the children of your kindergarten class for curing the Monday blahs!


(& thanks to your helpers too!)


Tuesday, July 07, 2015

A Pixie House Shrine

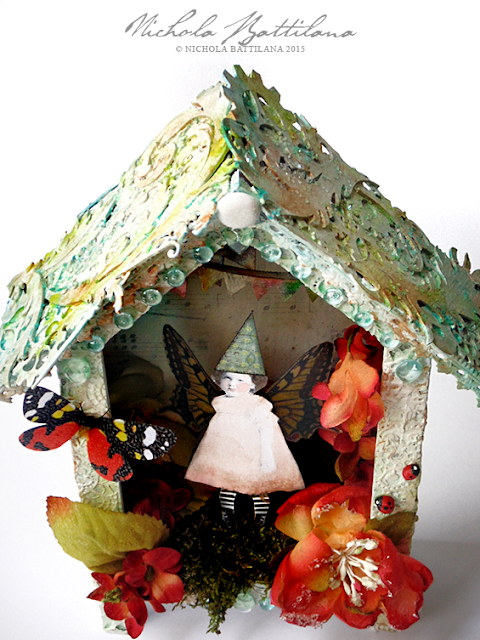
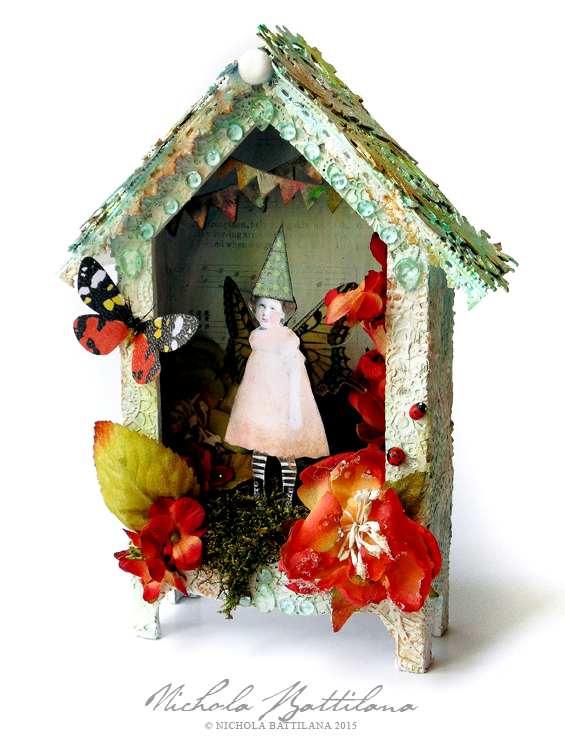
I altered this cute House Shrine Box for a colour challenge that I totally missed the deadline for. 

Pixie House Shrine - Nichola Battilana

I used to be terrified of colour but plowed through that wall. Now, I'm trying to consciously add texture to my pieces. This piece is chocked with textured elements. 


Here's the texture of the walls of this wee house. I've layered Cardstock Doily Set Intricates, painted them white and then added a smidge of colour with some ColourArte silks and H20's. I'm pretty smitten with the way it turned out.

Pixie House Shrine - Nichola Battilana

For the roof I used sturdier chipboard pieces. There are some Feathery Flourishes (quickly becoming one of my favourite embellishments!) and Steampunk Fan blades. Again I painted them white and added some colour with ColourArte products.

Pixie House Shrine - Nichola Battilana

The piece is finished off with some super cute Water Dew Drops from The Robins Nest, handmade ladybugs, a sweet winged vintage girlie and more. Here's the whole supply list kit-and-kaboodle.

White acrylic paint
Vintage image

This gal is currently listed HERE in the etsy shop.