Showing posts with label fairy sized. Show all posts

Friday, November 25, 2016

A Floo Network Fireplace

I interpret "Do you want to play with a fireplace?" as "OMG, MAKE A FLOO NETWORK THING!"

That's exactly what happened.

Floo Network Fireplace - Nichola Battilana

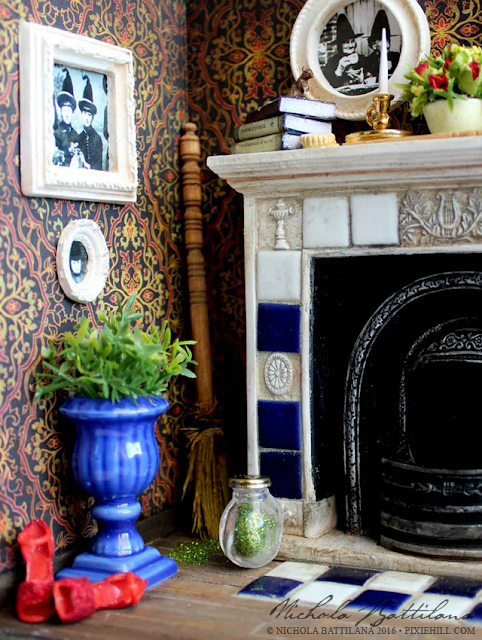
I've made a number of pieces inspired by the Weasley's (my favourite magical family) lately, so I wanted to do something a bit different with this piece. It occurred to me that it might be fun to create a something as if I lived in that magical world! And so, here is what I imagine my floo network fireplace might look like...

Floo Network Fireplace - Nichola Battilana

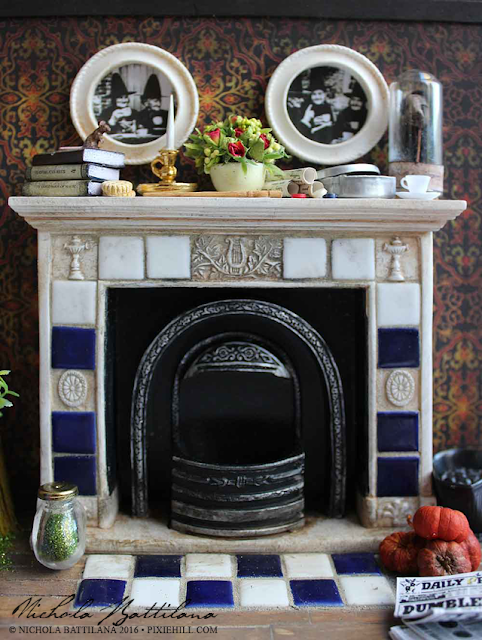
I'd have framed pictures of my magical relatives above the mantle. Stacks of books with magical titles, a Round Tin of tiny buttons, Cookies and a big bunch of Rose Buds too.

Of course I would read the Daily Profit regularly, and there's a stack on the floor. (Hint: A google search will provide you with several printables.)

Floo Network Fireplace - Nichola Battilana

You can't have a Floo Network fireplace without Floo Powder. There's some of that sparkly green stuff ready to go in a Tiny Glass Jar. And, because I'd be a mess even in the magical world, some powder has spilled and swept into the corner.

Floo Network Fireplace - Nichola Battilana

There's a lot going on this piece, but it's not ENTIRELY jumbled. It really does remind me of home with it's just-the-right-amount-of-clutter but not hoarder-level mess.

Floo Network Fireplace - Nichola Battilana

Even though it's not in complete disarray, there are loads of details to be found. Little stories within the scene, like this mouse keeping watch over the biscuits. That tea cup on the mantle and haphazardly placed pair of sparking red shoes clearly show what a busy witch I would be. (BTW I would wear those shoes every single day.)


I am quite smitten with this piece and think I'll keep it in view to remind me to strive for magical living in this world, and as evidence that a little mess is just fine and dandy.

Want to make your own? HERE is everything listed in one place and below is a list of the supplies I used:

White Undecorated Fireplace
Dark Blue Porcelain Tiles
White Porcelain Tiles
Blue Ceramic Urn
Corner Room Box
Coal Scuttle Set
Set of Miniature Books
Tiny Glass Candy Jar
Tiny Grey Mouse
Mini Silicone Mold - Cookie or Biscuit with Filling*
Mini Rose Buds - Red*
Mixing Bowl Set
Chamberstick Candle with Glasses
Doll Buttons - 6mm Mix
Domed Apothecary Bottles*
Miniature Round Cookie Tins
Simple Cups & Saucers Set - Set of 12
3-3/4 Inch Wooden Posts
Pumpkin Pods
Blue Damask Wallpaper Scrapbook Paper (outside of piece)
Wonderfully Wicked Haunted Scrapbook Paper
Little Library Collage Sheet
Something Witchy Collage Sheet
A Witchy Encore Collage Sheet
Glitter
Handmade shrunken head
Tiny sparkly shoes!
Paint
Glue
A crap-ton of love


Friday, March 04, 2016

Tooth Fairy Cart and Tutorial

It's the first Friday of March... and that means a new tutorial from little old me for Gypsy Soul Laser Cuts.

Last week I had a very interesting letter from the Department of Tooth Fairy Affairs. It seems that there is spike in tooth loss and the Tooth Exchange Fairies (the troop who preform the tooth/reward transactions) are having a hard time keeping up with the demand.

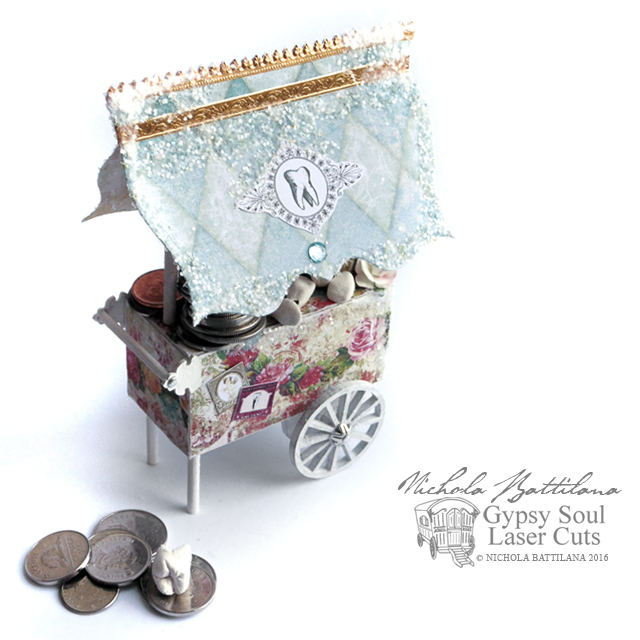
Tooth Fairy Cart with Tutorial - Nichola Battilana

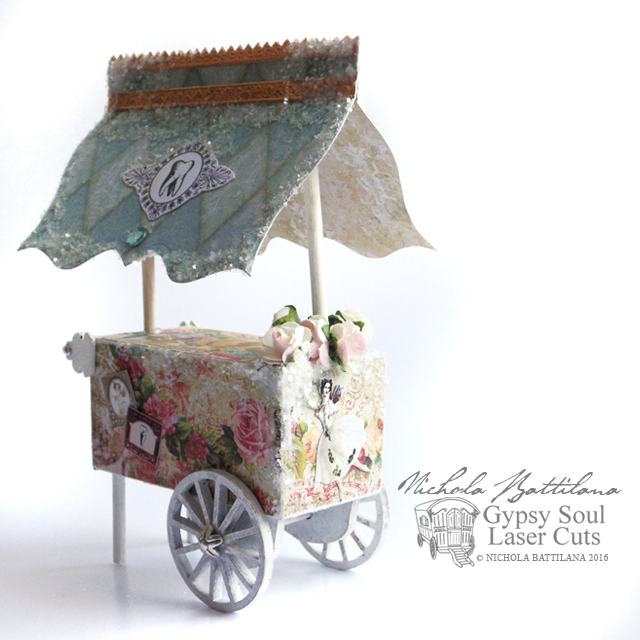
They asked very nicely if I might come up with a wee cart design, something to help with the transporting of goods, while remaining true to the Tooth Fairy Dress, Appearance and Conduct Code. (Fairies like to be very official.) I was happy to oblige.


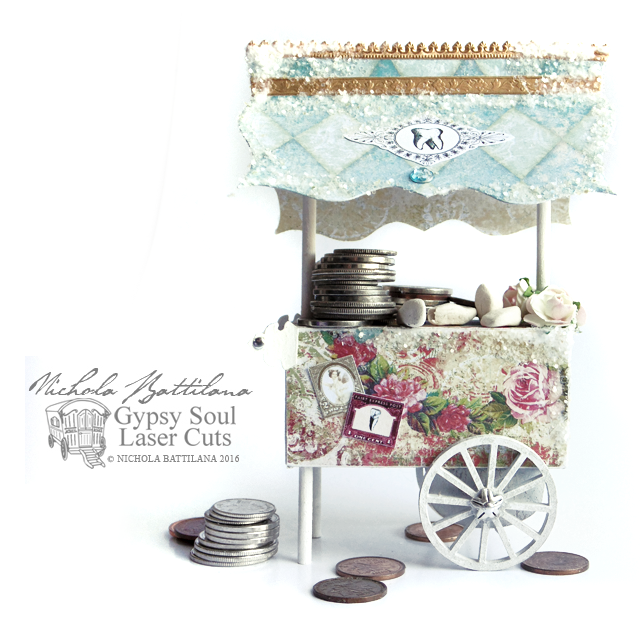
Tooth Fairy Cart with Tutorial - Nichola Battilana


With a Bagatelle BoxWheels, and Keys & Plates Shape Set from Gypsy Soul, some scrapbook paper, doweling, glitter and trims... I set to work.

Tooth Fairy Cart with Tutorial - Nichola Battilana

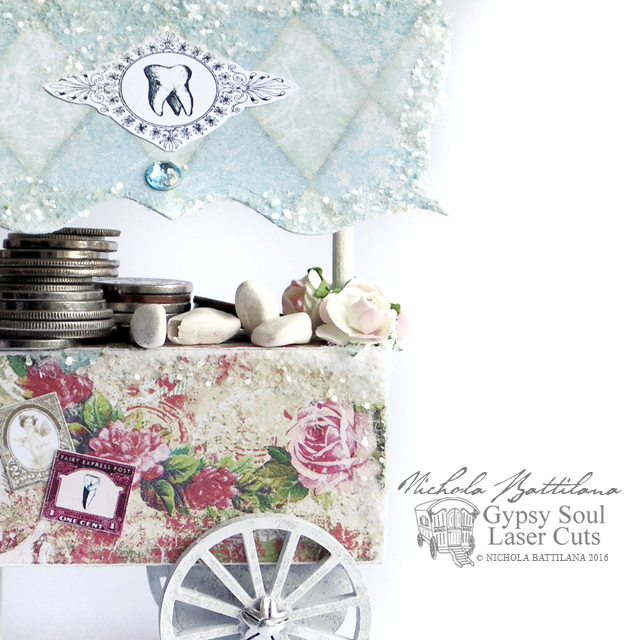
In no time at all I had assembled a tiny cart fit for a fairy! And while this one is intended to assist the Tooth Fairy Department with distribution and exchange, I'm sure that it would come in handy for other fair folk to exchange sweets, flowers, seeds, and cake crumbs too.

To create your own little cart, hop over to the YouTube Tutoral to see how I put this simple little cart together. Or just jump down to the very bottom of this post.


Tooth Fairy Cart with Tutorial - Nichola Battilana

Supply round up!

Bagatelle Box
 (I used the Bagatelle Box 1.5 by 3 inch but don't let that limit you! Use different sizes to create an assortment of looks)

Wheels 1.5 inch Straight
Keys & Plates Shape Set


Thin wood doweling or bamboo skewars
Glue
Glitter
Blush Charmed Scrapbook Paper (or paper of choice)
1/2 Inch Pale Pink Paper Roses*
3mm Silver Nailheads*
Mini Floral Dresden Borders - Antique Gold
Narrow Gold Fleur Dresden Borders*
Miniature Tooth Fairy Letter PDF collage sheet (used for graphics on cart)

Monday, November 02, 2015

Fairy Christmas Card Advent Calendar

Ok, I've let Halloween pass and now it's full steam ahead with the Christmas posts. I have a few projects coming up that I KNOW you're going to want to try so I'm posting nice and early to give you plenty of crafting time. Today, a totally freaking adorable advent calendar alternative.

Fairy Christmas Cards, an alternative Advent calendar - Nichola Battilana

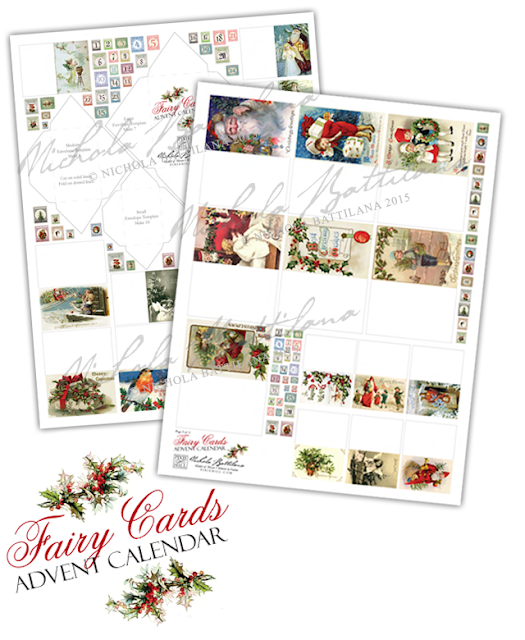
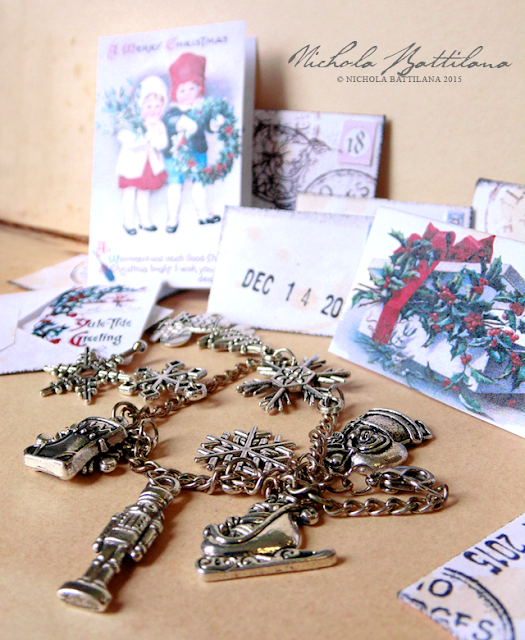
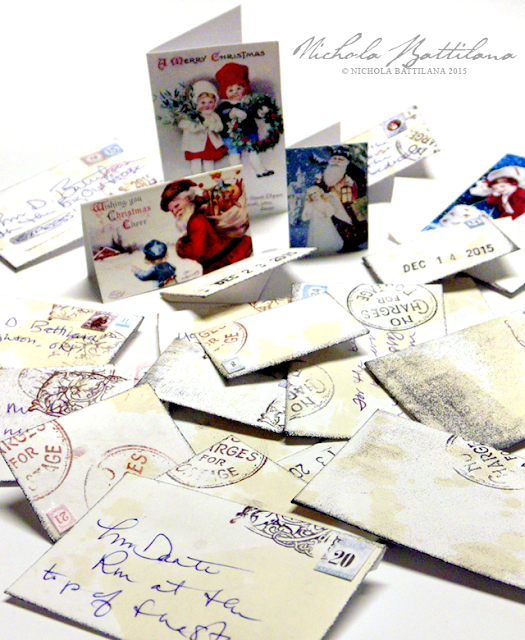
Imagine waking up each day to find a card from the fairies helping you count down to Christmas! I've put together a Fairy Card Advent Calendar, a 2 page download that includes 25 miniature cards with vintage holiday imagery, numbered postage stamps and three envelope templates to fit the various sized cards.

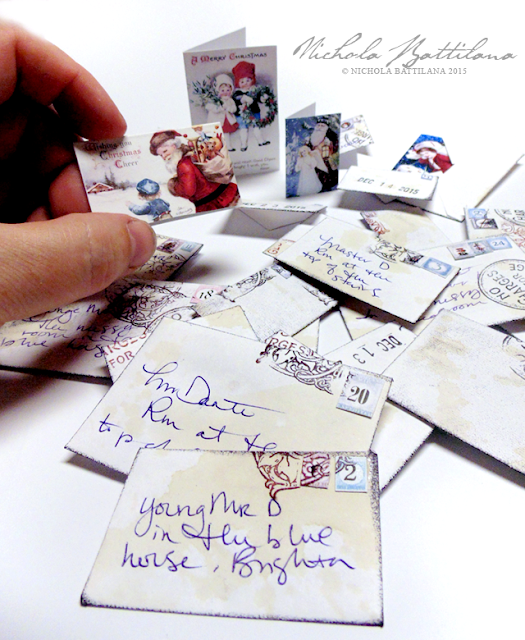
Fairy Christmas Cards, an alternative Advent calendar - Nichola Battilana

Now, when I showed this project to my kiddo he said "Yeah, but what about the treat?" The wheels in my mind starting turning and I thought of all the little things that would fit in those envelopes... letters, notes, coins, buttons, glitter, jokes, stickers, charms... then the light bulb above my head lit up. 

Fairy Christmas Cards, an alternative Advent calendar - Nichola Battilana

Every few days a charm could be included in the tiny card and your little pixie could make their own Christmas charm bracelet! The sets I've used here are the Santa Sleigh Silver Charm Set and the Silver Snowflake Charm Set from Alpha Stamps.

Fairy Christmas Cards, an alternative Advent calendar - Nichola Battilana

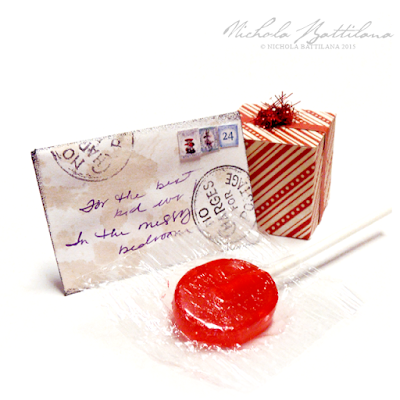
Cute as buttons and sugar free! Although if you do like the sweet stuff you could always give a lolly or chocolate kiss.

Fairy Christmas Cards, an alternative Advent calendar - Nichola Battilana

Don't do the advent calendar thing? No worries! You could always make these up and pass them out to the people in your life who need a little extra fairy magic around the holidays.

Fairy Christmas Cards, an alternative Advent calendar - Nichola Battilana

Now, as for decorating the outside of those envelopes, here's what I suggest:

1. Using the templates from the Fairy Cards Advent Calendar, trace the envelope shapes onto a piece of regular white paper.


2. Cut the shapes.
3. Fold the two short sides, then fold the bottom (the one with the flat edge) and glue into place. Be careful not to glue the envelope shut!


4. Sprinkle both sides with a bit of tea or coffee. I prefer tea as it doesn't leave a lingering scent. Allow to dry. NOTE: You can age your paper before creating the envelopes, but I found that doing it in this order results in a flatter, smoother finished piece. See wrinkles above.

5. Add little postage stamps and 'cancel' them using a rubber stamps. Any patterned stamp will do. Place a scrap bit of paper beneath so as not to ink your work surface.


6. Address the envelopes, personalizing them for the recipient.


7. Add the wee cards and any tiny surprises you'd like to include.


Fairy Christmas Cards, an alternative Advent calendar - Nichola Battilana

Lastly, and this is kind of important, these can NOT go through the regular postal system. Their size requires that they be handled only by Royal Faerie Post. If you want to send them to someone far away, I suggest mailing them within a larger card with a note of explanation.

Supply round up:
scissors
glue
tea/coffee for staining*
rubber stamps*
ink pad*
*optional

Do-dads for the charm bracelet:
Chain, clasp and jump rings / or pre-made bracelet
Santa Sleigh Silver Charm Set

Silver Snowflake Charm Set