Showing posts with label handmade. Show all posts

Wednesday, March 06, 2019

Love Notes Micro Albums with tutorial

There are areas of crafting that I am not particularly adept at. Scrapbook layouts are one, albums are another (knitting is another weakness but lets not go down that road). While I’m not very good at creating albums, I do enjoy making books, and miniatures.


And so, I’ve made some micro albums with Love Notes. The littlest books that you ever did see!


They’re quite tiny, at just a smidge over 1” wide. Some may think they’re far too small, but that’s ok, I think large albums are rather daunting! These are just big enough to tuck tiny notes, a lucky penny, a little feather or four leaf clover.


Perhaps you might include some teeny tiny portraits of imaginary relatives.


Or photos from you were little.


If you’re feeling adventurous, you could make a sweet little art journal.


Or add a string to tie your memories up tight and safe.


Like most good things, these require some fiddling.


But the results are adorable, and sweet as can be.


If you’d like to make your own batch of teeny tiny micro albums, I have a video tutorial HERE.

Here are all the bits you’ll need:


Graphic 45 Supplies:
Love Notes 12x12 Collection Pack
Floral Symphony
Love Notes Stickers
Love Notes 8x8 Paper Pad

Other Supplies:
Cardboard
Glue
String


Measurement notes:
Inside pages: 1.25” x 12”, scored at every inch

Card for cover: 2 pieces just a smidge larger than the finished folded page size inside (add about 1/16” to the length and width). 1 spine piece approximately ⅛” wide

Paper for cover: approximately 3.25” x 2”


And that’s everything you’ll need to make a big library of tiny books!

Good luck! 

Friday, November 16, 2018

Flutter Cards with 60 Second Tutorial for Graphic 45

The holidays are coming up so fast, and for many people that means Christmas, winter celebrations, and Thanksgiving, but I couldn't help but make a big batch of beautiful general purpose cards with "Flutter"

Flutter Cards with 60 Second #g45videotutorial - Nichola Battilana


Flutter Cards with 60 Second #g45videotutorial - Nichola Battilana

Because even with all those holidays peering around the corner, there always seems to be a thank-you that needs to be sent, or someone who could use a pick-me-up 'thinking of you' card. I am absolutely certain that these will not go to waste!

Flutter Cards with 60 Second #g45videotutorial - Nichola Battilana

These cards are simple. There's a bit of fussy cutting, but that's about as difficult as it gets . No fancy cutting or folding with these beauties. They are so easy that you'll whip up a big batch in no time at all.

Flutter Cards with 60 Second #g45videotutorial - Nichola Battilana

I've made a 60 second video to show you just how quickly they'll come together.

Easy as pie!! So grab a mug of something warm (or a glass of something tasty) and create a big beautiful stash of cards for those unexpected important moments that happen year round… even when the holidays are looming.
Flutter Cards with 60 Second #g45videotutorial - Nichola Battilana

Here are all the supplies you’ll need to create your own collection of “Flutter” cards:

G45 Supplies
Flutter 12 x 12 Collection Pack
Flutter Ephemera Card (back in stock!) Clearsnap Decades Dye Pad Venetian Lace


Other Supplies:
Adhesive foam squares
Floral Stamp
Gold embossing powder
Corner punch (optional)
White paper
Glue Stick

Thursday, November 15, 2018

Holiday Shadow Pillow Boxes

Do you ever wake up with an idea? I do, then immediately forget what it is. But not this time! This time I an idea struck me as soon as I awoke and by george I made sure it stayed in there. Not only did I make it stick, I followed through and made the thing I thunk up!


I'm sure it's all the matchboxes I've been working on that inspired these shadow-pillow-boxes. Using the pillowbox template found on the inside cover of Graphic 45's 8" paper pads, I traced and cut out pieces from Christmas Magic, then simply cut a window from one side of the box before assembly.


You could put all sorts inside... a wintery scene, a photo of this years visit with Santa, a picture of your cat. I've opted for a simple sentiment cut from Christmas Magic, and more of the winged Santa's Little Helpers that are fluttering all over my studio.


I seriously love these wee fellows. They are utterly charming and delightful!


**SHAMELESS PLUG ALERT: The wing transparency is available HERE. A download to print at home can be purchased HERE.**


I mean... come on... my teeth hurt from all the sweetness!


A paper sprig of greenery, some red holiday berries, a bow...


... and tah  da! You're all set!


Oh! I added a very sensible amount of glitter too.


NOW you're done.

Here's the list of goods I used to make these cute shadow-pillow-boxes.

Christmas Magic
I used the 8" pad for the boxes, the wee fellas were fussy cut from the 12" Santa's Helpers sheet
Wee Wings Transparency Sheet
Fancy Red Holly Berries Mix
1/4 Inch Red Holly Berry Stems
Green Ribbon
Waterfall Stickles
Clear glitter

Monday, November 23, 2015

Simple Mixed Media Canvas

I hosted a kids workshop at the studio this weekend. My goal was to create four gift quality projects that were also kid friendly. Participants could choose a project and it was wrapped/boxed before they left to ensure that there was no peeking by their grown ups. 

This little mixed media canvas was one of the projects offered.

Simple Mixed Media Canvas w/ Tutorial - Nichola Battilana

If you have little people to craft with, there's a video tute available on my youtube channel HERE or see below. (Note: I suggest keeping the kidlets away from the heatgun.)


Here is a list of all of the supplies I used:
4" canvas
Snowflake Shape Set
Cardstock Doily Set Intricates
Ornate Metal Keys from Graphic 45
Fancy Red Holly Berries Mix*
Silks Acrylic Glaze: Stargazer
twine
vintage image
clear glitter
white acrylic craft paint
white school glue
Aleene's tacky glue

And here are some of the other projects completed by my amazing workshop kiddies!


So proud of those little people :)

Monday, November 02, 2015

Fairy Christmas Card Advent Calendar

Ok, I've let Halloween pass and now it's full steam ahead with the Christmas posts. I have a few projects coming up that I KNOW you're going to want to try so I'm posting nice and early to give you plenty of crafting time. Today, a totally freaking adorable advent calendar alternative.

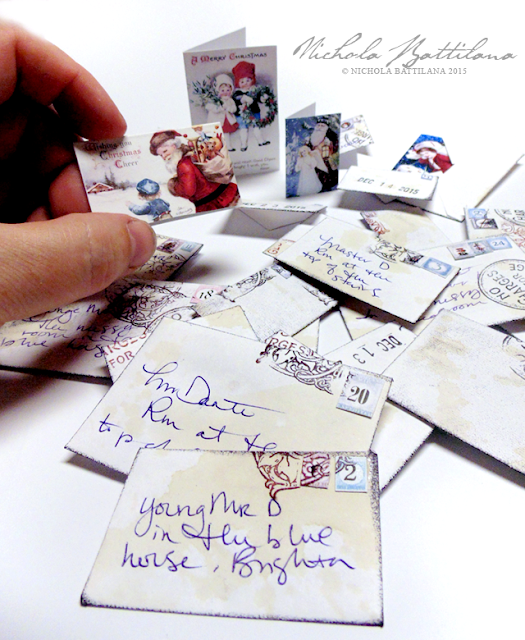
Fairy Christmas Cards, an alternative Advent calendar - Nichola Battilana

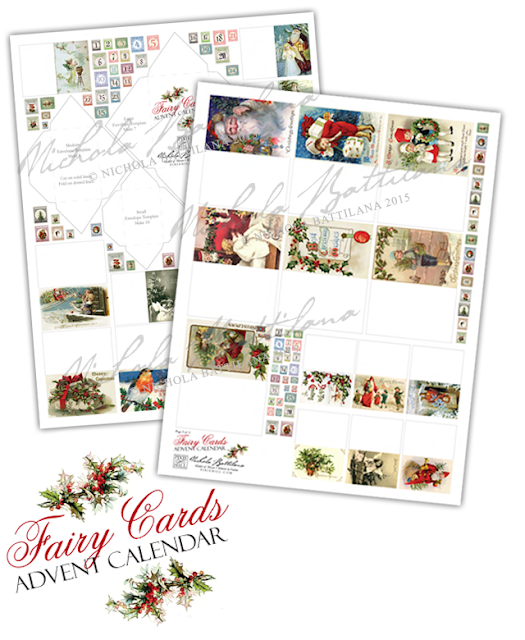
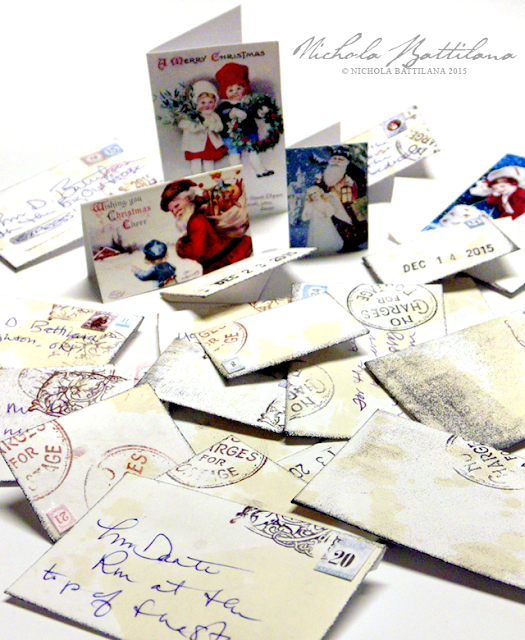
Imagine waking up each day to find a card from the fairies helping you count down to Christmas! I've put together a Fairy Card Advent Calendar, a 2 page download that includes 25 miniature cards with vintage holiday imagery, numbered postage stamps and three envelope templates to fit the various sized cards.

Fairy Christmas Cards, an alternative Advent calendar - Nichola Battilana

Now, when I showed this project to my kiddo he said "Yeah, but what about the treat?" The wheels in my mind starting turning and I thought of all the little things that would fit in those envelopes... letters, notes, coins, buttons, glitter, jokes, stickers, charms... then the light bulb above my head lit up. 

Fairy Christmas Cards, an alternative Advent calendar - Nichola Battilana

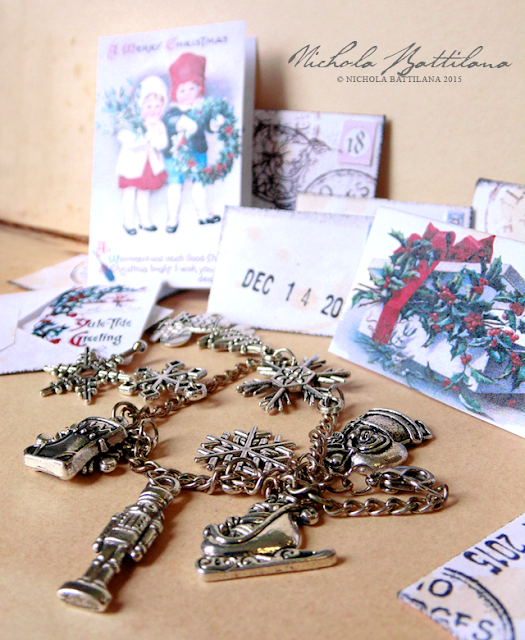
Every few days a charm could be included in the tiny card and your little pixie could make their own Christmas charm bracelet! The sets I've used here are the Santa Sleigh Silver Charm Set and the Silver Snowflake Charm Set from Alpha Stamps.

Fairy Christmas Cards, an alternative Advent calendar - Nichola Battilana

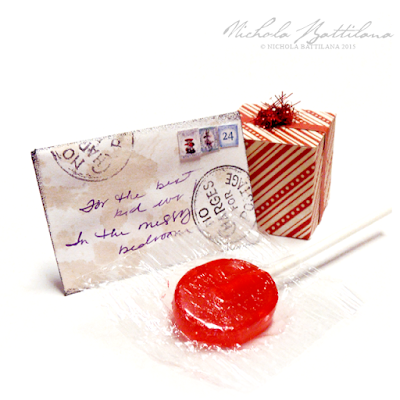
Cute as buttons and sugar free! Although if you do like the sweet stuff you could always give a lolly or chocolate kiss.

Fairy Christmas Cards, an alternative Advent calendar - Nichola Battilana

Don't do the advent calendar thing? No worries! You could always make these up and pass them out to the people in your life who need a little extra fairy magic around the holidays.

Fairy Christmas Cards, an alternative Advent calendar - Nichola Battilana

Now, as for decorating the outside of those envelopes, here's what I suggest:

1. Using the templates from the Fairy Cards Advent Calendar, trace the envelope shapes onto a piece of regular white paper.


2. Cut the shapes.
3. Fold the two short sides, then fold the bottom (the one with the flat edge) and glue into place. Be careful not to glue the envelope shut!


4. Sprinkle both sides with a bit of tea or coffee. I prefer tea as it doesn't leave a lingering scent. Allow to dry. NOTE: You can age your paper before creating the envelopes, but I found that doing it in this order results in a flatter, smoother finished piece. See wrinkles above.

5. Add little postage stamps and 'cancel' them using a rubber stamps. Any patterned stamp will do. Place a scrap bit of paper beneath so as not to ink your work surface.


6. Address the envelopes, personalizing them for the recipient.


7. Add the wee cards and any tiny surprises you'd like to include.


Fairy Christmas Cards, an alternative Advent calendar - Nichola Battilana

Lastly, and this is kind of important, these can NOT go through the regular postal system. Their size requires that they be handled only by Royal Faerie Post. If you want to send them to someone far away, I suggest mailing them within a larger card with a note of explanation.

Supply round up:
scissors
glue
tea/coffee for staining*
rubber stamps*
ink pad*
*optional

Do-dads for the charm bracelet:
Chain, clasp and jump rings / or pre-made bracelet
Santa Sleigh Silver Charm Set

Silver Snowflake Charm Set