Friday, February 26, 2016

Product Review: FixnZip

I freely admit this is a bit random.

A while ago I was contacted about doing a product review for something called FixnZip. I'm a total floozy for free stuff so I said "Yes please!" with the only caveat being that the review would have to wait until I found a zipper in need of repair. Cleaning my room yesterday I came across an old hoodie without a zipper... perfect!


The product comes in three different sizes and is available in light or dark nickle. I was sent both the small and medium sized pieces. For my hoodie, medium was the right fit.


This is the little doodad and it's easy to use. Simply unscrew to open those little jaws, place on the zipper teeth, and tighten it back up. It may take a little bit of fiddling to get everything going smoothly, but I had this in place and zipped in under two minutes.


Now, I'm delighted that my old comfy hoodie is wearable once more but in all honesty the FixnZip is weighty and probably better suited to heftier uses. Jackets, bags, purses, tents would be ideal. Using it on an airy organza dress might be overboard.


One small note worth a mention... the medium size came with a cord pull for which there were no directions to put it together. It might seem obvious (insert cord and snap shut) but it would have been nice to know the 'correct' way to assemble to ensure that it is secure.

ANYWAY it's a pretty nifty gadget. It would probably make a great gift for an outdoorsy sort to keep on hand in case of emergency. It would definitely come in handy if you wanted to salvage something expensive or sentimental. Hop over and check out their website at FixnZip.com for more information and where it is available.

Wednesday, February 24, 2016

Time for a TARDIS

I've mentioned before that I'm not a huge Doctor Who fan. I'm more of an acquaintance of the Doctor than a fan-girl of his holy Time Lordness. When I saw the House Oddities Box in the Alpha Stamps Odd Houses Add-On Kit however, the very first thing that popped into my head was "This is a TARDIS".

And although I've been swamped (I pinky swear I'll be back on track soon), and sick, and generally pulled three different ways to Sunday... I pushed obligations aside for a short while to make a little blue time machine.


Is it an exact replica? Nope, but that's ok! It was a fast and painless project and I'm sure that it would make a nifty gift box for a Whovian you love.


You have someone in mind? Excellent! Here's what I did: 

1. Assemble the House Oddities Box. The box comes with a door facade. I did add it, but then turned the thing around so that the front became the back of the box. (Basically our version has a back door.)

2. I created a new template. Glued it to some thick card, cut it out and affixed it to the 'new' front of the box. Hint: Leave some extra space around the outside of the template and trim to size after it is glued into place on the front of the box for a perfect fit.


3. Cut a couple of squares of extra thick card/paper board and glue on the top of the box. Add a small square in the centre.

4. Paint the whole thing a lovely shade of TARDIS blue.

5. Apply a wash of white paint in the top 6 paned windows. Once dry, a layer of Diamond Glaze will give a glass effect.

6. For the little light atop our time machine I've used a jar from this Set of Unlabelled Jars, Bottles & Tins and painted the top the same blue as the body.

7. Add a little Police Box and Public Telephone sign as a finishing touch.


Like I said, it's not perfectly accurate... but it was a fun quick make and I don't think any fan of the good Doctor would complain about being gifted one of these blue Time And Relative Dimension In Space.

Supply round-up:
House Oddities Box
Diamond Glaze
Set of Unlabelled Jars, Bottles & Tins

Cardstock
Thick paperboard
Glue
Blue paint (fyi Pantone 2955C is the approved TARDIS shade)

An altered statement brooch for Tresors de Luxe

This is my last project for Tresors de Luxe! It's been fun and I will continue to admire all the lush proejcts my teamies create :) Now on to the project...

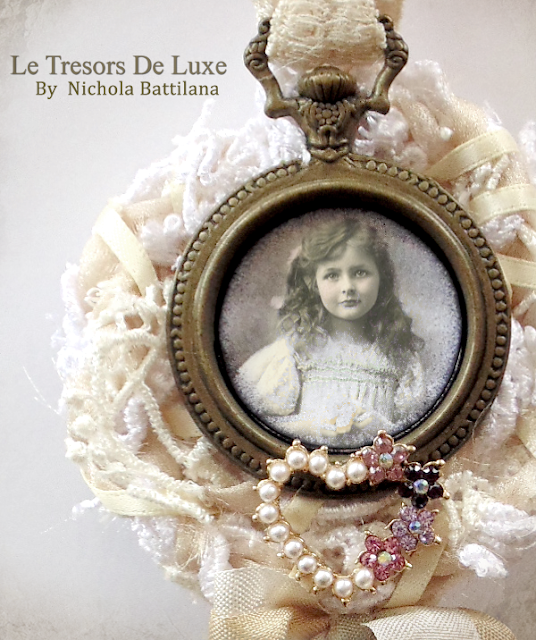
I created this altered brooch, a shabby statement accessory, to give my jewellry box a kick in the pants. It's sort of half altered art, half craft medal of honor... and I'm smitten with how it turned out.

Shabby Statement Brooch (or an award for clean counters) for #tresorsdeluxe - Nichola Battilana

I've used a piece from this Fleur de Lis Ivory Lace Trim to hold that watch fob charm in place.

Shabby Statement Brooch (or an award for clean counters) for #tresorsdeluxe - Nichola Battilana

Behind the hob I've braided some Ivory Lace Trim and White Lace Trim and scraps with some ribbon and organza and wound it into a sort of nest to create a background for the watch to rest upon. A little Rhinstone heart at the bottom adds a nice touch and a smidge of colour.

Shabby Statement Brooch (or an award for clean counters) for #tresorsdeluxe - Nichola Battilana

I've pinned this piece to my boring old jacket and can't wait to show it off!


Fleur de Lis Ivory Lace Trim
Ivory Lace Trim
White Lace Trim
Rhinstone heart


Other:
Watch fob charm
Rose coloured rhinestones
Satin ribbon
Organza
Vintage image
Brooch backing

Wednesday, February 17, 2016

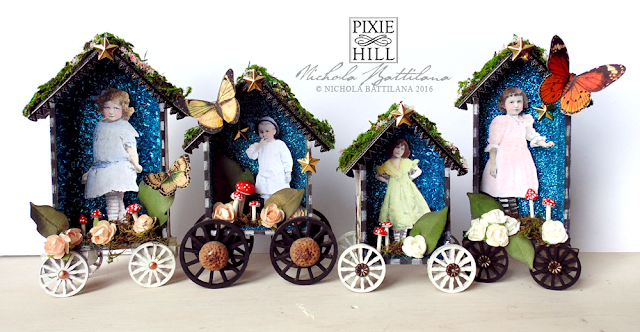
An Impish Convoy for Alpha Stamps


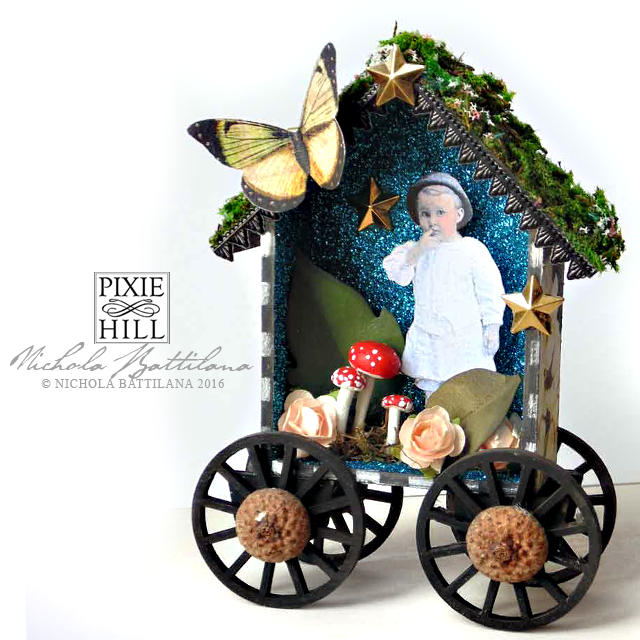
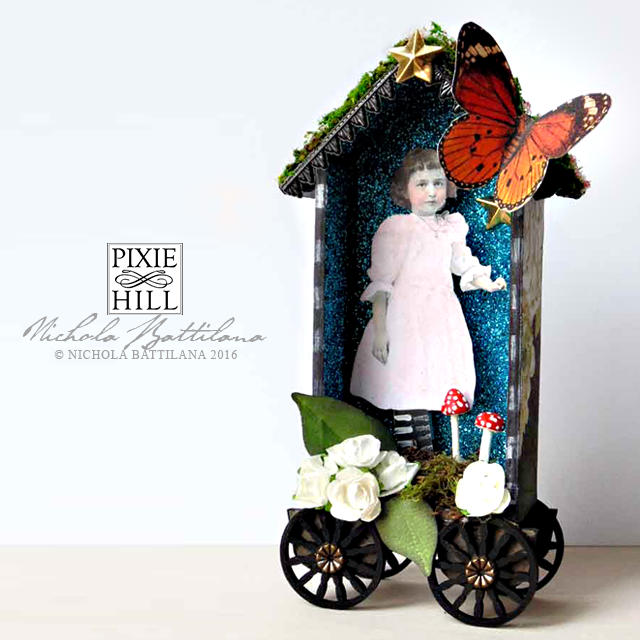
An Impish Convoy - Nichola Battilana

This month at Alpha Stamps is all about little houses. I had a couple of ideas bandying about... but they refused to cooperate and I ended up with this sort of impish convoy instead.

An Impish Convoy - Nichola Battilana

I don't mind that they misbehaved and did their own thing. You can't get mad when projects don't turn out as expected... or don't cooperate at all. Sometimes you just have to go with it. Sometimes THAT is the point ~ to play and enjoy the process of making. To get something... anything!... out and done on that work table. Wheeled house shaped shrines? Why not!

An Impish Convoy - Nichola Battilana

If you have a pile of "to-do's" in your work pile, maybe a little impish convoy is what you need too. A project to make for the sake of making, even if it doesn't make too much sense, to keep you out of trouble, and to drive the rut goblins away.

An Impish Convoy - Nichola Battilana

If you are so inclined, here is a list of the materials used in making these wheeled wonders:

Provincial Hydrangea Scrapbook Paper (Love!)
1/2 Inch Pale Pink Paper Roses*
Spoked Wheel Set - 2 Inch
Tiny Fancy Wheels Set*
Mini House Shadowbox 4 - 4 Inches Narrow*
Mini House Shadowbox 1 - 4.25 Tall*
Mini House Shadowbox 2 - 3.25 Tall*
Mini House Shadowbox 3 - 3 Inches Tall*
Sheet Moss*
Flat-Back Gold Star Studs - 12mm*
Flower Soft - Sweet Pea
Little Darlings Collage Sheet
Little Imps Collage Sheet

Or see the whole shebang HERE

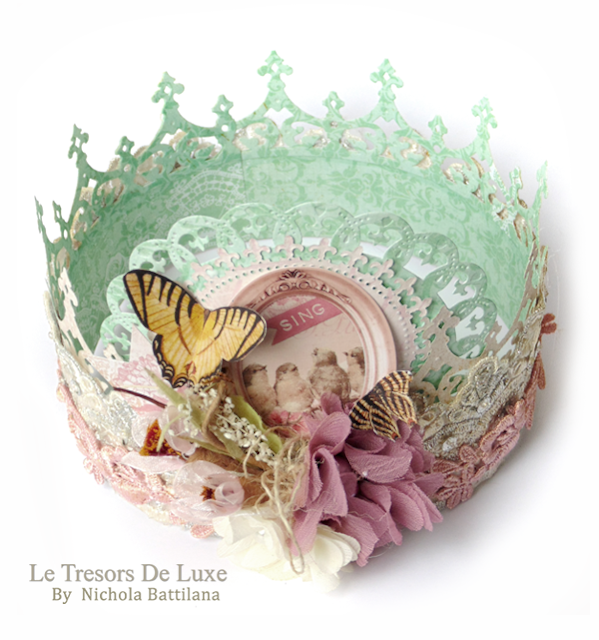
Thinking of Spring Paper and Lace Crown for Tresors de Luxe

The wood stove is working overtime and the snow is falling steadily. While there is a thick blanket of white outside, I'm dreaming of warmer days and the promise of spring.

Paper and Lace Crown #letresorsdeluxe #bobunny - Nichola Battilana

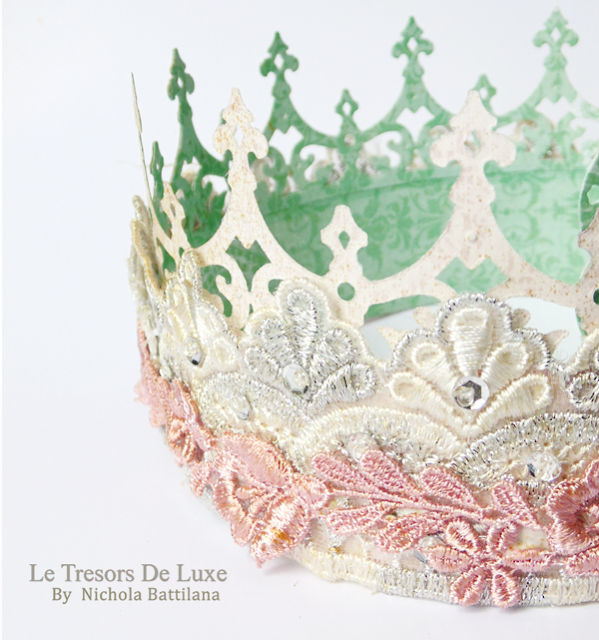
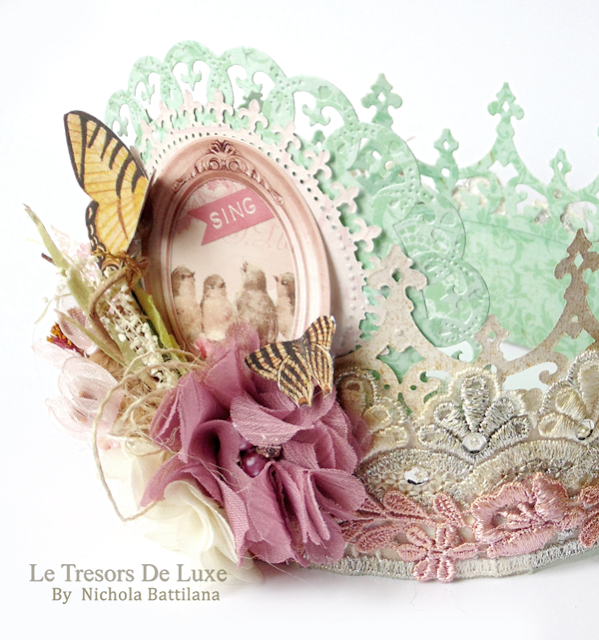
I've combined some sweet Tresors de Luxe laces with papers from the Madeleine collection from Bo Bunny.

Paper and Lace Crown #letresorsdeluxe #bobunny - Nichola Battilana

While it may not be my 'go to' colour combination... I gotta say, I'm lovin' the way this Carnation Pink Lace Trim compliments the vintage minty green of the Bo Bunny paper. The Silver Beaded Trim is really pretty too.

Paper and Lace Crown #letresorsdeluxe #bobunny - Nichola Battilana

And those Ivory Chiffon and Mauve Chiffon Flowers with Pearls and Rhinestone Center add a lovely lush accent to the frontpiece of the crown alongside a bundle of Rustic Ivory Shabby Chic Flower Embellishments

Paper and Lace Crown #letresorsdeluxe #bobunny - Nichola Battilana

Want to create your own crown to wear as you dream of spring and warmer weather? Here's my supply round up.

Ivory Chiffon and Mauve Chiffon Flowers with Pearls and Rhinestone Center
Rustic Ivory Shabby Chic Flower Embellishments
Carnation Pink Lace
Silver Beaded Trim
Paper butterflies


P.S. Sorry for the lack of posts recently. I'll be back in full force soon ;)

Wednesday, February 10, 2016

Shabby Pink Kerchief Hearts for Tresors de Luxe

Valentines day is fast approaching but there's still time to make a little something for your sweetie (or anyone else who needs a little love).

Shabby Kerchief Hearts #letresorsdeluxe - Nichola Battilana

These sweet hearts are created from an old kerchief but any scrap of fabric will do. These won't be handled often so I've simply quick stitched around the edges, giving a rustic, shabby look. There's something terribly sweet about handstitching, it weaves good thoughts into the piece your working on.

Shabby Kerchief Hearts #letresorsdeluxe - Nichola Battilana

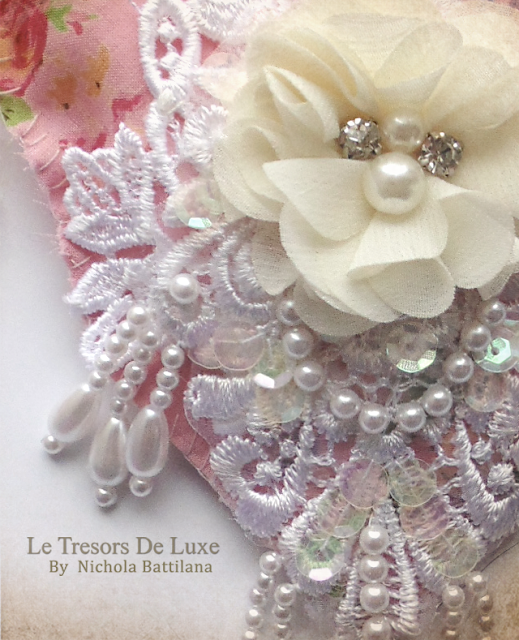
You can enhance your hearts as much or as little decoration as you like. I really like the combination of the primitive stitching with opulent Tresors De Luxe embellishments.

Shabby Kerchief Hearts #letresorsdeluxe - Nichola Battilana

How about a heart dripping with pearly beads and sequins WHITE LACE APPLIQUE and IVORY CHIFFON FLOWERS?

Or maybe something a little more sentimental with a vintage picture tucked in with some artificial flower embellishments...

Shabby Kerchief Hearts #letresorsdeluxe - Nichola Battilana

In the end, what matters most, is your personal touch and letting someone know they are dear to you.

IVORY CHIFFON FLOWERS WITH PEARLS AND RHINESTONE CENTER
WHITE BEADED APPLIQUE AP-023
Rustic Shabby Chic White Artificial Flower Embellishment FL-025
Rustic Light Blue Shabby Chic Flower Embellishment with Wooden Beads FL-097
Cotton kerchief
Ribbon

Friday, February 05, 2016

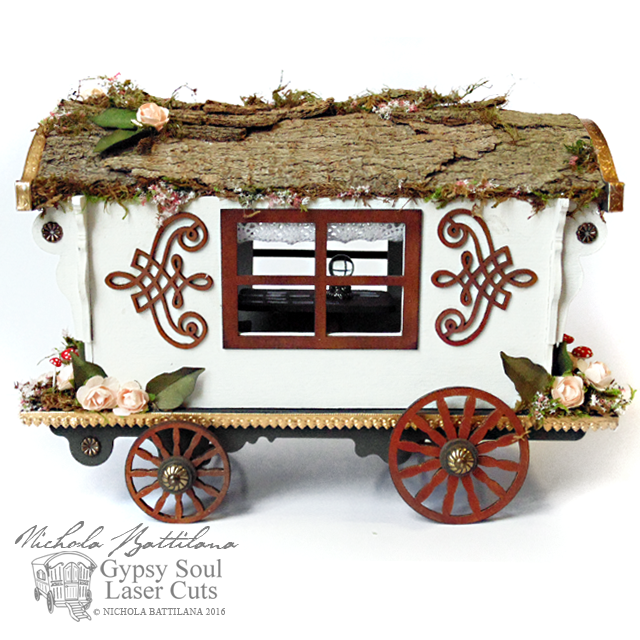
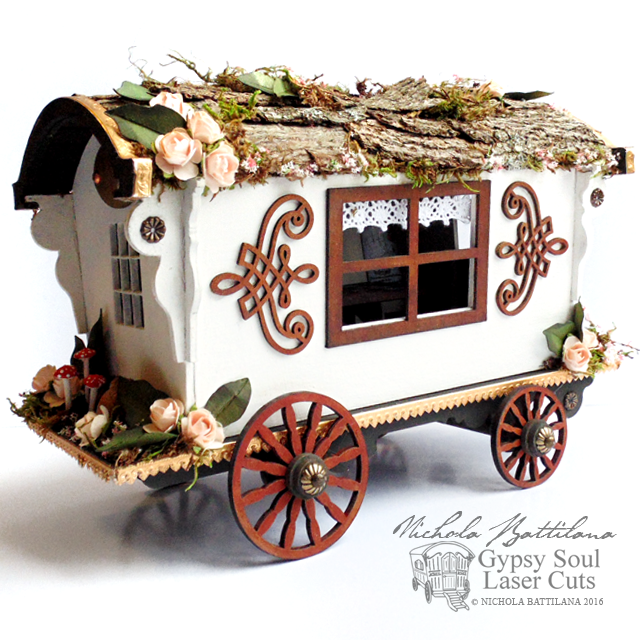
Woodsy Gypsy Wagon with Walk Through for Gypsy Soul Laser Cuts

This Gypsy Wagon

It was love at first sight. 

I swooned. I 'oohed' and 'ahhhed'. Finally, I could resist no longer and had my way with it!

Gypsy Wagon with walkthrough - Nichola Battilana

Isn't it darling?! AND I've got two videos to help you create this project. THIS ONE is me blabbing about how you shouldn't feel overwhelmed at all because it's pretty dang easy to put all those bits together. The second video is a walk though for decorating and embellishing this bad boy and can be found HERE.

Gypsy Wagon with walkthrough - Nichola Battilana


You absolutely 100% do not need to decorate the wagon as I have, but I hope the walk-through gives you a few ideas and a bit of inspiration. 

Gypsy Wagon with walkthrough - Nichola Battilana
There are other Gypsy Soul products that you might want to consider if you're making this piece. The 4 Panel Windows are a good fit for the side openings. And these Victorian Corners look amazing as decorative elements on the wagon. I've placed a Faux Metal Number Plate on the back... just because I'm smitten with them and use them at every opportunity.


Gypsy Wagon with walkthrough - Nichola Battilana

Now for my full-on gushing. There are plenty of opportunities for embellishment with this piece. You could go absolutely bonkers with fillagrees, frills and decorations. You could lose yourself in colour and trims. Really, this is one of those projects to pull out that 'something special' that you've been saving for just the right time. It's a crafty splurge.

Gypsy Wagon with walkthrough - Nichola Battilana

Don't forget the insides! Even with the roof fixed into place it's fun to peek through the windows and see what the little people have been up to. 


Now for the big fat supply list!

Gypsy Soul Products:
Gypsy Wagon
Victorian Corners
4 Panel Windows
Faux Metal Number Plates


Other supplies used:
Natural bark
Glue
Acrylic paint
Paper leaves and flower
Lace trim
1:24 Rectangular Table & 4 Chairs
Flower Soft - Sweet Pea
Narrow Gold Fleur Dresden Borders*
Mini Floral Dresden Borders - Antique Gold
9mm Antiqued Swirl Bead Cap*
7mm Flower Washers
Tim Holtz Long Mini Brads
10mm Clear Glass Marbles
Gypsy Fortune Teller #1 Collage Sheet
Tiny Curved Hinges