Showing posts sorted by relevance for query fairy lantern. Sort by date Show all posts

Friday, December 04, 2015

Fairy Lantern with Tutorial

** Please read to the bottom of this post for answers to common questions. Or visit THIS PAGE**


Gina's Designs Laser Cuts has a brand new name: Gypsy Soul Laser Cuts and I have a brand new tutorial for you!

I was sort of hesitiant about using this as a design team project because it's so easy and requires just a few simple supplies... but it's soooo stinkin' cute!

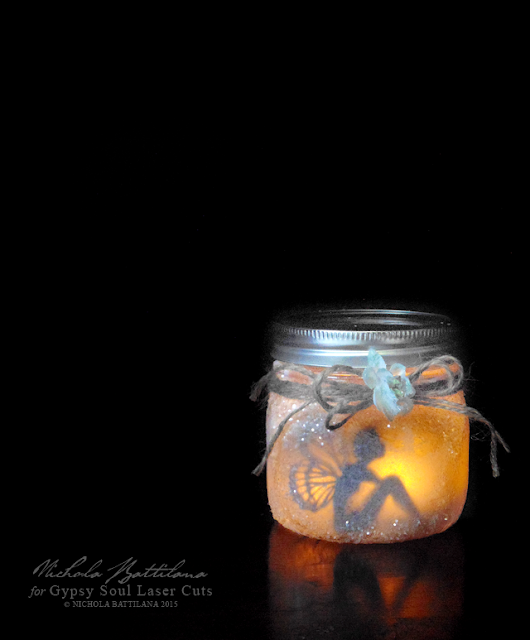
Fairy Lanterns with Tutorial - Nichola Battilana

Fairy lanterns! Now, anyone who has experience with real fairies knows that it is not a good idea to stuff them into jars. They will pinch and nip and basically make your life unpleasant if you treat them rudely. These jars are a fairy friendly alternative. Perfectly dreamy as a little nightlight, or magical accent.

Fairy Lanterns with Tutorial - Nichola Battilana

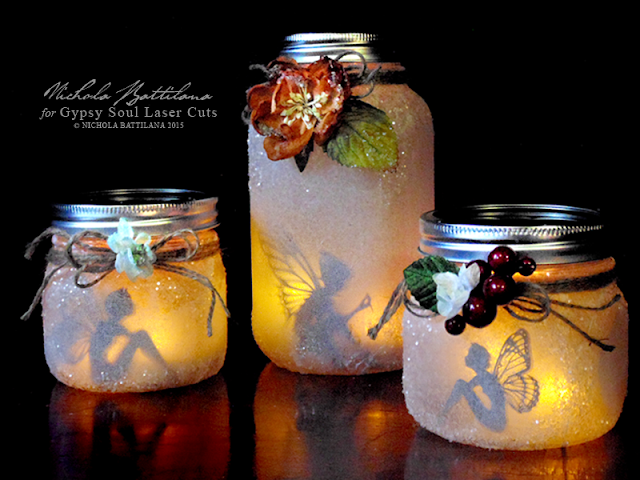
Gypsy Soul Laser Cuts carries the Garden Fairy cutouts in three different sizes so you can create a variety of lanterns in an assortment of jars. And if fairies aren't your thing... well, there's always baby dragons from the Dragons Shape Setfloral elements, or whatever suits your fancy!

Fairy Lanterns with Tutorial - Nichola Battilana

The tutorial can be found HERE on my YouTube channel (and below), but here are a few tips:

• Sticking the figures directly on the glass (generally) yields better, more detailed results
• Use two or three battery powered tea lights. More light = stronger silhouette effect.
• Take care how many layers of paper you use, how much overlap there is. (A little is ok.)
• Use thinner school glue for the paper and thicker tacky glue for the glitter
• DO NOT use real candles inside


Finally, the supply list:
Gypsy Soul Garden Fairy cutouts
• Glass jam jars with lids
• Thin tissue paper
• White school glue
• Quality white glue
• Clear glitter
• Twine
• Floral embellishments (THESE sugared blooms from Petaloo are gorgeous)
• Battery powered tealights or led string lights

NOTE: Please DO make for friends, as gifts, as a group project but remember that making them commercially (including teaching as a paid class) is not permitted.

___________________________

EDIT: to answer a few questions

1. The cutouts are available here: Gypsy Soul Garden Fairy cutouts
2. YES she does ship internationally. International customers might want to try placing an order via Alpha Stamps HERE. I also have a few listed in my etsy shop HERE.
3. The size you buy would depend on the size of the jar you are using. If using a pint sized canning jar small or medium is probably a safe bet.
4. "Can I use/do/change x,y,z ?" Give it a try! Experimenting is part of the fun of making.
5. DO NOT use real candles. Safety first!
6. NO, selling replicas of this project is NOT permitted. Seriously, just be inspired, add your own style and vision, and create your own version of a fairy lantern.  If you are selling handmade you should be selling YOUR ideas and style, not mine. Think of it this way, you wouldn't copy a book word for word... don't carbon copy this project. For fun? Make as many as you like. For profit? Make your own version.

Note: I am not the owner of Gypsy Soul Laser Cuts or Alpha Stamps. They send me products, I use them in my work, that is all. If you have a question about ordering products, please direct them to the company you are ordering from.

Thursday, June 27, 2013

Fairy Lanterns, Fancy Brooch & Half Sheet Freebie

Ok, how stinkin' adorable is this fairy lantern?!? Could it possibly be any cuter?


What if I add a tealight to show off those transparency wings?


*dreamy sigh* I had far too much fun making these lanterns for Alpha Stamps. Just look at this little fellow picking a tiny rose for his favourite fairy lovin' lunatic (that would be me).


I've kept the embellishments here fairly quiet. Because I haven't I haven't added too many bells and whistles, individually the lanterns have a clean look and together (totally grouping these for a table centre piece!) they are not too overwhelming.


Sometimes restraint is thought of as boring or dull, I believe that it can be classic and demonstrate a certain elegance. Some days restraint is in order... all other days need three buckets of glitter and a two miles of ribbon and as much dresden trim as you can possibly use.

Did you happen to notice those amazing fairy cameos? Totally swoon-worthy. I've used a gorgeous green one for this very fancy cameo locket brooch.


And the pretty thing opens up to reveal a little altered art piece inside :)


Now, on to the freebie.

Not too long ago Alpha Stamps held a Fairy Fashion Giveaway. There were so many sweet comments (especially about keeping fairy magic alive for children) that I knew I wanted to create some sort of freebie for Alpha Stamps customers. So, here it is...


These are the photos I used in today's lantern project. They will be available from Alpha Stamps for a limited time for you to make your own fairy magic. Just leave a comment on today's Alpha Stamps blog and they'll email you a printable version :)

Tuesday, January 19, 2016

Paper Pirate Ships (and How to Be Inspired Update)

My fairy lantern post and tutorial have been pretty dang popular over the past week or so. I'm very happy that it prompted parents, grandparents, and caregivers to craft with (and for) the little people in their lives. I thought I'd post another project and tute that might encourage that sort making to continue.

If you know me, you know that I'm not only a fairy fanatic but that I'm also smitten with pirates. I've made paper sky pirate ships in the past as well as a nifty paper Sky Pirate Zeppelin. I have them hanging from my ceiling and I love the idea that there are little fairy sized buccaneers keeping any goblins at bay.


ANYWAY, it's a fun little project. You can get as simple or complicated with it as you like. Loads of opportunity for little people to help... picking paper, measuring, bending and curling the paper, placing the sails just-so. What you'll need:

• thick scrapbook paper (I've used Typography from Graphic 45)
• paper straw
• jute/twine
• large bead / pony bead
• charms and embellishments
• trims (I used THIS ONE for the above sample)
• glue!

The tutorial can be found HERE on my YouTube channel (or below) and just in case you need some clarification, here is diagram of what your boat folds should look like:


___________________________________________

Finally, a quick check in for those following along with the "How to Be Inspired" posts:

After the initial think, I've collected and pinned loads of images over on the Inspiration Board. Now it's time to form some ideas and let them brew. 

I've got a couple of thoughts floating around in my head, directions that I'm considering. I'm loving the medieval tents I've come across. Their shape, colour and decoration are amazing. I also really like the circus tents that I've seen - so whimsical. But I think it's those simple camping tents that are calling my name so that's where I'm headed.

How are you coming along? Have you given it any thought? Do you have a clear vision what you want to create? It might be helpful to consider WHAT it is you want to make. Yes, you're making a tent... but is it a functional thing? big? little? decorative? ornate? simple? permanent? movable? Does it have a theme? a story? Figuring out these sorts of details will help to narrow down the vision for the final project.

I'll check in again next Tuesday with a few more details about my idea, what I'll be making and how I go about making it.

_________________________________________


Saturday, August 13, 2016

Wee Chippy Lanterns

AlphaStamps.com has some new chipboard Industrial Lanterns. They're really kinda cute, like small railroad lanterns, but of course I've filled mine with dragons and fairies ;)


Each side of the lanterns has an 'X' across it, but it's easily chopped off if you want to show off a miniature dragon or fairy silhouette. 


I've added some dresden trims to mine to fancy them up, along with some floral elements like Mini Fern Garland and Black Mini Paper Blooms. Paint and embellish those suckers to suit your tastes.


The 'glass' in these is the Clear Window Inserts with some tissue glued to the back and chopped to size. You can cover all four sides of a lantern with one sheet cut into quarters. I've also added a thin coat of white paint to the exterior here. It helps to hide the cutout when the lights are off, but you can still make them out when lit.

If those dragons are causing trouble (as dragons are wont to do) you can just bend those wings and tails to fit. Actually, those bent wings add a bit of dimension to the shadows.


And if you're itching to hang those lanterns, there are convienient holes in the removable lids. My reccomendation? Pop in a light, line up those holes and use a little bamboo skewar to hold them in place while you hang them via a Fluted Ring Pull glued to the top. 


OR you might just thread twine or ribbon through the holes to hold those pieces together with enough extra length that can be used for hanging too.


Whatever your fancy, here are the supplies I used to create these pieces to get you started: Everything in one place


Saturday, August 09, 2014

Through the woods...

The Halloween fun is starting early at Alpha Stamps. This month's kit theme is "Little Red Riding Hood", a delightfully sinister fairy tale. When I saw these Creepy Chipboard Tree Cut-Outs... I knew just what to make.


I've taken a Graphic 45 8x8 Matchbook Box and used papers from An Eerie Tale to embellish. Inside there's a spooky encounter between Little Red and that Big Bad Wolf using The Wolf At The Door Collage Sheet.


Perhaps my favourite part is the Mini Lantern with Battery Pack which gives the scene a a nice and creepy glow.


I'm also rather smitten with this Lion Head Handle that adorns the top of the box.I think he's a perfect finishing touch.

Want to make your own? Here's an easy peasy link to all the supplies from Alpha Stamps.

Or the items listed separately:

*August 2014 - Little Red Riding Hood Kit
*Little Red Riding Hood Add-On Kit
8x8 Matchbook Box
Creepy Chipboard Tree Cut-Outs 
Mini Lantern with Battery Pack
Sheet Moss
Lion Head Handle
Metal Hands
Ornate Metal Key Holes - Antique Brass
Trinkets & Baubles Adhesive Pearls Cream
Graphic 45: An Eerie Tale, Unsolved Mystery
Graphic 45: An Eerie Tale, Captivating Characters
Graphic 45: An Eerie Tale, You Bewitch Me
Graphic 45: An Eerie Tale Wicked Whimsy


Tuesday, September 06, 2016

Drippy Witch Lanterns

I've been making up a storm lately. There are bits and pieces of half finished projects all over the place and a bunch of completed pieces I can't show off quite yet. The posts have been a bit sparse lately so I made certain to get a little something done last night that I could share right away.

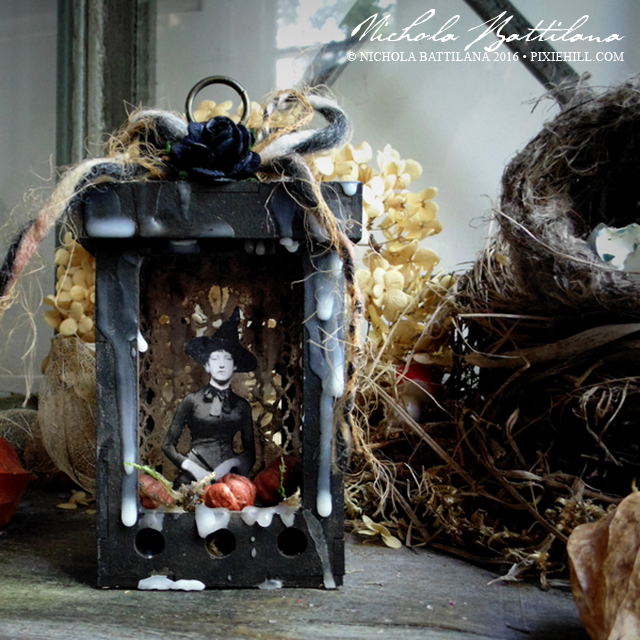
Drippy Witch Lanterns - Nichola Battilana

They are made with the same Industrial Lanterns used in THIS post.

Drippy Witch Lanterns - Nichola Battilana

And filled with moss, Pumpkin Pods and images from this Witch Stock Collage Sheet.

Drippy Witch Lanterns - Nichola Battilana

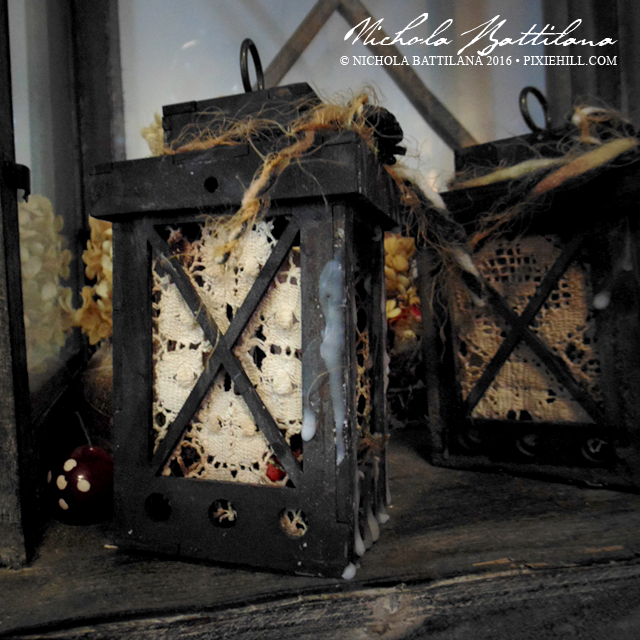
I've used stained lace trim to cover the sides of the lanterns.

Drippy Witch Lanterns - Nichola Battilana

There's a Black Mini Paper Bloom on top, and a length of fibre tied around the top. Finally I applied some drippy wax to the exterior.

Drippy Witch Lanterns - Nichola Battilana

I've got to add that these were inspired by some amazing pieces I saw on instagram a short while back. I cannot for the life of me find the original post to give proper credit. I'm going to have another search because it's driving me mad that I can't find it. Honestly, I have no idea what I'm doing on social media and it's sort of a miracle that I manage to post at all. (EDIT: I found her! Big fat thanks to Mary Fontones of Once Upon a Fairy for the inspiration.)

Lastly, if you decide to make your own and need help putting your lantern together HERE are the instructions for constructing those chippy lanterns.