Showing posts with label christmas. Show all posts

Thursday, November 09, 2017

MOTHER EFFIN' SNOWBALLS! with tutorial

Today was supposed to be the first snow of the season. Because it's daylight savings and now dark at 2 in the afternoon (not really, but it feels like it) I have no idea if it actually did snow today BUT there's these dudes. The yearly Cheeky Snowballs.

Cheeky Snowball Ornaments with Tutorial - Nichola Battilana

I've been making these guys for nearly 10 years. TEN FREAKING YEARS! They started out as emotional snowballs and transformed into the cheeky variety.

Cheeky Snowball Ornaments with Tutorial - Nichola Battilana

This year I've decided to do a tutorial so people can create their own. The video is available HERE on my YouTube channel. If you create your own, please share on social media and tag me. Seriously, it's appreciated and I totally want to see what you make.

Cheeky Snowball Ornaments with Tutorial - Nichola Battilana

A couple of things I KNOW are going to come up.

1. Can I use a different clay?  
I REALLY recommend you use Creative Paperclay for this project. It's super light weight so your ornament won't drag down the Xmas tree branches. It gives a beautiful finish. There may be a bit of a learning curve if you're used to other materials... but  In my opinion it's absolutely worth $ and time. 

2. It's taking SOOO LONG! Can I speed up the drying?
I prefer to let things dry naturally. There seems to be less warping, and cracking when I let things take their course. Plus, do you really want to put styrofoam in the oven? Nah.

3. Clear glitter?
Never mind fancy stuff, head over to the kids aisle in Micheal's and grab a big ole jar of Creatology "Crystal Clear" glitter. It looks like this...
What is most important is that your glitter of choice is NOT SOLID WHITE. The flecks in this product are transparent. This is important. You want a product that will allow the underlying paint colour to show through. Just look for something transparent or translucent.

4. I can't find tiny eye hooks!
I use teeny tiny eye hooks for hanging on my snowballs. If you can't find any small enough, try the jewellry section of the craft store and look for findings like these Tiny Silver Eye Pins*. Poke a hole with a straight pin, add a dab of glue, and slide it in. They'll work in a pinch.

5. What kind of glue do you use?
I'm using Elmer's School Glue in the tutorial. The better the quality glue you use (i.e. Aleene's Tacky Glue) the more glitter will remain on your snowballs in the long run.

6. Can I (insert other subsitution/method/madness)?
Part of the joy of creating is experimentation. Have an idea? Give it a try! Maybe it'll turn out a bazillion times better than my snow dudes!


Cheeky Snowball Ornaments with Tutorial - Nichola Battilana

THE LIST OF SUPPLIES!
- styrofoam balls (2" - 2.5" makes a nice size)
- Creative Paperclay
- white glue
- clear/transparent/translucent glitter
- pink, black paint
- mini eyehooks
- fake snow
- clear gloss medium like Diamond Glaze, Glossy Accents or Dimensional Magic

Saturday, December 17, 2016

Day 17 - Gnome Shaker Ornaments

A week ago I promiced a second set of these shaker ornaments, and here they are. This time they're filled with gnomes!


And I'll have to keep this post short and sweet because I currently have no home internet and my tablet is not a fan of working.


I'm an oldie and remember the days before the internet... but seriously, how did we get anything done?!??

Tuesday, December 13, 2016

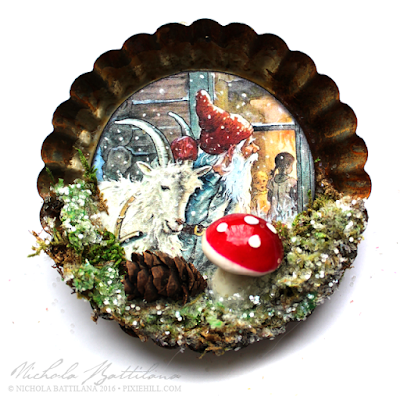
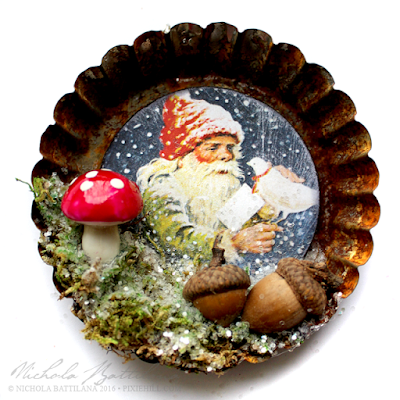
Day 13 - Gnome Tart Tin Ornaments

I seem to have a thing with gnomes this holiday season... and there is absolutely nothing wrong with that! Gnomes are rather lovely after all.

Gnome Tart Tin Ornaments - Nichola Battilana

I had a healthy stash of rusty tins left over from last year and I've finally put them to use. If you want to make your own rusty tins HERE is the blog post where I explain my process.

Gnome Tart Tin Ornaments - Nichola Battilana

This isn't a design team project, but it is a fortunate coincidence that the images from Alpha Stamps Gnome & Mushroom Ornaments Collage Sheet fit just-so in the bottom of my tart tins.

Gnome Tart Tin Ornaments - Nichola Battilana

Some spun cotton mushrooms, a bit of moss...

Gnome Tart Tin Ornaments - Nichola Battilana

...acorns and little pine cones...

Gnome Tart Tin Ornaments - Nichola Battilana
... and of course some glittery snow to finish them off.


P.S. Hope you're fine and dandy. Big wet kisses for you today!

xoxo

Saturday, December 10, 2016

Day 10 - Vintage Image Shaker Ornaments

This month the Alpha Stamps is offering Round Layered Ornaments Kits. They are pretty dang cute. I've actually done two* versions of these (you'll see the second batch next week). 

*Maybe even three if I get my act together.

But on to the ones that I've actually finished and am ready to show off today!


Pretty cute, no?! If you had told me a few years ago I'd be all about the glittery pipe cleaners (and yes, they will forever be pipe cleaners to me) I would have told you, you were nuts... but here we are all glittery and pipecleanerish!


Not only do these sweeties shake and make a lovely noise, are two sided to boot!


I'm smitten!

And here's all the goodies to make your own...

Round Chipboard Ornament Layers Sets
Snowy Winter Day Ornaments Collage Sheet
Silver Snowflake Charm Set
Winter Snow Glitter Mix
Round Ornaments Ribbon Set

Friday, December 09, 2016

Day 9 - A Winter Cottage

Look at the glistening snow! Aww, it's all melted now, but I've got all my fingers and toes crossed that it will return soon and that we'll have a proper white Christmas this year.


This itty bitty was made (mostly) with the  Chipboard House Ornament Kit from last month.


The house itself measures just 2-3/4" tall, 2-1/2". It's itty!


My favourite part of this little doodad is the tuft of raw wool smoke coming out of the chimney. Can't you just smell the wood fire?!


Hope you're dandy. Big love to you.

Thursday, December 08, 2016

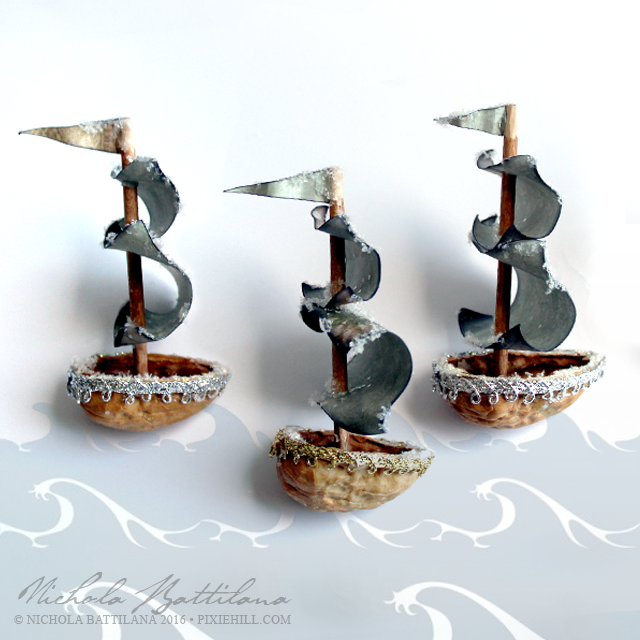
Day 8 - Walnut Sailing Ships

Despite not being a water-loving sea monster, I do have a thing for pirate ships and nautical adventure. AHOY! And all that jazz.

Walnut Sailing Ship - Nichola Battilana

I'm pleased as punch with these little walnut ships. They're kind of adorable and remind me of THIS Christmas song.

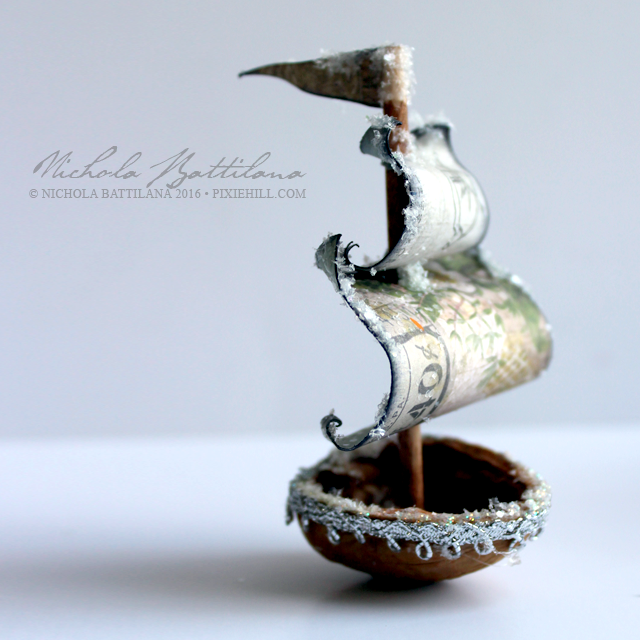
Walnut Sailing Ship - Nichola Battilana

They were super simple to make too. Just a walnut shell, 1/8" dowel, paper and trim. Easy peasy!

Walnut Sailing Ship - Nichola Battilana

There's a little snowy glitter too. I can't help myself.

Walnut Sailing Ship - Nichola Battilana

Hope your having a lovely day. I'm thinking of you.

xoxo

Wednesday, December 07, 2016

Day 7 - SPARKLE BATH!

As far as I am concerned, there are two types of people in this world: those who loathe glitter and those who want to bathe in it.


I've made some sparkly, glittery, shiny, smelly, rose-budded bubble bath for the latter.

If you see someone with red sparkle, you'll know they were on my Christmas list.


P.S. These remind me of the year I had $36 to spend on all of my Christmas gifts. If memory serves, most of that was spent on toiletries that were rationed and prettily re-packaged. It stinks not having money, but it is painful not having money during the holidays. If your holiday funds are tight, I'm sorry. I know exactly what that's like. You'll get through. Everything will be ok. I promise.

Monday, December 05, 2016

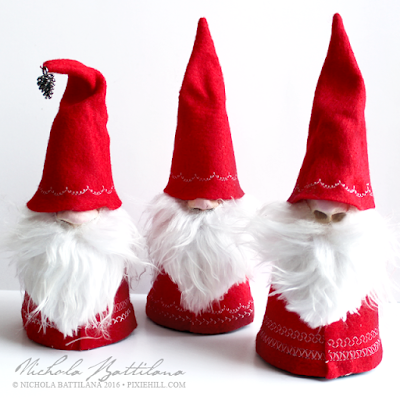
Day 5 - Tomte Christmas Gnomes

I made a batch of these fellows last year and I loved them so much I wanted to make them once again. This year they are quite a bit smaller (but just as cute).


Tomte are Scandinavian creatures associated with yuletide. They are delightfully gnomish and since I collect gnomes I love them dearly.


They are cute as buttons and making them is a lot of fun. Their personalities just seem to pop out as soon as those white whiskers are put into place.


Tomte, elves and sugar plum fairies... is it any wonder I adore Christmastime?!


Saturday, December 03, 2016

Day 3 - Tiny snowy house

Just something small and sweet today.

I think this will be a perfect thing to abandon with a note of holiday cheer.

The dome has been in my stash for quite a long while. THIS little tree was coloured green and dusted with some faux snow. The house is one which was pit fired in my back garden. And the gold is a snip from one of these dresden trims.


On top, a little bow with ribbon from THIS set, with a tiny snip of green and some colour from this Fancy Red Holly Berries Mix.

Ta dahhh! How's YOUR holiday cheer chugging along?


Thursday, December 01, 2016

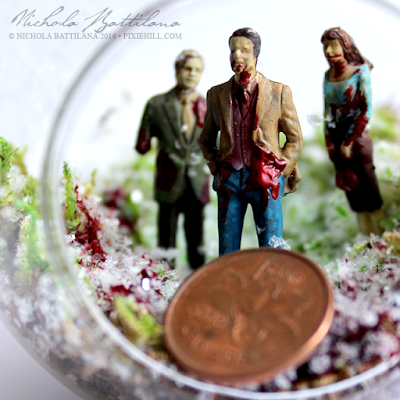
Day 1 - Zombie Ornaments

I had this ridiculous idea that I'd try to post a project a day, a sort of bloggy advent calendar for the month of December. I've got a good stockpile of projects here, so hopefully I can coax 24 blog posts for the month. Who knows if it'll happen but we'll give it a try, eh? ;) 

Some of the projects will be gifts. Some will be abandoned for strangers to spread some holiday cheer. And very few will be for sale if you want to gimme your pennies.

Let's get to business.... Zombie Ornaments!!!!!!

Zombie Ornaments - Nichola Battilana

I did some miniature zombies not tooooo long ago, and so when someone mentioned their 'creepmas tree' these things had to happen.

Zombie Ornaments - Nichola Battilana

I mean, just because it's winter doesn't mean that there are no zombies right?

Zombie Ornaments - Nichola Battilana

I bet that there are even Christmas Day zombies!

Zombie Ornaments - Nichola Battilana

I made a VERY small batch of these. There are only 8 for sale and I won't be making more.

Zombie Ornaments - Nichola Battilana

If you require some Christmas Zombie magic HERE is the listing.


P.S. Love you loads and bunches! Hope you're having the BEST day.

Friday, November 18, 2016

Altoid Advent Calendar

Are you ready to be bombarded with pictures? This is a biggun'. Well, the actual thing is quite small... but it's almost epic in it's awesomeness!

I've thought about creating an advent calendar in an Altoid tin for a very long while, and finally set my mind to it. I'm really, really proud of how it turned out and I'm so excited to share it with you.

Altoid Advent Calendar - Nichola Battilana

The outside is sweet and jolly lovely. A wee wreath made with a snip of Wired Pine Needle Stem with the teeniest bow and Star Sequins. The corners are frosty with layers of glitter and faux snow. That little gnome can be found on this Santa is Outside Collage Sheet.

But the inside... oh the inside!

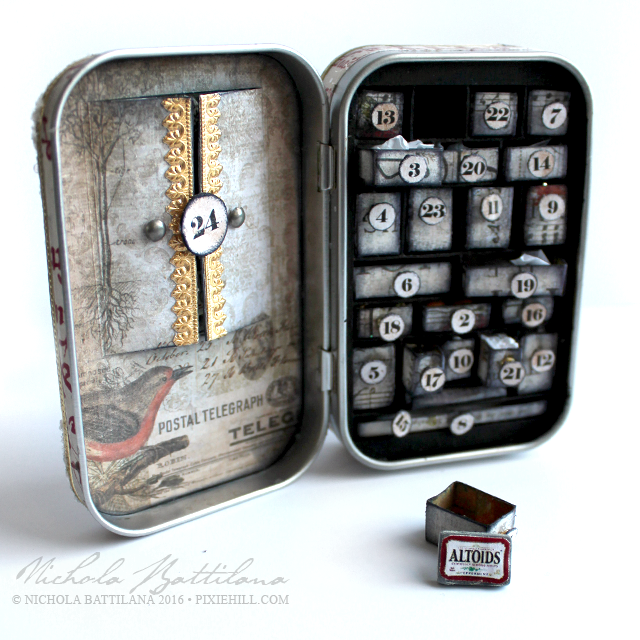
Altoid Advent Calendar - Nichola Battilana
*Gasps! Claps hands! Jumps up and down* LOOKY AT THAT! Can you even stand it?!

Get a load of all those little drawers. Each one with a little surprise tucked inside.

Altoid Advent Calendar - Nichola Battilana

I'm going to be honest. This was an enormous pain in the bum to make. It took a gazillion times longer than I had anticipated. I'm a disaster for measuring and straight lines, so those little boxes were a nightmare. And, because it's sooooo tiny, any wobble or imperfection throws everything off (and believe me, there are imperfections a-plenty here.)

Altoid Advent Calendar - Nichola Battilana

But let's not focus on the rump pain. Let's look inside... 

Altoid Advent Calendar - Nichola Battilana

Once the drawers were created, the next issue became what the heck would fit inside them. Some of the drawers contain dollhouse miniatures like the tiny tankard above. 

Altoid Advent Calendar (detail) - Nichola Battilana

One of the drawers contains a small collection of lucky charms. (Three is when something becomes a collection, right?) If you decide to tackle a similar project, charms and beads are a great option for filling those small spaces.


Another drawer is filled with shiny stars.

Altoid Advent Calendar - Nichola Battilana

There's an itty book of sketches.

Altoid Advent Calendar - Nichola Battilana

And a chocolate kiss made with a chocolate chip and snip of foil! 

(Confession: in reality I'm distraught because it's a butterscotch chip inside. The horror! The fairies must have eaten all the good and proper chocolate ones.)

Altoid Advent Calendar (detail) - Nichola Battilana

Of course I couldn't not include glitter. This glass vial was from a vintage set that contained the tiniest watchmaker gears you can imagine. Even though it was already so very small, I still had to cut and file it down to fit it in the drawer!

Considering the recipient is helpful for ideas too. This piece is on it's way to a fellow who once made a giant circus peanut, so I've included handmade fairy sized versions.

Altoid Advent Calendar - Nichola Battilana

I also included a teeny weeny Altoids tin...

Altoid Advent Calendar - Nichola Battilana

Perfect, no?!

Finally, on the last day of the count down, the little doors are popped open to reveal a message of seasonal glad tidings.

Altoid Advent Calendar - Nichola Battilana

What do you think? Do you love it?! I love it! I'm so damn pleased with myself it's obscene. Ha!

Thinking of making your own? I don't have a tute, but here are some pointers:

• Give yourself a lot of time.  A LOT. I mean it. This thing was nuts to make.
• Be as organised as you can be with your materials.
• Keep your working area clean (ha! I know.)
• If possible, gather more items than you need for the drawers. Having many options is really helpful.
• A small snip of tissue tucked into the drawers helps to keep small loose items in their place.
• Creating drawers of differing sizes not only adds visual interest, but allows you to include items of various sizes.
• Tweezers. Get some. Use them. Love them.

Other supplies used in this piece:
Narrow Gold Fleur Dresden Borders*
Tiny Dot Dresden Borders - Gold*
Wallflower 12x12 Paper Stash
Flat Brass Drawer Pulls - Set of 16
Old Fashioned Grocery Rectangular Tins

Be sure to let me know if you create your own version of this project and show off your mad skillzzzz. Start now and you may be done by next Christmas ;)

I love you THIS much!