Showing posts with label design team. Show all posts

Saturday, March 25, 2017

Magical Masquerade ATC's

This months kit at Alphastamps.com is themed "Beauty and the Beast" but I've run with the Midnight Masquerade papers and made a handful of pretty magical masquerade ATC's instead.


The colours are juicy and gem like and look lush with copper highlights. I applied some thick acrylic medium with the Quatrefoil Texture Sheet and Diamonds Texture Sheet to create some three dimentional texture.

NOTE: If you want to use your texture sheet over and over again, try a couple of coats of marine varnish to protect it and make the card super durable.


This card has adorable Small Mulberry Blossoms and pretty Lavender Purple Gardenias.


Those little Clear Iridescent Star Sequins on all of the cards are really quite nice and rather dreamy. I thought they seemed quite a bit thicker than most sequins I've worked with before.


And how gorgeous are those Gardenias in Mixed Cream Yellow Orange?


I think they turned out quite nicely. All dreamlike and rich.


See a card you like and want to swap? Shoot me a note and we can make a trade!

Want to make your own? Here's a list of all the bit's I used for these ones.

Saturday, January 28, 2017

Magic Mirror on the Wall

This month's AlphaStamps kit is themed "Snow White". How could I talk about Snow White, and not talk about magic mirrors?!


You know the story, the Wicked Queen gazes into her magic mirror to ask "Who's the fairest of them all?"

The idea of a magic mirror isn't made up. They have a long history with documented usage as far back as 3000 B.C., and are found in both Western and Eastern cultures.

Mirror gazing is a method of 'scrying'. It can be used for fortune telling, inspiration, spiritual guidance and prophecy. The viewer gazes into a reflective surface (like water, crystal balls, mirrors) and with focused meditation/trance interprets the visions or symbols that appear to them.

While the mirrors appear dark, and there is some fear that surrounds them, it is worth noting that there is also a belief that they can be protective, reflecting/deflecting evil or negativity.


Black volcanic glass called 'obsidian', is a traditional material used for scrying mirrors... but we can fudge our way around that. I simply cut a piece of Clear Plastic slightly larger than the frame opening. Make sure that the plastic is free from dust and coat ONE SIDE with black paint. You want complete coverage so you may need a second coat. Then glue into place with the UNPAINTED SIDE facing outwards. You should have a nice glossy surface for divination!

Note: A piece of decorative paper on the back will protect the painted surface and look much neater.


For a bit of an extra magical punch, I've added some symbols on to the base of the
Gothic Mirror With Drawer. I've also included elemental symbols and those representing Venus (as mirrors are sacred to her). In that little drawer I'll place some stones and herbs to encourage 'sight' and for protection.


The piece is finished off with Tiny Mixed Size Flat-Back Pearls (painted copper) Raw Brass Fancy Fleur de Lys and Antique Gold Square Filigree elements.


And now to brew some tea and gaze into my magic mirror through the rising steam and ask...
"Who's the fairest of them all?"


Note: The answer is probably Kate Bush.

Friday, January 06, 2017

Pins for Every Type of Valentine

The plan was to create an organization project. But I don't feel much like organizing.

I'd rather get romantic-like and look ahead to Valentine's Day.

So I came up with a slew of simply made pins for every Valentine.


I've used a variety of Punchelements from Gypsy Soul Laser Cuts for the bases. (Only the round are currently listed on the site.) Not too long ago I scored a 1" round punch at the craft store so making these was super simple.

Paint the base, add sparkle, add image/sentiment, embellish and finish off with a pin back!


I've made them to suit just about every Valentine. There's pink and sparkly for the romantic.


And something glittery and red for the saucy types. There's a "Go Away" pin for those who would rather be left alone.


"I am crazy" for my buddy who says this is the reason she is single.


A number of the pins have images of Cupid and Psyche, a theme I think I might like to further explore some time.


A few of the pins are a little crass... but I like the way glitter and the indelicate work together.


Do you want to make your own? You can download a sheet of the saucy and silly, nice and naughty sentiments below. (Note: You may have to click for the full sized image.)


If you need a little more direction the video tutorial for creating these wee thing-a-ma-bobs can be found HERE.

Supplies:

Punchelements 1 inch Scalloped

Acrylic Paint
Glitter
Glue
Embellishments
Pin Backs


Now, prepare some sparkly Valentine's for the peeps you love!


Saturday, December 10, 2016

Day 10 - Vintage Image Shaker Ornaments

This month the Alpha Stamps is offering Round Layered Ornaments Kits. They are pretty dang cute. I've actually done two* versions of these (you'll see the second batch next week). 

*Maybe even three if I get my act together.

But on to the ones that I've actually finished and am ready to show off today!


Pretty cute, no?! If you had told me a few years ago I'd be all about the glittery pipe cleaners (and yes, they will forever be pipe cleaners to me) I would have told you, you were nuts... but here we are all glittery and pipecleanerish!


Not only do these sweeties shake and make a lovely noise, are two sided to boot!


I'm smitten!

And here's all the goodies to make your own...

Round Chipboard Ornament Layers Sets
Snowy Winter Day Ornaments Collage Sheet
Silver Snowflake Charm Set
Winter Snow Glitter Mix
Round Ornaments Ribbon Set

Friday, December 02, 2016

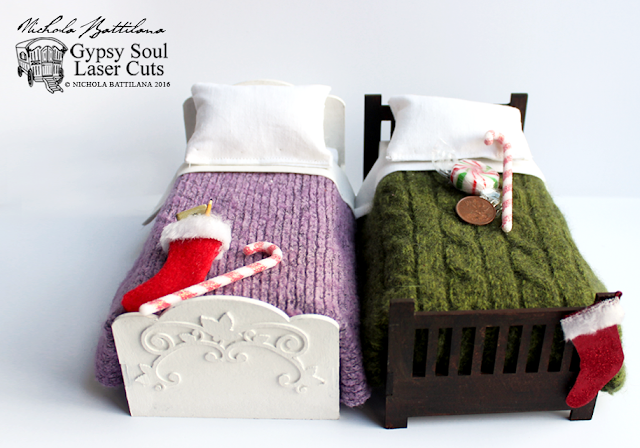
Day 2 - Cozy Fairy Beds

When I was a little girl, my Christmas stocking was always placed at the bottom of my bed. I'd wake up super duper early on Christmas morning and find a sock full of treats waiting for me. I'm sure this pleased my mother, as it gave her some extra sleep while I pillaged the stocking goodies.

Cozy fairy beds - Nichola Battilana

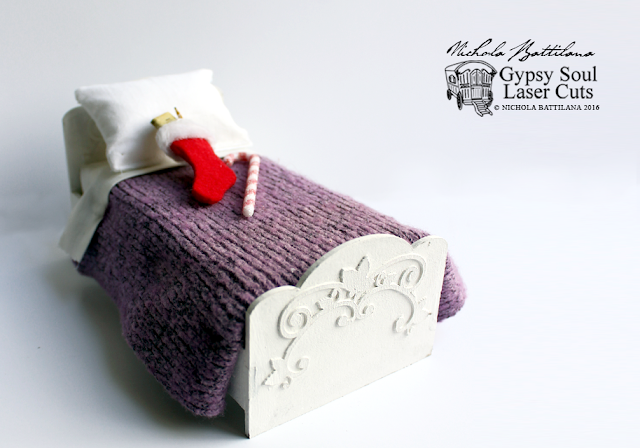
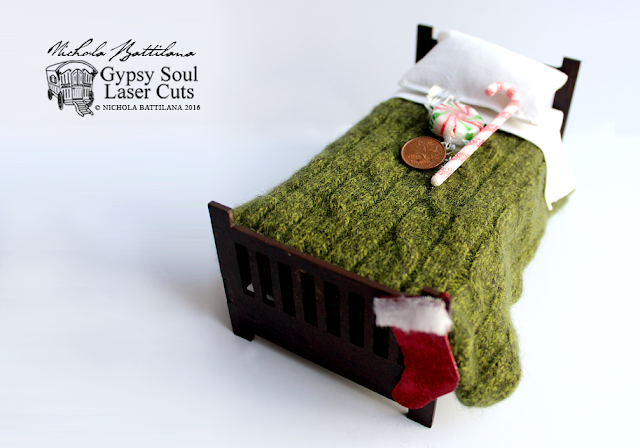
I am CERTAIN that fairies celebrate Christmas too. (In fact, fairies love celebrating so much, I'm sure that they partake in every possible holiday!) I wanted to give my fairies the same Christmas experience so, I've made my house fairies some little beds to get tucked into on Christmas eve. I've used a Gypsy Soul Mission Style Bed and a Standard Bed. I've added Leafy Corners to the Standard Bed as decorative accents. 

Cozy fairy beds - Nichola Battilana

The linens have been made from an old cotton pillowcase and the bedding is chopped from discarded sweaters. They are quite the cozy little things!

Cozy fairy beds - Nichola Battilana

I've also used the Christmas Shape Set to add a stocking to the end of the bed. I've dusted one with glitter and added a fuzzy trim... but if you want to get extra fancy, use the cutout as a template and cut 2 shapes out of felt. Glue the edge together and you'll have made a cute little stocking you can put the tiniest of treats inside!

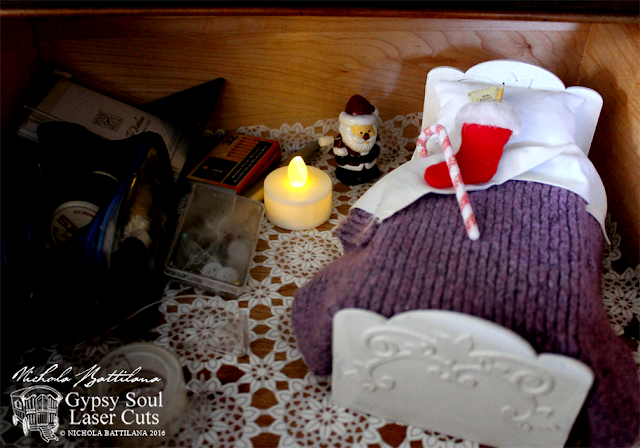
Cozy fairy beds - Nichola Battilana

Now my fairies will be tucked safely into drawers and cupboards, no-so-patiently waiting for Santa's arrival. If you want to create your own wee beds, HERE is a video showing just how I put these cuties together.

Happy holidays to you and your fairy folk

Supplies
Acrylic paint
Glue
Styrofoam
Cotton fabric
Old sweater
Felt & fuzz (if making stocking)


Saturday, October 22, 2016

Miniature Weasley Burrow Clock

I have a thing for clocks. There are clocks scattered all over the Pixie house. I even have a cuckcoo clock hanging above my work table in my studio. Not a single timepiece in this home tells the correct time.

So, I was excited to learn that 'clocks' were the theme at AlphaStamps this month and as soon as I learned that grandfather clocks were on the menu I knew I needed a Weasley Burrow Clock.


I chose not to paper the clock, but rather cover it in wood filler and gesso. I applied each, layer by layer, allowing it to dry and sanding before the next application. Two healthy layers of each, and a little touch ups to cover the chipboard joints, seemed to do the trick.


The piece is covered with acrylic paint, metal embellishments added, and then washes of earth tones give it some age and grime.

Inside I've placed a Glass Tube Pendant and filled it with magical time glitter. (I said it, so it's a thing, right?)


I've only used three spoons as the hands on the face. (It really should be 9 golden hands if you want absolute authenticity.) Any more seems to get a bit thick where they overlap. If you wanted to add more, I would suggest cutting the handles and placing them 'just-so' to circumvent the issue of over thickness.


For the clock face and Weasley family pictures, I just did a quick google search.
There is a drawer that fits into that bottom area of the clock. After applying so many layers of filler and gesso it becomes a bit of a tight fit. I like the idea of the Weasley's tucking things into every available space so I've used this area for storage. Paper scrolls, Half Scale Wine Bottles that look just like little potion vials, Pumpkin Pods and a Mini Black Cauldron are all crammed into that little space.

And although he's a rotter, I've painted a Tiny Metal Mouse to look like 'Scabbers'. After all, I'm pretty sure he would have kept a close eye on where the family was at all times.


I realize that there are variations of the clock (Mrs. Weasley is said to carry it around the house with her) but I have always thought of it as a grandfather clock as it is in Harry Potter and the Goblet of Fire

Even if it ain't 100% accurate, I'm pretty darned pleased with my little burrow clock.


And bit by bit:
Tiny Metal Mouse
Glass Tube Pendant
Brass Flower Charms*
Bronze Branch Connectors
Half Scale Green Wine Bottle
Half Scale Red Wine Bottle
Mini Black Cauldron
Pumpkin Pods
Silver-Plated Teacup, Teapot, Spoon
Tiny Dot Dresden Borders - Black*
Victorian Drop or Handle - Raw Brass

Thursday, October 13, 2016

Shabby mojo bag

The beautiful Miss Amy Love invited me to guest design with Shabby is Chic Boutique and of course I said 'Yes!' because everything she carries is adorable!

When I saw this Cotton Drawstring Pouch in my package I knew I wanted to make a shabby mojo bag to encourage crafty inspiration!


First, what exactly IS a mojo bag? Basically it's a pouch, or bag, usually made of flannel, containing magical items used in hoodoo for spell work. Similar bags are used in other magical traditions for luck, protection and healing.

This is NOT a traditional mojo. I'm using the concept as a magical inspiration point.


My Cotton Drawstring Pouch is layered in Butterfly Dangle Trim and lace, then tea stained. I've added vintage buttons as accents, and centred a Filigree Wrap Around as a focal piece.


Silver Fairy Wand CharmSilver Fairy Charm, and a cute Witch Hat Charm are attached to the filigree and hopefully supply an added dash of fairy magic.


Finally, the most adorable Gold Plated Spoon is attached to the drawstring. I love it sooo much and imagine I'll use it for scooping glitter!


The contents?  Well, these sorts of bags are kind of like birthday wishes - you really aren't supposed to tell. 


To encourage crafty inspiration you may want to add items that reflect the colours, textures, motifs, mediums and themes that you love. Or, you could add herbs and flowers that encourage inspiration to make a magical sachet. And if magic ain't your jive, you could always use it to store something small and pretty.


Wednesday, October 12, 2016

Miniature Funeral Carriage

Something a little dark but (I think) lovely today. A miniature funeral carriage, inspired by beautiful Victorian horse drawn hearses.

The Funeral Coach base is a chipboard kit available from AlphaStamps. Inside I've slipped a 6 Inch Coffin Box

Makers note: I actually didn't include the coffin lid and simply used the main part box upside-down. I trimmed the coffin height down as I was considering adding flowers, or a traditional funerary wreath to the top and was thinking of the available space.


The whole carriage is painted in matte black and gussied up with LOADS of black dresden borders. (I think I have a serious dresden fetish. It's like Franks Red Hot. I put that s**t on everything!)


I've also added loads of ornamental do-dads using Creative Paperclay* and this Silicone Mold - Architectural Flourishes. That particular material works really well with the matte black finish.


19mm Fancy Metal Drawer Pulls act as finials accents for the top. And there is the most lovely little Antique Brass Mini Trunk Lock on the back doors. 

Makers note: the rear doors aren't actually hinged in place. I am a horror show with hinges! They never seem to work well for me and I just make an awful mess. Since I don't plan on opening and closing those doors often, and they sit quite nicely without much fuss, I'm taking the totally lazy route and leaving them free.


I've lined the interior with Bright Red Suede Paper. If you're looking for a more 'authentic' feel, line that sucker in black. (I personally love the shock of red inside.) Finally, the windows. Many funeral carriages had swags of lush drapery inside but I was liking the 'clean' look of this little coach. I put together this Filigree Funeral Carriage Windows Collage Sheet with vintage fancy framework that can be printed on transparency sheets and glued into place. 

I'm smitten with this piece. It looks great on my mantle, and is a good size at somewhere around 10" x 6". Although it's intended as a Halloween piece, it'll stay out year round in my spooky old house ;)

Want to make your own?  
ALL THE BITS in one place

The list of individual bits:
Funeral Coach
Filigree Funeral Carriage Windows Collage Sheet
6 Inch Coffin Box
Creative Paperclay
Silicone Mold - Architectural Flourishes
19mm Fancy Metal Drawer Pulls
Antique Brass Mini Trunk Lock
Bright Red Suede Paper
Black Suede Paper*
12mm Flat Fancy Bead Cap - Bronze*
Baroque Dresden Borders - Black
Black Zig Zag Dresden Borders
Half-Round Dresden Borders - Black
Thin Fleur Dresden Borders - Black
Thin Looped Dresden Borders - Black

Friday, September 02, 2016

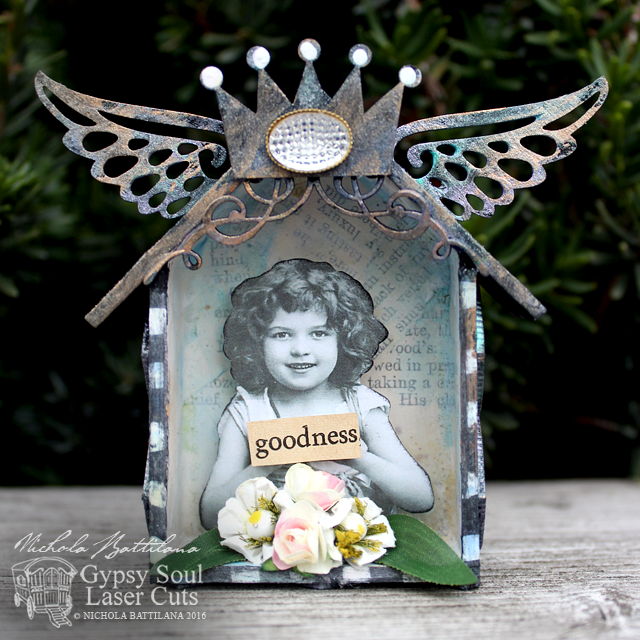
Wee Winged Shrines with Tutorial

Can you believe it's the first Friday of September?! (What happened to the summer? Seriously, where'd it go?) The good news is that means it's tutorial day and I have a a fun and fantastical project for you. 

This month I wanted to encourage the spreading of good will, kindness and nice surprises. These little winged shrines are just the ticket! They're pretty easy to put together, and you can get a bit smooshy and sloppy in your mess making and have a lot of fun with them.

Wee Winged Goodness Shrines with Tutorial - Nichola Battilana

Each of these sweet things uses a Mini House Shadowbox as a base, and Victorian Corners to finish off the peak.

Wee Winged Goodness Shrines with Tutorial - Nichola Battilana

Add some wings from the Steampunk Shape Set and then whatever embellishments your heart desires. Buttons, little paper flowers, charms... you name it!

Wee Winged Goodness Shrines with Tutorial - Nichola Battilana

The images I've chosen were all selected from thegraphicsfairy.com. She has a lovely selection of images that are free to use. The sentiments are just snipped from discarded books, but you could easily write your own or use a commercial sentiment.

Wee Winged Goodness Shrines with Tutorial - Nichola Battilana

I think these are absolutely the sweetest and I'm sure that given as a gift, especially a surprise for no reason at all, they'd certainly help to spread cheer and goodness.

To help you make your own, here's how I put these cuties together


And here are all of the supplies I used in the pieces above.
Misc. decorative bits & bobs and embellishments
Acrylic craft paint
Instant glue