Showing posts with label alpha stamps. Show all posts

Wednesday, October 19, 2016

In which some weirdos put on a show

"What's the title?"

"No, idea."

"Well, what is it?"

"Just a bunch of weirdos putting on a show."

"There's your title." 

That, right there, is a good example of why designing for AlpahaStamps is a pretty sweet gig.

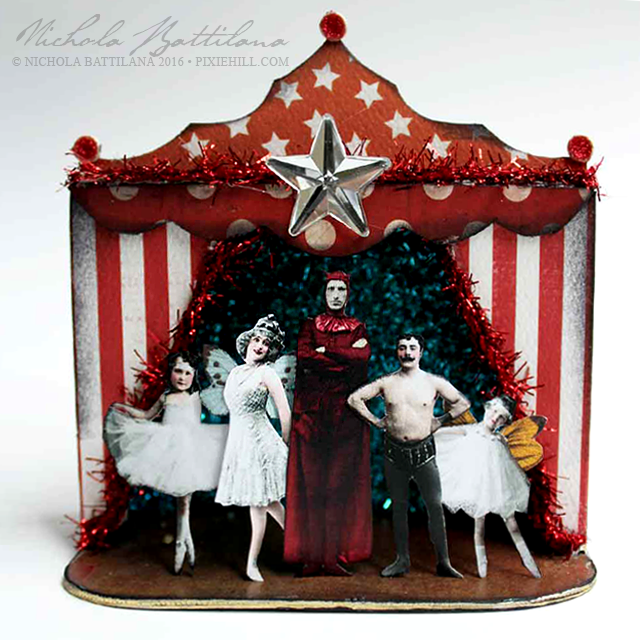
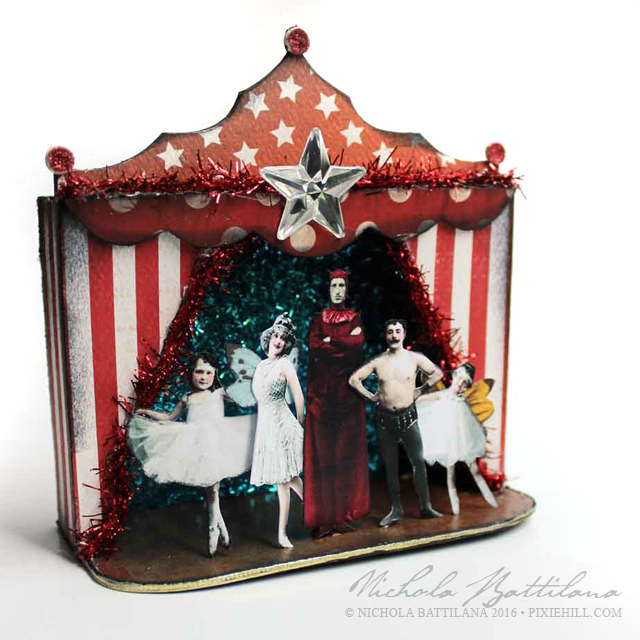
"A bunch of wierdos put on a show" miniature stage - Nichola Battilana

I was sent this Miniature Chipboard Stage and I just sort of set to work without much direction. I knew I wanted to have a glittery background. I knew I wanted red and white and stripes and stars and polka dots. Beyond that... ?

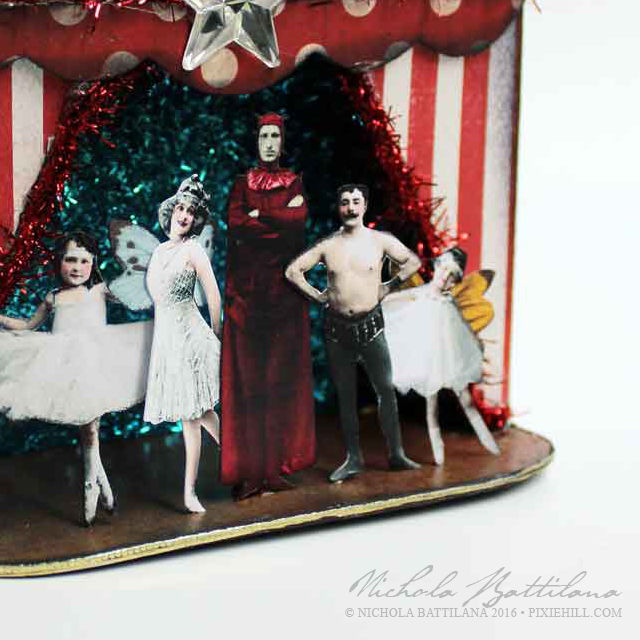
"A bunch of wierdos put on a show" miniature stage - Nichola Battilana

What a stage really needs are it's players. So I printed out the Little People Collage Sheet at 50%, fussy cut those suckers, and added wings. Note: I'm not entirely certain where that devilish fellow in the centre popped up from... he just sort of snuck in there!


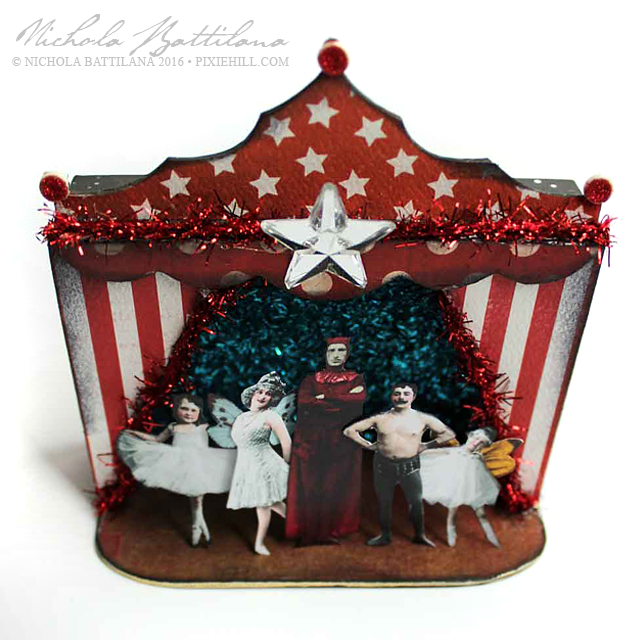
"A bunch of wierdos put on a show" miniature stage - Nichola Battilana

There's touches of glitter and sparkle all over. Tim Holtz Mirrored Stars, Shiny Tinsel and Tiny Embossed Gold Dresden Borders.

"A bunch of wierdos put on a show" miniature stage - Nichola BattilanaReally, there's no great intention, meaning or reason behind this piece, it's just a sweet bit of nonsense."A bunch of wierdos put on a show" miniature stage - Nichola Battilana


If you'd like to create your own set of weirdos here are some of those bits and pieces.

Miniature Chipboard Stage
Little People Collage Sheet
Tim Holtz Mirrored Stars
Tinsel
Tiny Embossed Gold Dresden Borders.

Wednesday, October 12, 2016

Miniature Funeral Carriage

Something a little dark but (I think) lovely today. A miniature funeral carriage, inspired by beautiful Victorian horse drawn hearses.

The Funeral Coach base is a chipboard kit available from AlphaStamps. Inside I've slipped a 6 Inch Coffin Box

Makers note: I actually didn't include the coffin lid and simply used the main part box upside-down. I trimmed the coffin height down as I was considering adding flowers, or a traditional funerary wreath to the top and was thinking of the available space.


The whole carriage is painted in matte black and gussied up with LOADS of black dresden borders. (I think I have a serious dresden fetish. It's like Franks Red Hot. I put that s**t on everything!)


I've also added loads of ornamental do-dads using Creative Paperclay* and this Silicone Mold - Architectural Flourishes. That particular material works really well with the matte black finish.


19mm Fancy Metal Drawer Pulls act as finials accents for the top. And there is the most lovely little Antique Brass Mini Trunk Lock on the back doors. 

Makers note: the rear doors aren't actually hinged in place. I am a horror show with hinges! They never seem to work well for me and I just make an awful mess. Since I don't plan on opening and closing those doors often, and they sit quite nicely without much fuss, I'm taking the totally lazy route and leaving them free.


I've lined the interior with Bright Red Suede Paper. If you're looking for a more 'authentic' feel, line that sucker in black. (I personally love the shock of red inside.) Finally, the windows. Many funeral carriages had swags of lush drapery inside but I was liking the 'clean' look of this little coach. I put together this Filigree Funeral Carriage Windows Collage Sheet with vintage fancy framework that can be printed on transparency sheets and glued into place. 

I'm smitten with this piece. It looks great on my mantle, and is a good size at somewhere around 10" x 6". Although it's intended as a Halloween piece, it'll stay out year round in my spooky old house ;)

Want to make your own?  
ALL THE BITS in one place

The list of individual bits:
Funeral Coach
Filigree Funeral Carriage Windows Collage Sheet
6 Inch Coffin Box
Creative Paperclay
Silicone Mold - Architectural Flourishes
19mm Fancy Metal Drawer Pulls
Antique Brass Mini Trunk Lock
Bright Red Suede Paper
Black Suede Paper*
12mm Flat Fancy Bead Cap - Bronze*
Baroque Dresden Borders - Black
Black Zig Zag Dresden Borders
Half-Round Dresden Borders - Black
Thin Fleur Dresden Borders - Black
Thin Looped Dresden Borders - Black

Saturday, August 13, 2016

Wee Chippy Lanterns

AlphaStamps.com has some new chipboard Industrial Lanterns. They're really kinda cute, like small railroad lanterns, but of course I've filled mine with dragons and fairies ;)


Each side of the lanterns has an 'X' across it, but it's easily chopped off if you want to show off a miniature dragon or fairy silhouette. 


I've added some dresden trims to mine to fancy them up, along with some floral elements like Mini Fern Garland and Black Mini Paper Blooms. Paint and embellish those suckers to suit your tastes.


The 'glass' in these is the Clear Window Inserts with some tissue glued to the back and chopped to size. You can cover all four sides of a lantern with one sheet cut into quarters. I've also added a thin coat of white paint to the exterior here. It helps to hide the cutout when the lights are off, but you can still make them out when lit.

If those dragons are causing trouble (as dragons are wont to do) you can just bend those wings and tails to fit. Actually, those bent wings add a bit of dimension to the shadows.


And if you're itching to hang those lanterns, there are convienient holes in the removable lids. My reccomendation? Pop in a light, line up those holes and use a little bamboo skewar to hold them in place while you hang them via a Fluted Ring Pull glued to the top. 


OR you might just thread twine or ribbon through the holes to hold those pieces together with enough extra length that can be used for hanging too.


Whatever your fancy, here are the supplies I used to create these pieces to get you started: Everything in one place


Saturday, August 06, 2016

A Little Burrow

July's kit for Alpha Stamps was the Vintage Beach Cabanas. And although I'm not a beachy sort, I did manage to make those Cabanas work for me. I made a little burrow.


This isn't exactly the Weasley abode (it's far too tidy and not nearly wonky enough) but it is inspired by the home of my favourite magical family.

Now, I don't have a full tute, but I will give you a few pointers if you'd like to make something similar. 

I simply took the Cabana Row House Set and stacked the wee buildings together, chopping out any bits that were in the way, to make everything fit neatly.


The roofing tiles, although applied in rows, are totally wonky. I think it's kind of charming though... neatness isn't everything after all. You'll also notice here a little Thin Fleur Dresden Borders around the edge and peaks of the roof which I think add a nice touch. And there are people peeking through the windows from the Seaside Victorian Children Collage Sheet


If you look on the bottom left here you'll see some Wooden Spreaders. They don't actually hold anything in place (yay hot glue!) but they make sense visually. You can absolutely cheat when it comes to miniature construction. Build the impossible! BUT adding little details like fake supports and whatnot adds a smidge of 'reality' to your nonsense.


That bent chimney is a bendy straw painted black. If you happen to be out and about and see a box of those things on the cheap, buy them. They are super handy for making chimneys and pipes in miniature work. The rooftop chimneys include Black Umbrella Bead Cap which I think adds a nice little detail. 


Don't forget the back and sides of your piece. They are easy places to overlook but, if possible, worth fleshing out. It's always a pleasant surprise to see that an artist or maker has take the care to consider every viewpoint.


This little project was a lot of fun, so much so that I'm thinking I might make a second proper Weasley Burrow to be it's neighbour!.

Here are all the bits used in this project in one place.

Or the individual parts:
Cabana Row House Set
1-1/2 Inch Wooden Spreaders
1-7/8 Inch Wooden Spreaders
Seaside Victorian Children Collage Sheet
French Riviera 8x8 Paper Pad
Seaside Doors & Windows Set
Thin Fleur Dresden Borders - Black
Tim Holtz Long Mini Brads
Black Umbrella Bead Cap
Tiny Black Hinge Set
Flower Soft - Vintage Christmas
Box Feet
Bendy Straw
Acrylic paint
Glue
Wood Stir Sticks (door)

Wednesday, July 13, 2016

A Bell Jar Fairy and English Fairy Garden Collage Sheet

A couple of weeks ago these two imps helped me out during preparations for my open house.

Imp and Fairy Jar - Nichola Battilana

This week I have a new little helper.

Bell Jar Fairy - Nichola Battilana

She prefers a bit of space to prance around, so she has a large bell jar to play in and keep her safe.

Bell Jar Fairy - Nichola Battilana

Of course she can get out whenever she likes, but it's cool in there and she's not a fan of the current hot humid weather. (Neither am I to be honest.)

Bell Jar Fairy - Nichola Battilana

If you're thinking you might like your own winged darling, I have two new collage sheets available. 

Little People and English Fairy Garden Collage Sheets - Nichola BattilanaThe Little People Collage Sheet and English Fairy Garden Collage Sheet are currently available as digital downloads or printed sheets from AlphaStamps.com

Bell Jar Fairy - Nichola Battilana

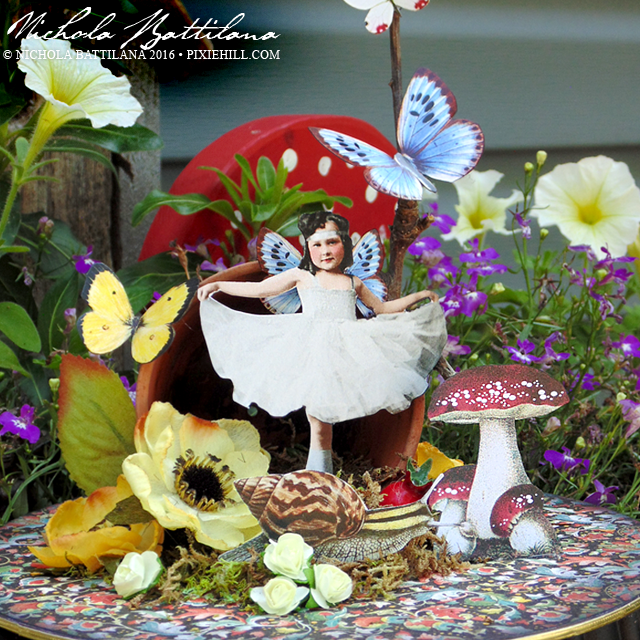
I mean, who doesn't need a little winged fairy to play with snails between the toadstools?!

English Fairy Garden Collage Sheet
Tiny Embossed Gold Dresden Borders
Tiny Paper Roses*

Graphic 45 - Enchanted Forest > Sumptuous Floral
Petaloo - Anenome flowers 1176-103


Friday, July 01, 2016

Under the Sea Matchbox Shrine

Some people have sea water in their blood. They love the sea like I love the moon. While those waters may not run quite so deeply for me, I appreciate the beauty of the barnacled. For Alpha Stamps this month I've made a matchbox shrine full of texture and unwater colours.

The base of this piece is a Tiny Matchbox Theatre. I do love theatres (and an underwater one would be amazing!) but instead chose to make mine into a sort of underwater pocket shrine.


Now about that texture! I've glued pieces of a 6x6 Gears Texture Sheet to the surface of the box and splashed and sploshed paint and gesso and whatever else was on hand. I also layered some Seashell Sequin Mix which give a sort of wonderful fish scale texture. The sentiment on the front is from Voyage Beneath the Sea - Steampunk Splash Scrapbook Paper which I've simply tinted to match the colour of my box. A Brass Patina Seahorse Charm* and Conch Shell Charms* then a dash of crusty glitter (because why not) and the front is complete.


Inside I've used an image from the Mermaid Garden #3 Collage Sheet. He was a sort of surprise... I wasn't thinking of this sort of interior at all... but he fit so well and seemed quite at home in his sparkly cove of Coral Chipboard.

Wednesday, June 08, 2016

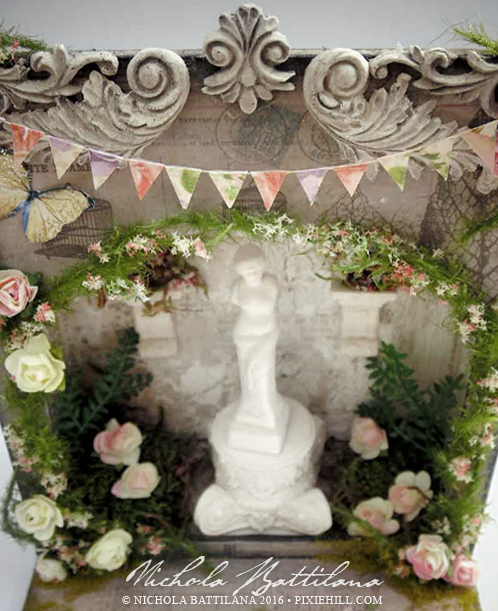
Venus' Grotto

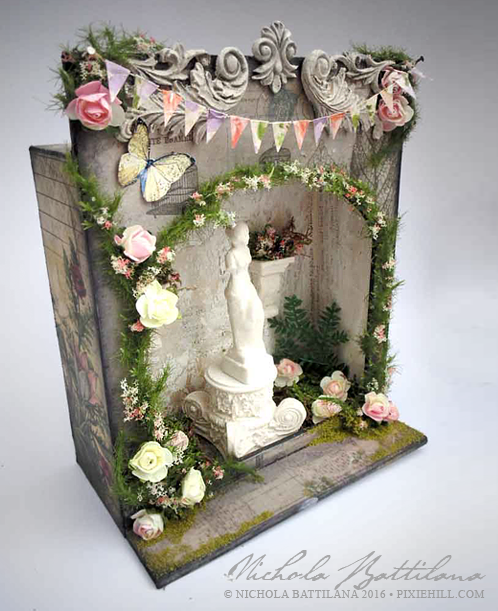
This little grotto has been sitting in limbo since just before Christmas! I received the Half Scale Arch Front Room Box from AlphaStamps, promptly covered it in Tim Holtz Wallflower and vintage papers, added Pink Paper Roses and Asparagus Fern Garland... and then it sat.

Venus' Grotto - Nichola Battilana for alphastamps.com

I was waiting for the perfect little thing to place inside my grotto. I tried my little figure of
St. Expeditus but he wasn't quite happy in there. I bought a beautiful little Madonna statue, Our Lady of the Cape to be specific, but her crown wouldn't let her fit inside.

Venus' Grotto - Nichola Battilana for alphastamps.com

But it this little grotto wasn't meant for a saint after all... it was meant for a little Venus de Milo!

Venus' Grotto - Nichola Battilana for alphastamps.com

And the little space seems a fitting shrine for the goddess of love and beauty. A smidgen of space to dedicate to prettiness. The original Venus de Milo (or Aphrodite of Milos as is her proper name!) was actually discovered burried in a niche, so I'd like to think she's happy to be tucked in her little arched shrine box.
Venus' Grotto - Nichola Battilana for alphastamps.com

Want a slice of beauty to sit on your own shelf? Here's the supplies I used to create this piece:

Half Scale Arch Front Room Box
White Resin Column Set
2.5 Inch Venus Statue
Silicone Mold - Architectural Flourishes*
Creative Paperclay*
Asparagus Fern Garland*
Fern Garland*
1/2 Inch Pale Pink Paper Roses*
Flower Soft - Sweet Pea
Rectangular White Shelf Brackets - Set of 2
Tim Holtz Wallflower 12" pad

Wednesday, May 18, 2016

Looking Glass Mini-Shrine with Faux Plaster Tute

I've created two "Alice" projects for AlphaStamps.com this month. First there was Alice's Altoid Manor House and now a second little tin shrine inspired by the mirror that inspired Lewis Caroll to write "Through the Looking Glass". If you peek to that link, you'll see they look nothing alike, but it's that lovely old ornamentation I was after, not really replication.


The base of this piece uses one half of a Small Hinged Tin and one panel of this Small Altoids Tins Triptych FrameIt's quite small, with the base tin measuring just 2-1/2" tall.


Inside is filled with moss and Mini Rose Buds with some sweet Flower Soft blossoms.


While I am usually all about tiny floral elements, it's the fake plaster details that are my favourite this time around. Can you guess what they are made from? Hot glue!

Normally I'd make these elements with Creative Paperclay but I was feeling impatient. Some leafy silicone molds, hot glue, layers of gesso and white paint, and voila! Held side by side with resin, you can't tell the difference, and adding additional layers of gesso and paint softens the details and makes it look quite like plaster.


AND because I love you (and Leslie asked so nicely) I've made a video of that technique HERE.


Just look at this plastic frame with 'faux plaster' leaf embellishments! I can't wait to see what you make with them :)

Supply round up:
Small Hinged Tin
Small Altoids Tins Triptych Frame
Large Leaves Silicone Mold*
Multi-Sizes Leaves Silicone Mold*
Flower Soft - Sweet Pea
Mini Rose Buds - Red*
Pink Rose Garland* (leaves)
Small Round Silver-Plated Pendants (not shown, applied to back of shrine for hanging)
Moss
Hot glue!
Gesso and white acrylic craft paint


Wednesday, May 11, 2016

Alice's Altoid Manor House

This month's Alpha Stamps kit is *drumroll* Alice in an Altoids Tin!

I'm really excited to share this particular tin, which I've named Alice's Altoid Manor House, because it's actually quite simple to put together.


I simply applied the Altoids Tin Book Covers to the front and back of the tin. I didn't even bother with the book spine (though I'm sure it'll come in handy for something). Then a Window Pediment - Federal was added to the front top edge and the Window Pediment - Yorktown to the bottom front edge. A snip of Thin Fleur Dresden Border is applied under the top pediment, then whole shebang is painted grey.


The windows are just little paper frames I cut out. I placed some Alice charaters from the Wonderland Rabbits and Hares Collage Sheet in the squares and added a layer of Diamond Glaze to make the 'windows' glossy. The door is framed with some snippets of wood and topped with little bit of filagree that broke off something-or-other that I kept for just such an occasion. Finally I finished the exterior with a Bronze Stopwatch Clock Charm and some Flower Soft.

I've kept the inside fairly simple too.


On the shallow tin lid I just placed an image from the Alice Covers Collage Sheet adjusting the size to fit. Tip: If you want your book/house/tin to close tightly, you'll want to avoid adding much thickness to this part of the tin, especially around the edges.

Finally, the fat portion of the tin. I've taken an image from the Alice Herself Collage Sheet (printed slightly larger to fit the tin) and cut out each of the elements, layering them in a simple paper tole style. The last touch, a little cake made of paper clay and a glass bead 'drink me' bottle.

So now it looks as though I've written a darned novel, but I promise, this was a practically painless project! Sure the sides aren't covered... but the tin opens and I didn't have a meltdown attempting to apply hinges. (I often have hinge related meltdowns.)

Here is your supply round up:
Altoids Tin Book Covers
Blank Altoids Tins
Window Pediment - Federal
Window Pediment - Yorktown
Bronze Stopwatch Clock Charm
Mini Silicone Cake Mold Set
Thin Fleur Dresden Borders - Turquoise
Flower Soft - Peony Pink
Flower Soft - Meadow Green
Creative Paperclay*

Wednesday, April 13, 2016

Mothering ATC's in pink and golden floral glory

"Who wants to make some ATC's?"

ME! ME! ME! (I'm a keener)

And maybe I'd like to make some sort of Mother's Day thing-a-ma-doodle? You know, for people who like to plan ahead and not do everything last minute. I have no idea who these 'think ahead' people are, but sure!

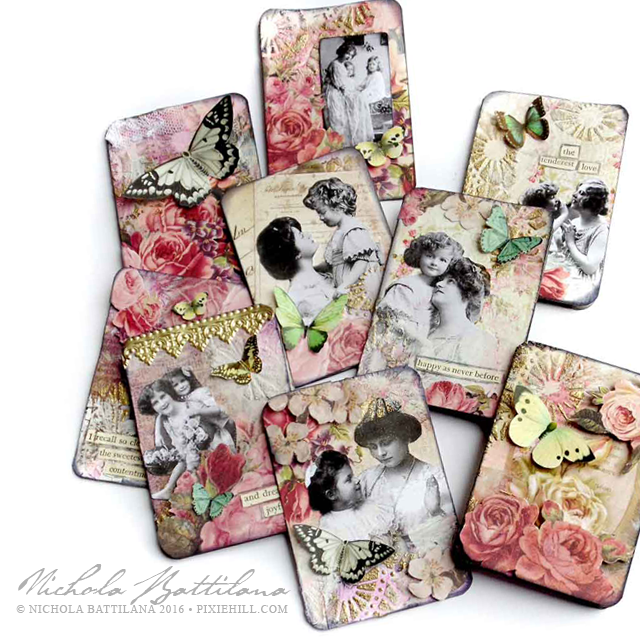
That's how I ended up making this pretty batch of Artist Trading Cards for my friends at AlphaStamps.


Mothering ATC's - Nichola Battilana


There's 9 of the pretty things all together which means you could make your favourite motherer a pocket letter. Be sure to include a gift certificate, a sweet note, photograph, mementos or charms in there if going this route.

Mothering ATC Pocket Letter - Nichola Battilana

I've made some of these little darlings as ATC sized cards. Perhaps you'd prefer to distribute a little love to all the great motherers you know.

Mothering ATC's - Nichola Battilana

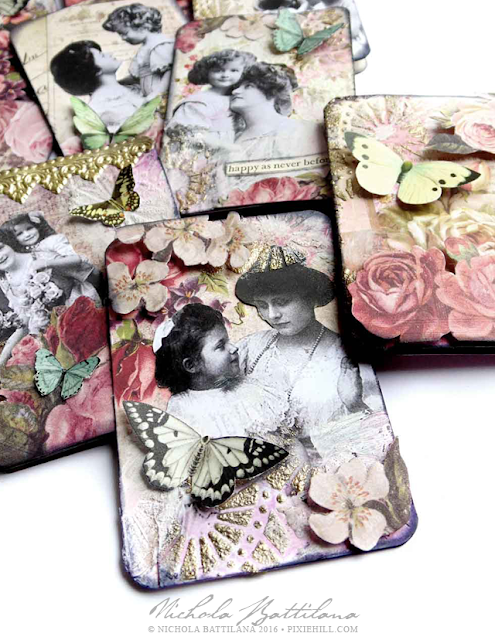
The cards were a cinch to whip up, but here are a few of the steps you may find useful

• Using papers from this month's kit I cut out the appropriate ATC size 2.5" x 3.5" OR 5" x 3.5" for folded ATC cards, then rounded all of the corners.

• I applied some acrylic gel medium using a doily as a stencil and sprinkled some gold embossing powder sparingly on top and set it with a heat gun. I really liked the way these worked together!

• I applied fussy cut images from Mother Knows Best Collage Sheet (which I printed in black and white)

• All of the winged things are from this Butterflies & Moths Collage Sheet. I printed one sheet full size and a second sheet at 50% to give me an even wider variety of sizes.

• When gluing the butterflies into place, I only glue the centre body part. This way the wings can be folded back, giving a 3D effect.
Mothering ATC's - Nichola Battilana

Easy peasy and all the bits came together nicely. Soooo, if you feel like making something pink, floral and feminine, (or are one of those amazing people who want to get a jump start on a mothers day project!) here's your supply round-up:

Baroque Dresden Borders - Gold
Mother Knows Best Collage Sheet
Butterflies & Moths Collage Sheet
House of Roses Old Letters Scrapbook Paper
House of Roses on the Porch Scrapbook Paper
Prima Tales of You & Me Notre Jardin Secret Scrapbook Paper
Prima Tales of You & Me Jardin de Fleurs Scrapbook Paper
Doily
Gold Embossing Powder
Acrylic Gel Medium
Saturday, April 02, 2016

The Bird House for AlphaStamps

A while ago I created a set of mixed media chunky houses with bases I had the hubs cut from mdf. I still had one of those housey shapes kicking around and I decided to put it to use for this month's AlphaStamps.com project. And so, here is 'The Bird House'.

There's nothing too complex going on here. Some fussy cutting, some embellishing, painting and gluing and Ta Da! a pretty shabby thing-a-ma-doodle to hang on the wall.


I restrained myself and didn't use a spec of glitter. To make up for it I did paint a golden egg and add some Narrow Gold Fleur Dresden Borders* (which I think is just about the prettiest thing ever). And topped it with this Fancy Silver Birdhouse Charm* 


Normally I avoid using gold and silver together but I think they're getting along on this piece. Maybe it's because they're just sitting delicately, and are too buy being pretty to compete against one another. 

Note: Yes, my supplies have personalities.


While going off the deep-end, buying buckets of supplies, and throwing all you've got at a project can be fun, sometimes a 'simple' something is just the thing for your soul. Sometimes you only need a little this and that.

"The Bird House" supply round up from AlphaStamps
Silver Bead Caps
MDF board